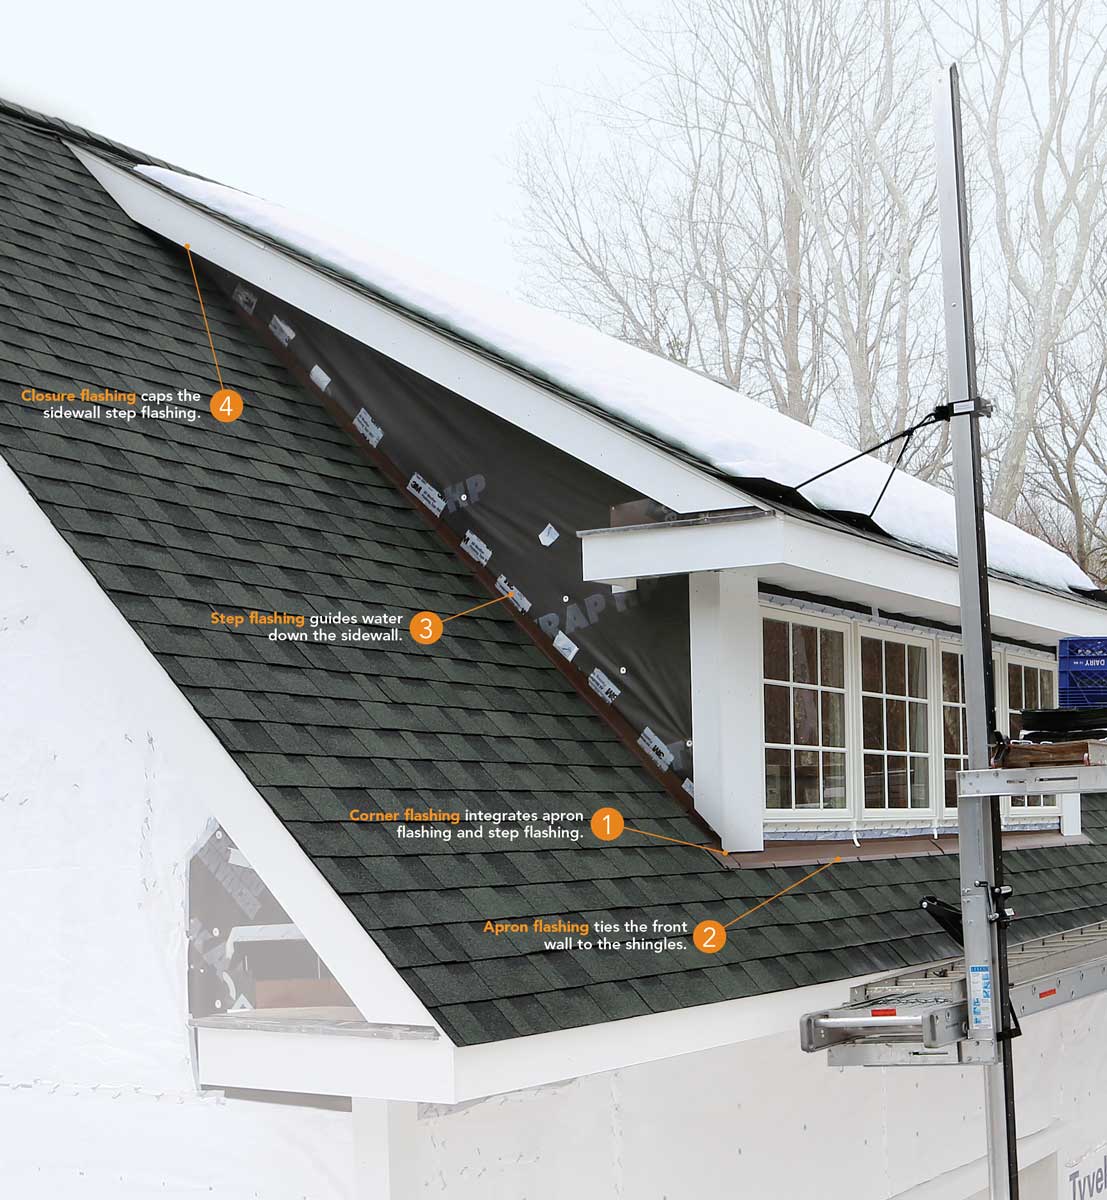
Synopsis: While the gold standard for roof flashing is soldered copper, the fact is that for economic reasons, the vast majority of roof flashing is done with aluminum. In this article, veteran remodeler Mike Guertin shows how to flash a dormer with bombproof details.
Roof flashing is critical to keeping a house dry, but people often get it wrong. Most roof leaks I’ve investigated are due to either undersize or improperly installed flashing. To keep out water, flashing has to be fabricated from durable materials, sized to keep out wind-driven rain, and installed in a weather-lapped fashion—that is, with the upper layers overlaying the lower layers. Also, it doesn’t hurt to design flashing to be visually appealing.
Because their front and side walls meet the roof in different ways, dormers require several techniques to integrate the flashing with the roofing material as well as with the house’s water-resistive barrier (WRB) of housewrap or felt paper.
Start with the right flashing
Galvanized steel, lead, copper, stainless steel, UV-stabilized PVC, and TPO are all good flashing materials (the latter four are also the right choices for coastal areas), but the most common material is probably painted aluminum. A lot is riding on the flashing, and heavier-gauge metal doesn’t cost much more than light-gauge stock, so don’t skimp on material. The IRC requires that metal flashing be corrosion resistant and have a minimum thickness of 0.019 in. (26 ga.). Some unfinished aluminum sold as flashing doesn’t meet the thickness requirement and is more prone to corrosion than coated aluminum. Peel-and-stick membrane can be an effective backup to the primary rigid flashing, but it won’t stand up to sunlight or to physical damage from sticks, ladders, and debris. Don’t use it in place of rigid flashing.
On this dormer, I used commonly available painted aluminum coil stock for flashing. Because this type of metal flashing can’t be soldered, making a leak-proof joint where the flashing turns the corner at the bottom of the dormer called for special attention, but I have a detail that handled the situation nicely.
Getting started
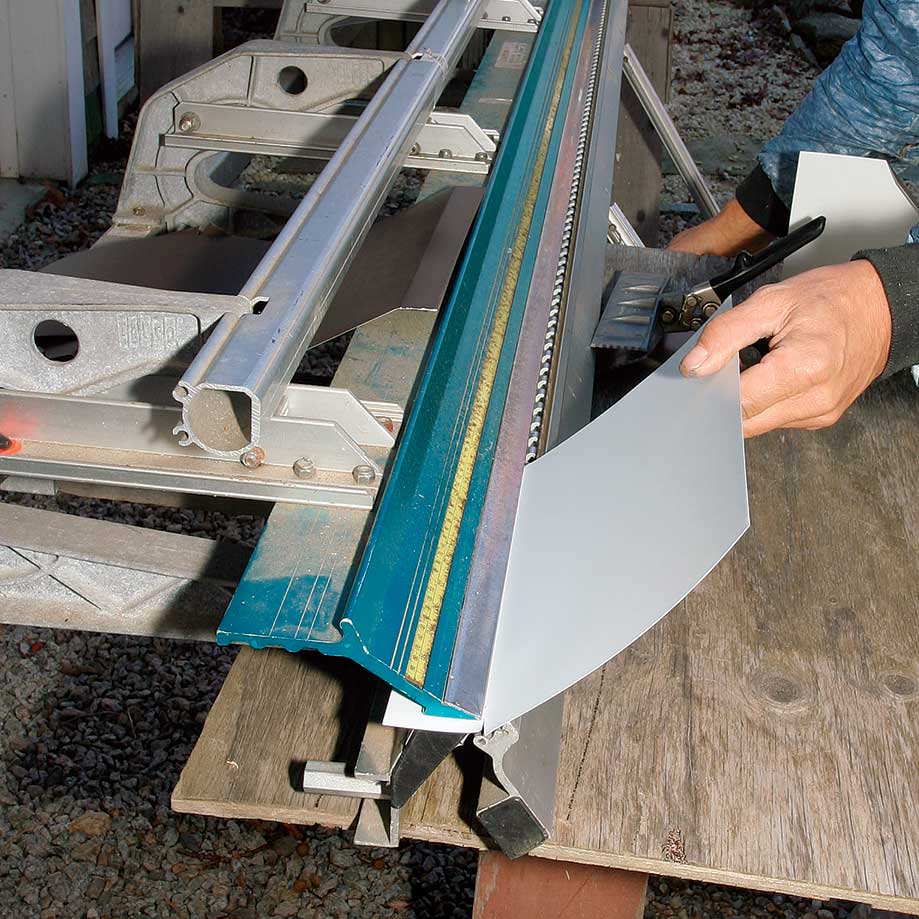
The basic tool for metalwork is a siding brake. It’s pricey to buy but readily rented. Hand seamers make bends in tight spots where a brake is hard to use. Many cuts are done with sheet-metal snips, but a sharp utility knife is handy for tight work and for long cuts guided by a straightedge.
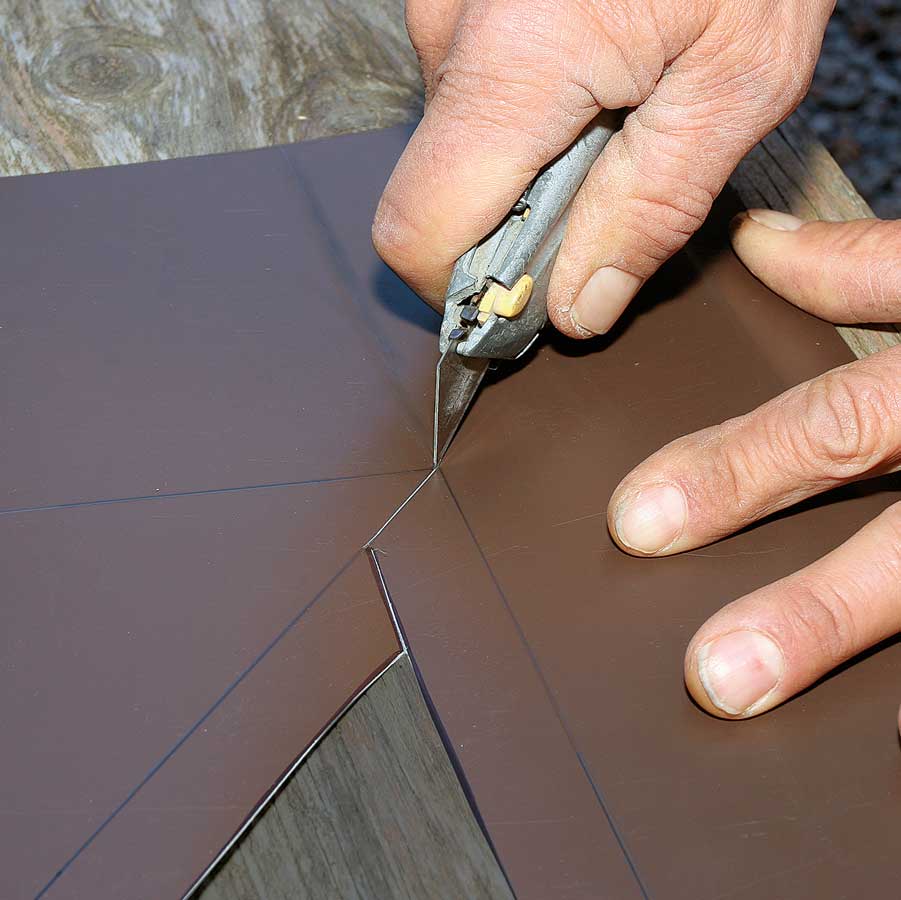
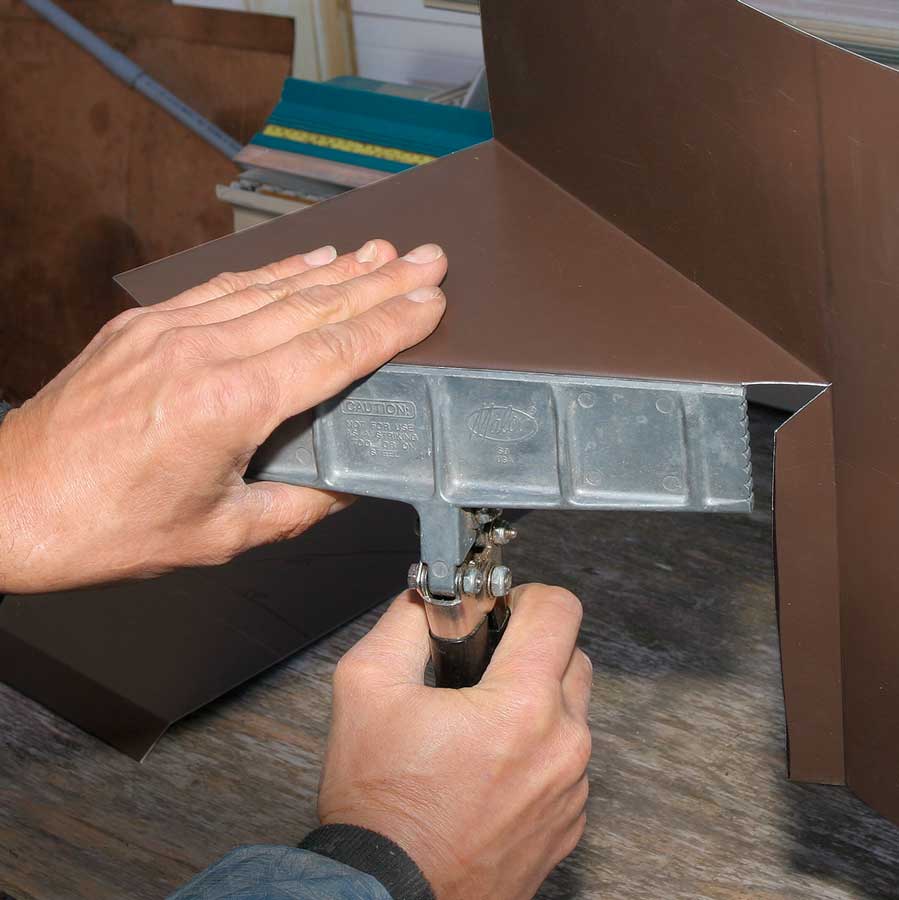
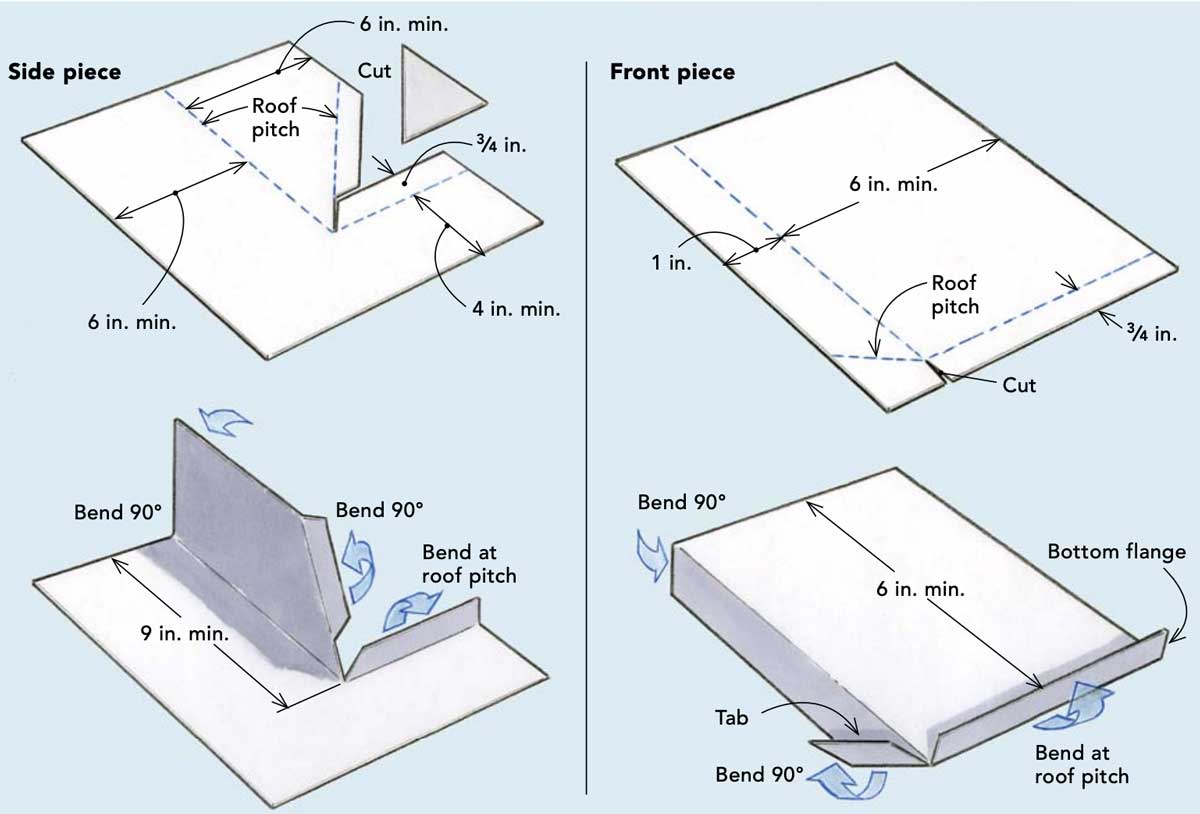
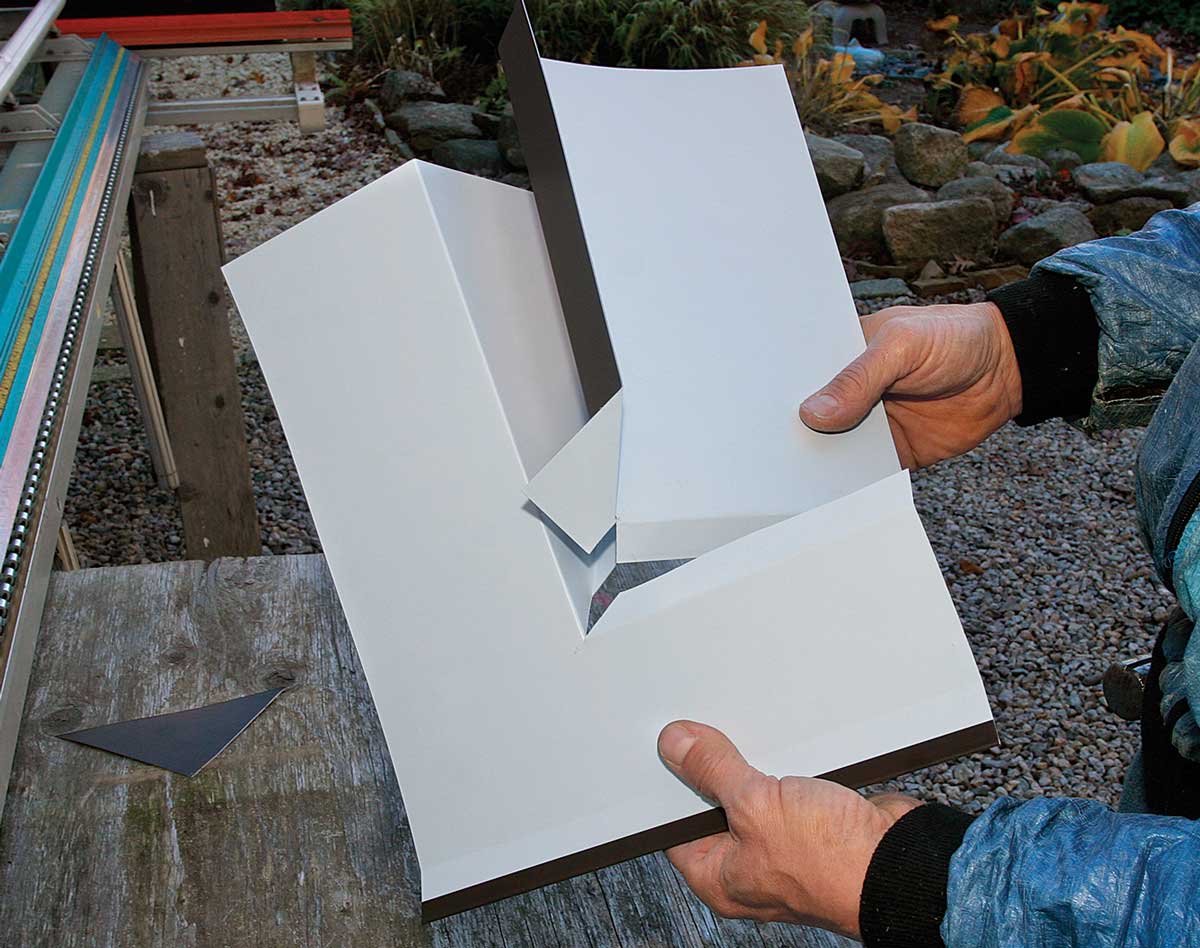
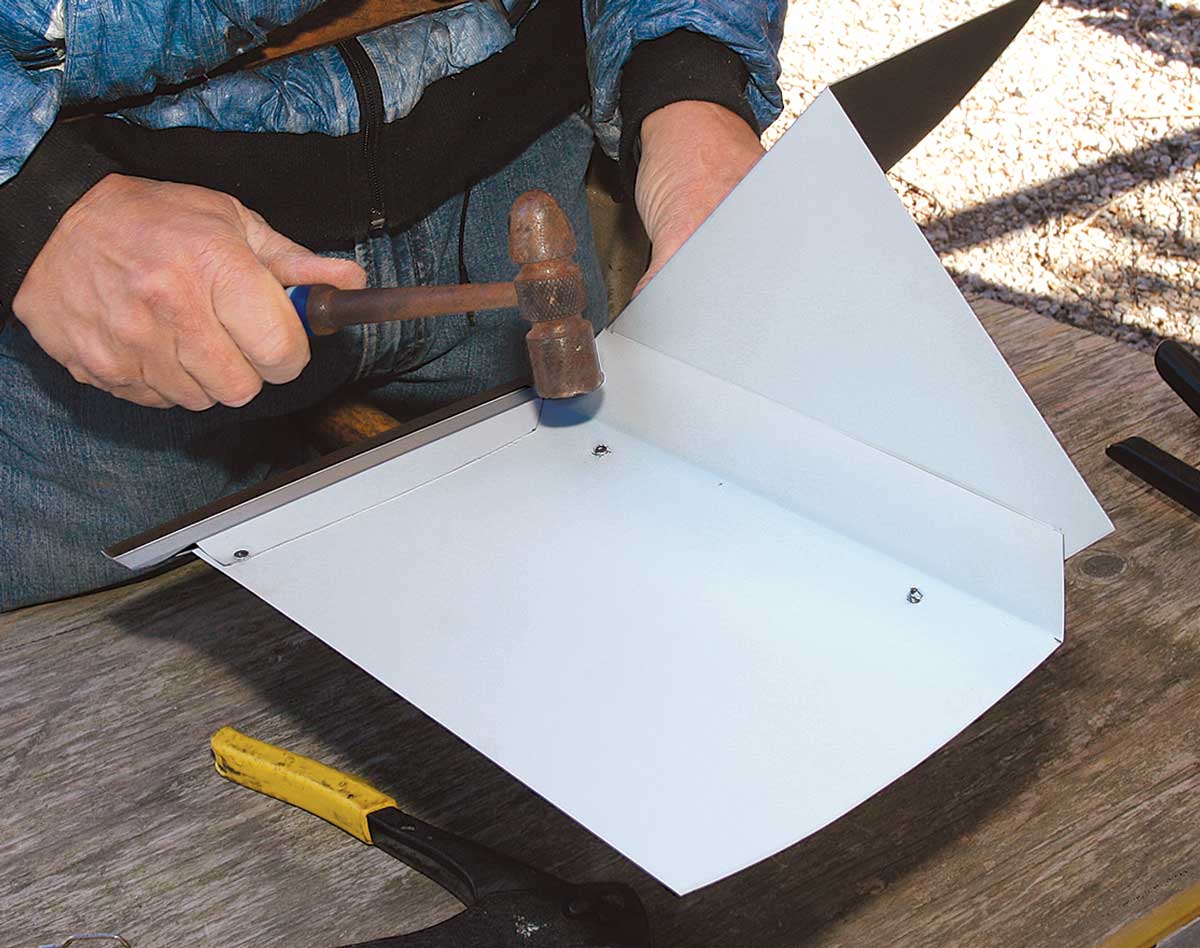
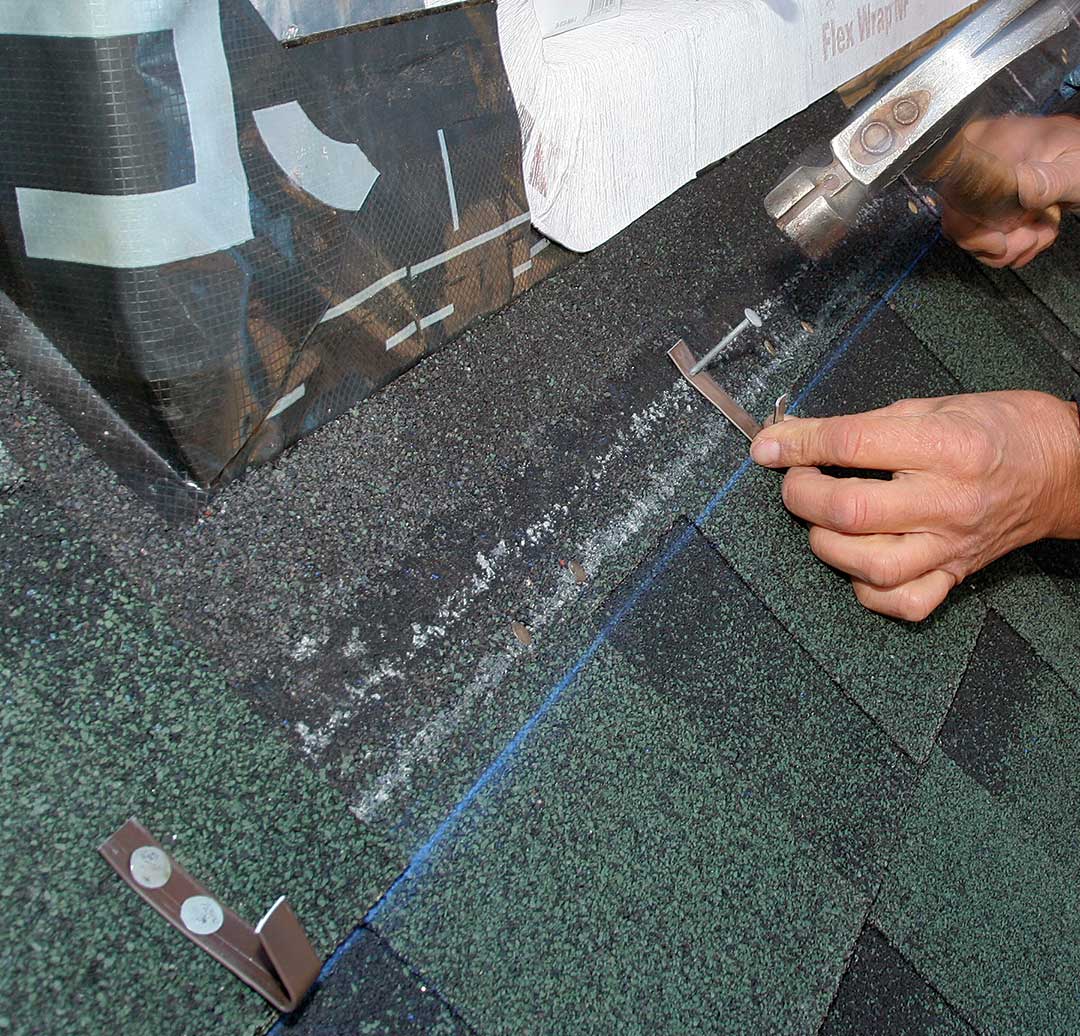
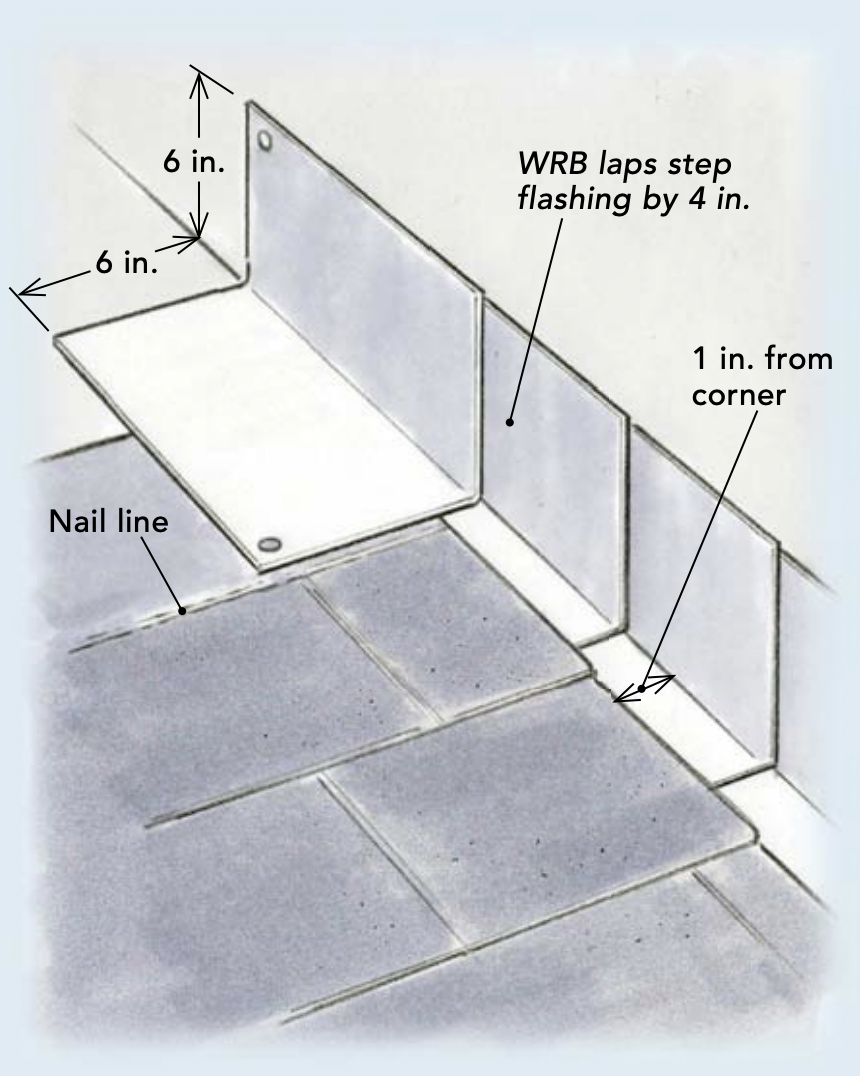
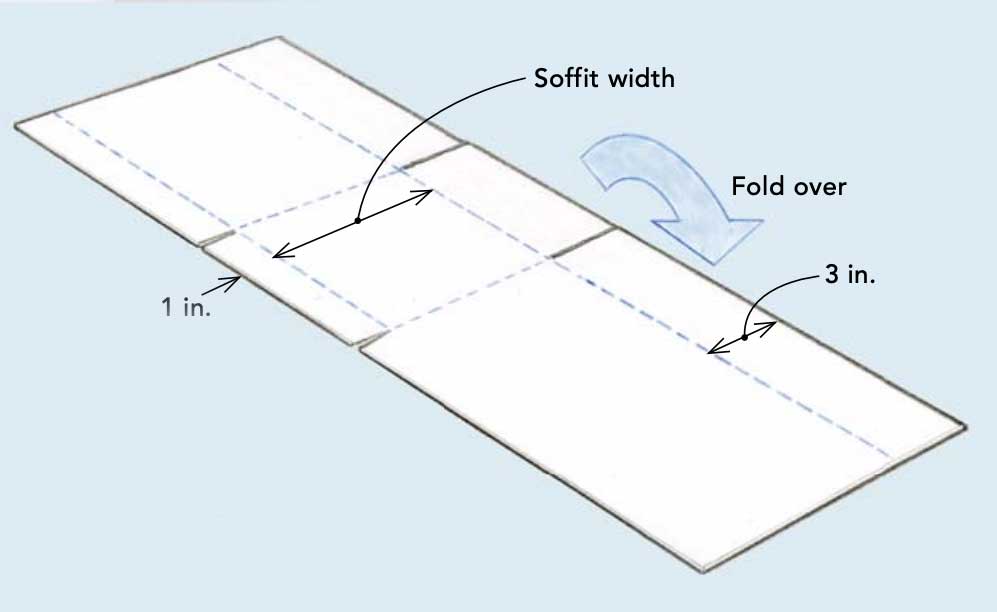
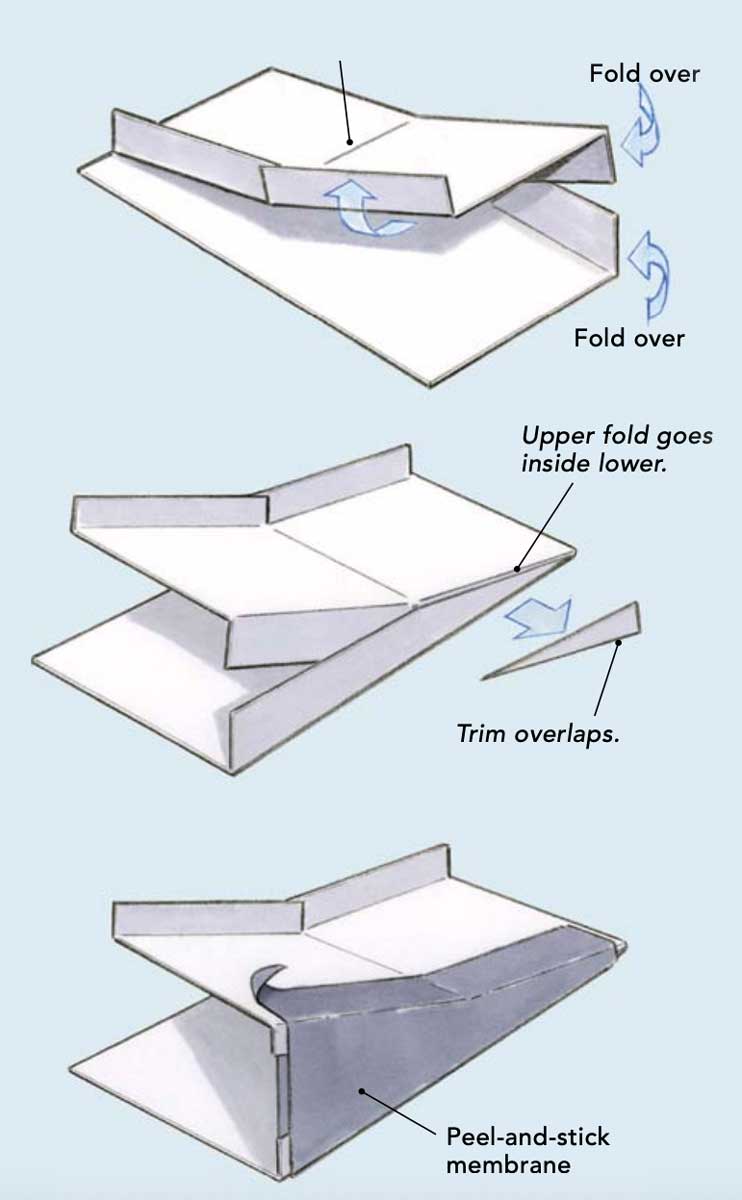
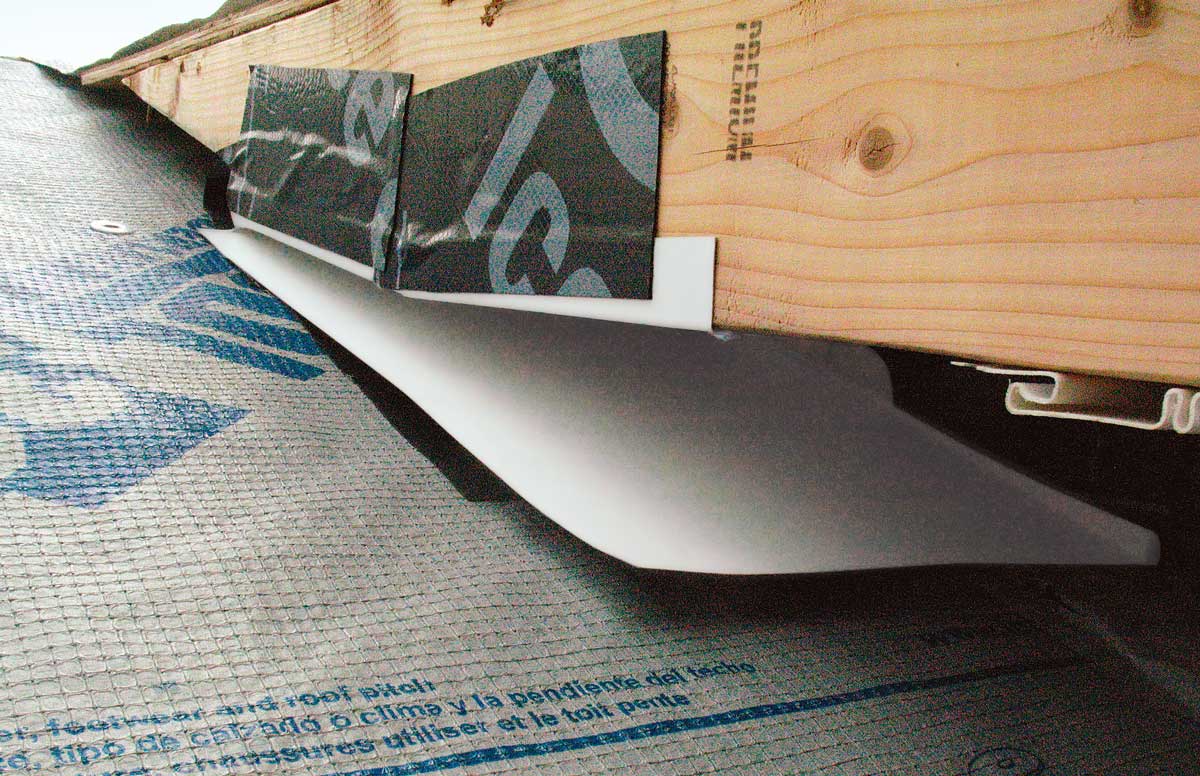
Siding brake
Hand seamers
Utility knife
1. Make the Corner
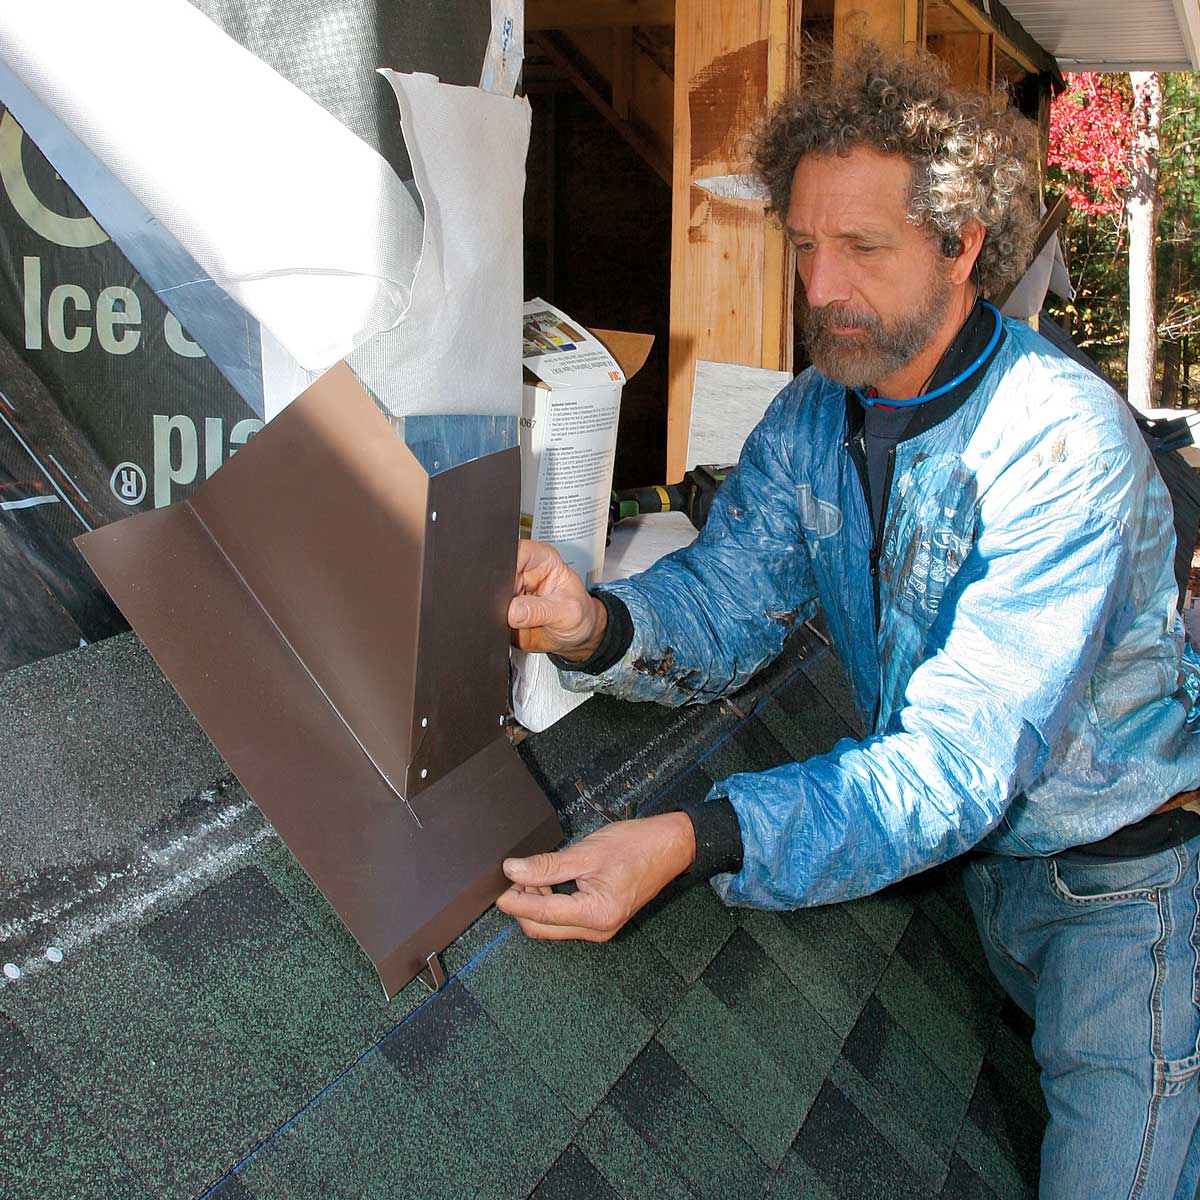
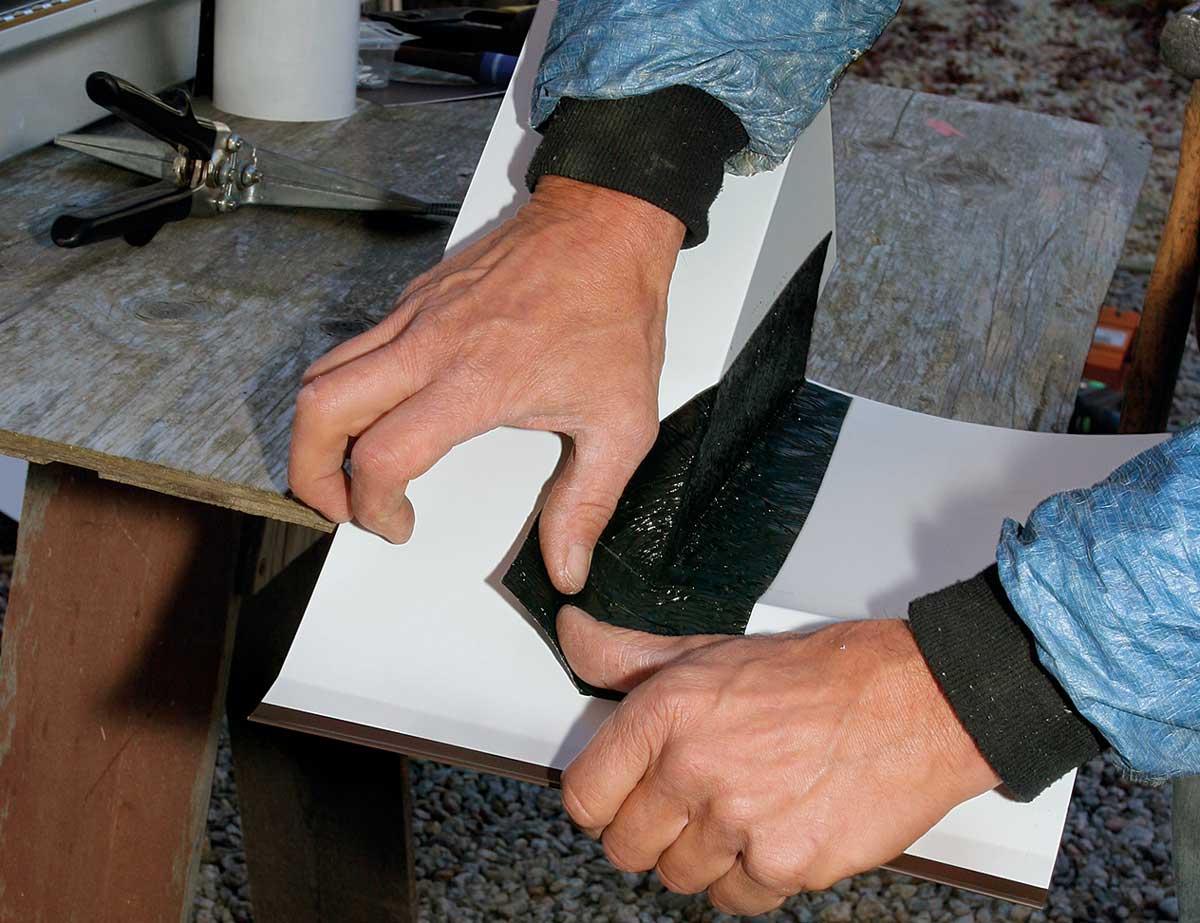
The corner flashing integrates the apron flashing on the dormer’s front wall with the step flashing on the sidewall. Before installing the corner, I mark the location of the bottom of the apron on the roof, and nail hold-down clips in place. The corner must be made from two pieces. Many roofers try to seal the joint with caulk or tar, which don’t last long. Instead, I seal the joint from the underside with flexible self-adhering membrane to keep water out for the long term.
Fold the corner. The corner flashing consists of two pieces that interlock and are riveted together. Mark the layout on the flashing using a square and a pencil or permanent marker.
Interlock the two pieces. Assemble the pieces so that the front’s tab goes under the side piece and the front’s bottom flange sits on top.
Pop goes the rivet. Pop rivets connect the two pieces. To keep the back of a rivet from pushing the assembly away from the wall, hammer it flat, using a second hammer below as an anvil.
Seal the back. With metals that can be soldered, the solder seals the joint against water. Aluminum can’t be soldered, so apply a flexible peel-and-stick membrane to the back of the corner to seal the joint.
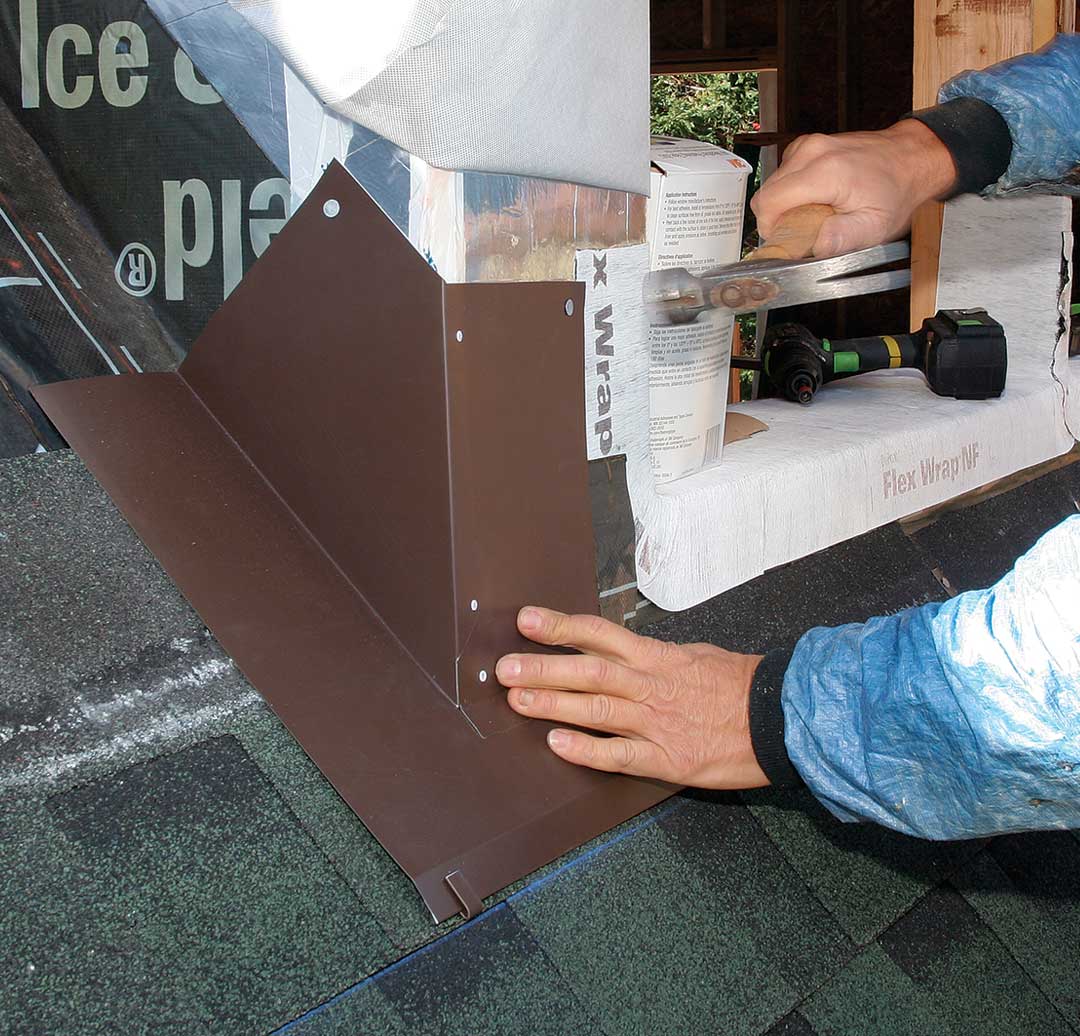
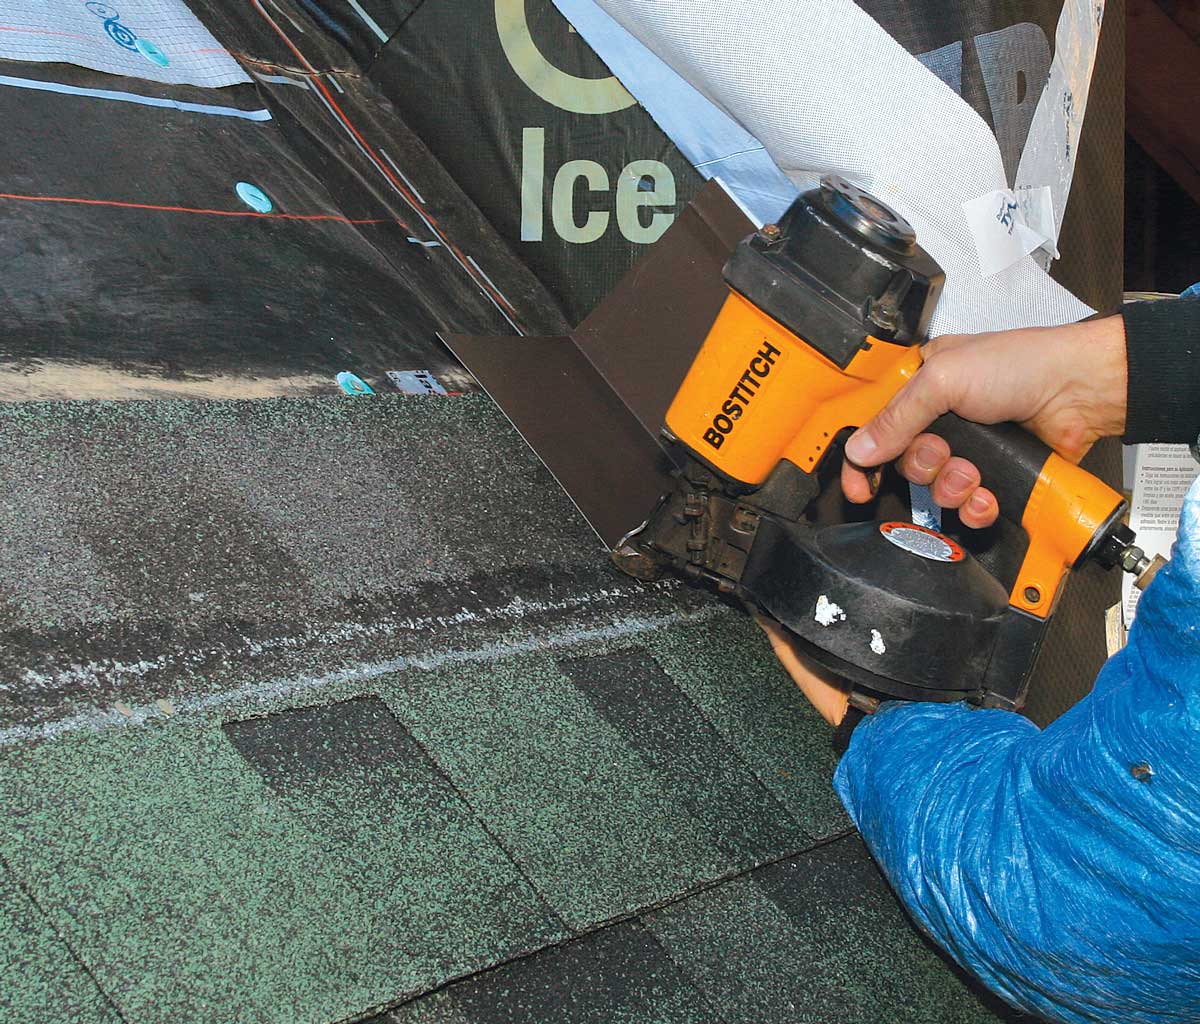
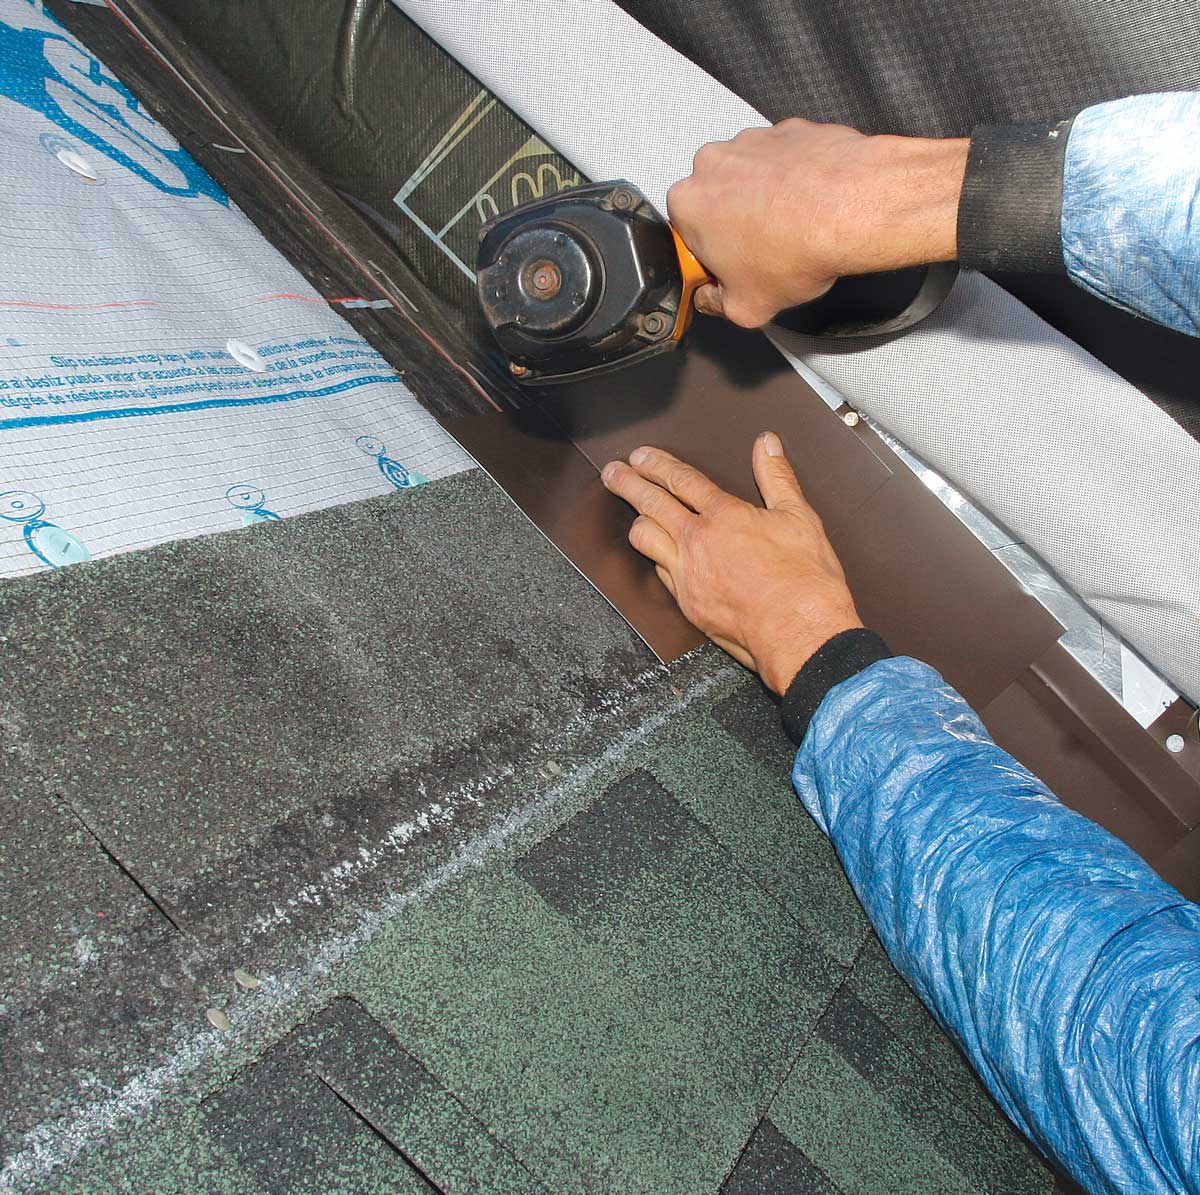
2. Install the corner and the apron
Apron flashing protects the joint between the dormer’s front wall and the roof below. Its wall leg is at least 6 in. tall and will be covered by the WRB and the siding or window trim. The roof leg should lap over the roof shingles by at least 4 in., and it needs to be bent so that it clamps tight to the roofing surface to resist wind-driven rain. This is achieved by hemming the bottom edge (folding the edge back on itself) and adding a stiffening crease.
Bend the apron. Bent from 12-in. coil stock, the apron pieces can be as long as the brake will accommodate. Overlap pieces by 6 in., sealing the joints with peel-and-stick membrane.
Clips hold down the flashing. Fold 3-in.-long by 1-1⁄2-in.-wide strips of metal in half lengthwise to make hold-down clips. Bend them to make a 1-in. tab for securing the bottom edge of the apron and the corner, and nail them every 16 in. above the apron’s layout line.
Nail the corner. Use nails that are galvanically compatible with the flashing: aluminum or hot-dipped galvanized with aluminum, copper with copper, stainless steel with stainless steel, and galvanized with galvanized.
Seal all horizontal overlaps. Vertically slit the backing on a 2-in.-wide piece of peel-and-stick membrane before folding it in half. Remove half the backing, adhere the membrane to the corner flashing, and peel away the remaining backing.
Set the apron. Slip the apron’s front edge into the clips, then settle the flashing onto the peel-and-stick seal. Press it firmly into place, nailing it off in several places high up the wall.
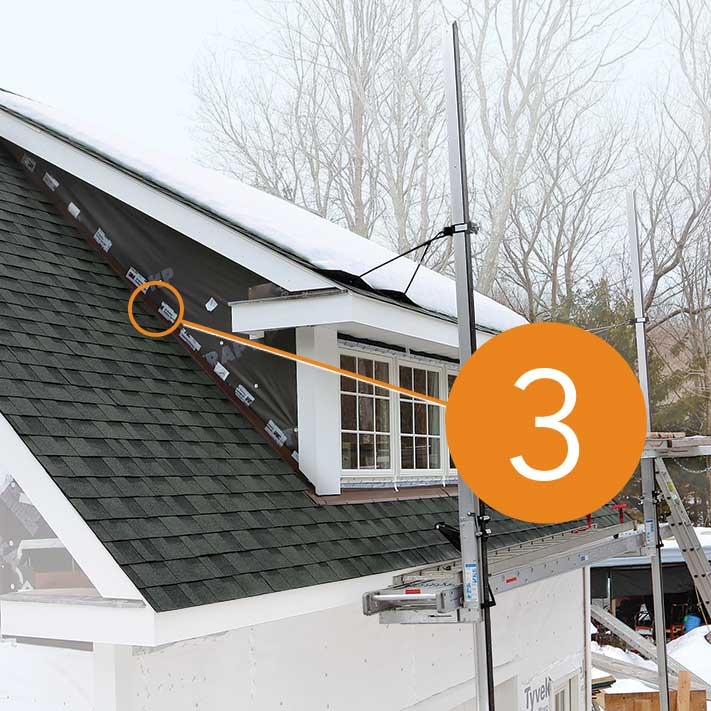
3. Apply the step flashing
Most precut step flashing is too small. I make step flashing from 12-in.-wide coil stock so that each leg measures 6 in. This allows the flashing to extend the code-required 4 in. behind the wall’s WRB and the siding to be kept 2 in. above the roof, as many sidings require. (Step flashing should be 3 in. longer than the shingle exposure, a total of 8 in. or 9 in.) I bend the flashing slightly less than 90° so that the legs press tight to the roofing and the wall.
Lap the step flashing. Step flashing interweaves with the shingles on the roof and is covered on the wall by the WRB and the siding.
Shingle over the corner flashing. The first row of roofing shingles alongside the dormer should lap the corner flashing by at least 4 in. Keep the end of the shingle about 1 in. away from the wall leg so that water can flush debris out of the corner.
Lap the step flashing over the shingle. Keep the bottom of the flashing above the shingle’s nail line, and drive one roofing nail through the outside bottom corner of the flashing.
Nail the flashing to the wall. Add a second nail to the topmost corner of the wall leg. Continue lapping flashing and shingles to the top of the dormer.
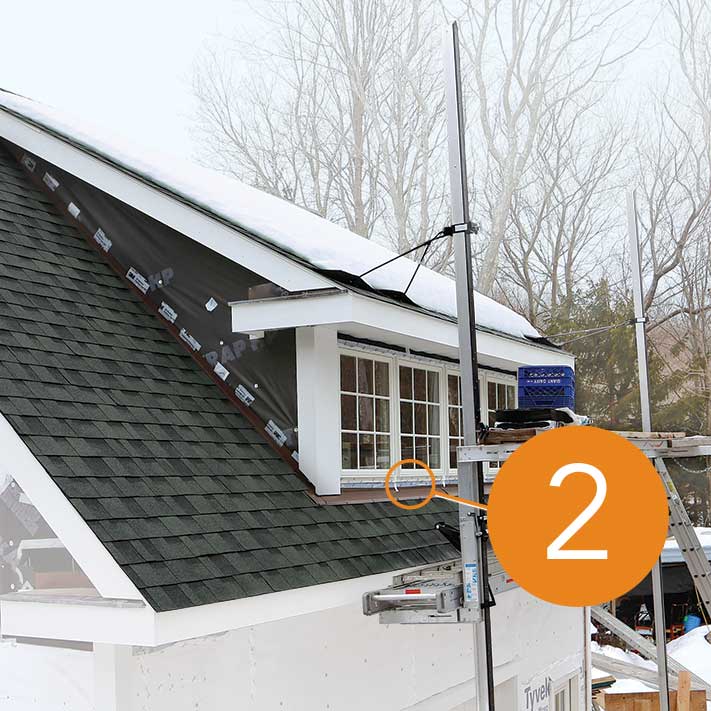
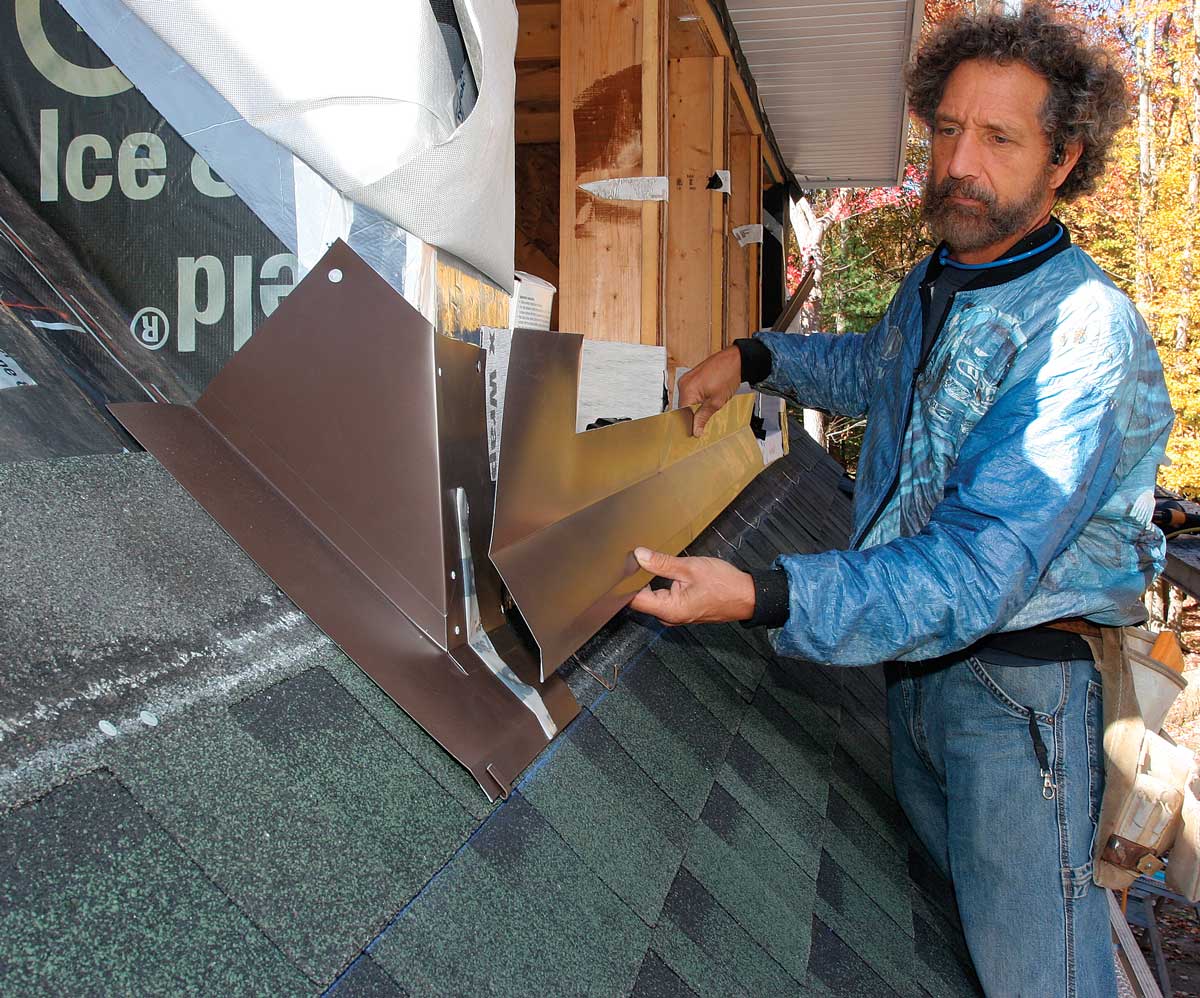
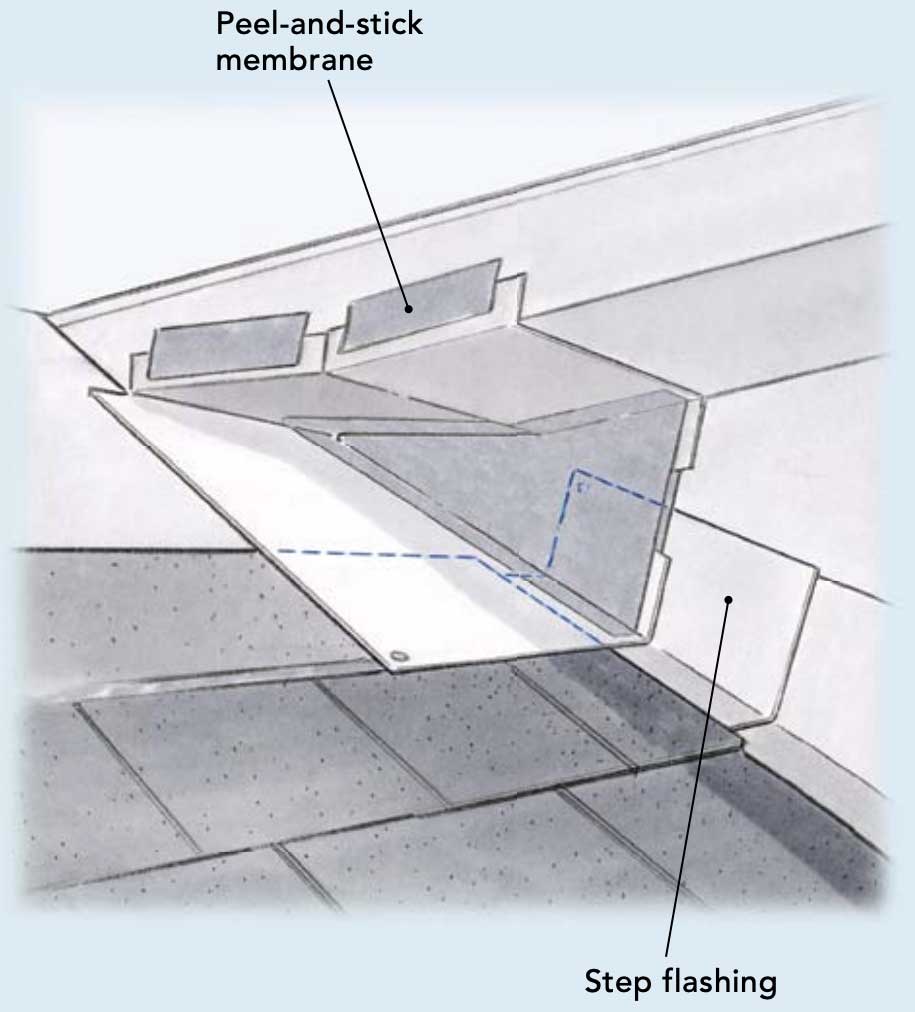
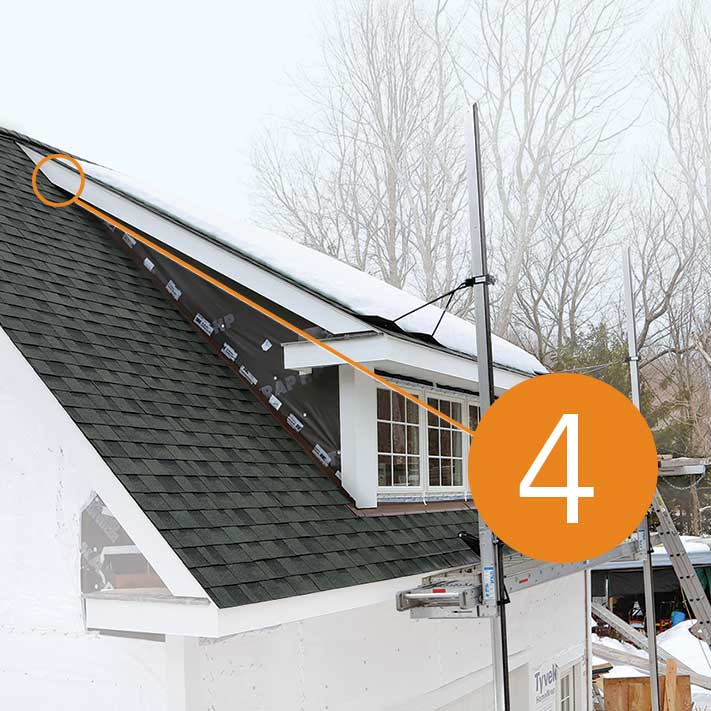
4. Integrate the closure flashing
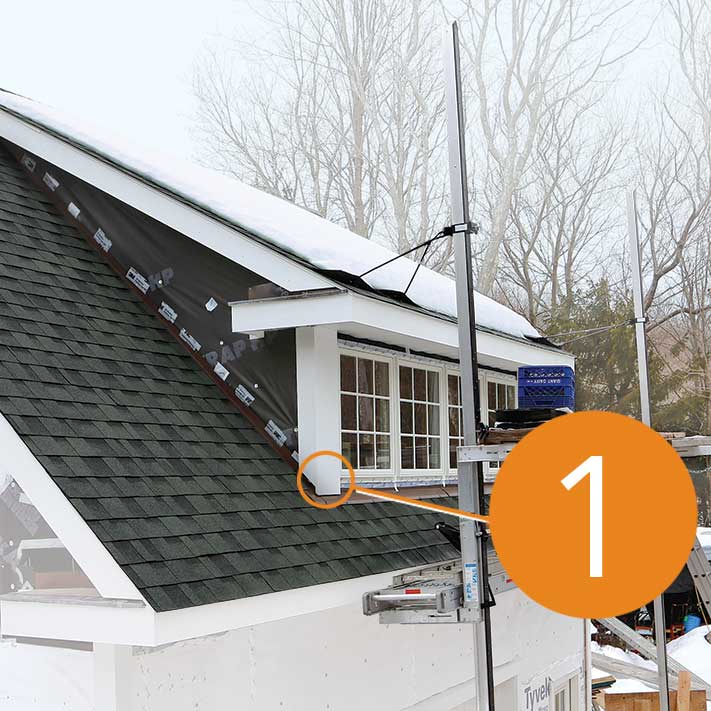
Where the dormer-roof overhang meets the main roof, I install a three-sided closure flashing that covers the last 12 in. of the soffit, roof, and sidewall to keep water from getting behind the step flashing. A bend in the top of the closure flashing allows it to tuck below the end cut on the rake rafter, moving the joint farther up the roof to be less vulnerable to wind-driven rain. Step flashing between final courses of shingles and the rake rafter covers the open side of the closure flashing, and the finish rake trim laps the step flashing.
Finish with closure flashing. Closure flashing joins the overhang to the roof, integrating with shingles, siding, soffit, and rake trim.
Membrane seals the side. The closure flashing is a 24-in. length of stock cut 4 in. wider than the soffit. Bend it in half to make two 12-in. legs. Peel-and-stick membrane completes the inner “V.”
Editorial adviser Mike Guertin is a builder and remodeler from East Greenwich, R.I. Photos by Andy Engel, except where noted.
From Fine Homebuilding #252
Fine Homebuilding Recommended Products
Fine Homebuilding receives a commission for items purchased through links on this site, including Amazon Associates and other affiliate advertising programs.
Flashing Boot Repair
Prolonged exposure to the sun and weather can compromise the rubber gasket on standard vent flashing. Use this to quickly and permanently fix failed seals or to help protect the gasket in new-construction applications.
This tool makes tearing off shingles easier and faster, providing powerful leverage that allows you to work comfortably. Its beveled teeth and wide blade make it easy to remove nails and push shingles off the roof.
All-steel construction makes these roof brackets durable and long lasting, and their adjustability allows you to create a flat, safe standing surface on most any pitched roof.
This is a dialog window which overlays the main content of the page. The modal window is a 'site map' of the most critical areas of the site. Pressing the Escape (ESC) button will close the modal and bring you back to where you were on the page.
We use cookies, pixels, script and other tracking technologies to analyze and improve our service, to improve and personalize content, and for advertising to you.
We also share information about your use of our site with third-party social media, advertising and analytics partners.
You can view our Privacy Policy
here and our Terms of Use here.
View Comments
Mike Guertin is the consummate carpenter. Thanks for the invaluable tips.
Thanks for this!