
Leak-Free Skylights
A peel-and-stick membrane under the flashing guarantees that the skylight won’t leak—ever.
Synopsis: Skylight installations can be fraught with concerns, not the least of which is introducing the potential for water leakage and subsequent related problems (mold, rot, damage). Contributing editor Mike Guertin shares his technique for installing a skylight, which promises no leaks with the use of a peel-and-stick (or self-adhesive) membrane under the flashing. Guertin’s step-by-step method begins with creating the opening for the skylight. Next, he installs the peel-and-stick membrane. Finally, he installs and flashes the skylight. Although the project featured in the article is a retrofit, Guertin says that the process is the same on a new house.
I used to worry every time I installed a skylight. Even with the best installation detailing, I could still expect a storm to hit from just the right direction and drive water behind the flashing. When I discovered peel-and-stick membranes, my worrying days ended. Now I follow a series of simple steps that hasn’t failed in more than 15 years’ worth of installations. The key to success is integrating the membrane and the flashings with the shingles to direct water back to the surface of the roof. Although the project shown here is a retrofit, I would flash it the same way on a new home.
What is peel-and-stick membrane?Peel-and-stick membrane (also known as self-adhesive) consists of either polyethylene sheets backed with rubberized asphalt-based adhesive or a mineral-surfaced fiber reinforced with an asphalt-based adhesive. The asphalt adhesive self-heals around fastener penetrations. The plastic-sheet type is the best choice for skylight flashing because it’s flexible and elastic, and has a more aggressive adhesive tack. |
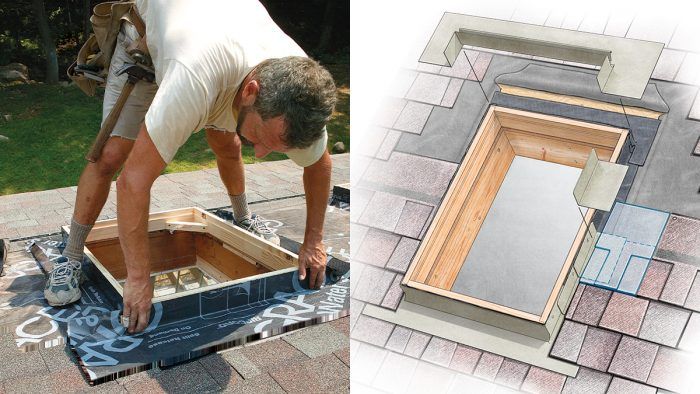
Put the skylight here
This project called for adding two 22-in.-wide skylights (for 24-in. on center framing) into rafters spaced 16 in. on center. To support the opening and tail rafters, I sistered the inside face of the existing rafters to close the overall opening down 3 in. more. Then I positioned the skylight up the roof plane so that the opening would be centered on the interior room’s ceiling. I framed the skylight openings from the inside.
Reframe, strip, and cut
Skylight openings sometimes need additional modifications. In this example, the center rafter was cut out to create a space wide enough for the skylight. The amount removed included the thicknesses of both headers to be added. The rafters on each side of the space must be doubled from ridge to plate if the tail rafter (the remnant below the skylight) is more than 3 ft. long. In this case, the extra rafters were added to the inside to reduce the rough opening’s width. Finally, headers were installed above and below the skylight’s position.
Things to consider when framing skylightsBuilding codes. Check local building codes to verify framing details. Standard sizes. Many skylights are sized to fit between rafters 16 in. or 24 in. on center, and only need a header installed between the two rafters. Roof trusses. Don’t cut trusses without consulting an engineer. For more information on framing skylights in roof trusses, see “Q&A” in FHB #132 (p. 24) and “Dramatic Skylight” in FHB #164 (pp. 92-97). |
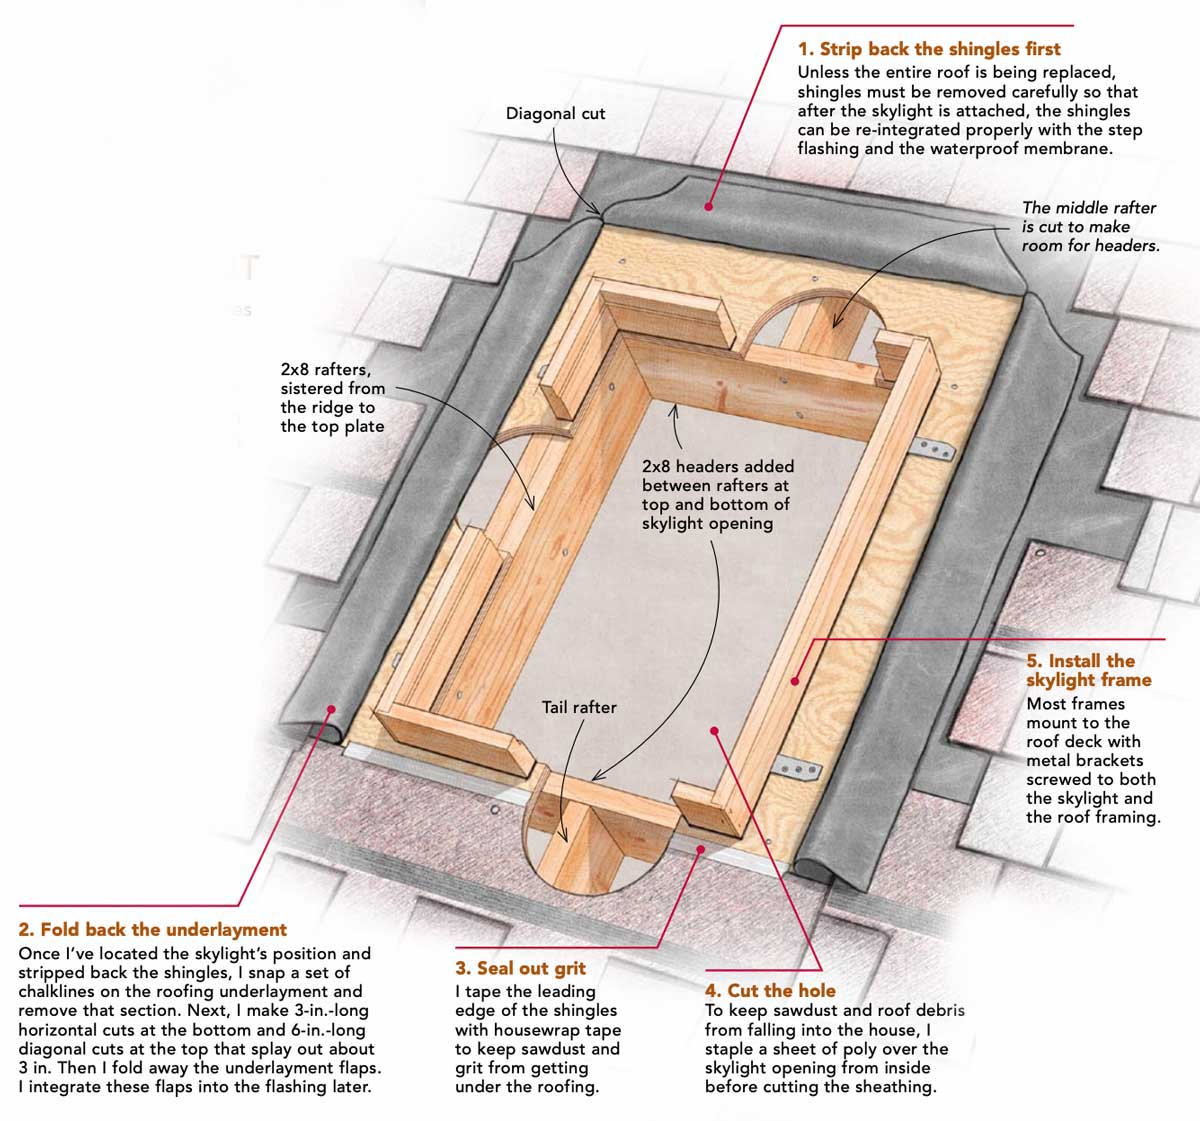
Cut the opening one layer at a time
With the rough opening framed, the easiest way to locate the skylight on the roof is to stand inside and drive screws up through the sheathing and the shingles at all four corners. Then I can go out and snap chalklines between the screws to mark the location.
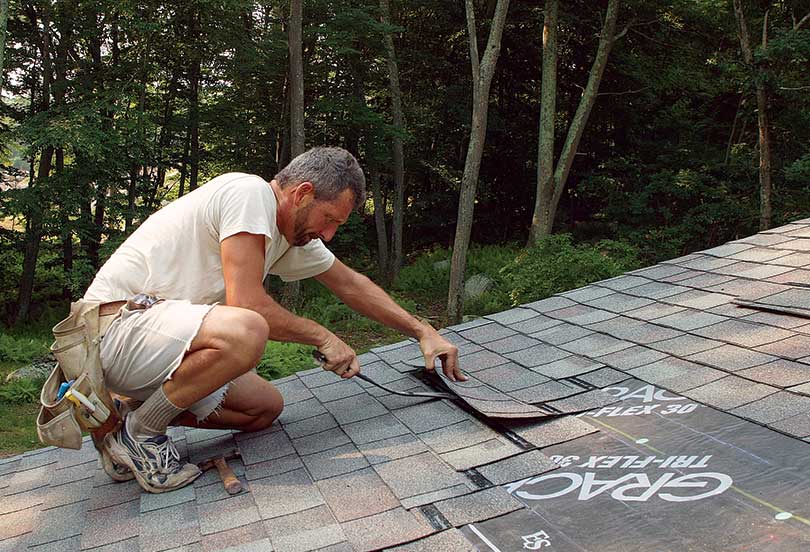
To start the hole, I strip back the roof shingles, beginning three courses above the top of the skylight. To free the third course, I pull the nails at the center and at the course above. A carefully inserted thin flat bar breaks the shingles’ self-adhesive strip and wedges up under the nails. It’s easier to separate the self-adhesive strip when the shingles are cool. In hot weather, I break the seal early in the morning before the sun has hit the roof. I remove full shingles to the next joint left and right of the skylight opening rather than cutting them in the middle.
Once the upper course of shingles is done, successive courses are easier to remove because the nails are exposed; just pull the nails and separate the self-adhesive strip. I remove shingles until I reach the course whose top edge is within 2 in. above or below the bottom line of the skylight opening. I save the shingles I’ve pulled to reuse around the skylight.
With the shingles removed, I snap chalklines between the screws to outline the skylight location, then remove the screws. Inside, I staple plastic over the skylight opening to contain the dust. Then I go back to the roof, where I use a circular saw to cut the roof sheathing.
After I’ve swept the roof, I separate the glass portion of the skylight from the frame and install the frame per the manufacturer’s instructions. I prefer to remove the glass from the frame to reduce the skylight’s weight and to cut the chance of scratching the glass, and to make it easier to run the peel-and-stick membrane to the top of the frame.
Slice, wrap, and protect with a watertight seal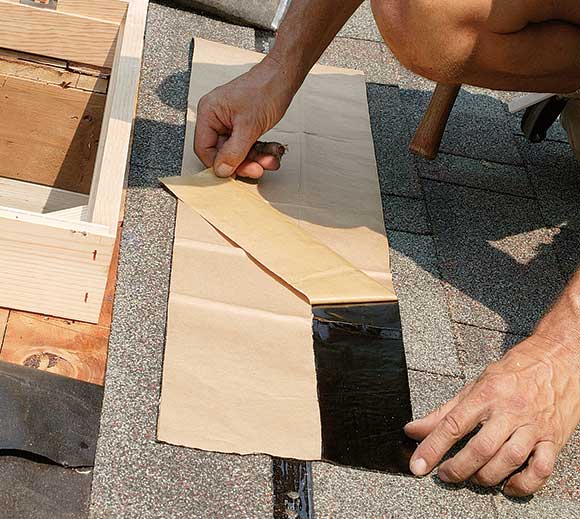 the other half when it’s in place. Although metal step flashing is the primary weather barrier between the skylight frame and the roof shingles, self-adhesive membrane, when applied first, makes a watertight seal that also self-heals around nail penetrations. I cut 9-in.- to 12-in.-wide strips of membrane for each side of the skylight (there should be a minimum of 5 in. adhered to the roof) and make each one about 12 in. longer than the skylight edge.
|

Peel-and-stick membrane seals the frame to the roof
Despite the layers of underlayment, shingles, and flashing, I count on the peel-and-stick membrane as the final line of defense against leaks. Applied meticulously around the skylight frame, the membrane collects water that gets beneath the metal flashing and redirects it to the shingle surface below the skylight.
The key is to lap the peel-and-stick membrane over the top edge of the shingle course that runs along the bottom of the skylight. Without this step, water that reaches the membrane will empty onto the roof underlayment and have to travel the length of the roof slope beneath the shingles until it reaches the eave. Along the way, the water has hundreds of nail holes that it could leak through.
Integrate the metal flashing with the roof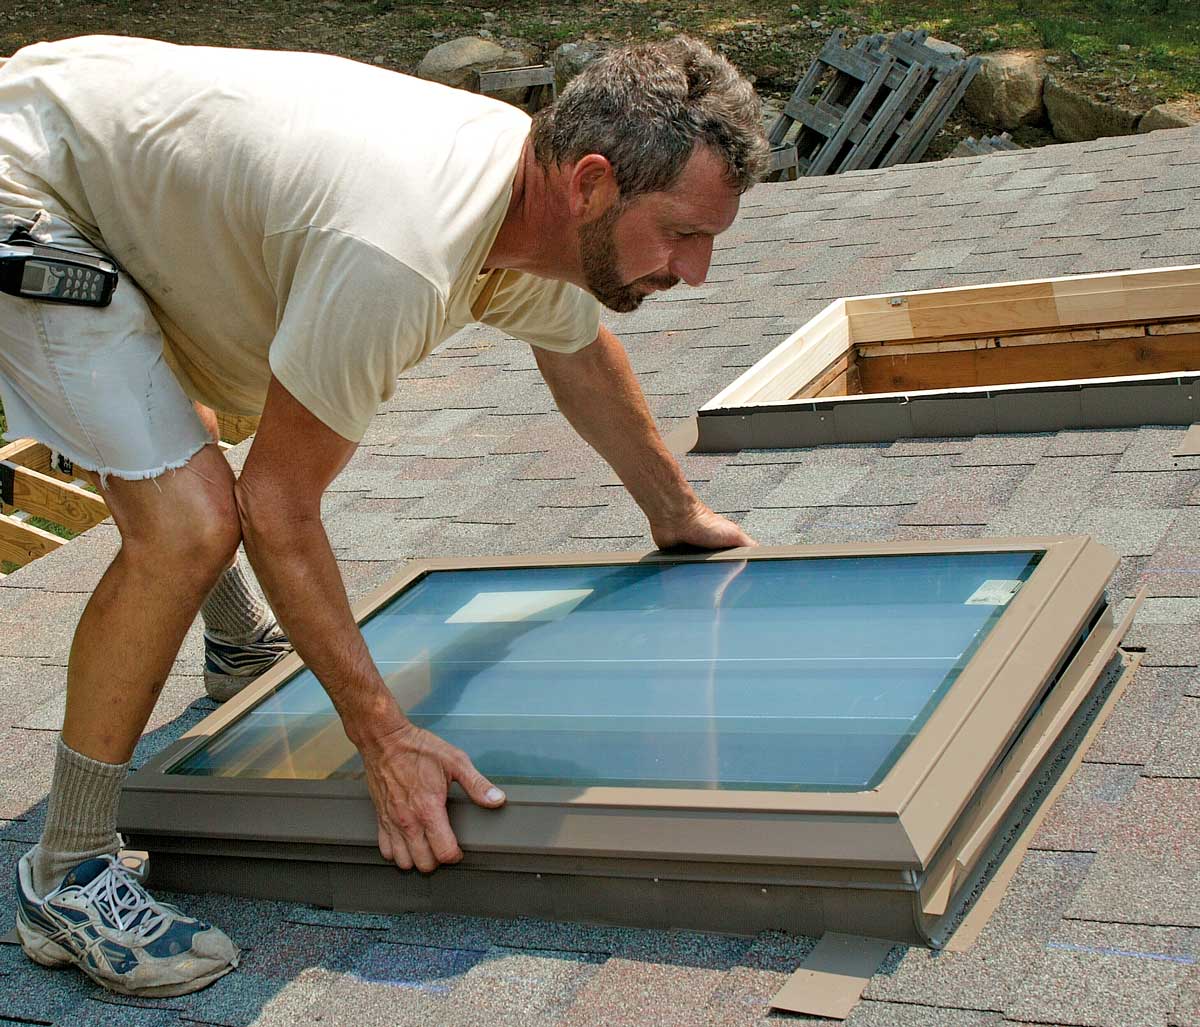 Once I’ve brought the shingle courses back to the bottom of the frame, I install the base-flashing piece, then begin to alternate between the step flashing and the shingles up along the frame. This skylight was a fixed frame, so the gasket was built into the window frame. If the sky-light is operable, the gasket is separate, and I tuck the top edge of the flashing beneath the gasket first, then attach the step flashing with short nails or screws to the side of the skylight frame. I position the bottom edge of each step flashing above the self-adhesive strip of the shingle below.
|

Skylights are easy to install
Reshingling and flashing are the simplest parts of the process. The base flashing wraps around the bottom of the curb, the step flashing is integrated into the shingle courses along the sides, and the head flashing caps the top. I slip the top edge of the flashing under the skylight gasket, then secure the base flashing to the frame with short nails or screws at the top corners. When replacing shingles, I don’t drive nails through the step flashing; their rigidity prevents the last several inches of shingle from lifting up.
With the head flashing nailed in, I slip the last couple of shingle courses beneath those still in place, lifting up the shingles to hammer the nails. Most important, I keep in mind that I have to renail the courses above the skylight. It’s a place that’s easy to forget at the end of a long day spent working on the roof.
Mike Guertin is a remodeling contractor in East Greenwich, R.I., and a contributing editor to Fine Homebuilding. His Web site is www.mikeguertin.com. Photos by Charles Bickford.
From Fine Homebuilding #204
For more photos, illustrations, and details, click the View PDF button below:
Fine Homebuilding Recommended Products
Fine Homebuilding receives a commission for items purchased through links on this site, including Amazon Associates and other affiliate advertising programs.

Fall Protection

Shingle Ripper
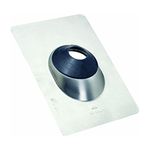
Flashing Boot
