
Plumbing Vent Boot Flashing Repair: Method 1
Repair a boot flashing without doing a full replacement.
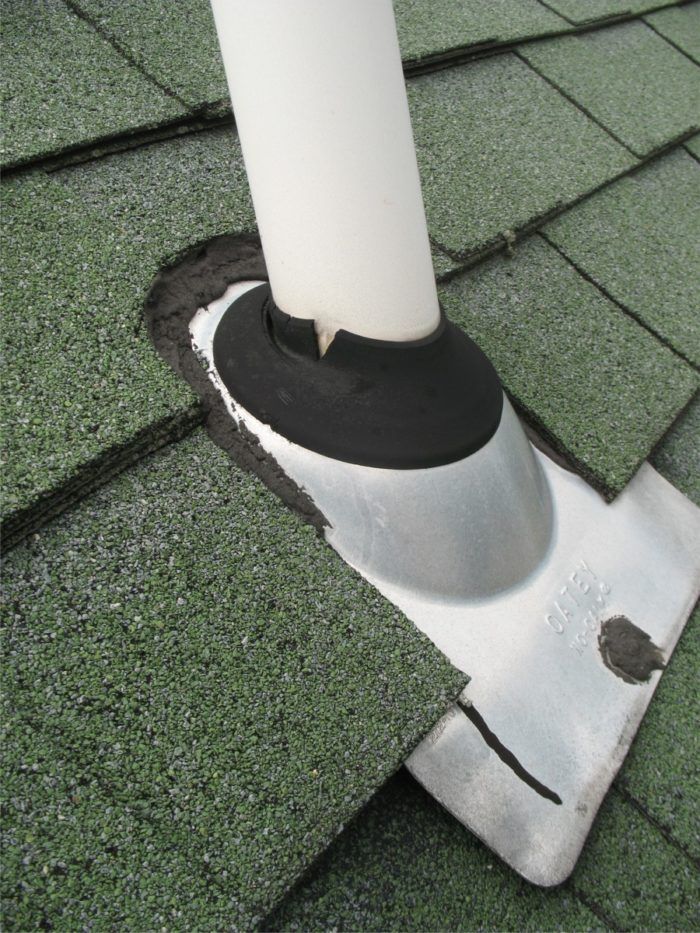
The rubber collar on plumbing vent boot flashings don’t seem like they’re made to last as long as today’s long-lived asphalt roof shingles. I’ve had two collars split in the past 3 years on homes I built about 20 years ago. One presented itself as a stain on a ceiling and the other I found just by chance when spraying lichen and moss killer on a roof.
One solution for a split boot flashing is to remove and replace it with a new one. That involves stripping back shingles and runs the risk of damaging the shingles. Plus it takes an hour or more. In less than half the time a repair can be made that will last as long as a full replacement and may actually be more durable. There are several repair methods. This blog will cover a repair using butyl adhesive backed EPDM flashing tape and a new boot flashing. See other blogs for a proprietary vent flashing repair kit and a repair using a boot flashing with the roof pan trimmed off.
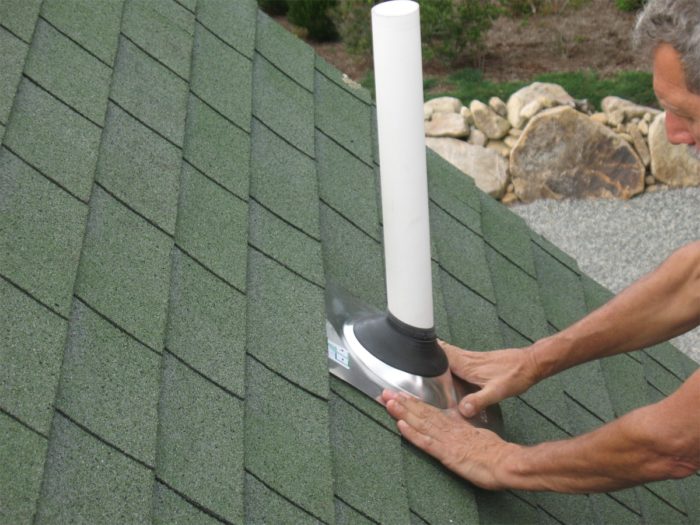
I’ve used this repair on several roofs over the years. In simplest terms a new vent pipe boot flashing is slid over the top of the existing one and the top edge of the pan is lapped beneath the overlying shingle course. There’s no need to lace the flashing pan into the shingles since the boot and bell of the new flashing will shed water around the damaged part of the old one.
Figuring that the rubber collar on the new flashing may split before it’s time to strip and replace the roof shingles (another 20+ years hopefully)
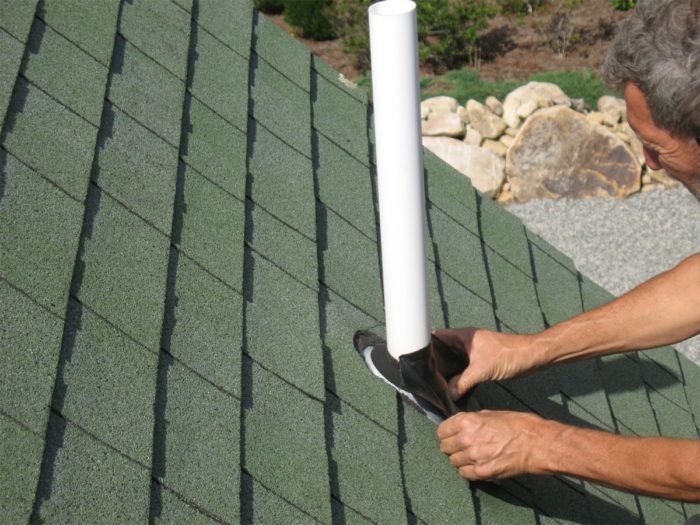
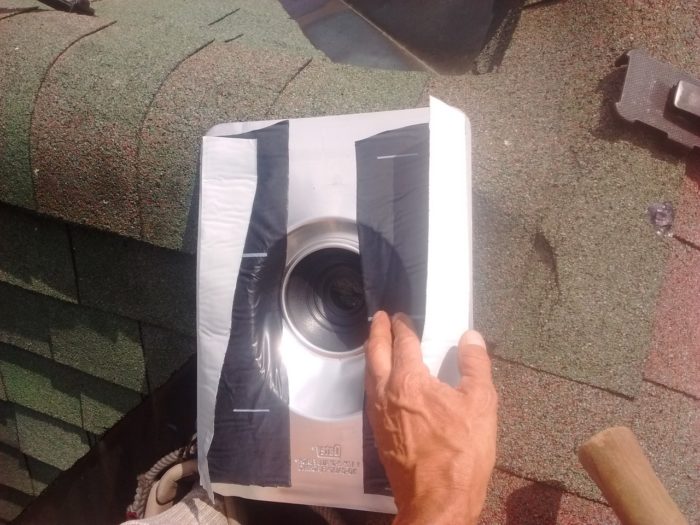
I first seal the vent pipe to the metal of existing flashing with ProtectoWrap’s Form Flash 2 flashing tape. It’s an stretchable uncured EPDM membrane with a butyl adhesive backing and rated for full exposure to UV light.
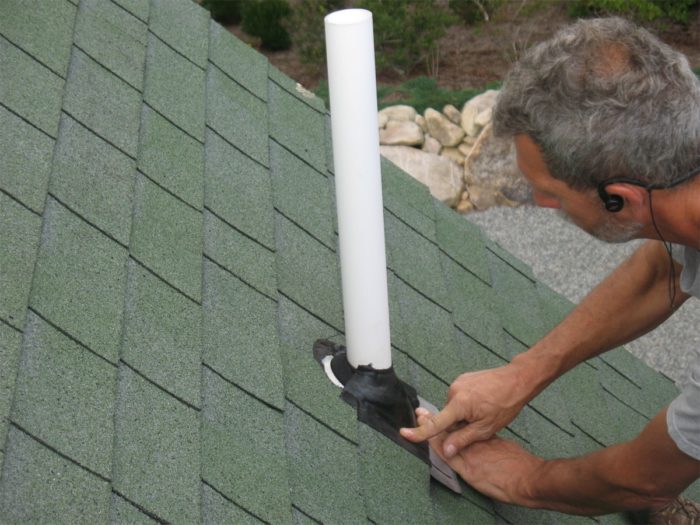

Before sliding the new flashing over the vent pipe I apply strips of regular flashing tape to the bottom of the flashing pan.

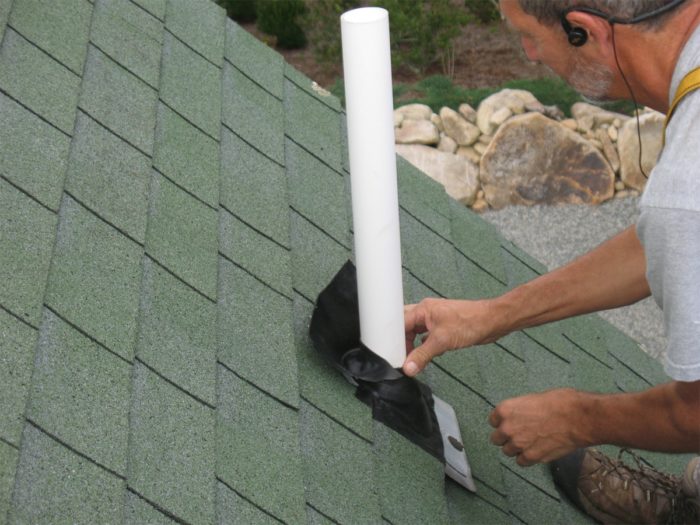
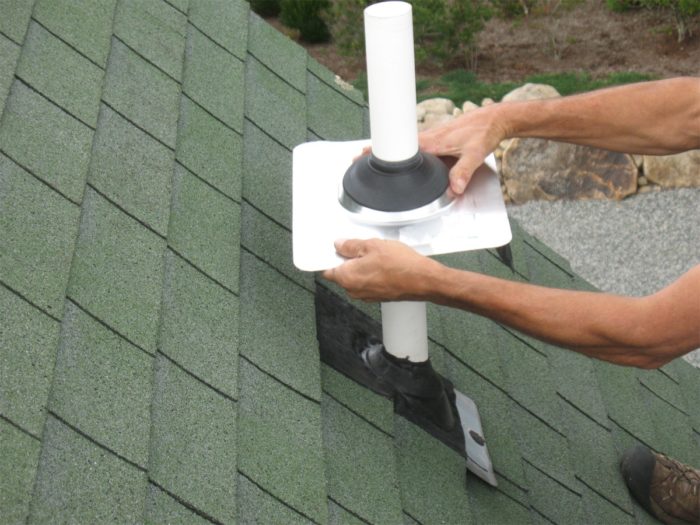
The new pan is slid over the vent pipe and the top edge is slipped under the shingle course running just above the old flashing.

A couple of roofing nails can be driven at the bottom corners of the flashing pan to ensure it stays put in high wind.
Click here for details on another way to do this job.
Fine Homebuilding Recommended Products
Fine Homebuilding receives a commission for items purchased through links on this site, including Amazon Associates and other affiliate advertising programs.
Flashing Boot Repair
Fall Protection

Peel & Stick Underlayment


View Comments
"A couple of roofing nails can be driven at the bottom corners of the flashing pan to ensure it stays put in high wind."
You go through all that work only to put a couple more holes in the roof for water intrusion. If the flashing won't stay down in high winds with only roofing cement/tar (like every shingle flap on the roof does) then you need a different/proper flashing.
There should never be exposed nails in any metal flashing. And no, a dap of tap/caulk on the nail head doesn't make it right.
I generally don't install nails at the bottom corners of the flashing - and didn't on this repair. I don't however believe doing so in areas with high wind like coastal zones poses any leak hazard with or without a dab of sealant. Have you examined roofs with face nailed boot flashings where the nails were the source of a leak?
Many years ago, I used to drive 1 1/2" or longer roof nails into the lower corners of the flashing, but now I use metal roof panel screws with neoprene washers. These are self sealing and do a great job for the high wind zone of the gulf coast.
Yes, I have seen nails in roofs as the source of leaks, however, that is irrelevant as it's still improper.
All one has to do is point to every shingle flap on the roof-- no nails. They are all held down with roofing cement/tar. Shingles are much more flexible than aluminum, so why would aluminum not stay down with roofing cement?
But since you brought up high wind areas... in such critical installations, why wouldn't one take the extra 1/2 hour to hour to do the job correctly and remove the surrounding shingles to properly install the vent flashing. When done properly, there is only an inch or so of flashing on the bottom that is exposed to the wind, instead of 75% of the edge on 3 sides, like in the installation shown in this post.
In my opinion, this is a corner-cutting technique that has no place in a magazine with the high standards that Fine Homebuilding has.
In any case, if I was left with no other option, I would definitely use nail/screws with neoprene washers (as ABBAUSA stated) even though that is still unnecessary and improper on a correctly installed vent flashing of this type.
Thank you for this information. My current situation is I'm unemployed and living on savings. I recently noticed when cleaning gutters that the vent pipe flashing boots have holes in them. I need a new roof, it's not shot but is missing a few shingles, but can't afford it right now. I also can't afford to pay someone for a proper repair of the flashing. Given that my roof is 19 years old I'm not willing to attempt to mess with the shingles any more than necessary for fear I might damage them and end up in a worse situation than I am now. This repair is fairly simple. Something I can handle myself and is reasonably inexpensive. So it works in my situation. Thanks for the info. This repair will give me peace of mind until life improves.
My vent pipe flashing is similar to this.
https://i.imgur.com/FFizEDv.png
Would it be ok to remove the rubber that is above the roof level then seal with roof flashing tape. Then put the new boot over this one. My thinking is this boot is large enough that putting one over top of it it going to be a problem. Thanks for a reply.