Roof Vent Retrofit from the Outside In
Reroofing is the perfect time to lift the hood and make short work of an otherwise awkward venting job.
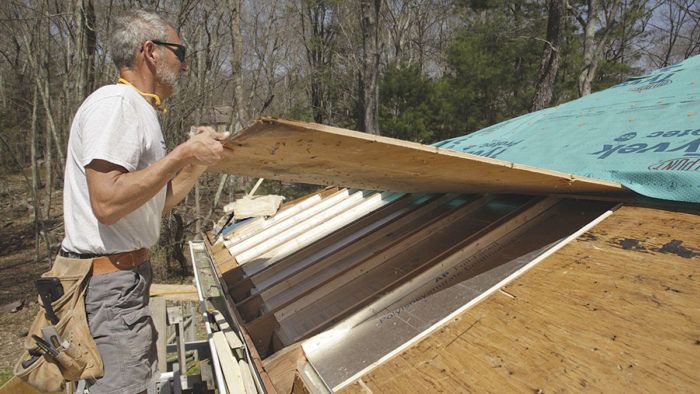
Synopsis: This article details the process of venting, air-sealing, and insulating the area along exterior walls where the rafters meet the top plate. By combining the work with roofing replacement, most of the job can be done from outside. A series of step-by-step photographs shows the process of removing the sheathing and propping up the roof; building, adding, and fastening baffles; and reinstalling the sheathing.
The roofs in a lot of older houses with unconditioned attics aren’t properly vented, and that can be a problem in many climates. Ventilation helps keep the roof deck dry, and, combined with air-sealing and insulation, helps prevent ice dams when it’s cold.
The most challenging part of venting, air-sealing, and insulating an attic in an old house is dealing with the area along the exterior walls where the rafters meet the top plate. The space between the rafters and ceiling joists is cramped, making it a difficult spot in which to maneuver and work. This is especially the case on lower-slope roofs (less than 6-pitch), where all of the action takes place in a tight spot just out of reach.
One solution is to combine the attic insulation and ventilation upgrade work with roofing replacement. This way, instead of working inside the attic, most of the work can be done from outside.
Pop the hood
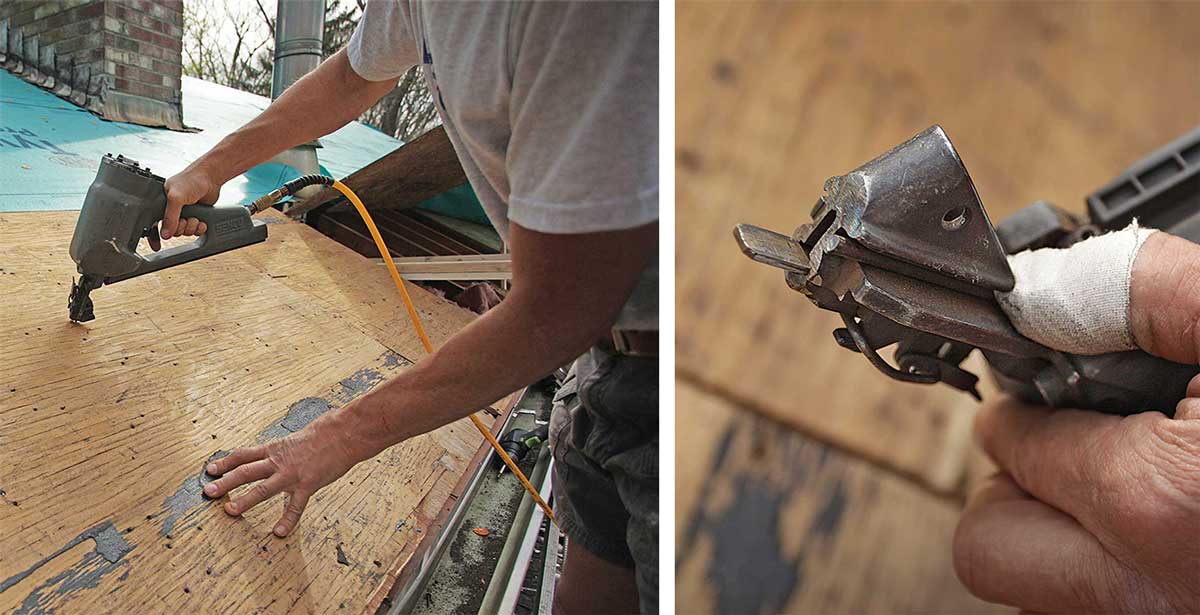
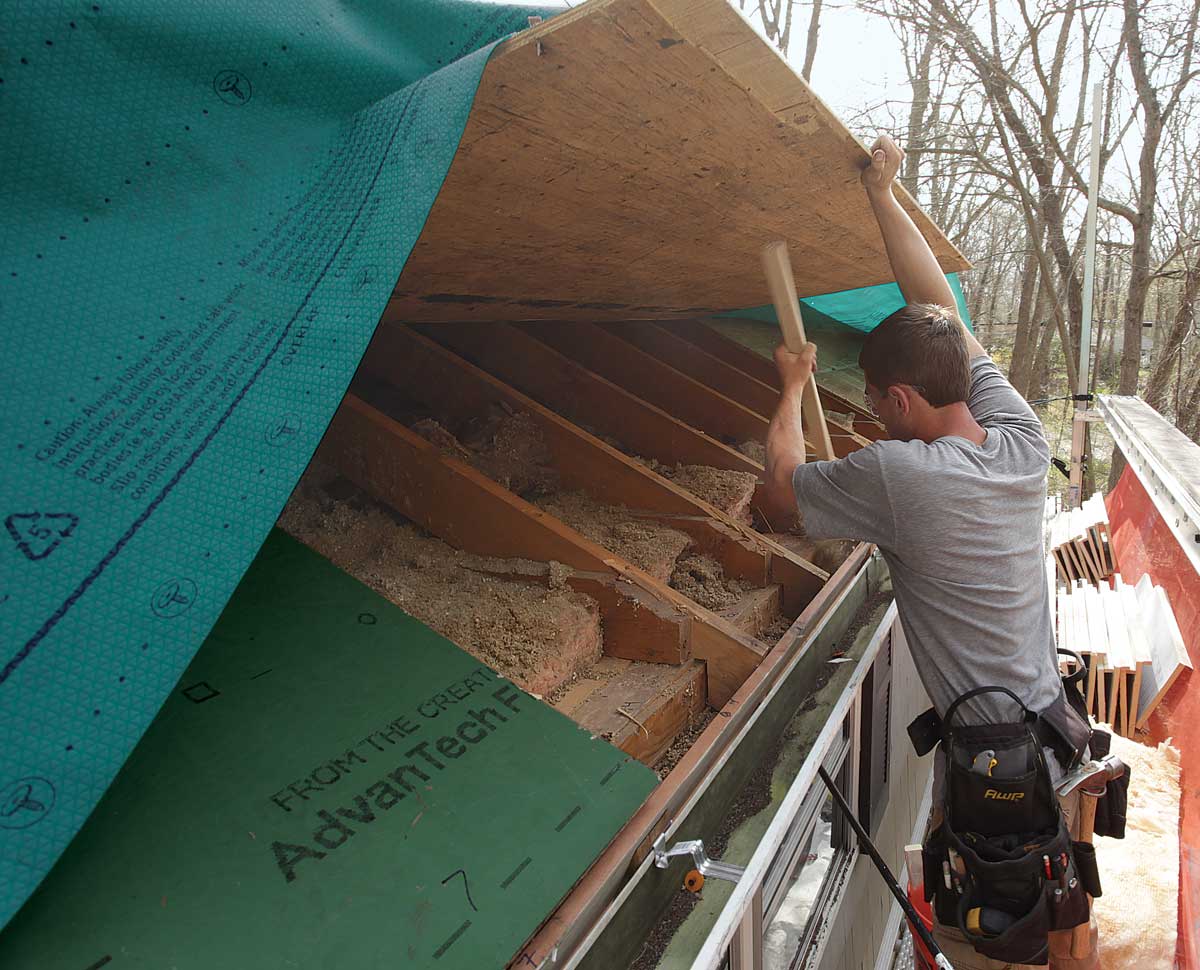
After stripping off the old roofing, we use a modified framing nailer to free up the bottom course of roof sheathing and expose the top plate, rafters, ceiling joists, and existing insulation.
The conventional way to remove roof sheathing is to yank the nails using a cat’s-paw-style puller, but I find it faster and less damaging to just punch the nails through the sheathing. There are tools made specifically to remove nails or drive them through lumber, but we just use an old framing nailer that I modified by grinding 3⁄8 in. from the end of the driver nose (the business end of the nailer). With the nose ground down, the nail driver projects about 5⁄8 in. from the nose when you pull the trigger, which is more than enough to punch nails through the 1⁄2- in. roof sheathing.
After driving the nails through the sheathing, we lift the panels and either slide the loose sheets up the roof or tilt them up like the hood of a car, bracing them with scrap wood in order to provide some shade to work under.
It’s up to you whether it makes sense to work in smaller or larger sections. For efficiency on this project, we kept an eye on the weather and opened long sections of roof at a time so we could production-build the vent baffles.
Add some site-built baffles
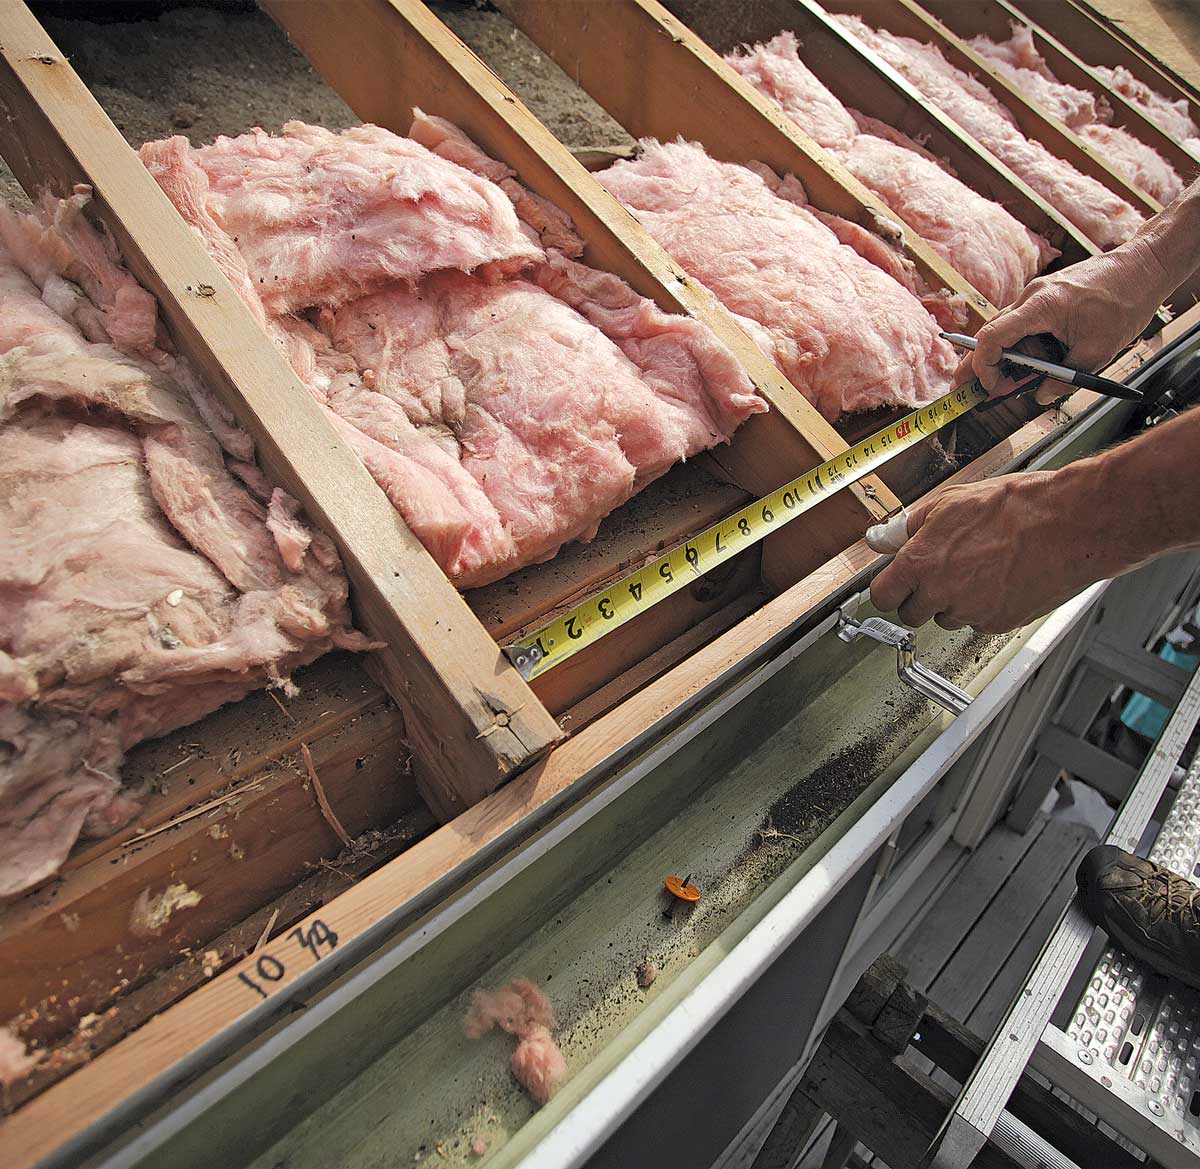
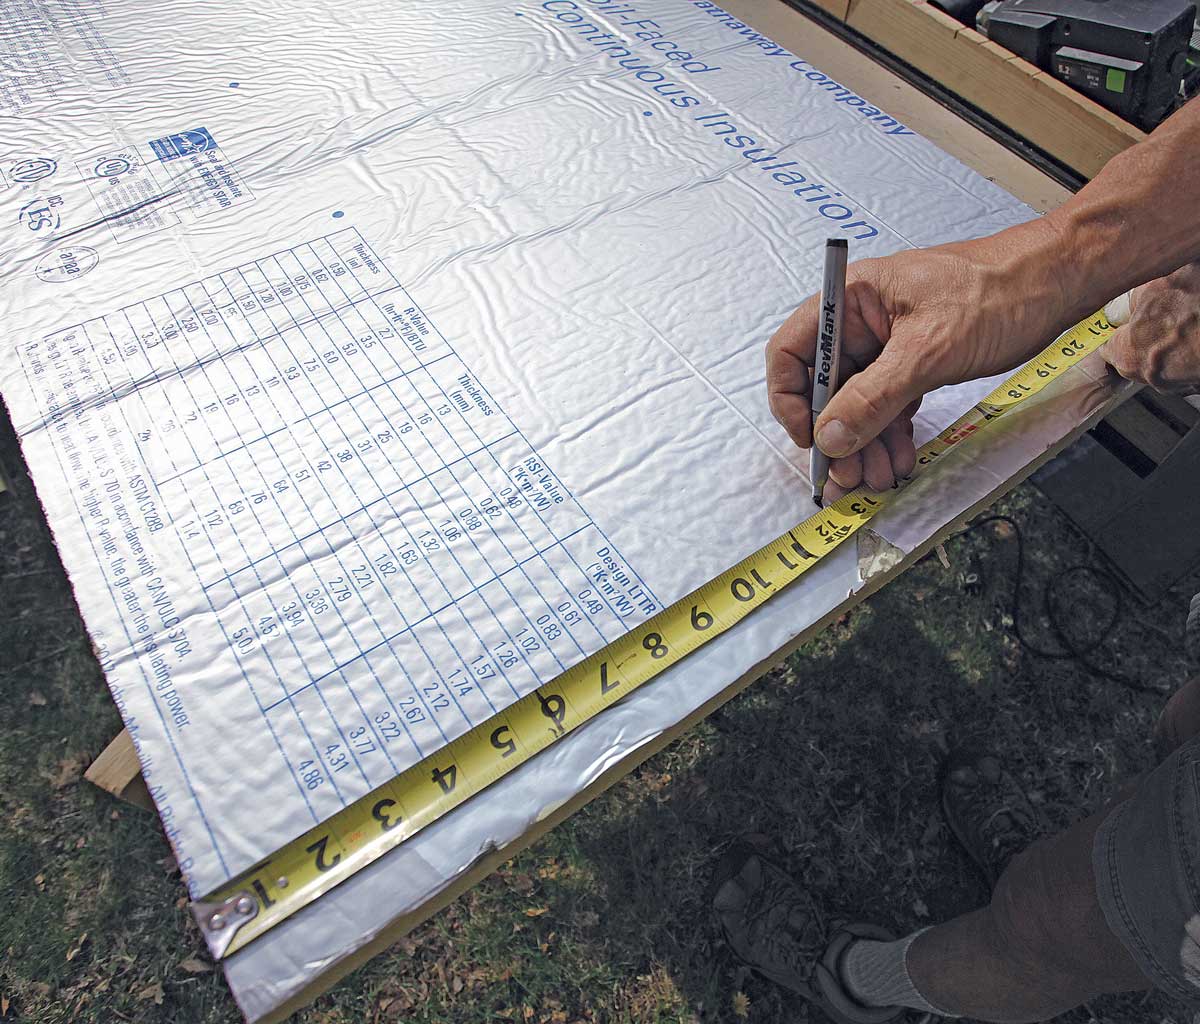
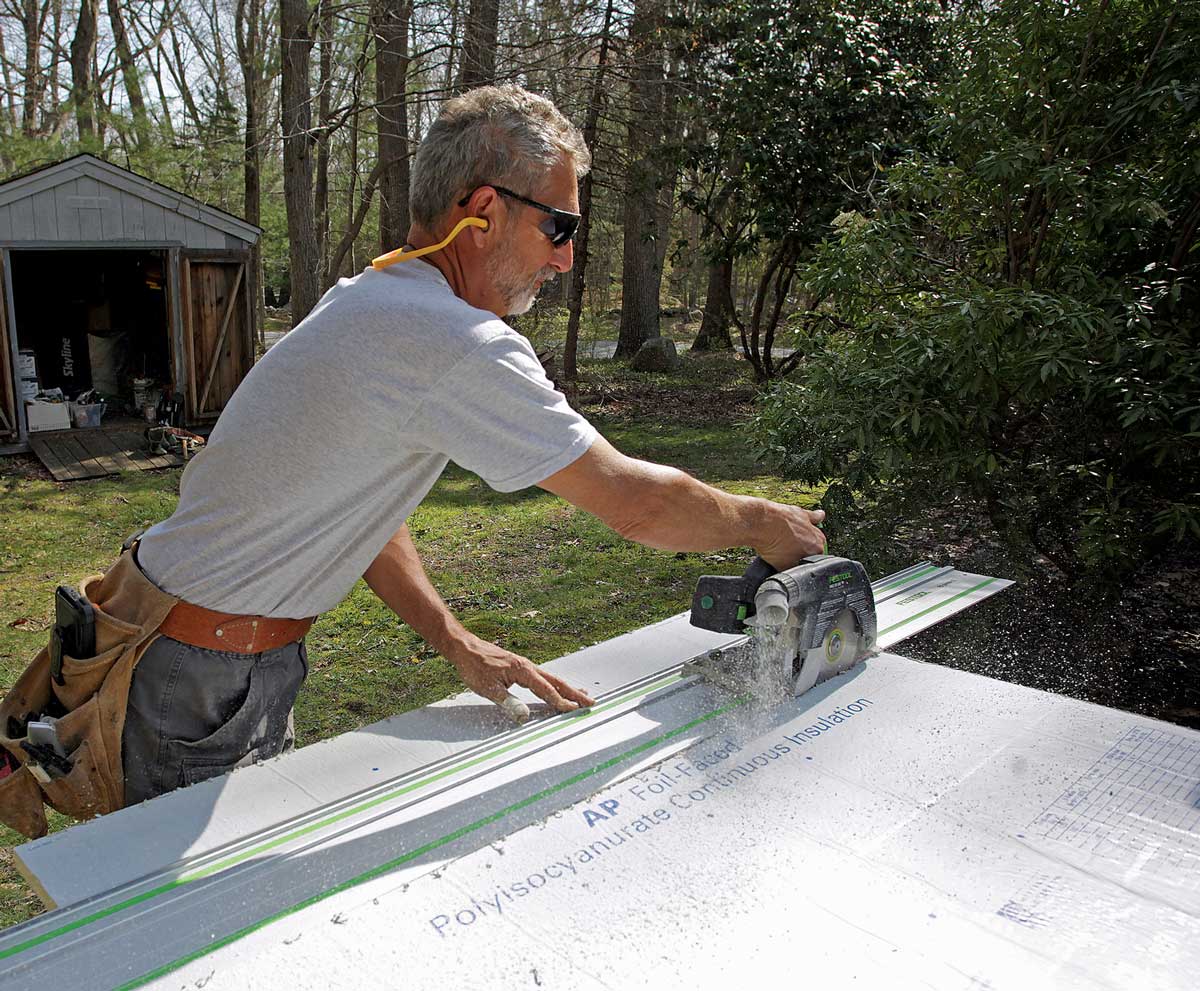
With the sheathing removed, it’s easy to air-seal penetrations in the drywall ceiling, like recessed can lights and electrical boxes. Then we measure each rafter bay and fabricate vent baffles from rigid-foam insulation and wood strips to install between the rafters.
Vent baffles perform three tasks: they create an air gap between the insulation and roof, they prevent insulation from spilling into the soffit, and they provide an air barrier to minimize wind-washing of the insulation, which can compromise its R-value.
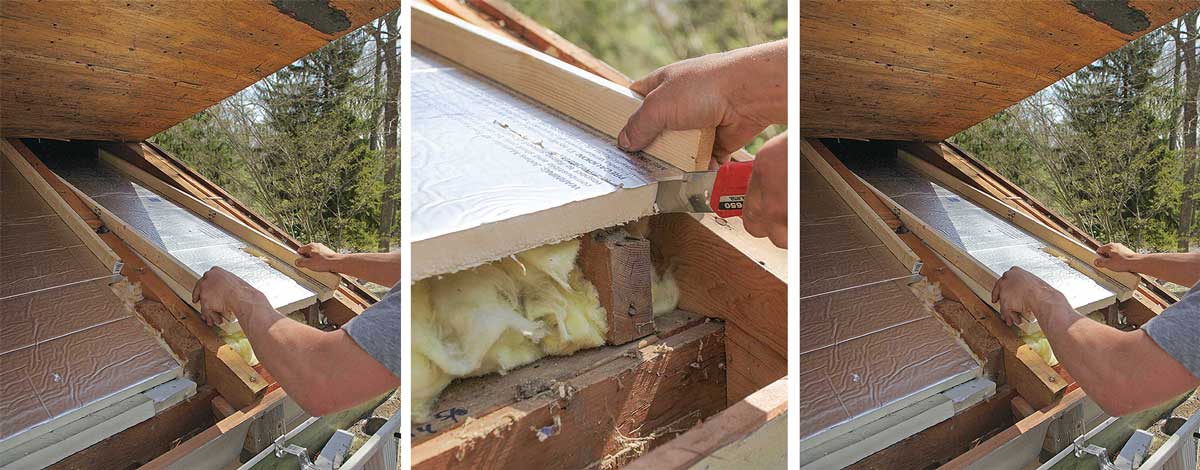
We usually install 4-ft.-long baffles made from 1-in.-thick polyiso and 3⁄4-in. by 1-5⁄8-in. wood strips. OSB, plywood, and other rigid materials can be used instead, but I like the foam because the space between the top plate and the roof sheathing is usually narrow, and the foam adds insulating value.
A quick note on the depth of the vent baffles: The IRC calls for a minimum ventilation space of 1 in., though building scientists suggest leaving a 2-in. vent space for better airflow. Since the distance between the roof sheathing and top plate on this and most other low-pitch roofs is cramped, a deep vent channel reduces the space for insulation. There’s going to be a compromise, and it’s the installer’s call—more vent space, or more insulation. We like to split it somewhere down the middle.
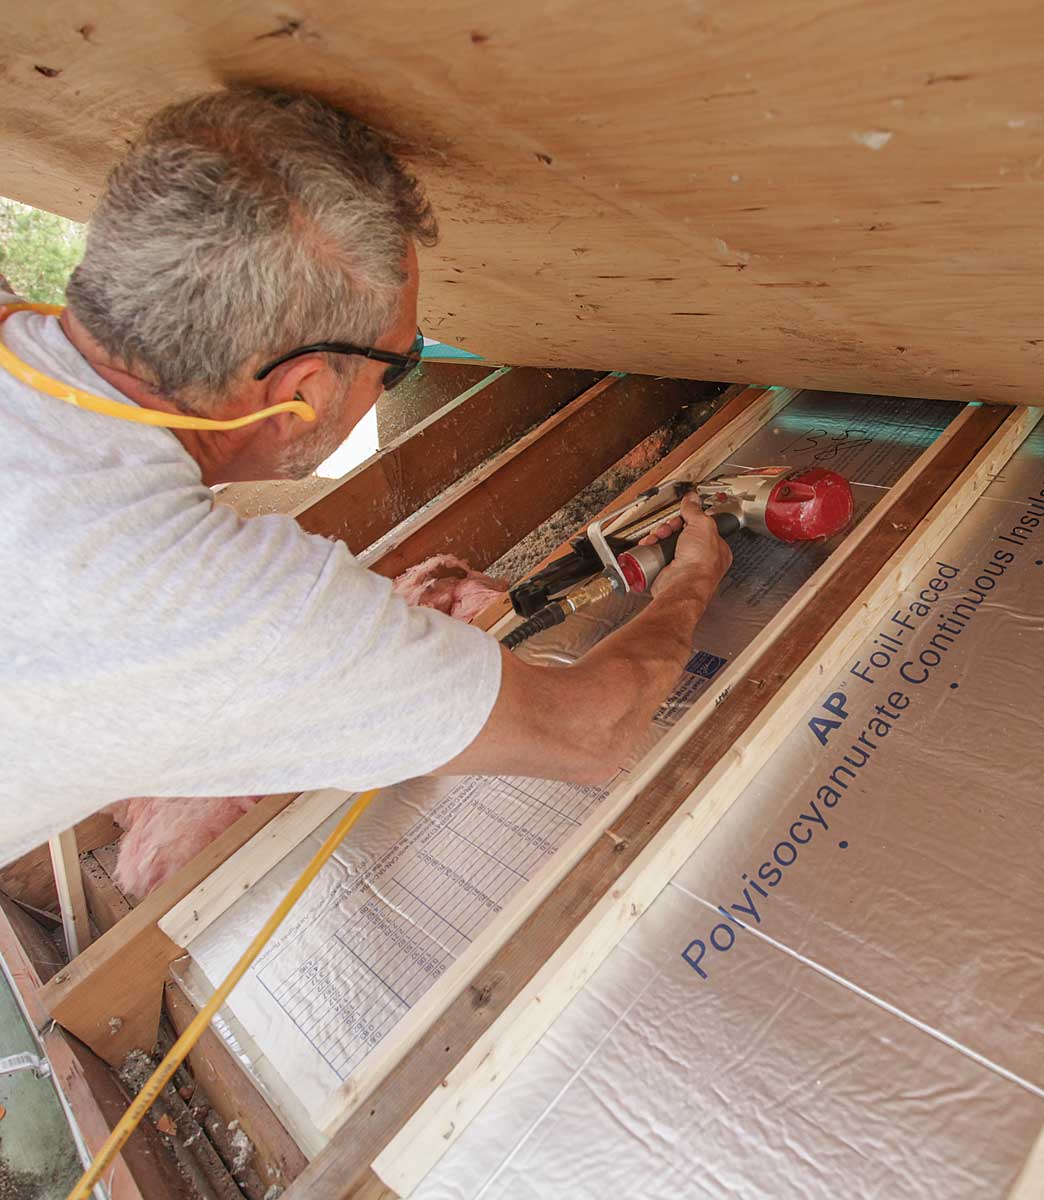
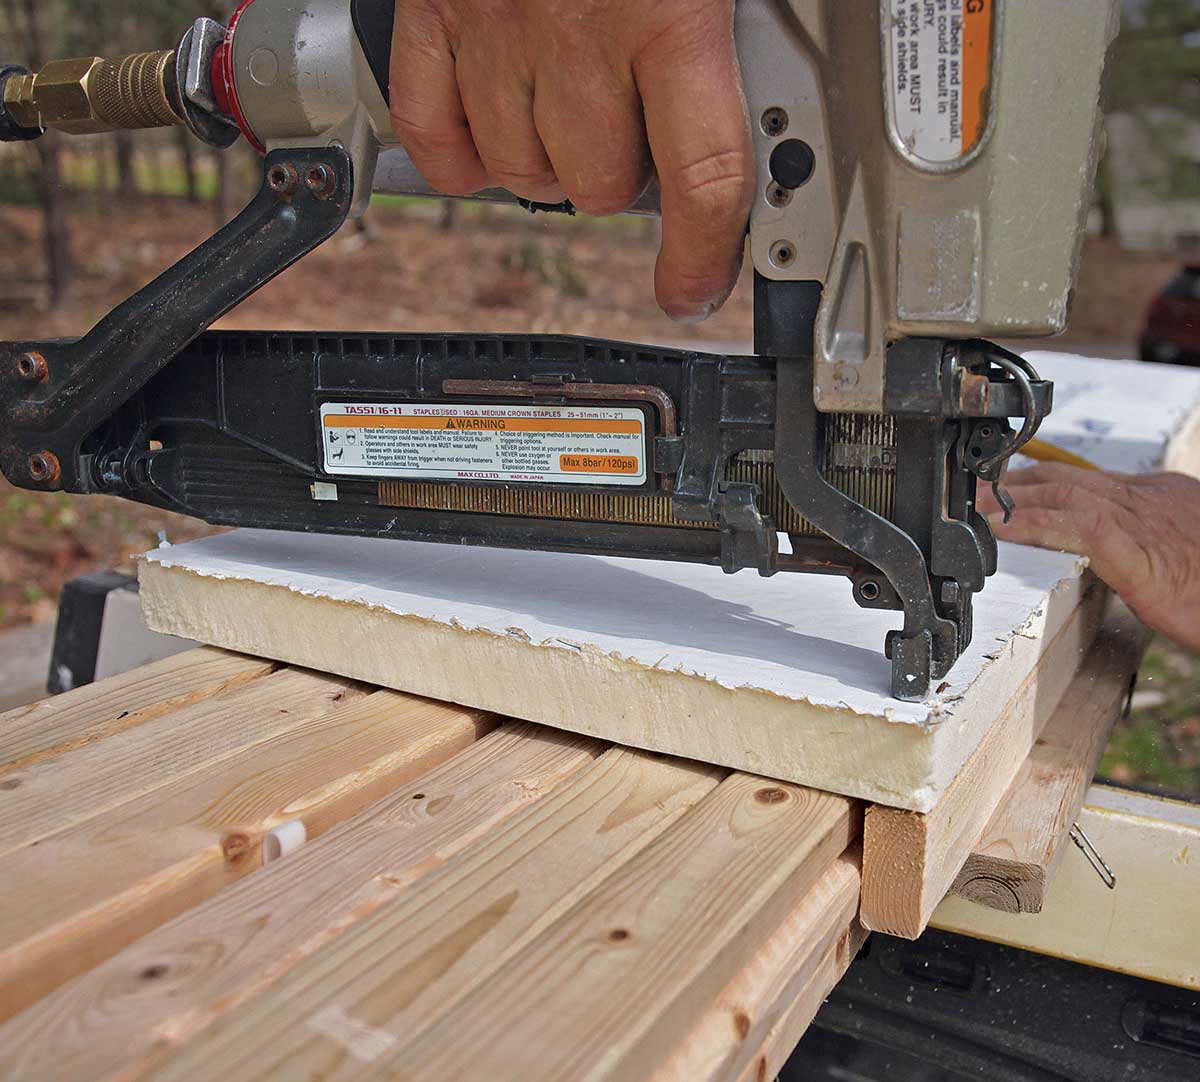
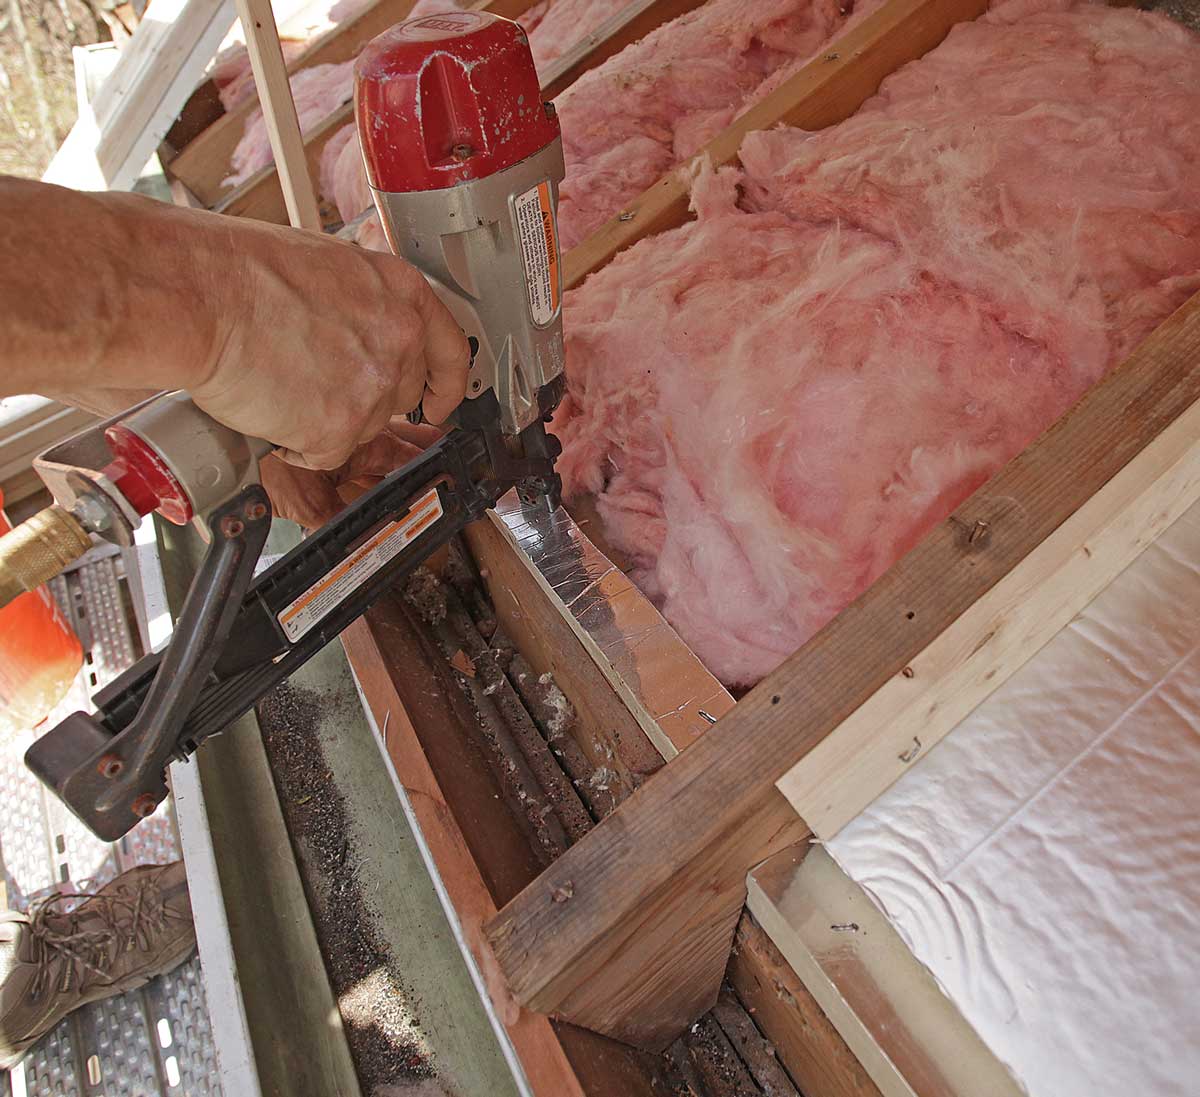
These baffles didn’t fill the space all the way down to the top plate on this roof—they were 1 in. shy. In order to fill the gap, we used scrap strips of 1-in. polyiso insulation. We cut the strips to fit between the framing at the bottom of the rafter bays, and then we stapled them in place with the same pneumatic staples that we used to fabricate the baffles.
Before installing the baffles, we realign the existing batt insulation on the attic floor, and add more insulation to fill the space under the lower portion of the baffle, starting over the top plate and extending about 18 in. inside. It can be tough to get blown-in insulation to fill this cramped spot, and this simplifies the insulation effort.
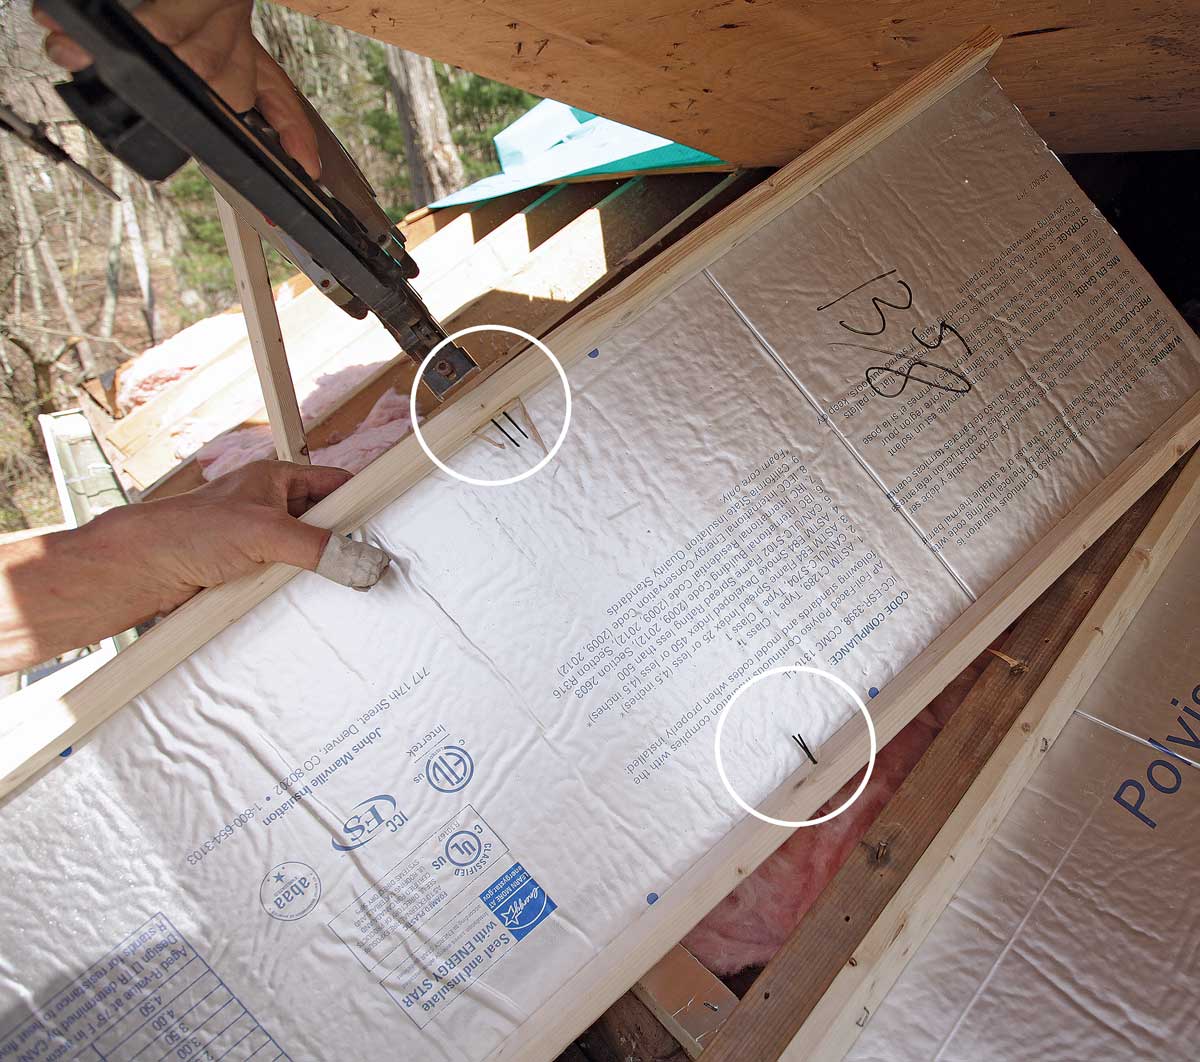
When the baffles are installed under the 6-pitch roof, there’s about 20 in. of vertical distance between the ceiling drywall and the top of the 4-ft. vent baffles for insulation. If deeper insulation is planned, we’ll have room to maneuver inside the attic to extend the baffles up the slope. The wood strips, meanwhile, act as spacers to keep the top of the baffles 1-5⁄8 in. or more beneath the roof sheathing, and also as a means to attach the baffles to the rafters.
Rafter-bay widths may vary, but adjacent rafters are mostly parallel. We take one measurement at the bottom of each bay and another 4 ft. up. When rafters are slightly out of parallel (less than 1⁄4 in.), we use the narrower of the measurements to make the baffle. When rafters are seriously out of parallel, we taper-cut the foam baffle to fit. Any gaps between the baffles and framing are sealed with spray foam or caulk.
When working the roof in shorter sections, we write down each rafter-bay measurement on the top plate or fascia for reference. If we’re working in larger sections, we typically write a number on each bay in addition to the measurement. The measurements and corresponding bay numbers are added to our cutlist, and written on each baffle as we make it to keep track of what goes where.
Close it up and move inside
After the vent chutes are in and other retrofit work is complete, we’re ready to lower the roof sheathing back in place, nail it off, and move inside to blow in some additional insulation. But there’s one thing to consider before closing up the roof: hurricane ties. There wasn’t much thought to load path and high-wind resistance when older homes were built. With the roof open, it’s a good opportunity to better secure the rafters and ceiling joists to the top plates.
It took less than an hour for two of us to cut and assemble over 60 baffles needed for the two long walls of this roof. The materials
cost about $5 per baffle, and labor runs about $1 to $2 each, depending on hourly wage and our efficiency. Though we have the extra steps of removing and reinstalling the roof sheathing, this outside-in method is still a time-saver, and allows for a better installation of the vent baffles and insulation.
Fit and fasten
  Reinstall the sheathing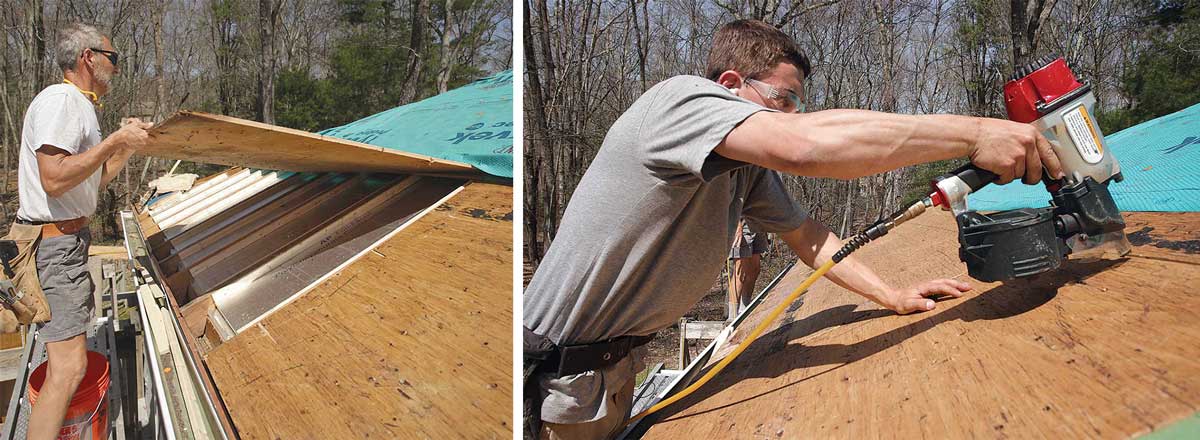 |
Mike Guertin (@mike_guertin) is editorial adviser. Photos by Matthew Millham, except where noted.
Fine Homebuilding #278
ALSO: Retrofit Intake Vents and Remove Roof Sheathing With a Modified Framing Nailer
Fine Homebuilding Recommended Products
Fine Homebuilding receives a commission for items purchased through links on this site, including Amazon Associates and other affiliate advertising programs.
Flashing Boot
Fall Protection
Flashing Boot Repair



View Comments
I have wonder about this for a long time. If you build baffles, attach then and seal them how does the moisture on the house side escape? On these I see because of the short run the moisture can work it's way out. But what about a long run that runs the full length of rafters. Doesn't this trap moisture between the insulation and the house?
Ideally there should be very little if any moisture vapor escaping from the inside of a modern house into the attic. In an old house I would be reluctant to run this type of vent chute from eave to ridge because of just your concern - if moisture migrates into the attic space then the eave to ridge vents made from foil-faced poly iso wouldn't permit vapor to permeate into the vent channel. I guess you could make vent chutes from 1 in. EPS which has a perm rating of 2 - 5 (plywood is about 1 perm and OSB is about 0.5 for comparison)
I have seen some new homes recently that were just as leaky as 30 year old or older homes. The opening to the living space should be sealed with canned foam or fire proof caulking. Where the space is too large to seal with these materials other things can be used like metal sheeting for areas around a chimney with fire proof caulking added or where there is a double wall in a bathroom, the top opening should be completely sealed with solid wood or plywood and fitted to the pipes coming up into the attic or through to the roof. All this should be sealed to prevent moisture from getting into the attic space. If the ceiling is attached directly to the rafters it should probably be sealed along the edges of the rafters and ceiling. That is one of the reasons it is better to attach the ceiling to 3/4 inch furring attached to the rafters. You also get a flatter ceiling.
Don't forget to seal all the electrical outlet and computer cable boxes that are in the walls. Every wall or ceiling penetration needs to be sealed. Some of the new LED recessed ceiling lights can be sealed against the ceiling or you can use a fixture in the attic that is sealed to the ceiling but is still accessible from above. The metal can is also sealed when it is installed. Look for fixtures or cans that allow direct contact with insulation. Otherwise you will have to build a box of polyiso, sheet-rock or plaster board sealed to the ceiling to keep the air leakage to a minimum.
If you want to vent the peak of the roof there may be a better way to do it than you have heard about. Remove the shingles, cut the slots, but cover the slots with a vapor permeable membrane that will let vapor go through while keeping wind blown water out. Some are available in a peel and stick membrane. Then add the ridge vent. If the ridge vent doesn't have any thing to keep out the bugs, add some screen on the inside held in place with hot glue or compatible building cement. There are other materials that can be used to keep out the bugs. Check out what is used for metal roofing.