Secrets of Slate Roofing
It's hot, heavy, and hard work installing it, but few roofs look as good or last as long.
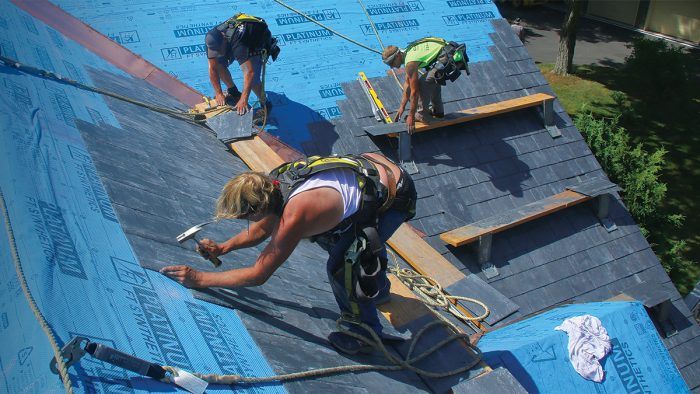
Synopsis: Remodeler and roofer Andrew Grace describes the process of working with slate on one slate-roofing project. He begins by determining the layout of the slate courses, with the appropriate amount of side lap, head lap, and exposure. Using tools specific to working with slate, he makes his way up the roof, punching holes for nailing and showing the method of cutting slates for rakes, valleys, and other transitions before capping the ridge.
Although I have repaired many slate roofs, opportunities to install an entire new slate roof are few and far between. When these customers first contacted me about their rapidly deteriorating 80-year-old slate roof, the conversation began with talk of replacing the slate with standing-seam metal. When they later asked me about pricing the job with new slate, I gave them a quote, but I’ll admit I was a little surprised when they chose slate over steel at nearly twice the price.
My crew and I are all experienced roofers, but I felt a project of this scale required some additional training. The Slate Roofing Contractors Association (SRCA) offers slate roofing training courses at sites across the country. Luckily for us, Joe Jenkins, the man who literally wrote the book on slate roofing— The Slate Roof Bible is a tome I’ve owned for many years— lives two hours from me and offers classes at his shop.
I learned that installing slate is as much about feel as it is about technical knowledge. The hands-on training proved invaluable, and after an intensive and informative class, we were ready for our first whole-house slate project.
Layout is everything
Slate roofing is won and lost in the layout. The most important concept is head lap. Head lap is the amount of coverage a slate is provided by the slate two rows above it. This is the key to a watertight roof. Head-lap requirements are pretty straightforward. From 12 in-12- to 8-in-12-pitch roofs, a minimum 3-in. head lap is required. From 8-in-12- to 5-in-12-pitch roofs, a 4-in. head lap is required. On roofs steeper than 12-in-12, a 2-in. head lap is possible, but good installers typically stick with 3 in. You can’t use slate when the pitch is less than 5-in-12.
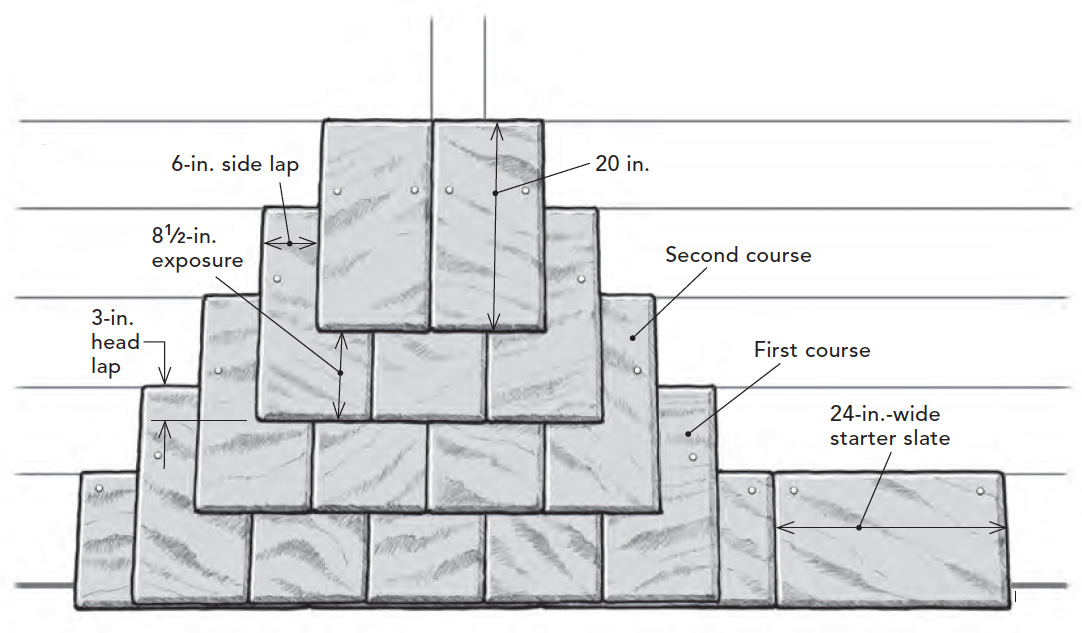
The exposure of a slate course is related to head lap in a simple equation. You take the overall length (we’re using 20-in. slates), subtract the head lap (3 in.), and divide by 2 to get the exposure: 20 – 3 = 17; 17/2 = 8-1 ⁄ 2 in., our slate’s exposure.
Side lap is also important. Side lap is the amount a slate overlaps the edge of the slate in the row below it. Because slates don’t seal together like asphalt shingles, water can wash outward from the joint over the slate under it. Without enough side lap, there can be a leak. The minimum side lap is 3 in., but with 12-in.-wide slates, we had 6-in. side laps.
The amount of head and side lap also affects the size of the starter slates. The math is simple: 8-1 ⁄ 2-in. exposure plus 3-in. head lap requires a minimum 11-1 ⁄ 2-in. starter. Twelve-inch-long starters are a standard size, so that was a logical choice. (Head lap can be increased, but never decreased.) We used 24-in.- wide starters for extra side lap, which makes it easier to lay out the first and second courses.
Getting slate to your job
The color and durability of slate depends on where it’s quarried. My customers wanted to approximate the color of their old roof, so they chose a non-weathering black slate from Glendyne, a quarry in Quebec, Canada. It is high-quality slate with a consistent color that cuts easily and predictably. Slate roofs can have complex geometric patterns, a mix of different slate sizes, and even a completely random layout. We went with a 12-in. by 20-in. size and a simple running-bond layout. I ordered the slate directly from the manufacturer and it was shipped by LTL Freight. It took a little over three weeks to arrive once I placed the order.
In addition to our 12×20 common slate, I ordered a few hundred 15×20 slates. These wider slates can substitute for a common slate plus a small piece, eliminating skinny pieces of slate, which are prone to breakage. I also ordered 100 starter slates and 100 lb. of copper nails for this 40-square roof (one square is equal to 100 sq. ft.). When the materials arrived at the site, I was responsible for unloading the 11 crates, which weighed north of 5000 lb. each. I had a friend with a large all-terrain forklift unload the truck and place the pallets on three sides of the house, so we wouldn’t have to move them any farther than necessary when getting the slates to the roof.
Start slating
A slate roof starts with a cant strip, a 1-in.-wide strip of green hemlock that’s screwed to the sheathing (1). It holds the starter and first courses at the same angle as subsequent courses, and is as thick as the slates—usually 3 ⁄ 8 in. to 5 ⁄ 8 in. Since slate is so strong, a drip edge isn’t necessary, but a copper drip edge is sometimes used for decoration or to hide a gap between the top of the fascia and the roof sheathing.
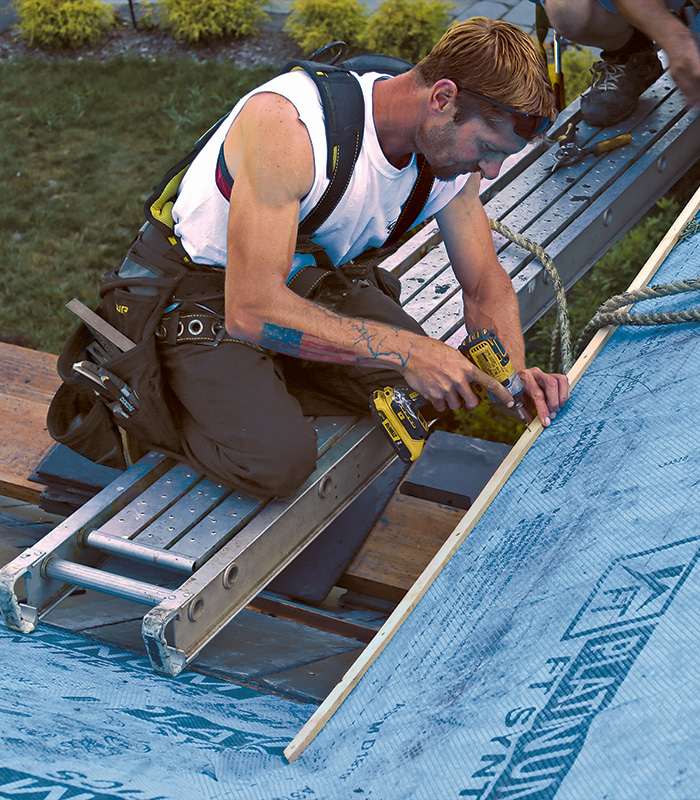
To start slating, we snap two horizontal lines at 10-1 ⁄ 2 in. and 18-1 ⁄ 2 in. from the eave, which mark the top edge of the starter slates and the top of the first course (with the 11 ⁄ 2-in. eave overhang). After this point, we can keep snapping lines, measured from the top of the first course at our designed 8-1 ⁄ 2-in. exposure.
 |
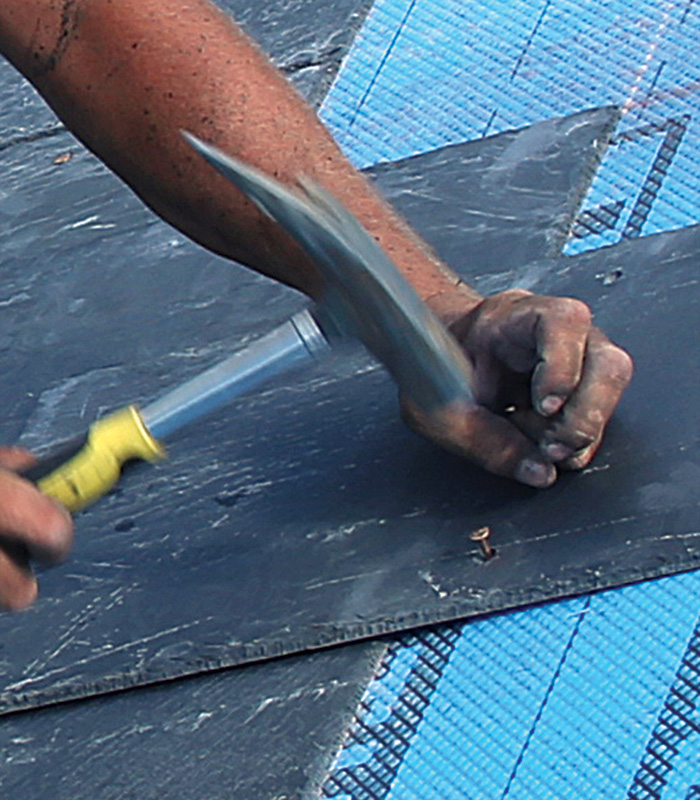 |
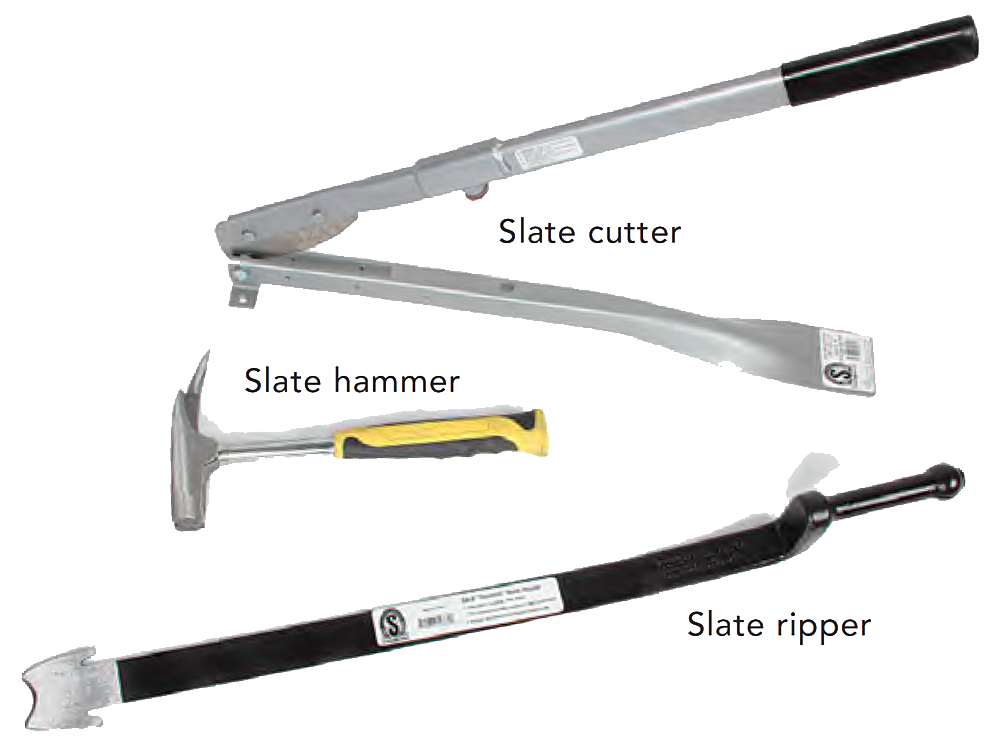
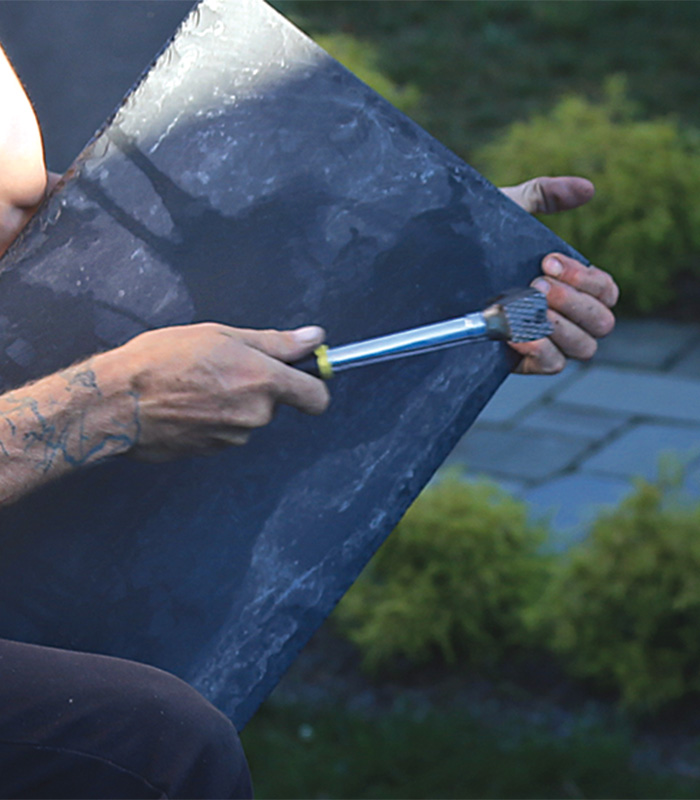
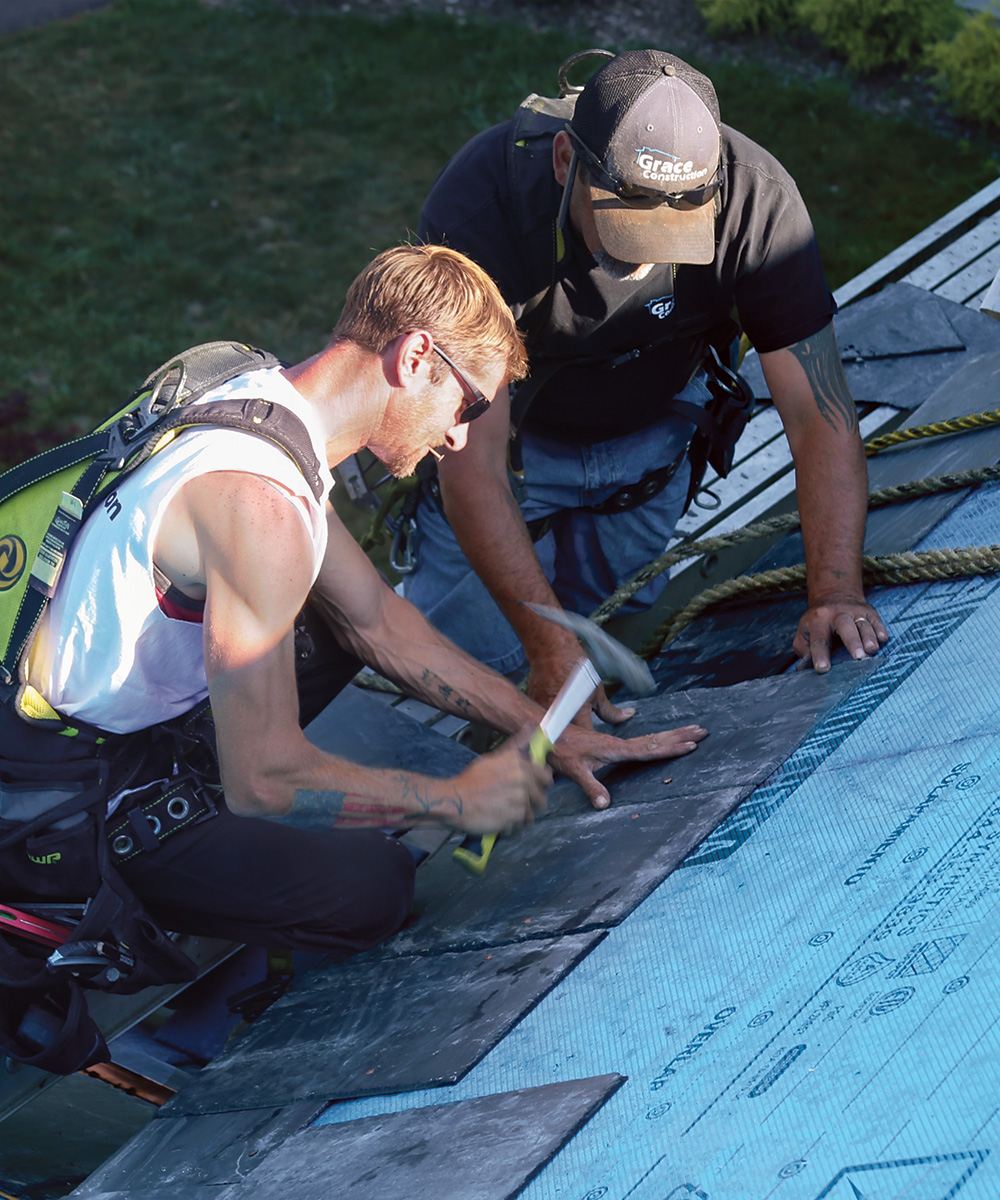
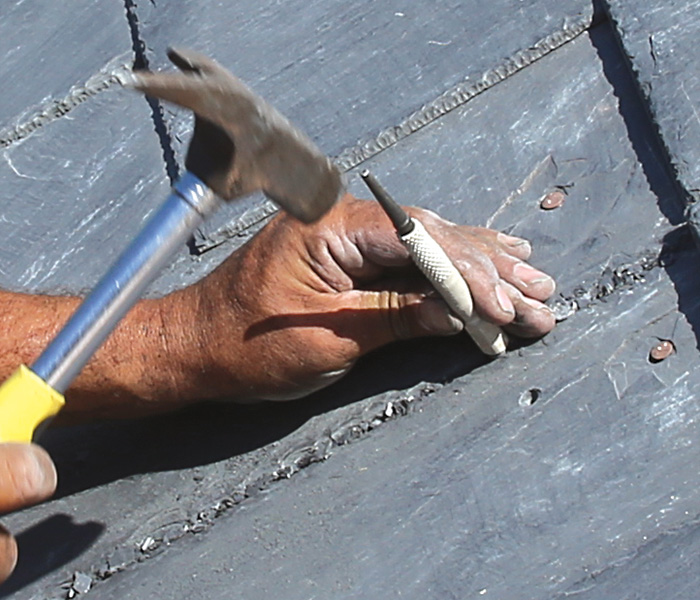
The starter shingles come unpunched, and sometimes even the pre-punched field slates need additional holes because the punched holes are too close to the ridge or they line up with a gap in the sheathing. Slate hammers have a sharpened claw that makes punching the holes easy. They’re punched from the back to the front so the layers of slate spall on the side to be nailed (2), creating a countersink for the nail head (3). Starter slates are installed with the beveled edges facing down, so we punch those holes from the beveled side. The first course is installed so its eave edge is flush with the eave edge of the starter strip (4).
Fasten with feeling
Slates are handnailed with copper or stainless-steel roofing nails. For our slate thickness, we used 11 ⁄ 2-in.-long smoothshank copper roofing nails. Ring-shank nails should be avoided because they are hard to pull with a slate ripper. The same is true of the harder stainless-steel nails, but they may be necessary with extremely hard sheathing.
 |
 |
 |
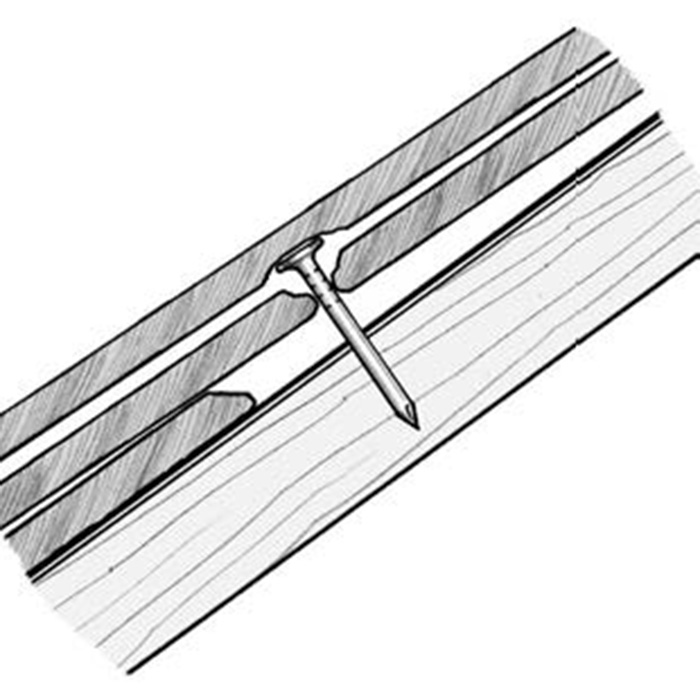
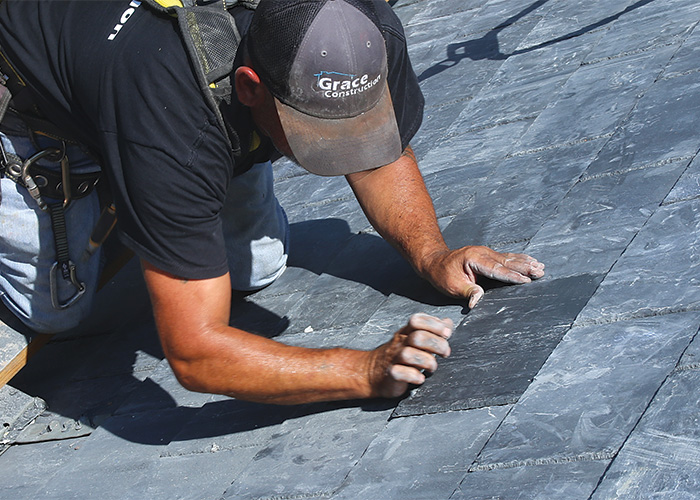
Each slate is fastened to the roof with two nails. This is where slate roofing is about feel. You should think of slates as being hung, not nailed. Slates should be nailed snug but not too tight. Overdriving the nail puts too much stress on the slate and it will breakat some point— immediately, weeks, months, or years later. The nail also needs to be flush with the surface of the slate or it can rub through the slate above over time. The best way I’ve heard it described is, “Make the nail snug, but when you think you have to give it another tap, don’t.”
Cutting
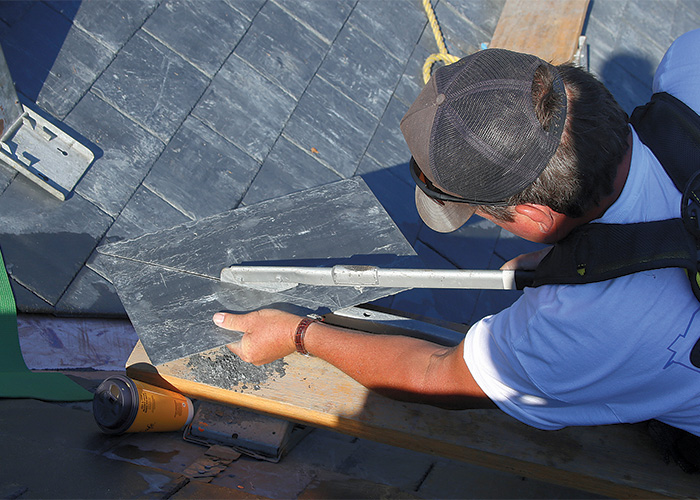
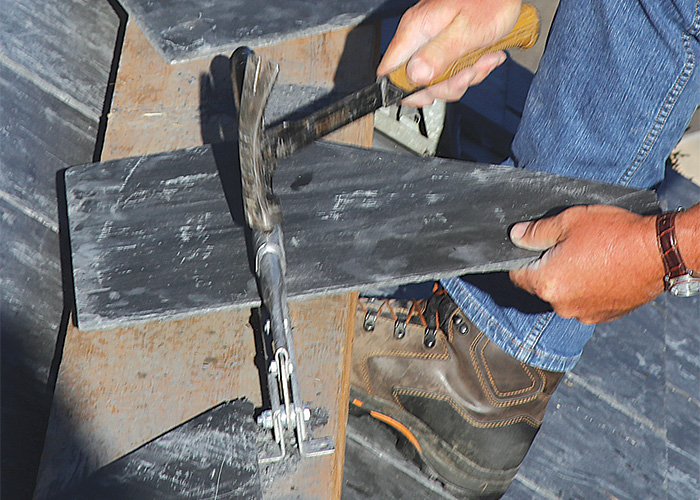
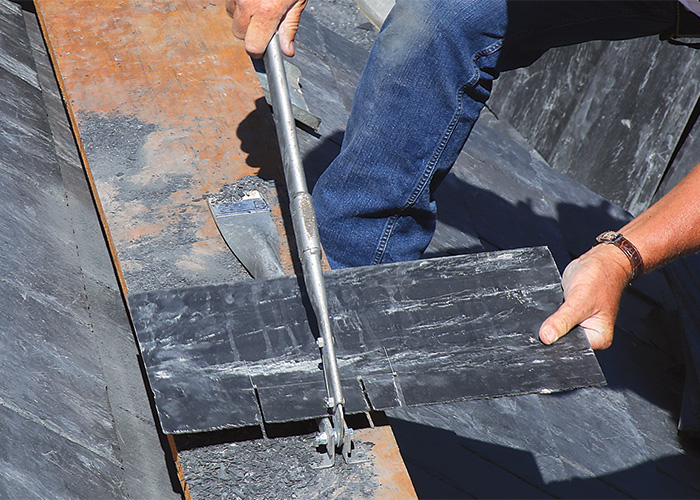
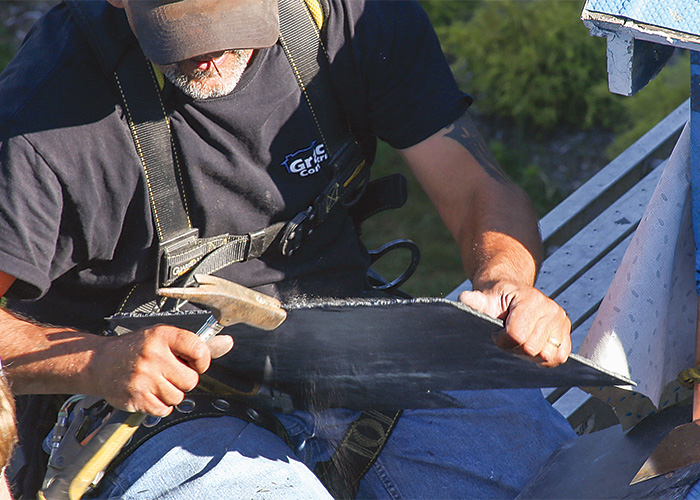
Rakes, valleys, side-wall transitions, and ridges all require cuts. A slate cutter easily cuts slates to width, length, and on a bias for valleys right on the roof. The slates should be cut upside-down, which puts the slate’s characteristic beveled edges where they show. Each close of the cutter handle takes a 1-in. to 2-in. bite (1). The cutter also has a punch for making holes in the slate for nailing. The punch is under the reinforced part of the handle that you hit with a hammer to make the hole (2). Curves and “U”-shaped cuts are made with a series of small cuts (3), and the narrow pieces are broken off with fingers or with hammer taps. Light taps and running the hammer’s waffle face over cut edges can smooth a ragged cut or trim a slightly oversize slate (4).
 |
 |
 |
 |
Stop sliding snow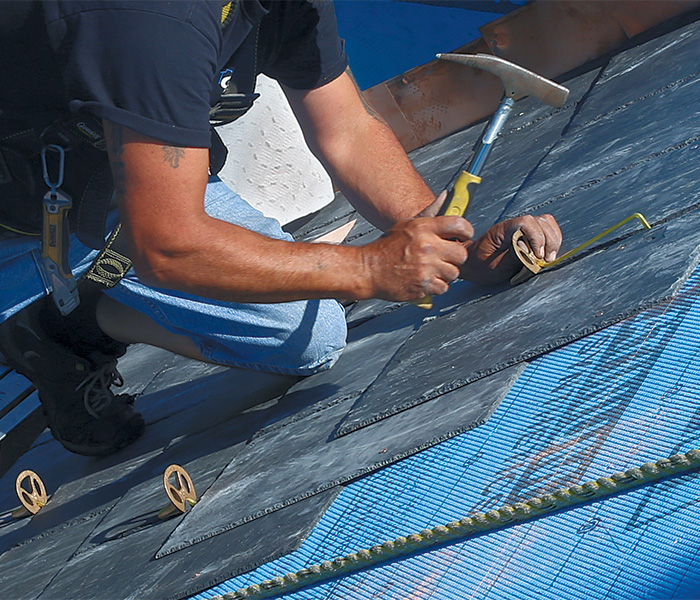

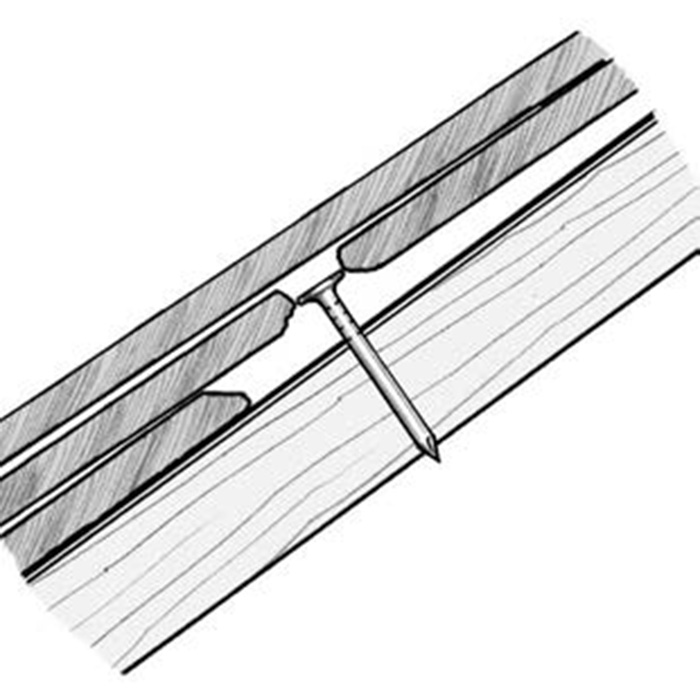
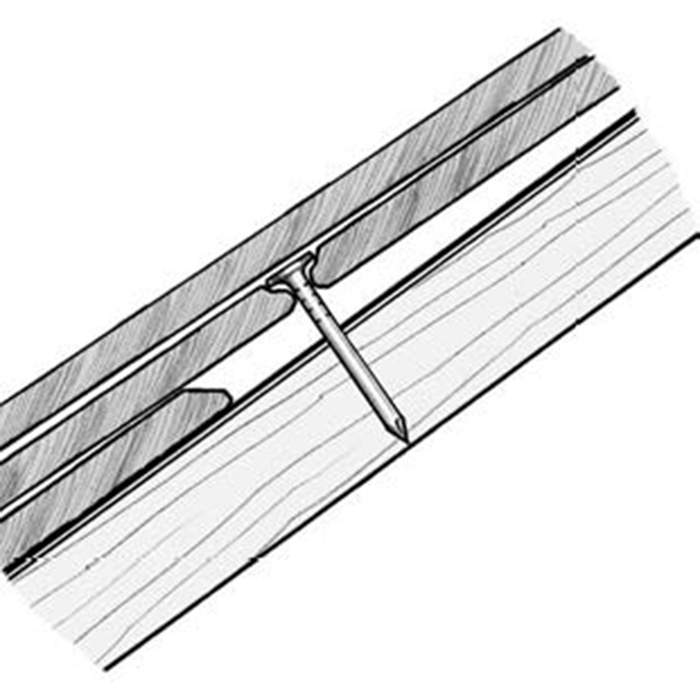
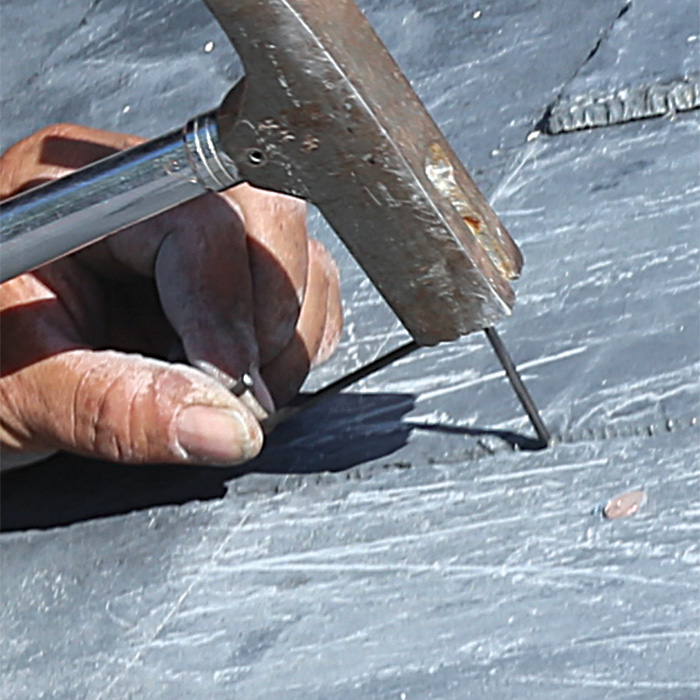
In this part of Pennsylvania, we get regular—sometimes heavy—snows, so we installed snow guards to prevent blankets of sliding snow from damaging the landscape or hurting someone. The client chose Sieger Boss 1 snow guards in bronze, a spike-style snow guard available since the turn of the last century. The shank is bent to 90° and sharpened so it can be driven into the sheathing between two slates, and is hidden by the next course. The slates on both sides of the snow guard are notched slightly to allow room for the shank while maintaining the correct layout. The shank has to be driven into the sheathing deep enough so it won’t rub through the slate above. The first row of snow guards should be directly over the exterior wall to provide support for the snow load, and spaced every two slates. The second row is two rows above the first and offset by one slate; the third is two rows above that with the same layout as the first row.
Working up the roof
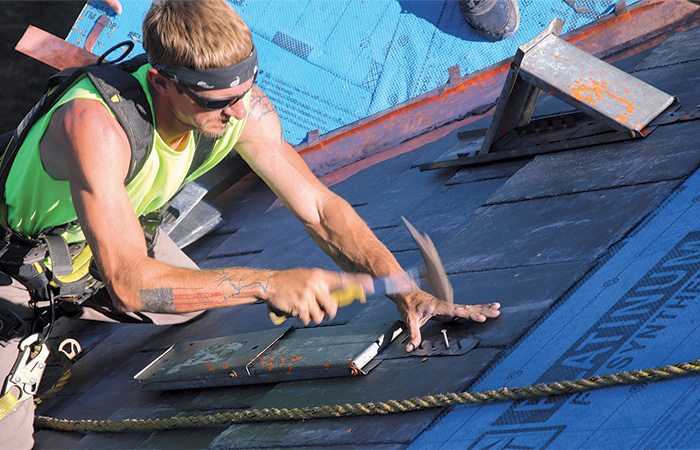
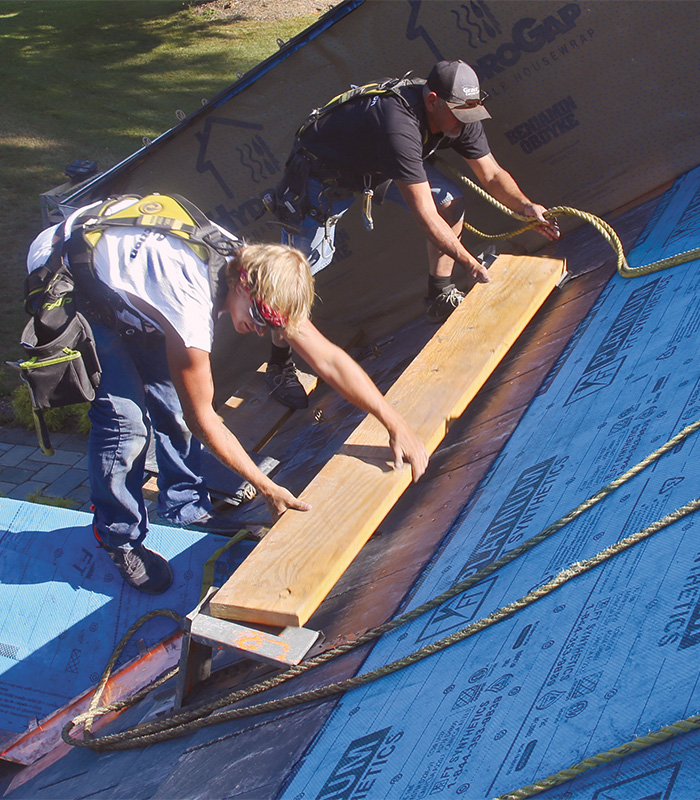
After every four or five courses of slate are installed, we nail a set of roof jacks to the rafters (1). The worst thing you can do to a slate roof is walk on it, because you will break slates. The rows of jacks are set close enough to get from one row of staging to another without stepping on the slate. Slating roof jacks are installed 8 ft. on center, with 1-3 ⁄ 4-in. by 9-in. LVL scaffold planks on top (2). It sounds like overkill, but at times the plank will hold piles of slates and two roofers.
 |
 |
Start with a sound deck
As with any roofing job, a successful project starts with sound sheathing. At 700 lb. to 800 lb. per square, slate is much heavier than other roofing materials, so you need to know that the roof framing and sheathing can support the extra weight. We were replacing an existing slate roof over a stout frame with 3 ⁄ 4-in. tongue-and-groove Douglas-fir sheathing, so I wasn’t worried about this roof. If you’re building a new house with a slate roof, the SRCA details allow installations of slate over 3 ⁄ 4-in. CDX plywood, but I would only install slate over sturdy board sheathing. That’s not as elitist as it sounds; we know board sheathing can outlast a slate roof because there are countless examples to prove it, so I see no reason to take a chance.
As for underlayment, 30-lb. tar paper is the traditional choice, but we used synthetic underlayment because of its increased grip and tear-resistance, and because it lays flat wet or dry, making layout easier. We also used self-adhering underlayment at the eaves because it’s a code requirement.
Sidewalls
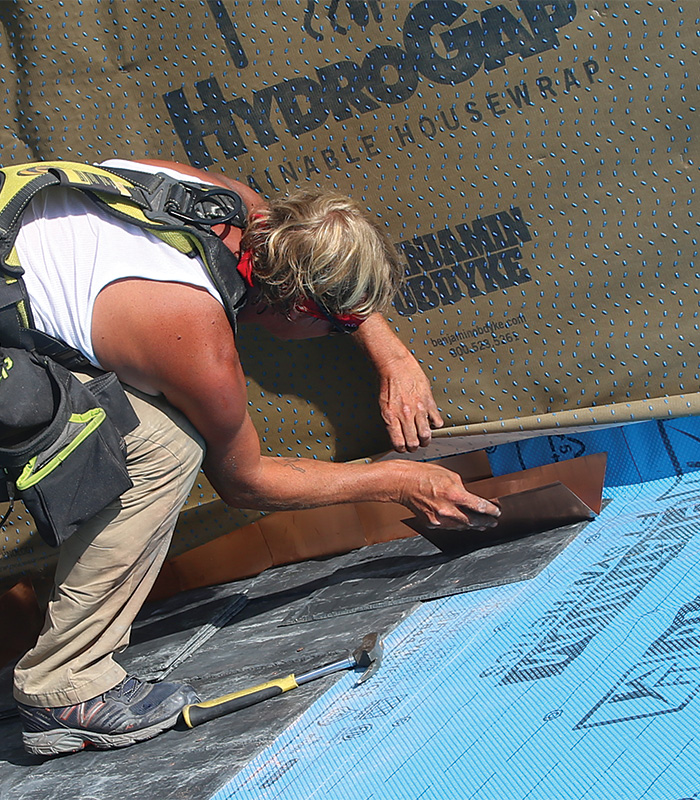
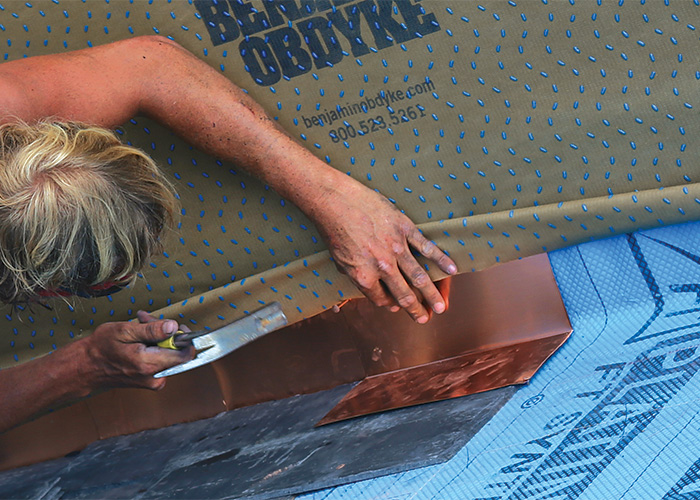
Wall transitions are flashed with 13-in. copper step flashing, so it can be nailed to the roof deck above the slate it covers. The vertical leg is tucked under the WRB on the walls (1) and its corners are nailed to the sheathing (2). Avoid small slates (under 3 in. wide) at sidewalls. They won’t lay flat over the step flashing, and they are prone to breaking.
 |
 |
Valleys
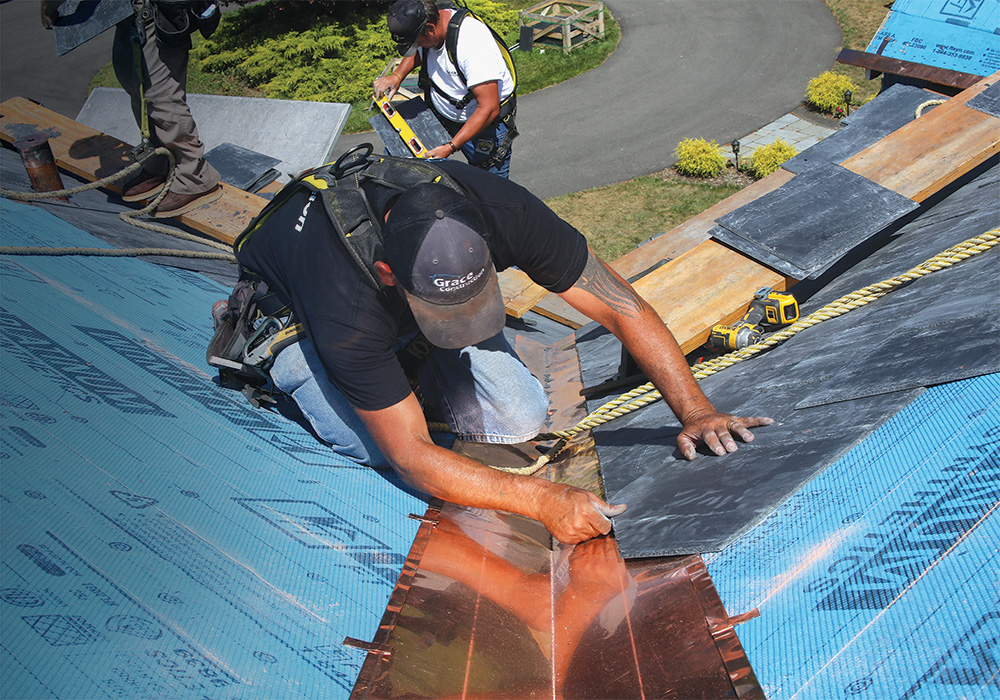
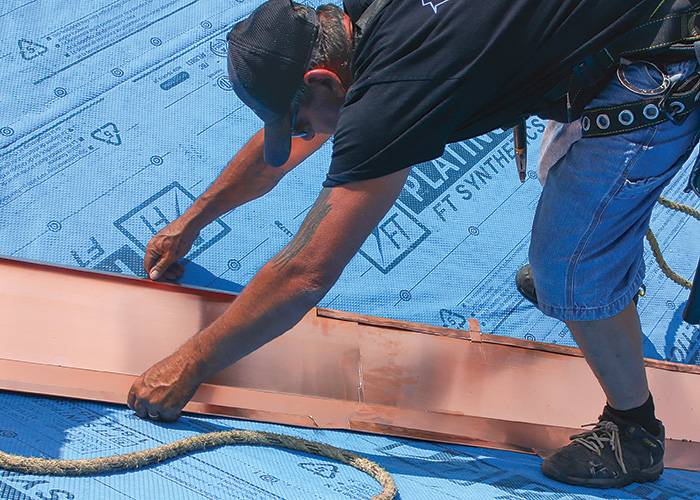
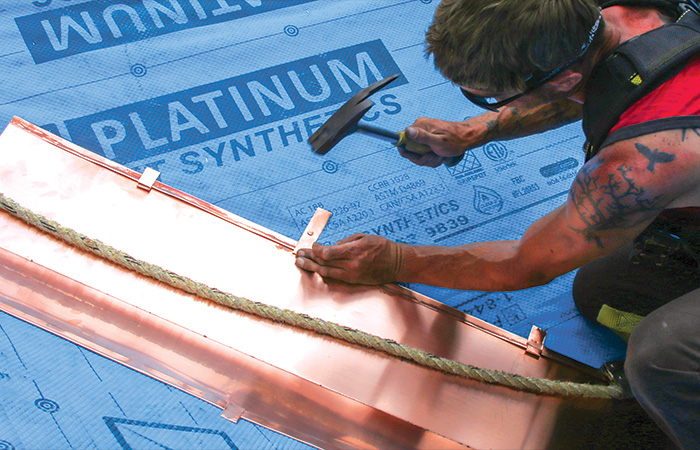
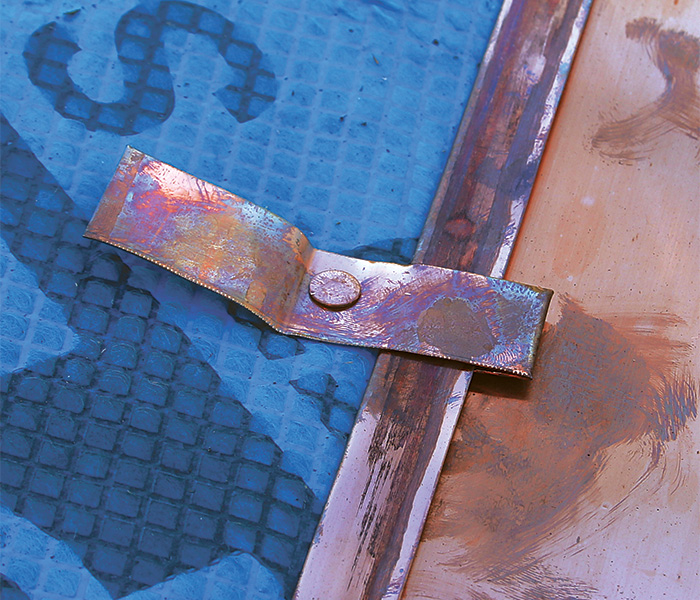
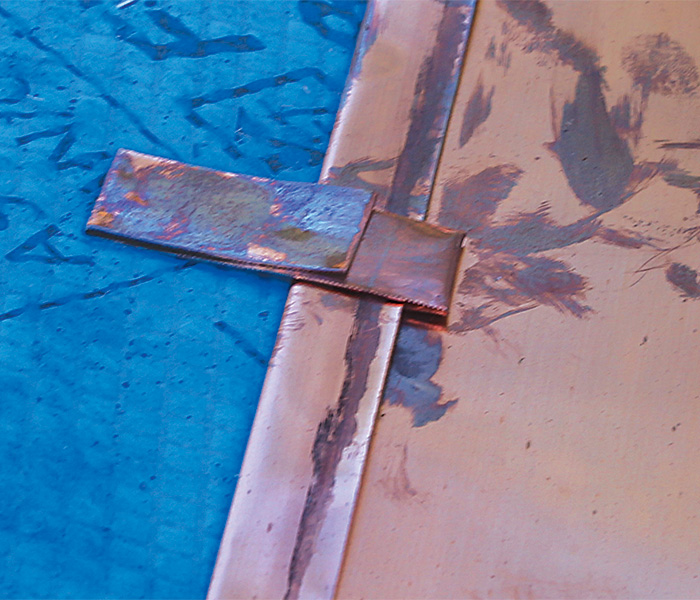
We use 20-in.-wide, 16-oz. copper to make our valleys. There’s a 4-in.-wide valley exposure on short valleys like dormers. On longer valleys, we use a 4-in. wide exposure at the top that tapers 5 in. at the bottom to accommodate the greater volume of water at this location. To contain water, the valleys have upturned edges that are trimmed where pieces overlap (1). Folded copper strips grab the upturned edges and secure the flashing to the roof without hindering expansion and contraction with temperature changes (2, 3, 4). We snap lines along the valley to help line up the slate.
 |
 |
 |
 |
Pay attention to layout
We calculated the horizontal layout using measurements taken near the middle of the roof, which helps to compensate for out-of square conditions. A good layout also minimizes narrow slates along the roof edges to avoid breakage.
On several sections of the roof, our horizontal layout turned out to be only an inch short using all full slates. When this happened, we spaced the slates a little wider apart to make up the difference. Up to 1 ⁄ 4 in. between slates is acceptable. We also snapped two vertical control lines in the center of the slopes for our vertical layout. We did the same at rakes to keep our overhangs straight and indicate when we need to stretch or shrink the layout to match the roof. I made two 8-ft. aluminum story poles with notches cut into the sides to help mark the 8-1 ⁄ 2-in. exposure. Story poles save time and prevent math errors.
Installing slate requires a lot of patience and attention to detail. In the end, this project gave us the opportunity to create something that will last a century, maybe longer. I don’t want to over-romanticize it— hand-nailing 6000 stone shingles to a roof is hard work. Slate also holds and radiates a lot of heat. A few days we quit early because the dark-colored slates were burning our hands.
But slate is all about the long game. The installation has to outlast a material that can last a century. It takes dedication and a willingness to rip out and replace a few questionable slates as you go along. But for me, slate roofs have a beauty and longevity that makes them worth the effort.
Cap the Ridge
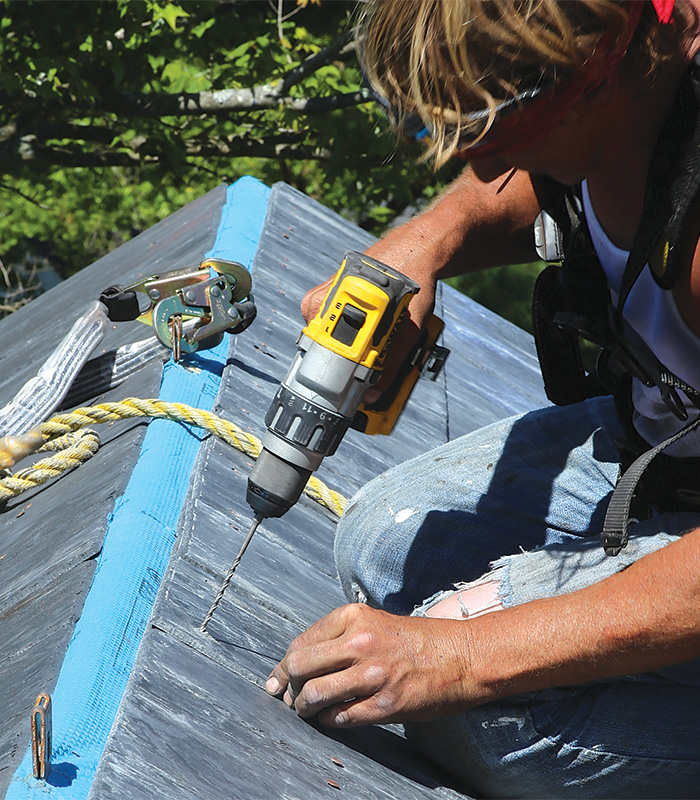
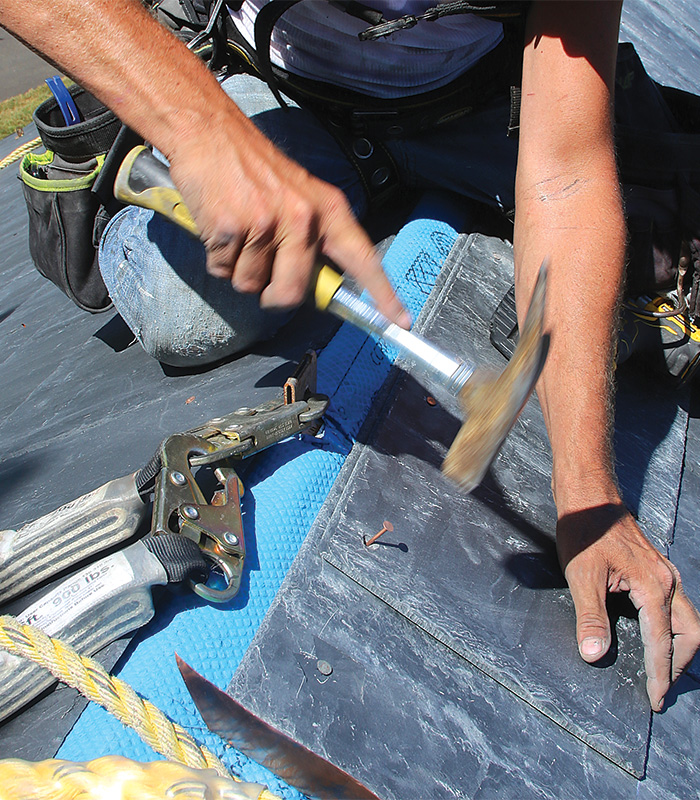
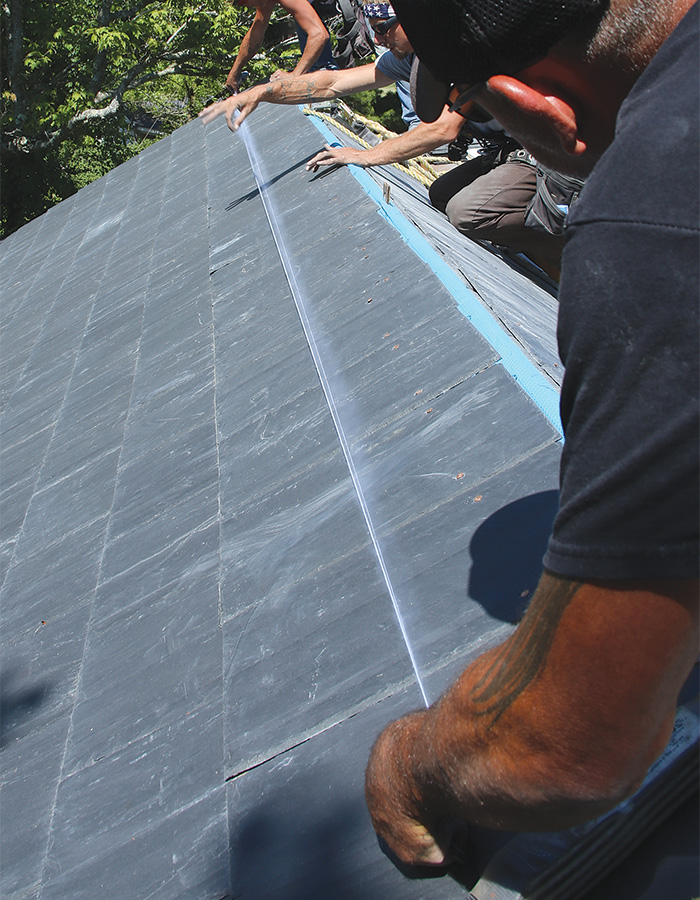
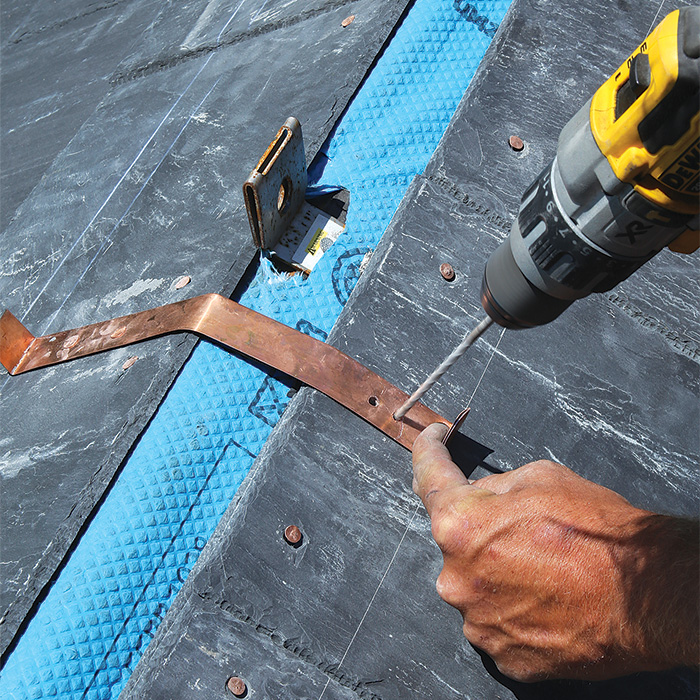
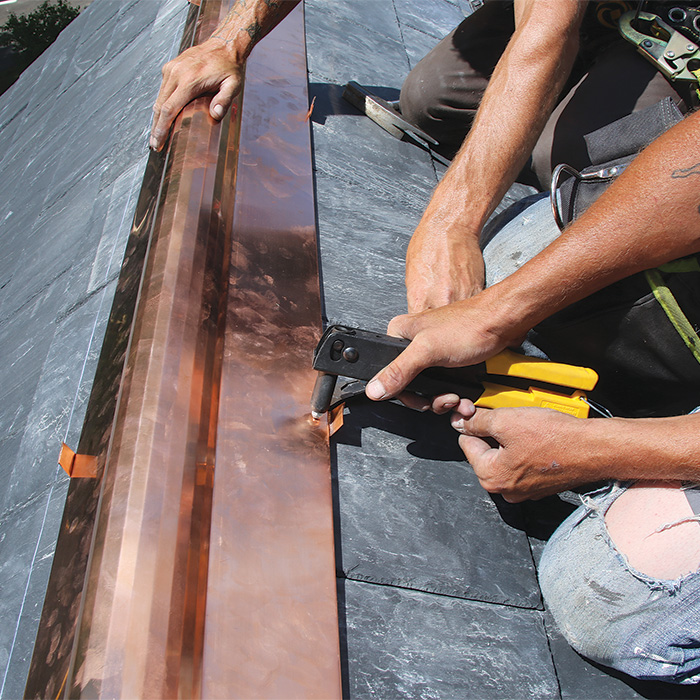
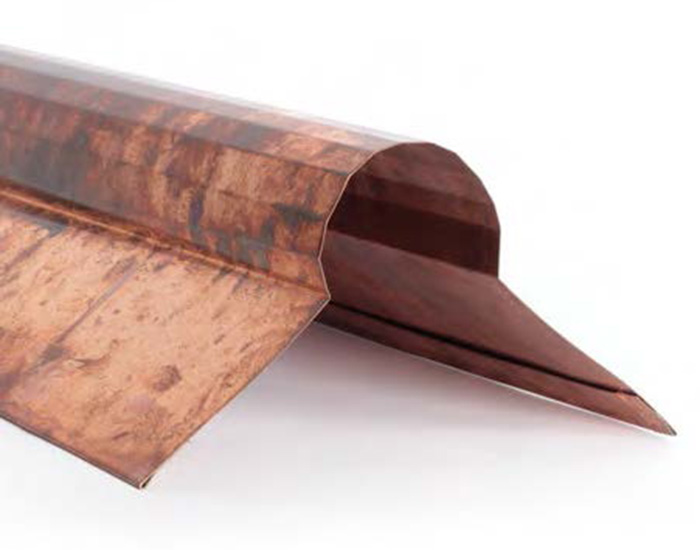
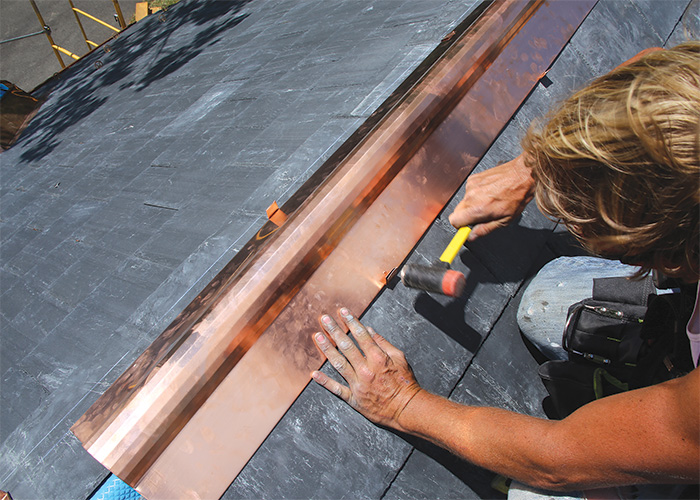
Standard coursing continues until the ridge, where the final course must be cut to length before installation. The multiple layers are drilled with a 3 ⁄ 16-in. masonry bit (1) and then the last course is nailed with copper nails (2). A snapped line ensures the ridge cap is straight (3), then it’s attached with copper straps (4) and rivets made from a copper/brass alloy (5). The size and coverage of the cap is a function of head lap. The cap has to lap the second row of slate by 3 in.
 |
 |
 |
 |
 |
 |
 |
Cover your tracks
When the roof is capped, we work our way down, taking down the planks and roof jacks (1). It’s important to doublecheck the work at this time. We rap each slate with a knuckle to see if it’s broken or loose— it should ring when we knock on it. We check the flashing, too—it’s easier to fix now than later.
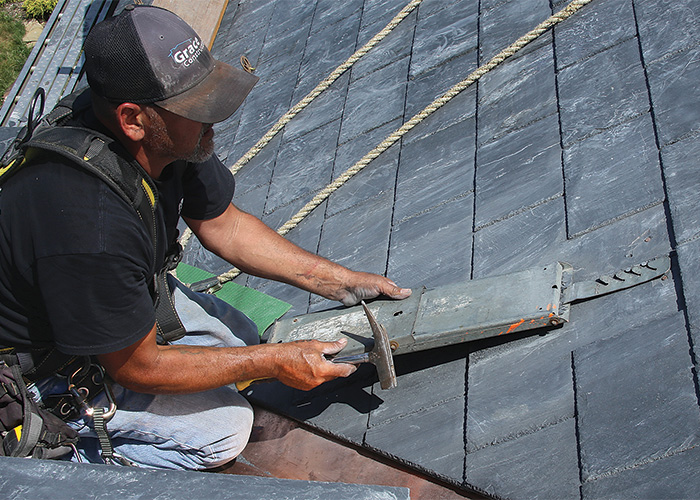
If we need to replace a slate, we slide the ripper under the slate to be replaced and hook the nails holding the slate. Yanking on the ripper or hitting it with a hammer pulls out the nails. A slate hook holds the new slate in place. We also use slate hooks to fill in the slates where the roof jacks were. After removing the jacks, we drive the spikes that held them so they’re flush with the sheathing (2). Then we drive a black anodized, stainless-steel slate hook into the joint (3). We slide the slate under the slates above and down into the hook, which holds it in place (4).
 |
 |
Andrew Grace is a roofer and remodeler in Ligonier, Pa.
Photos by Patrick McCombe, except where noted.
From Fine Homebuilding #296
To read the entire article, please click the View PDF button below.
Also read the bonus article, Make a Copper Flashing Boot.
Fine Homebuilding Recommended Products
Fine Homebuilding receives a commission for items purchased through links on this site, including Amazon Associates and other affiliate advertising programs.
Peel & Stick Underlayment
Ladder Stand Off
Hook Blade Roofing Knife

