
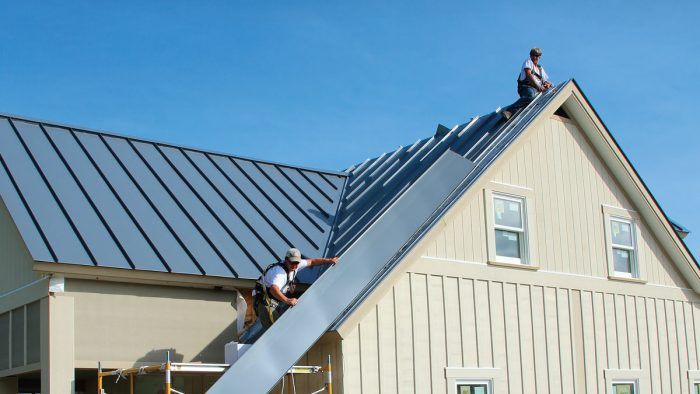
Snap-Lock Standing-Seam Metal Roof Installation
Factory-made panels and flashing go together without specialty tools or subcontractors.
When you’re a remodeler in a rural location, you often have to venture into uncharted territory because there’s nobody else to do the job. This was the case on a recent project when I was asked to install a standing-seam metal roof as part of a major remodel. Although the roof was relatively small, it had nearly every complicating element you can think of: valleys, doghouse dormers, slope transitions, and even skylights. Our company specializes in difficult roofing projects and I take pride in our sheet-metal skills for flashing and built-in gutters, but I had never attempted a standing-seam roof. My crew and I had to figure it out on our own. To ensure our roof was done right, two of my employees and I attended a two-day training at the manufacturer’s headquarters in preparation. This article describes everything we learned while installing this complicated roof.
A peek under the panels
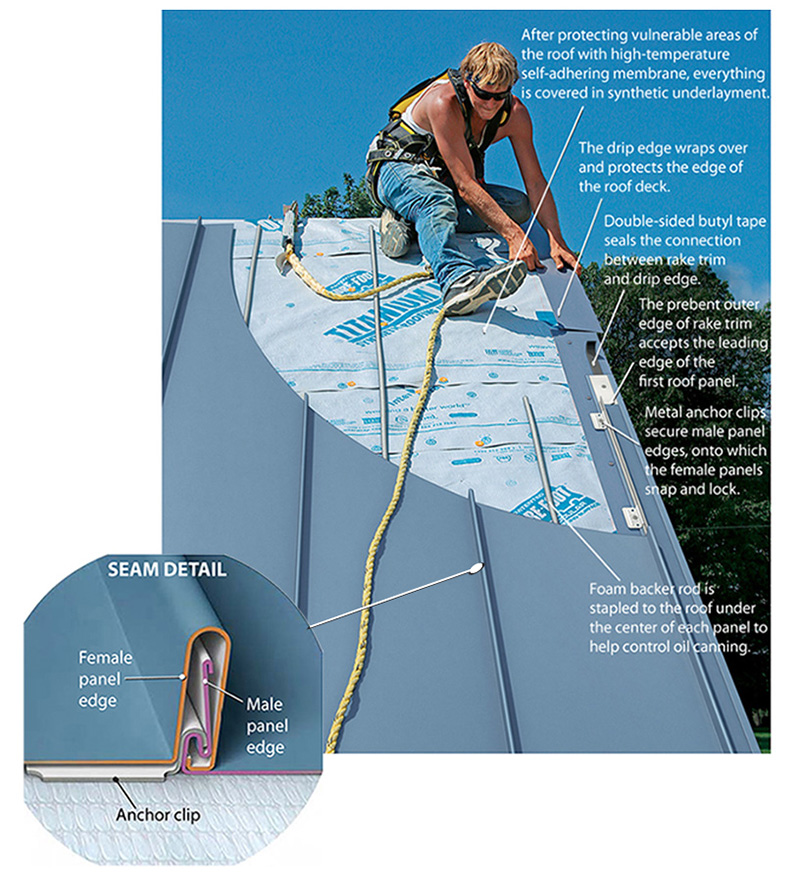
Compared to traditional standing-seam roofing—where the panels are mechanically joined on the roof using a crimper—many companies now offer more user-friendly snap-lock versions. Working in conjunction with factory-bent trim and accessories for different situations, each panel has one male and one female edge that lock together over a metal clip secured to the weatherized roof deck.
There’s more than one kind of standing seam
There are two basic styles of panel for standing-seam metal roofs: field seamed and snap lock. Field-seaming requires the joints at the panel edges be crimped together as each piece is installed on the roof. This is the traditional installation method, and it calls for some expensive specialty tools. The big advantages of field-seamed standing-seam roofs are their traditional look—owing to the imperfections in the field-made seams—and their low-slope capabilities (down to 1 ⁄ 2-in-12).
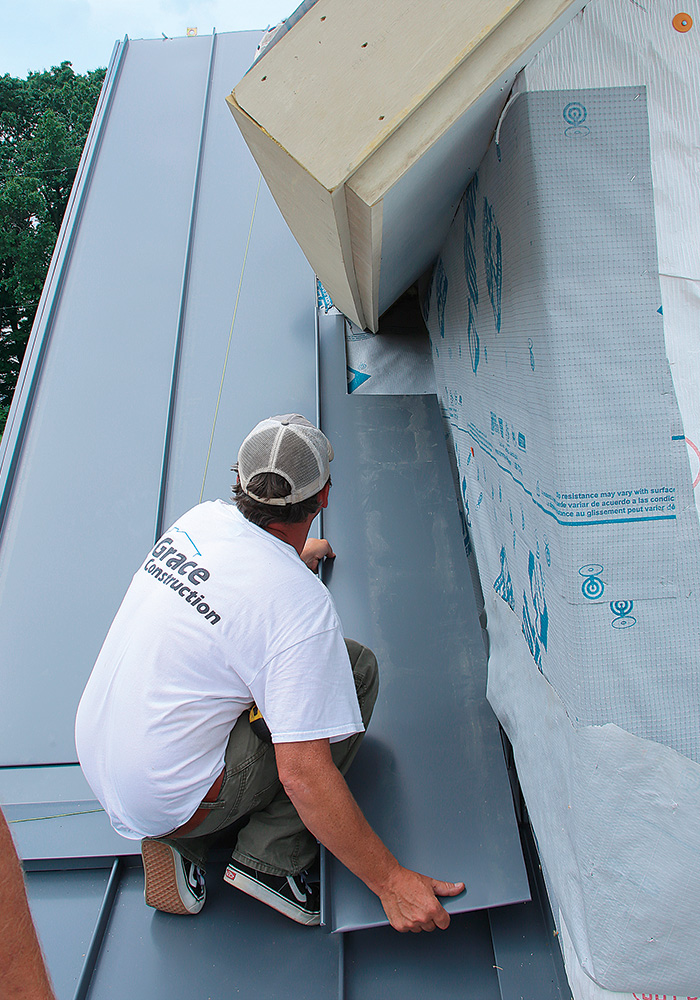
Snap-lock panels are manufactured to be put together without expensive mechanical seamers. Instead, they lock together with a few bumps of your fist. The installation method saves time and produces perfectly straight standing seams. In this case, the client wanted perfectly straight seams, so snap-lock panels were the better choice. Both types of panels are secured to the roof using metal clips that allow the panels to expand and contract with changes in temperature.
After deciding which type of panels to use, the next step is to choose the type of metal. Although standing-seam panels are sometimes made from copper, stainless steel, and even zinc, most are rollformed from coils of painted steel and aluminum. The fluoropolymer paints that cover the panels and flashing are better known by their brand names, Kynar and Hylar, and have a reputation of unsurpassed durability, including the ability to endure complex forming without cracking.
The choice of aluminum vs. steel involves several factors. Steel panels are stronger in comparable thicknesses, so they’re more often used in steel-framed commercial buildings because the panels can span the longer distances between framing members. That said, scratches on steel panels will rust, as can cut edges like those at eaves and valleys, staining the roof and surfaces below. Aluminum doesn’t have this corrosion problem, but it is typically more expensive. However, currently the commodity price between steel and aluminum is so close, we opted for .032-in.-thick aluminum, which was only slightly more expensive than a steel roof. This roof is expensive (nearly $30,000 in materials) and it took almost three weeks for us to install, but it looks great and will last a lifetime.
Start at the rakes then tackle the eaves and ridge
Rake edges are not only the panels most susceptible to wind uplift—and therefore require some extra attention—but they also establish the layout of the entire roof, which often means starting with a partial panel to ensure both ends of the roof look the same.
 |
 |
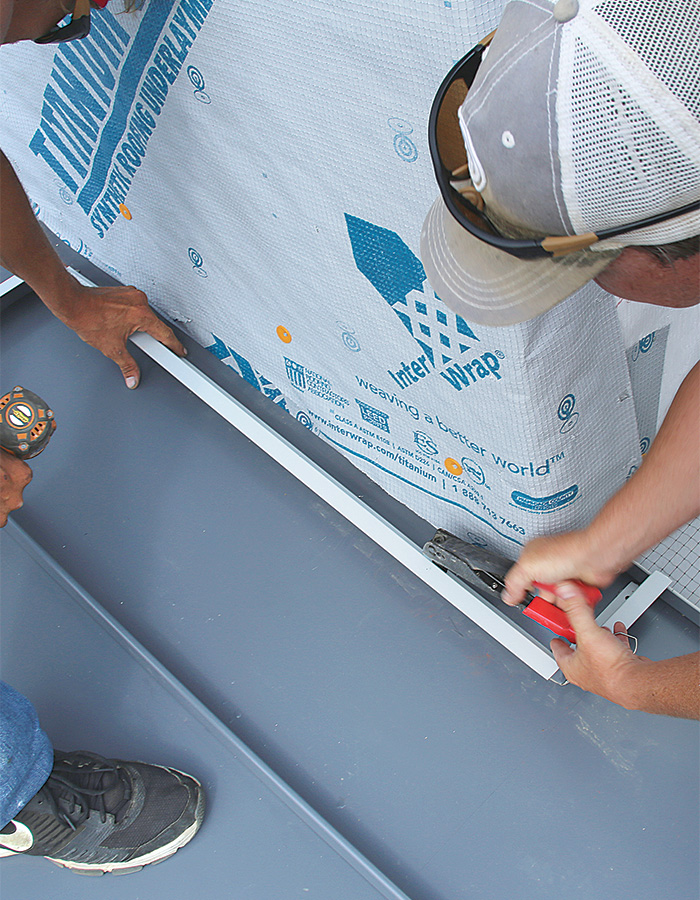
| Start square. A wide drip edge accommodates slightly out-of-square sheathing, allowing the roofing to be installed square. Guided by a snapped line, the piece is attached with pan-head screws. | Rake trim ready to receive. Set atop a strip of double-sided butyl tape, the rake trim is aligned to the outer edge of the drip edge with its hemmed edge facing up to receive the leading edge of the first panel. |
 |
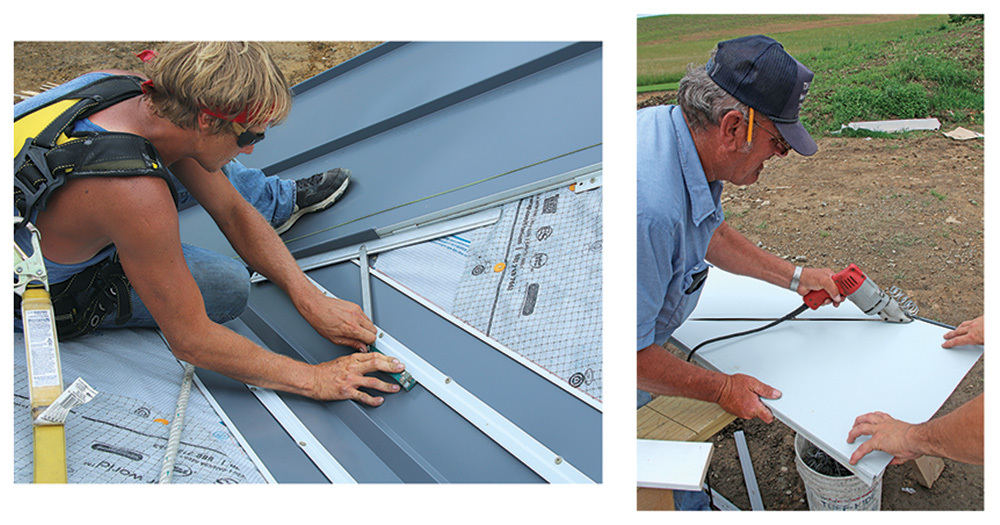
| The first panel sets the stage. To create a symmetrical layout across the roof, the first panel usually is trimmed in width with shears before being tucked into the rake trim to conceal and secure the cut edge. |
 |
 |
 |
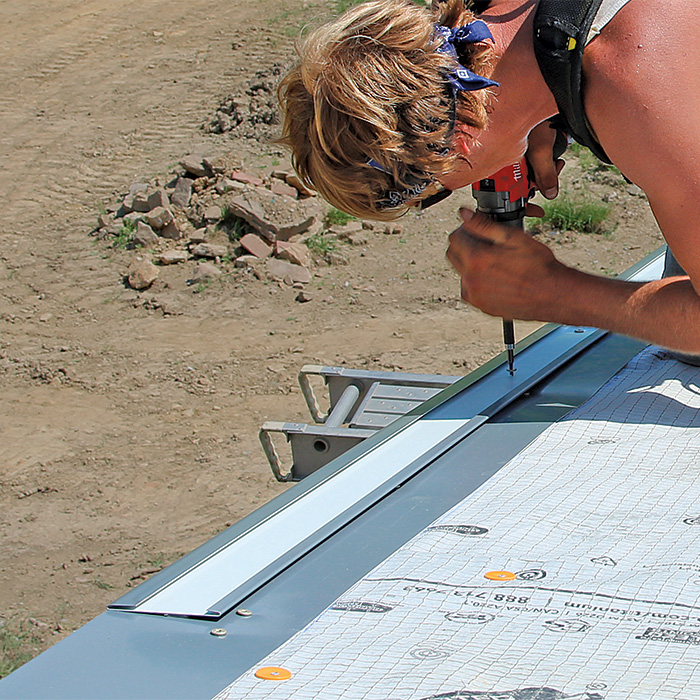
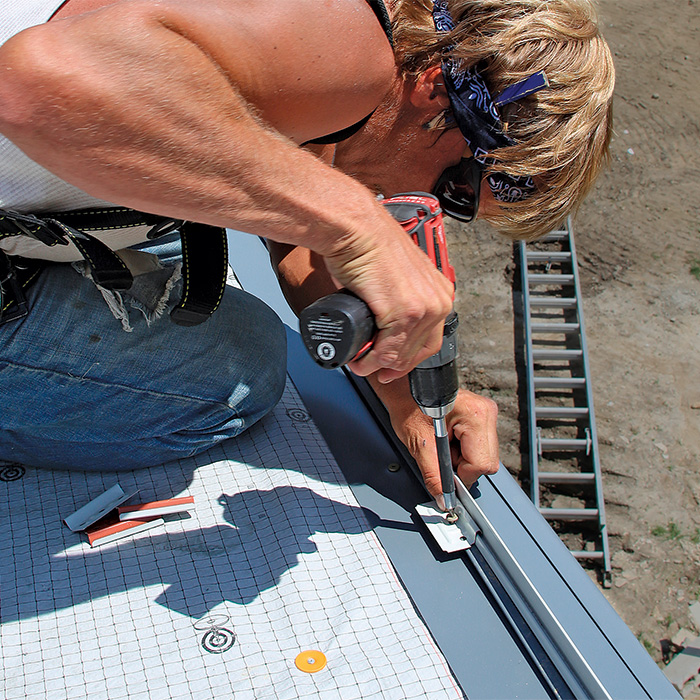
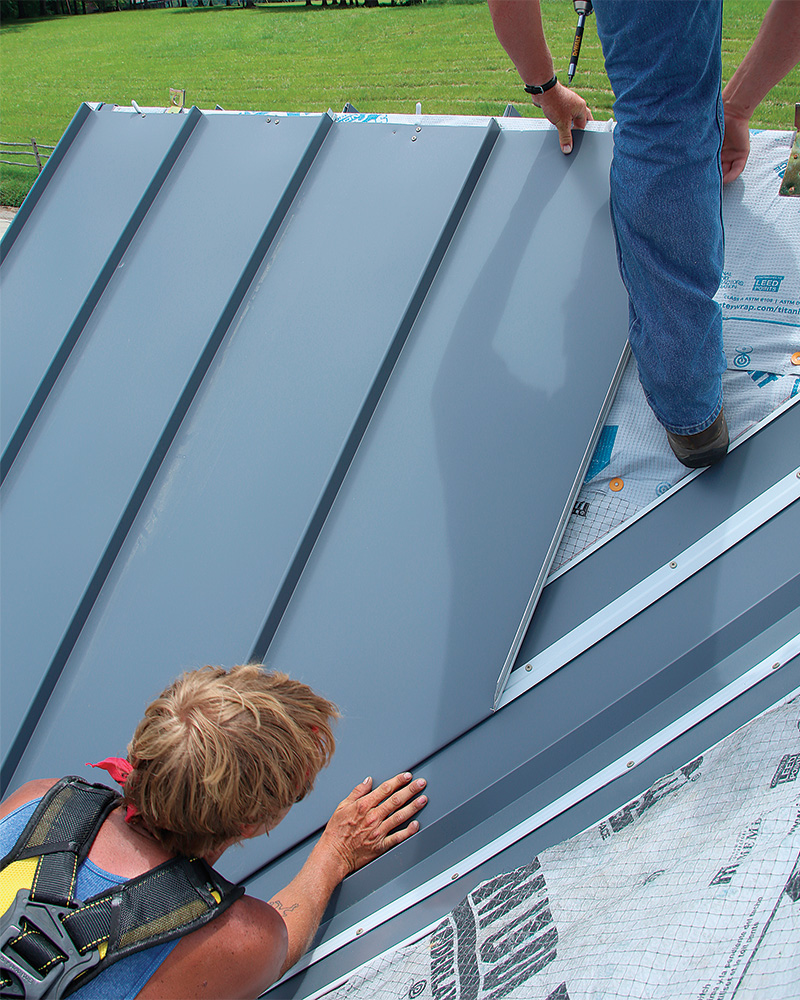
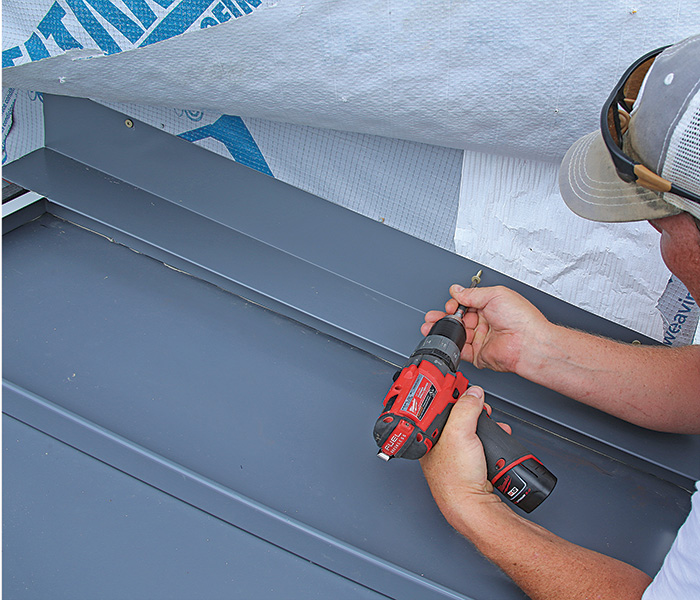
| Hidden fastening. With the cut edge secured, the male edge of the first panel is fastened to the roof sheathing using metal clips and pan-head screws spaced 1 ft. o.c., a tight spacing meant to resist wind uplift. | First full-width panel. The female side of the second (first full-width) panel is set atop the male side of the first panel and then locked together with a rubber mallet or a few firm, open-hand smacks. | Clips, continued. The first full panel, and the next two that follow, are also secured with clips spaced 1 ft. o.c., a pattern that then switches to 2 ft. o.c. across the rest of the roof. |
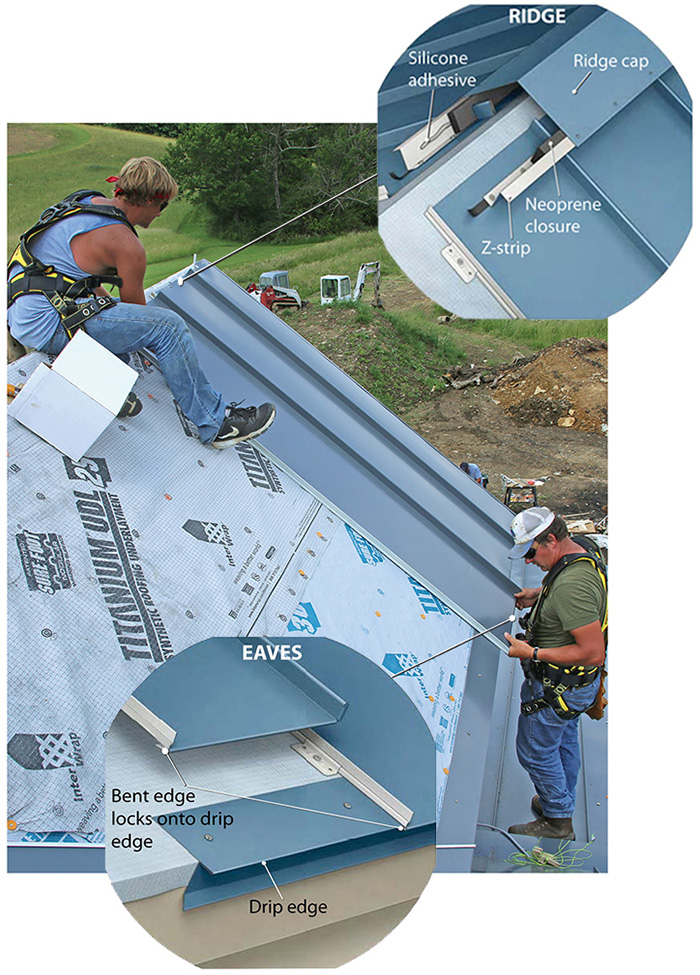
Eaves and ridge caps are used to finish off the exposed bottom and top edges of the roof panels while also accommodating the natural lengthening and shortening of the metal panels that will occur with changes in temperature.
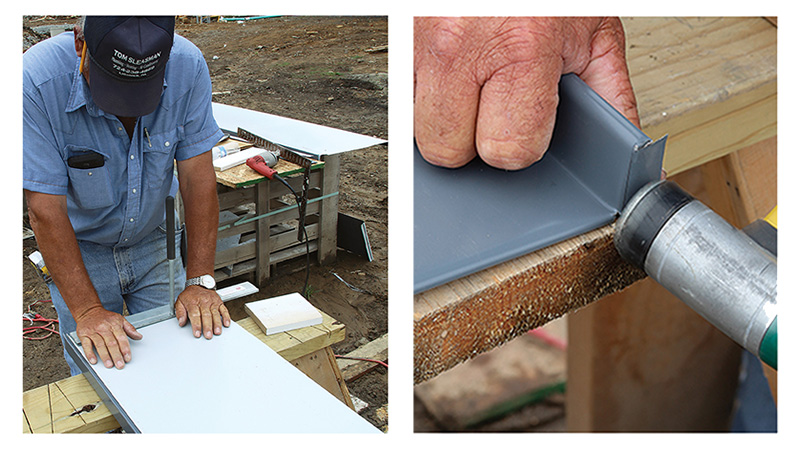 |
| Hem the bottom. A nearly 180°, 1-in.-long bend hooks onto the drip edge at the eaves. Made with a hand brake, the wide hem gives the end of the panel additional strength and allows it to expand and contract without buckling. Before passing the piece back up to the installers, the open end of the rib is cut and hammered over. |
 |
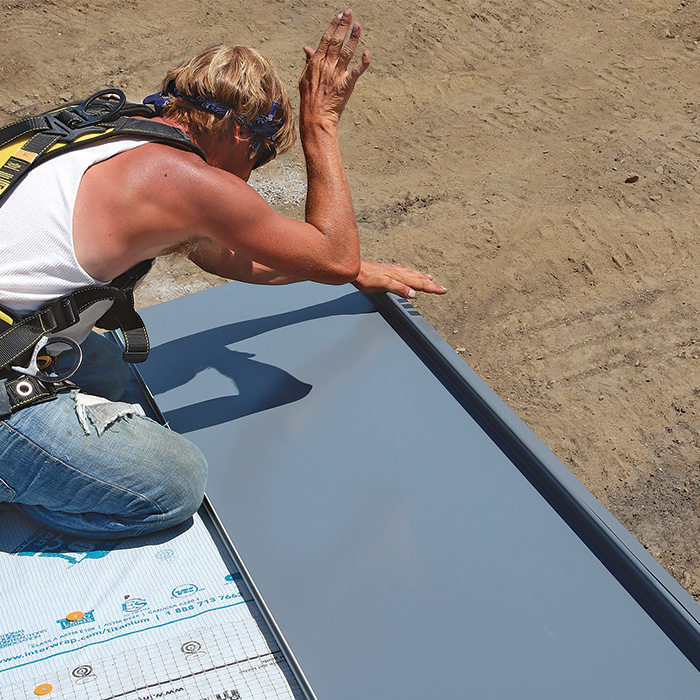
| Consider the temperature. On a hot day, the panel is first pushed tight to the drip edge and then pulled back slightly to leave room for the inevitable contraction that will occur when the hot metal panels shrink along their length in colder weather. Once the overhang is correct, the panel is secured at the ridge to keep it from sliding off the roof. |
What’s underneath matters
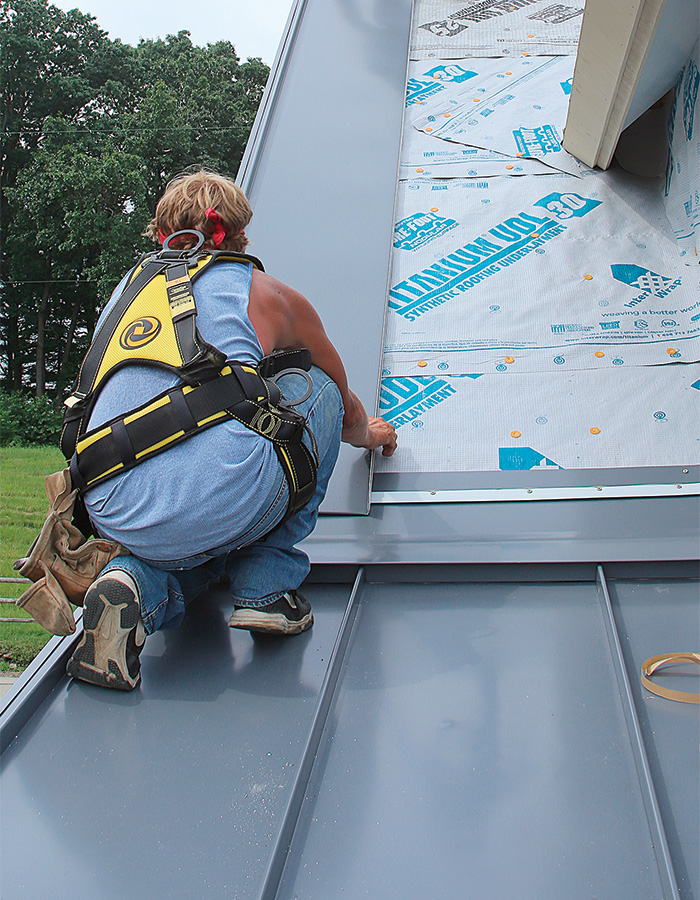
Regular asphalt-based peel-and-stick roof membrane is not made for the high temperatures under metal roofs and can melt and ooze out from the eaves as tarlike stalactites, so our first step was to protect eaves and valleys with a high-temperature membrane. We then covered the entire roof with synthetic roofing underlayment, including the areas already covered with the adhesive membrane. The synthetic underlayment acts as a slip sheet under the metal so the panels can easily expand and contract with temperature fluctuations.
When installing a roof like this, it’s important to check the roof for square. We adjusted the placement of the drip edge to compensate for out-of-square conditions—otherwise we could have ended up with tapered panels or a condition known as “sawtoothing” at the eaves, in which square-cut panel ends attach to neighboring panels at a slight angle. With the drip edge secured, we determined the panel layout and the width of the first panel. Ideally, you want equal-width panels on the rakes of a gable, and the standing seams should line up on both sides of a valley. There are other considerations too—the panels are a predetermined width, and you need a certain amount of space between seams and trim or flashing legs. On complex roofs like this one, it’s invaluable to have a responsive manufacturer help estimate material. Our rep measured the roof and worked out the trim details with the designer, and more than once I called him with questions during the installation. Having everything well planned is a must because ordering custom-width panels or non-standard flashings to solve problems can take two weeks or more.
Plan for movement
Both field-seamed and snap-lock metal roofs experience two kinds of movement from changes in temperature. The first, oil canning, is a condition that causes the panels to wrinkle. It doesn’t often damage the roof, but it can be unsightly. Our 191⁄4-in.-wide panels are the widest available from our maker (Dutch Seam, made by Atas International) and they have no strengthening ribs between seams at our client’s request. This wide width and the lack of reinforcement increase the likelihood of oil canning, so at the manufacturer’s suggestion, we ran 1 ⁄ 2-in. foam backer rod from ridge to eave on the centerline of every panel. Although not noticeable from the ground, the backer rod creates a slight crown in the center of the panel that encourages the panel to expand upward without oil canning. Panels also expand and contract along their length, so each panel is fixed along the ridge, but secured at eaves with a 1-in. hem that locks on the drip edge, allowing panels to lengthen without unhooking.
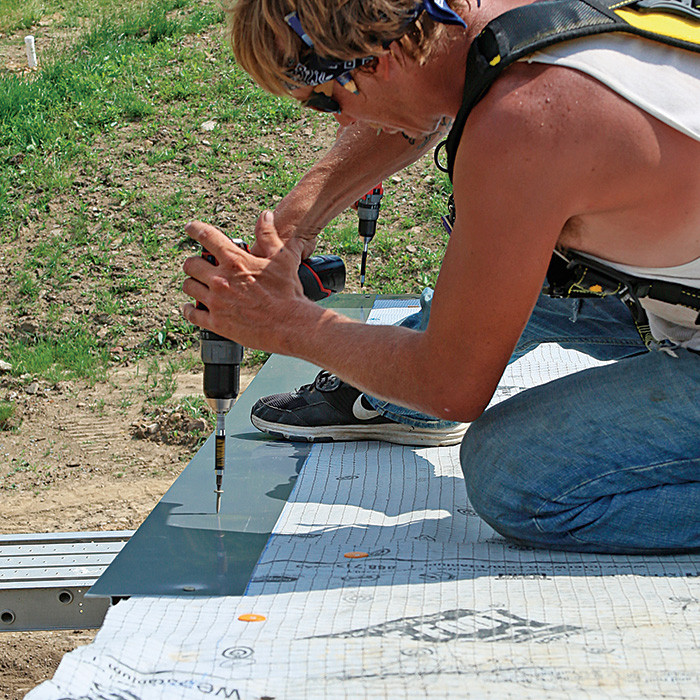
Because the panels move, they’re secured with clips that hook over the panels’ edges. We drove the flathead square-drive screws using compact drills with the clutch set to prevent overdriving. The manufacturer specifically says not to use an impact driver because it’s too easy to overtighten the clips. We also carried square-drive screwdrivers in our tool bags for fine-tuning the clips as needed.
Because roof edges experience the greatest wind load, clips are installed every 1 ft. on the three panels closest to the rakes. Eaves get clips at 6 in. and 1 ft. from the end of the panel, then every 2 ft. along the rest of the seam. After installing all the clips on a panel, we checked that it could slide freely. A portion of the 100-year-old farmhouse roof framing and its board sheathing were left intact, so we checked the straightness of panels with a string and shimmed underneath the clips as needed. In the future, I would be more insistent on installing a 1 ⁄ 2-in. layer of plywood or OSB over old board sheathing. I’m sure that shimming the clips on the old section of roof took longer than it would have to install a new layer of sheathing.
Prebent trim pieces ease the worry over weak spots
Valleys start with installation of a W-shaped valley flashing, which provides hidden fastening for the bottom of the angle-cut roof panels and prevents wind, water, and snow from getting under panels.
 |
| Clean, watertight valleys. After setting wide valley trim in place, Z-shaped “joggle cleats” are set atop butyl tape before being screwed 4 in. to either side of the valley centerline. An oversize bevel gauge (Pactool) then helps measure the angled cuts for panel ends, becoming a template to guide the shears when making each cut. |
 |
| Room to move. After hand-bending each panel along its angled bottom edge, each panel is locked onto the valley’s joggle cleat before being pushed tight, and then backed off to leave room for expansion. |
Slope transitions and dormers—two of the most notorious trouble spots when it comes to leaks—are solved with the help of some clever nesting trim pieces that direct water away before it has a chance to lead to problems.
 |
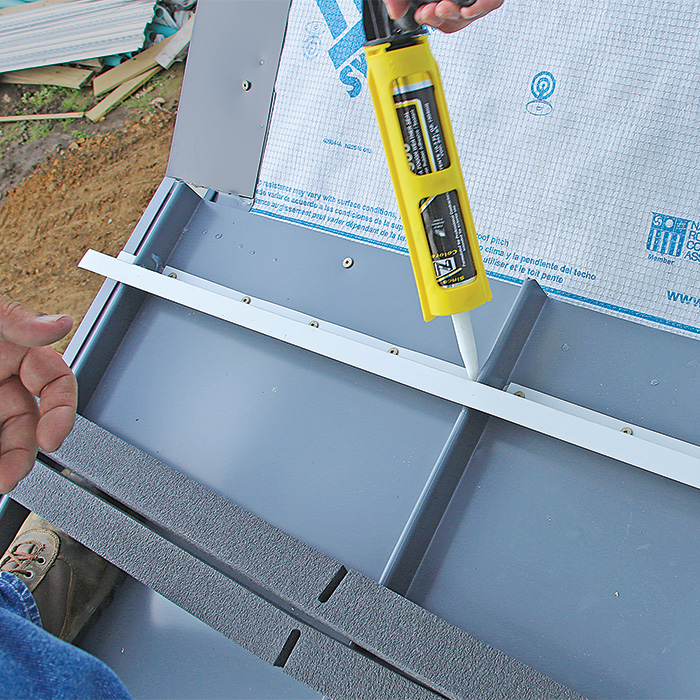 |
| Closed off. Ridge caps and slope transitions use notched Z-strips fit over panel ribs to prevent rain and animals from getting underneath. | Sealed slope change. After the Z-strip is seated in tape and fastened, it’s coated with adhesive and backed up with weatherproofing neoprene strips. |
 |
 |
| Trim for transitions. With the Z-strip and neoprene closure in place, a slope transition is hooked onto the top leg of the Z. Ridge caps connect similarly. | On up the roof. With the transition flashing in place, the same joggle cleats used for valleys are taped and screwed on top to receive the bent edges of the upper roof panels. |
 |
 |
 |
| Cut to width. Panels abutting dormers or penetrations are first cut to length and width and then clipped to the neighboring panel. | Rivets, not screws. Unnotched Z-strips connect to roof panels and sidewall flashing with rivets, but are not fastened down with screws, allowing movement. | Sidewall flashing. With the Z-strip fastened, sidewall flashing is hooked onto the top of the Z before being fastened to the sidewall through its vertical leg, which will later be covered by the WRB and siding. |
Details already worked out
What’s nice about modern metal roofing is that the manufacturers have good-looking standard details for hips, valleys, dormers, and ridges, and they can also solve virtually any site-specific complication, including curved elements. This means there are very few new tools required and little site fabrication. I really liked that none of our flashing and transition details relied on exposed fasteners, which means this roof will last for decades with no maintenance.
Although an entire residential standing-seam roof is still a novelty in our area, we’re increasingly seeing them on commercial buildings and as a smaller decorative element on mostly asphalt-shingle roofs, especially on low-slope areas. We expect to be doing more of this kind of work—and with one roof under our belt, the next will be easy.
Andrew Grace is a roofer and remodeler in Ligonier, Pa.
Photos by Patrick McCombe.
From FineHomebuilding #272
To view the entire article, please click the View PDF button below:
Fine Homebuilding Recommended Products
Fine Homebuilding receives a commission for items purchased through links on this site, including Amazon Associates and other affiliate advertising programs.

Roof Jacks

Peel & Stick Underlayment

Shingle Ripper

View Comments
I don't understand the economics of this roof system ($30,000 for materials plus three weeks of labor, so $40,000 total cost?). I had a 2000 square foot steel standing seam roof (10/12 pitch with two large, even steeper dormers) installed on a house in New England 2 years ago for about $12,000 (materials plus labor) and it took the pros only 1.5 days start to finish! I see no reason to consider any alternative.
Where's the skylight details, valleys and dormers?
I have a plan to use the interlocking metal roof system on the new house I am building and want to know if the fact that the roof design is a shed style roof, with a 9 to 12 ft pitch, no dormers or odd angles to contend with, will make it cheaper to install? I plan to harvest rainwater from the roof thought this would be the best design for that.
I installed a standing seam metal roof on my shed style, single pitch roof, 3:12 pitch. I used synthetic underlayment and 1 foot wide corrugated panels (pro lock roofing). 3350 sq.ft of roofing, on a sub roof of 3/4 inch edgegold osb. The cost was $9,000 for materials and $5900 labour (Canadian dollars). Total cost $14,900. The roof looks great and is on its second year now without any problems.
Nice roof job!
But 40 G's for a roof is a lot of coinage. The roof looks like it's worth more than the house. Cheap azz white vinyl windows. Some type of textured plywood exterior siding with those 1by verticals? I dunno. Marvin windows would look much better. As would cedar siding shingles.
It would be nice to have a follow up article about installing metal roofs in the South ( yes, we build houses down here too).
Usually we install standing seam roofs on 1x4 purlins or battens (some horizontal and some in 45° angle). It's common to see Asphalt Felt or Tar Paper, but Synthetic underlayment is gaining market.
In the South, I'm starting to use Vapor Diffusion Ports, so the framing, underlayment and ridge vent needs to be adjusted. If we build conditioned attics, rigid foam goes on top of the deck. Maybe that could be addressed too.