Installing Shaker-Style Roof Trim
In this video, learn how to install an elegant but tricky roof-trim detail modeled after a Shaker garden shed at historic Hancock Shaker Village.
Transcript: One side of the building is pretty close to being wrapped up–we’re just wrapping up the siding now. From the inside out, what we have here is Zip System® sheathing, we have core event furring strips to create a gap, and we have LP SmartSide Lap Siding for the trim. We’re using Boral TruExterior, which is a poly ash material. The idea here is that we’re using really durable materials that can take a punch. We want this building to really last and because we’re doing it kind of as a weekend by weekend project, it was important that it be able to stand up to the elements while we were building it whereas wood trim and wood siding could start to soak up water while we’re in the middle of the process.
Background and building a roadmap
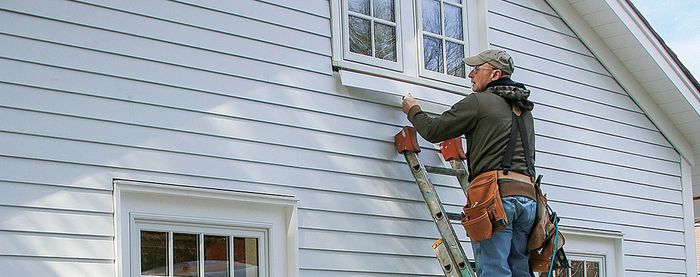
What we’re talking about now is the roof trim. In appearance, it’s a fairly simple trim detail that we modeled after this Shaker Shed at the Hancock Shaker Village. We reverse engineered how that trim went together, which they hand-cut, and actually, their model varied from one side of the building to the other, but we looked at all the different corners of their building and we kind of came up with our version of it as faithful to the original as we could.
You can see this is kind of the magic where it all comes together. This is the view where you really get a sense of how complicated this is. Now, I have this little mock-up that we built back in the shop to kind of make sure we knew all of our angles and it took some fussing, but I think we got there. This is kind of the roadmap to making these cuts and it’s a kind of a head-scratcher. It’s really easy to get confused in the middle of this and have a piece oriented the wrong way, but let me show you how we do it.
So, we’re going to start with this piece back here and as you can see we already have the eave trim on and we already had the bottom piece of rake trim, so now we just need to add that secondary piece of crown molding at the top. This should be fairly straightforward, but let’s see how it goes.
This is another piece of Boral TruExterior–it’s 5/4 x 6. We’re going to use this for our top piece of crown. When in doubt, just hold it up and use the building as as your guide to make sure you’re not screwing it up because these pieces of trim are not are not inexpensive and one wrong cut and you could end up wasting a whole piece. The easiest way to keep track of this, because it does get confusing, is to write down all of your notes from your mock-up right on the mock up itself and that includes not just the degrees of miter and bevel, but also instructions like have this side facing out at this side against the table. When you’re on the job-site you don’t want to have to think about it. Just have a roadmap. It’s hard enough even with this.
Test the fit
All right, let’s see how it fits. That’s pretty good. What I might do here is knock a little bit off the bottom of this piece so it’s got a bevel and it sits tighter. Just to make sure I get a snug joint on this piece and the one up there, I’m just going to bevel a little bit with the block plane. This stuff actually planes out beautifully–it’s just like wood although you may have to re-sharpen your blade after.
Looks pretty good to me. We’ve got a nice tight miter with a little gap right here, but that’s fine. We’re going to add some polyurethane adhesive there so that it’s going to foam and fill out.
I’m just going to nail this sparingly and then I’m going to go grab some quick clamps and I’m actually going to pinch it tight until the glue sets up. You can see the clamps really pull that thing nice and tight together and eliminate any gaps you might have running up along the rake.
We’ll leave those on for at least an hour–sometimes more. What you want to see is the glue starting to foam out and we can come back after it dries and just chisel it off. You notice that I stopped short here and, in this case, I didn’t have any stock that made it from one end to the other in one piece, but even if I did I actually kind of like cutting it. It allows me to finesse one end and then the other, and this seam in the middle, if it’s glued and then painted, it disappears.
Next, I’m just going to cut this little section with the miter at top and then we’ll do the other side. Last up we have to fit this top piece of trim which is going to be compound miter at the top, check the fit, and it’s good to go.


