Weaving Sidewall Shingle Corners
Woven corners are more complicated to install, but they give an elegant look to shingle siding.

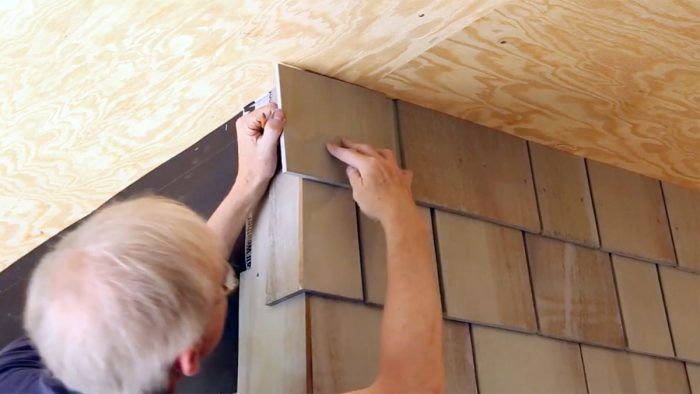
There are two ways to handle outside corners with shingle siding: butt the shingles into corner boards, or weave the shingles so their edges overlap in an alternating pattern. The corner-board approach is simple enough to be nearly self-explanatory, but woven corners are more complicated (and give a more elegant look, in my opinion). With woven corners, the shingles on one side run past the sheathing, while those on the other side butt to the first. The side that runs past and the side that butts alternates with each course. Because shingles are wedge shaped, the edge of each shingle in a woven corner needs to be scribed and trimmed at an angle. Corners are installed before field shingles and serve to establish the elevations of all the courses. One trick to making shingle siding really sing is to plan the exposure to avoid having a narrow course where the siding meets the soffit.
That’s a simple enough matter: Measure the wall height, add 1 in. for the shingles to hang over the foundation, then divide that number by the designer or manufacturer’s maximum shingle exposure to determine the number of courses. If you’re lucky, the dividend will be a whole number. But in most cases, you have to take two more steps: Round the dividend up to the next whole number, which will equal the number of courses, and then divide the wall height (including the 1 in.) by the number of courses to find the exposure. This exposure is marked on a story pole, which is used to transfer the course lines to the building. Don’t exceed the manufacturer’s maximum exposure—it’s critical to make sure there are always two layers. This way, if the face shingle cracks, the second layer protects the wall.
You can further adjust the shingle exposure so the bottoms of the courses fall even with the tops and bottoms of the windows and doors, but those exposures have to be kept consistent all around the house so the woven corners align. I like to work four or five courses at a time, installing the corner shingles pyramid-style with wider ones at the bottom and narrower ones at the top. I’ll install the field shingles of those courses, then nail on another four or five courses at the corner until topping out.
No matter the exposure, the flashing behind corners is crucial. The industry association for wood shingles, the Cedar Shake and Shingle Bureau (cedarbureau.org), calls for #30 asphalt-impregnated felt lapped at least 2 in. shingle-style as a WRB. At the corners, they recommend an additional layer of either self-adhering membrane or sheet metal extending at least 6 in. onto each wall. I like the self-healing characteristics of membranes around nails, but brake-bent sheet metal provides a very crisp corner to work with.
Also watch the video Andy made to go with this article: Weaving Shingle Corners.


