FHB Logo Facebook LinkedIn Email Pinterest Twitter X Instagram Tiktok YouTube Plus Icon Close Icon Navigation Search Icon Navigation Search Icon Arrow Down Icon Video Guide Icon Article Guide Icon Modal Close Icon Guide Search Icon Skip to content
Subscribe
Log In
  • How-To
  • Design
  • Tools & Materials
  • Restoration
  • Videos
  • Blogs
  • Forum
  • Magazine
  • Members
  • FHB House
  • Podcast
Log In

Fine Homebuilding Project Guides

Siding & Exterior Trim

Guide Home
  • Choosing Siding
  • Installing Siding
  • Choosing Exterior Trim
  • Installing Exterior Trim
  • Repairing Siding & Trim
How-To

Working with Manufactured Stone

Man-made stone might get a bad rap, but installed correctly, it can have a long life and can appear deceptively real.

By Brendan Mostecki Issue 192
  • X
  • facebook
  • linkedin
  • pinterest
  • email
  • add to favorites Log in or Sign up to save your favorite articles

Synopsis: Manufactured stone might get a bad rap for not being the real thing, but installed correctly, it can have a long life and can appear deceptively real. Mason Brendan Mostecki has nearly ten years of experience working with manufactured stone, and he shares his lessons on how to make a good installation. Mostecki begins by preparing a solid substrate with peel-and-stick membrane, wire lath, and builders’ felt. He says that corners should go on first and that it’s important to keep variety in mind when placing pieces. Mostecki also includes tips for preparing the mortar and applying it correctly so that the manufactured stone isn’t damaged or defaced. The article includes a sidebar on the different sizes and styles of mortar joints for manufactured stone.


About nine years ago, I stopped to visit a friend at a job site after a 10-hour day of lifting fieldstone and pounding on a chisel. I was exhausted, and my fingers were curling into what we masons refer to as “monkey hands” from moving stone all day.

My buddy had been working with manufactured stone all day, and he looked like he had just come off his first morning break. I asked him a flurry of questions about manufactured stone and picked up a few pieces for a closer inspection. I remember noticing that they felt almost weightless compared to what I had been lifting. I took a swing at the man-made stone with my hammer and watched it break along the desired line as if it had a memory. I was hooked.

Since that first encounter, I’ve incorporated manufactured stone into more and more projects. I’ve also noticed the growing popularity of this material just about everywhere I go. Don’t get me wrong; I still love working with natural stone. But cold winter mornings gripping an ice-cold chisel and swinging a 3-lb. sledge are not my idea of a good time.

I know lots of people are skeptical about man-made stone, and I was, too. But large manufacturers have really improved their processes to make these stones look realistic, and the increasing number of styles available means that you can get just about any look you’re after. Sure, this stone might be man-made, but with the right installation techniques, it can look just as good as the real thing.

Prep work depends on the substrate

Natural-stone veneer is heavy, so it requires wall ties and a ledger for proper support. Manufactured stone, on the other hand, installs like tile. It can be applied over plywood, OSB (oriented strand board), rigid-foam insulation, block walls, concrete, or even drywall.

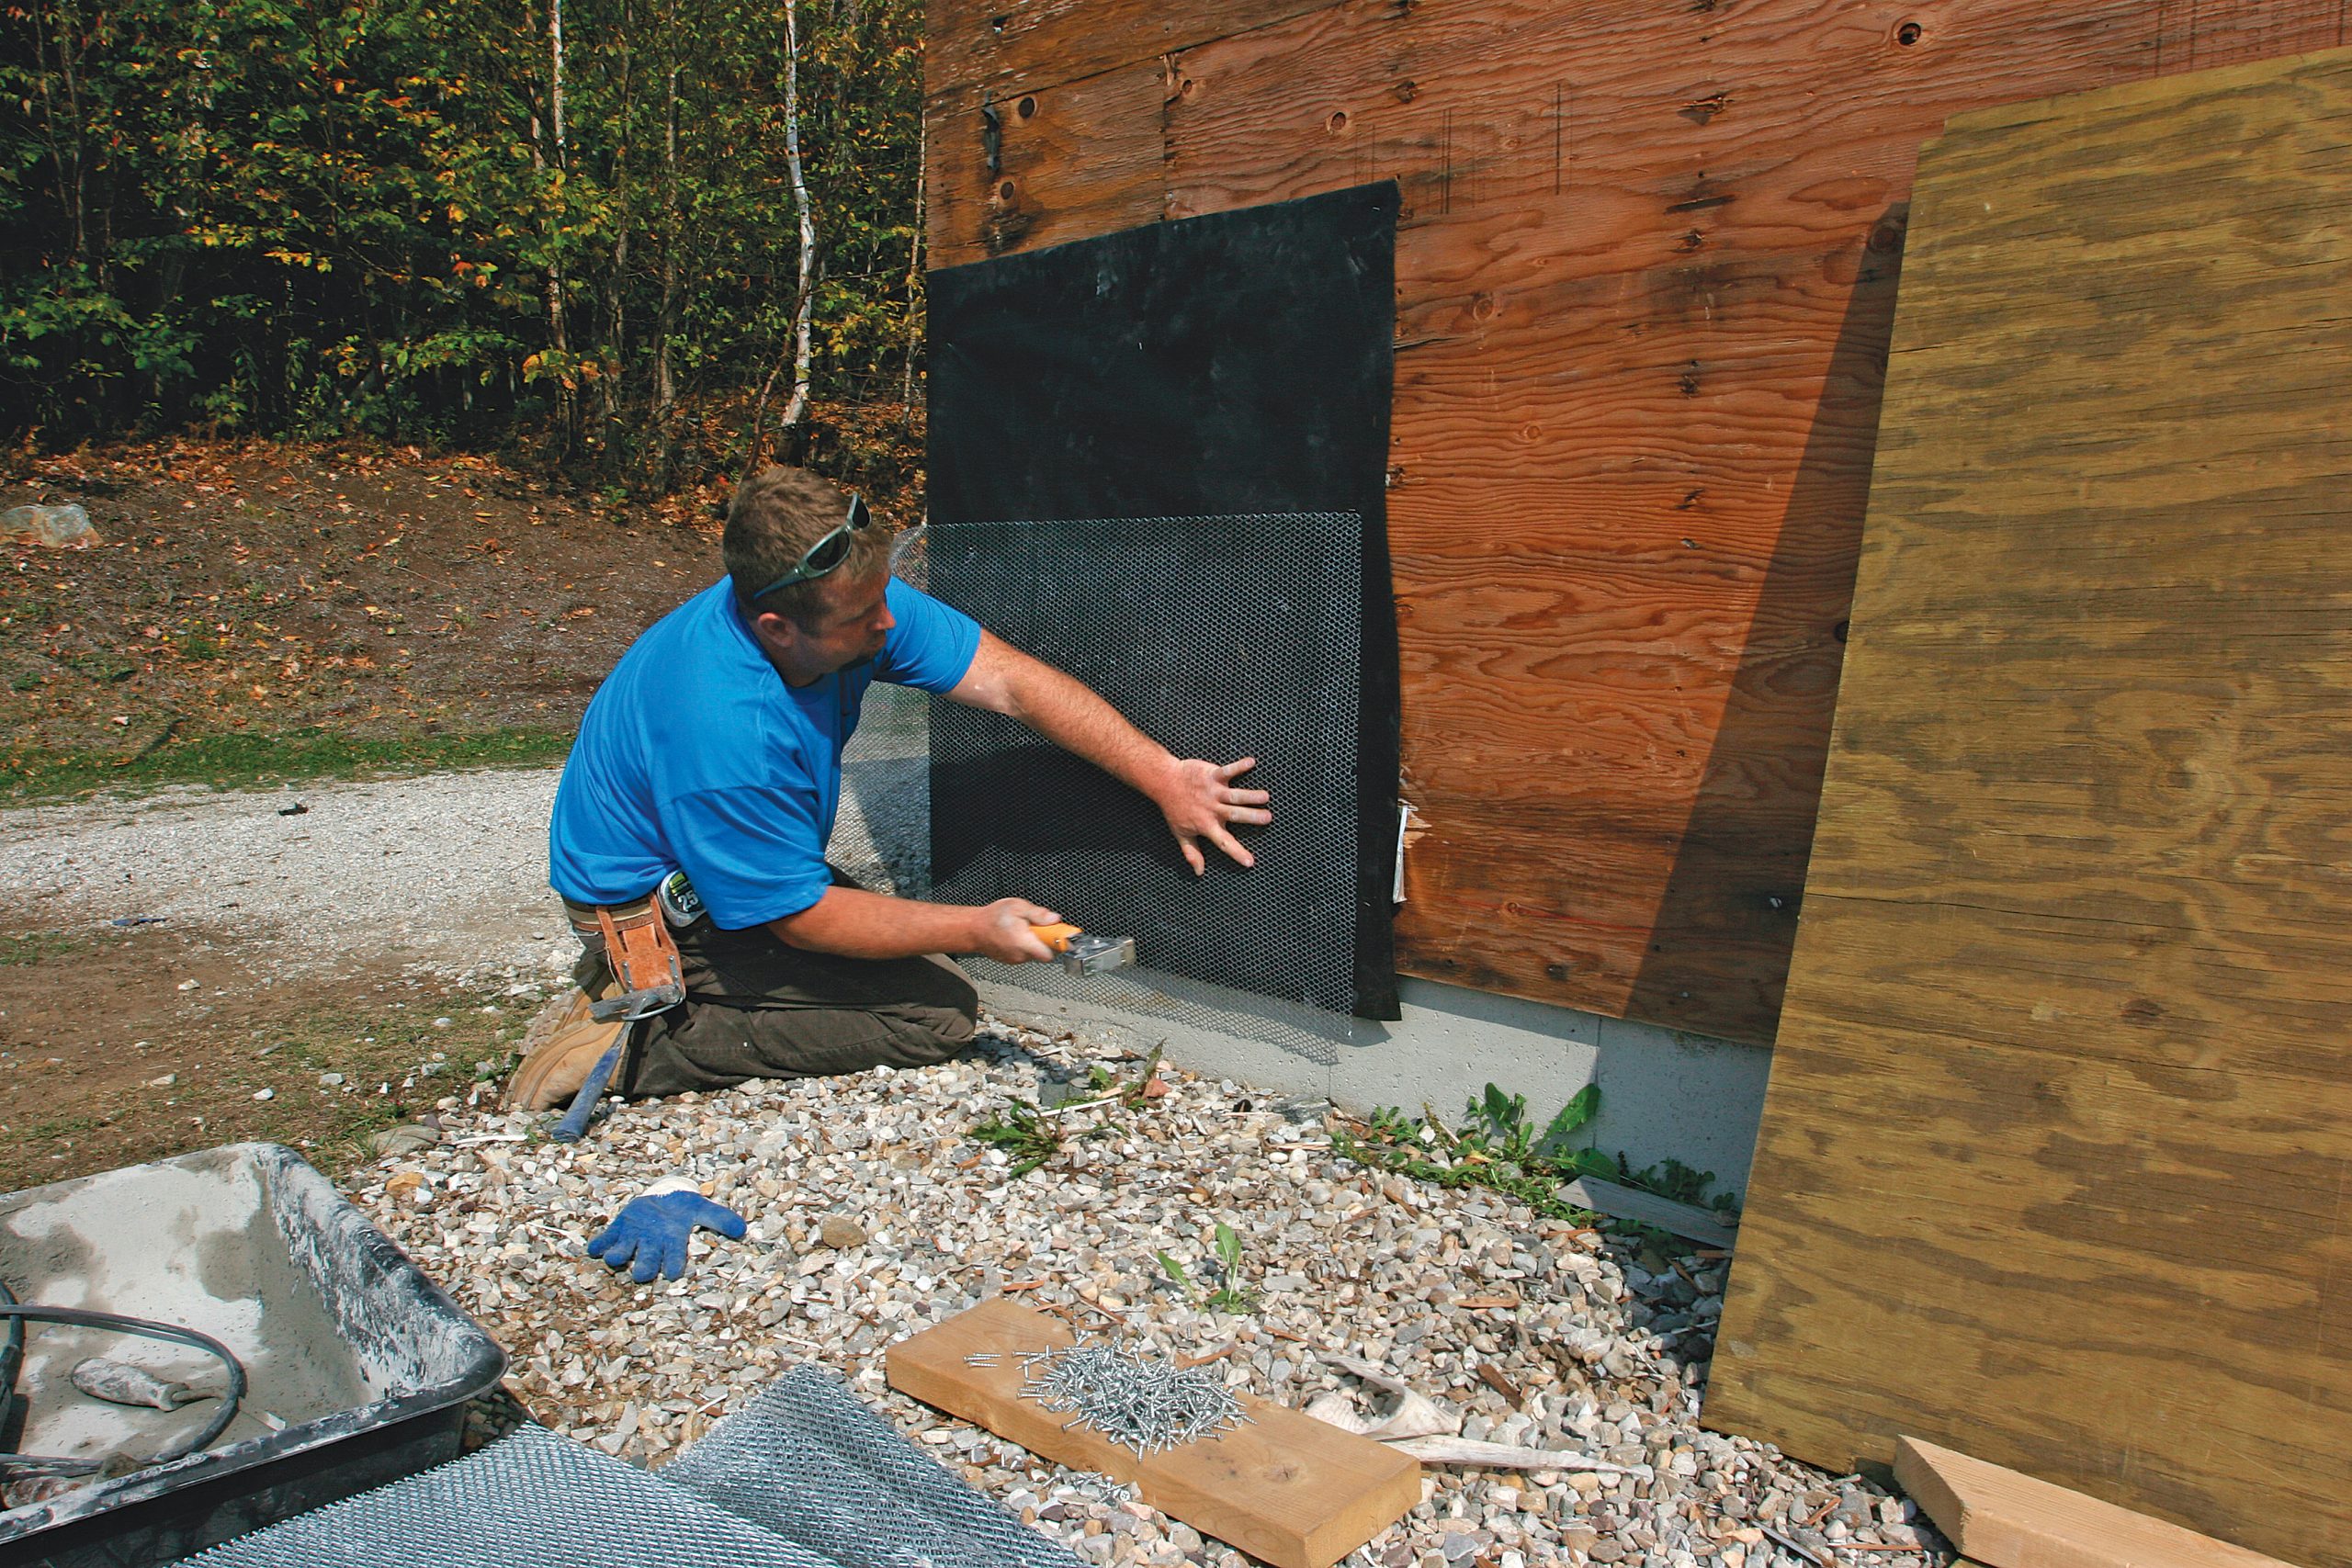
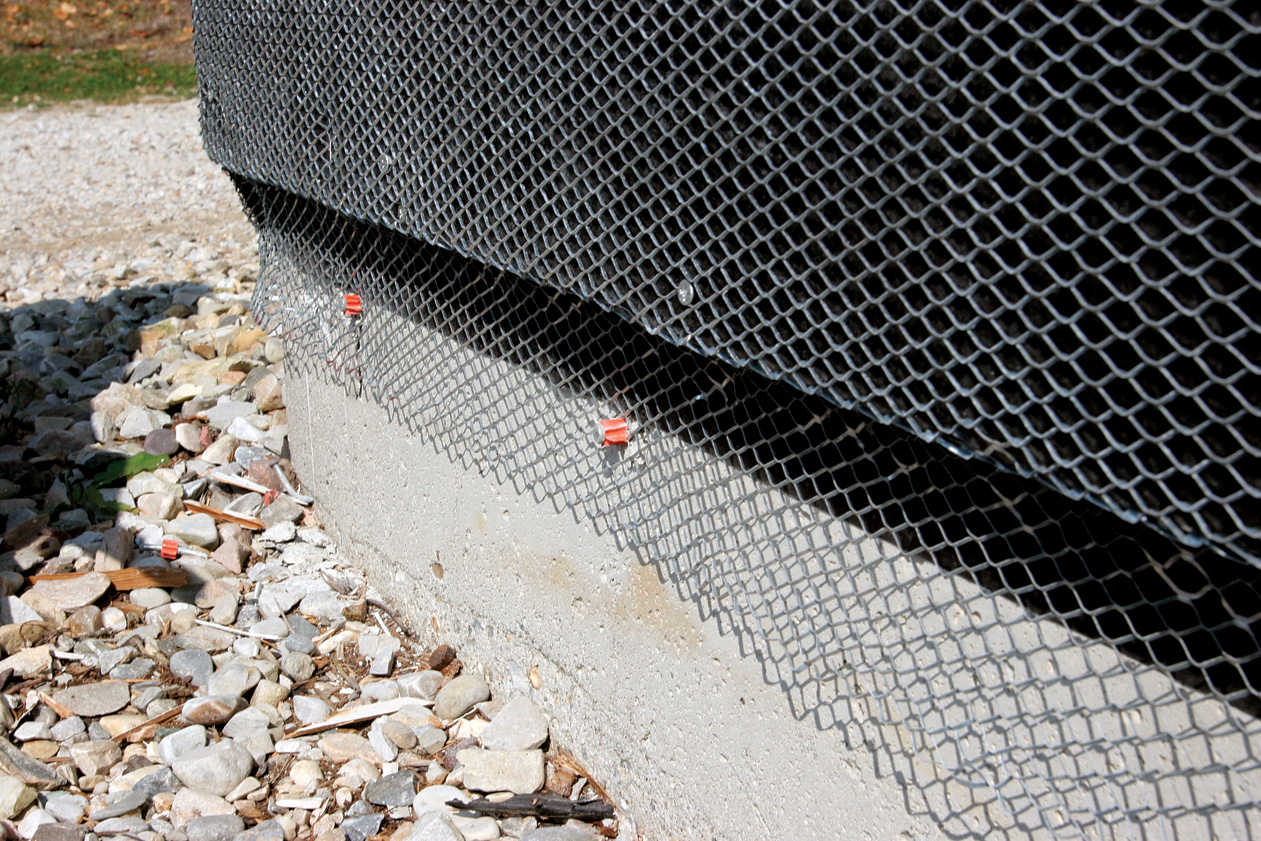
When you’re installing man-made stone over a smooth, non-masonry surface, such as the plywood sheathing shown on this project, the common denominator is wire lath. When fastened securely to the sheathing, this strong metal grid enables the mortar to form a mechanical bond with the wall. Because this project was an exterior installation, I also paid careful attention to weatherproofing.


Prepare the substrate

If you are installing the stone over an exterior wood substrate, as shown in the project featured here, start by applying a double layer of a weather-resistant barrier. Builder’s felt is the standard choice, and I strongly recommend #30 felt over the lighter weight #15 felt. the latter rips too easily. Peel-and-stick membrane should be used around all windows and doors, and also on 90° inside corners to ensure a proper seal against the weather. It’s also necessary to install wire lath over the felt paper, or the mortar won’t adhere properly to the wall.

tack substrate with staples
Tack with staples, anchor with screws. I’ve seen some installers secure wire lath with roofing nails, but they hold tightly only if you hit a stud every time. I like to use a hammer tacker to hold the lath in place, then fasten it securely with 1-in. galvanized screws, spaced about 10 in. to 12 in. apart. When driving screws, aim for the corner of the diamond-shaped holes in the lath, then pull the sheet in different directions as you fasten it so that the lath is nice and tight between the screws.

keep the lath tight to the foundation
Keep the lath tight to the foundation. If the stone is going to extend down to the foundation, make sure to bend the lath tight to the edge of the plywood and concrete, and fasten it to the foundation with 1-in. powder-actuated concrete nails spaced every 12 in. If you don’t extend the lath, the mortar will slide off the weather barrier.

An organized site ensures a smooth installation

At the start of each project, I walk around the site with the homeowner or general contractor and figure out where to set up all my equipment. It’s important to think ahead about access points for bags of mortar and sand, as well as the mixing station. Whether you have a gas-powered mixer or a guy with a hoe, you need to be able to run wheelbarrows to and from the area easily, so figure out where to set up the mixing station before anything else happens. You also need access to water and electricity, the closer to where you will be working, the better.

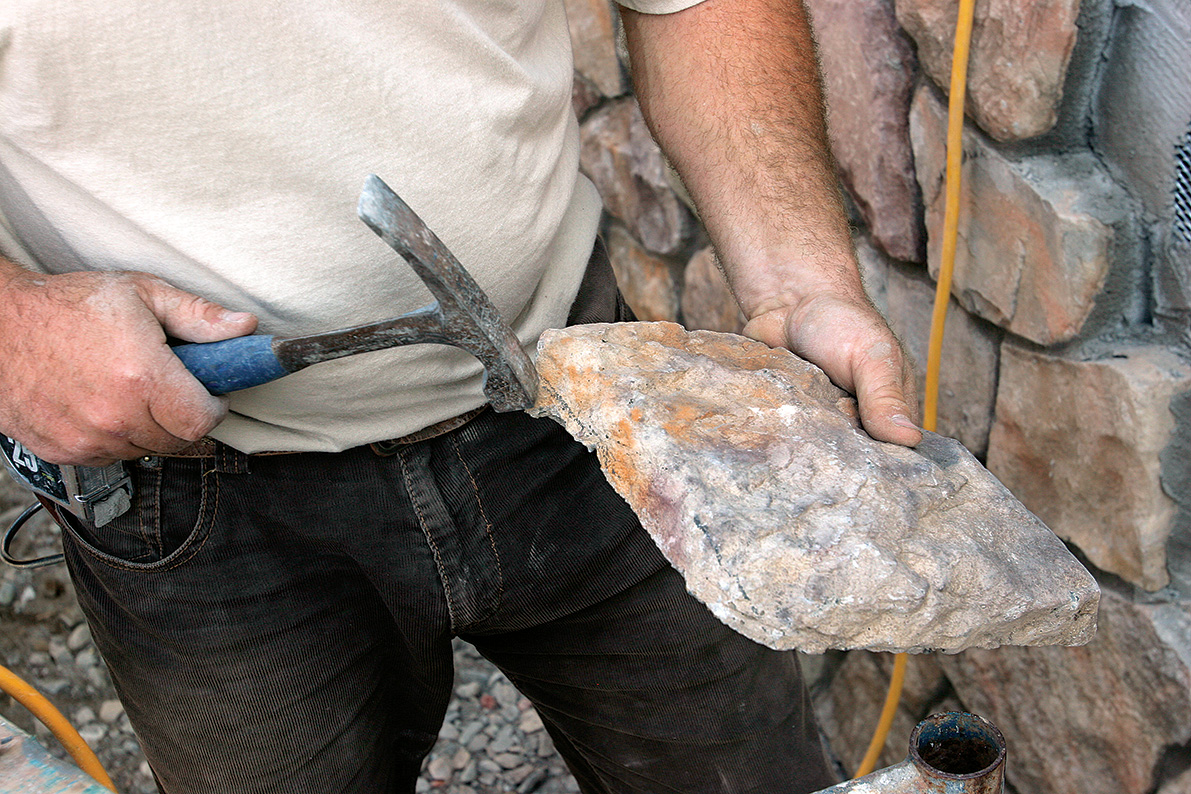
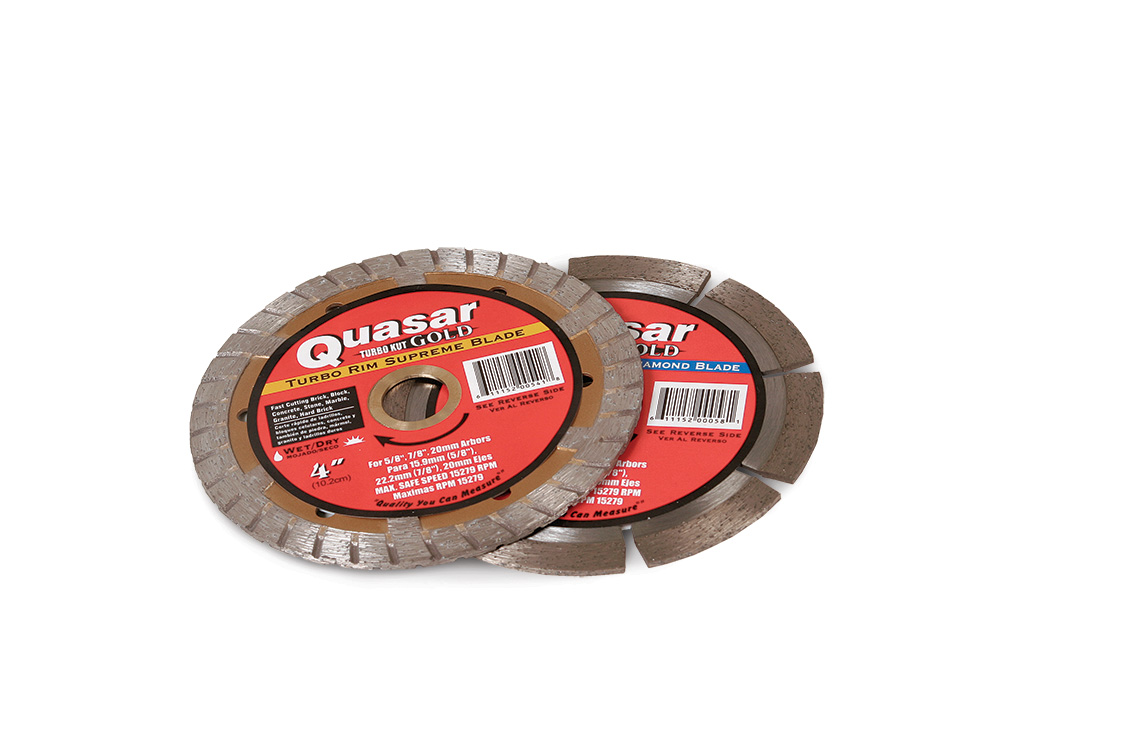
Before you mix the first batch of mortar, make sure you have the appropriate tools on hand. The basic stone-veneer tool kit includes a brick hammer, a tuck pointer (I find 3⁄8 in. to be the most-versatile size), a stiff-bristle brush, an angle grinder, and one or more diamond blades, depending on the amount of stone to be installed.

It takes time to develop a mason’s memory for stone

With the mortar station set up and the tools close at hand, I like to open all the boxes of manufactured stone and choose an assortment of sizes and shapes from each box to ensure that the look remains natural.

When choosing the right stone for the right spot on the wall, it all comes down to retaining certain stone shapes in your memory. a good mason can sort through a pile of stone, organizing pieces into different groups and remembering 25 to 50 different stones. This way, when he needs to fill a specific spot, he knows he has a piece that will fit. This memory for stones comes over time, though. beginners will find it helpful to lay out the pieces in front of the work area so that they have a variety of shapes, sizes, and colors to choose from.

It’s important not to fit just one stone at a time. The installation will look more natural if you are thinking two or three stones ahead and paying attention so that you don’t create long, uninterrupted grout lines or odd angles that will be hard to work around later.


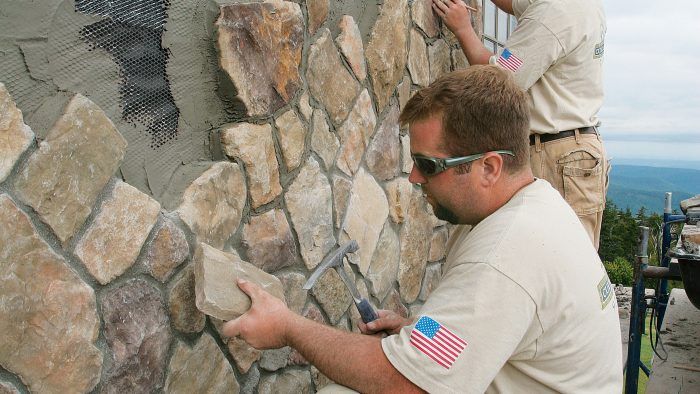
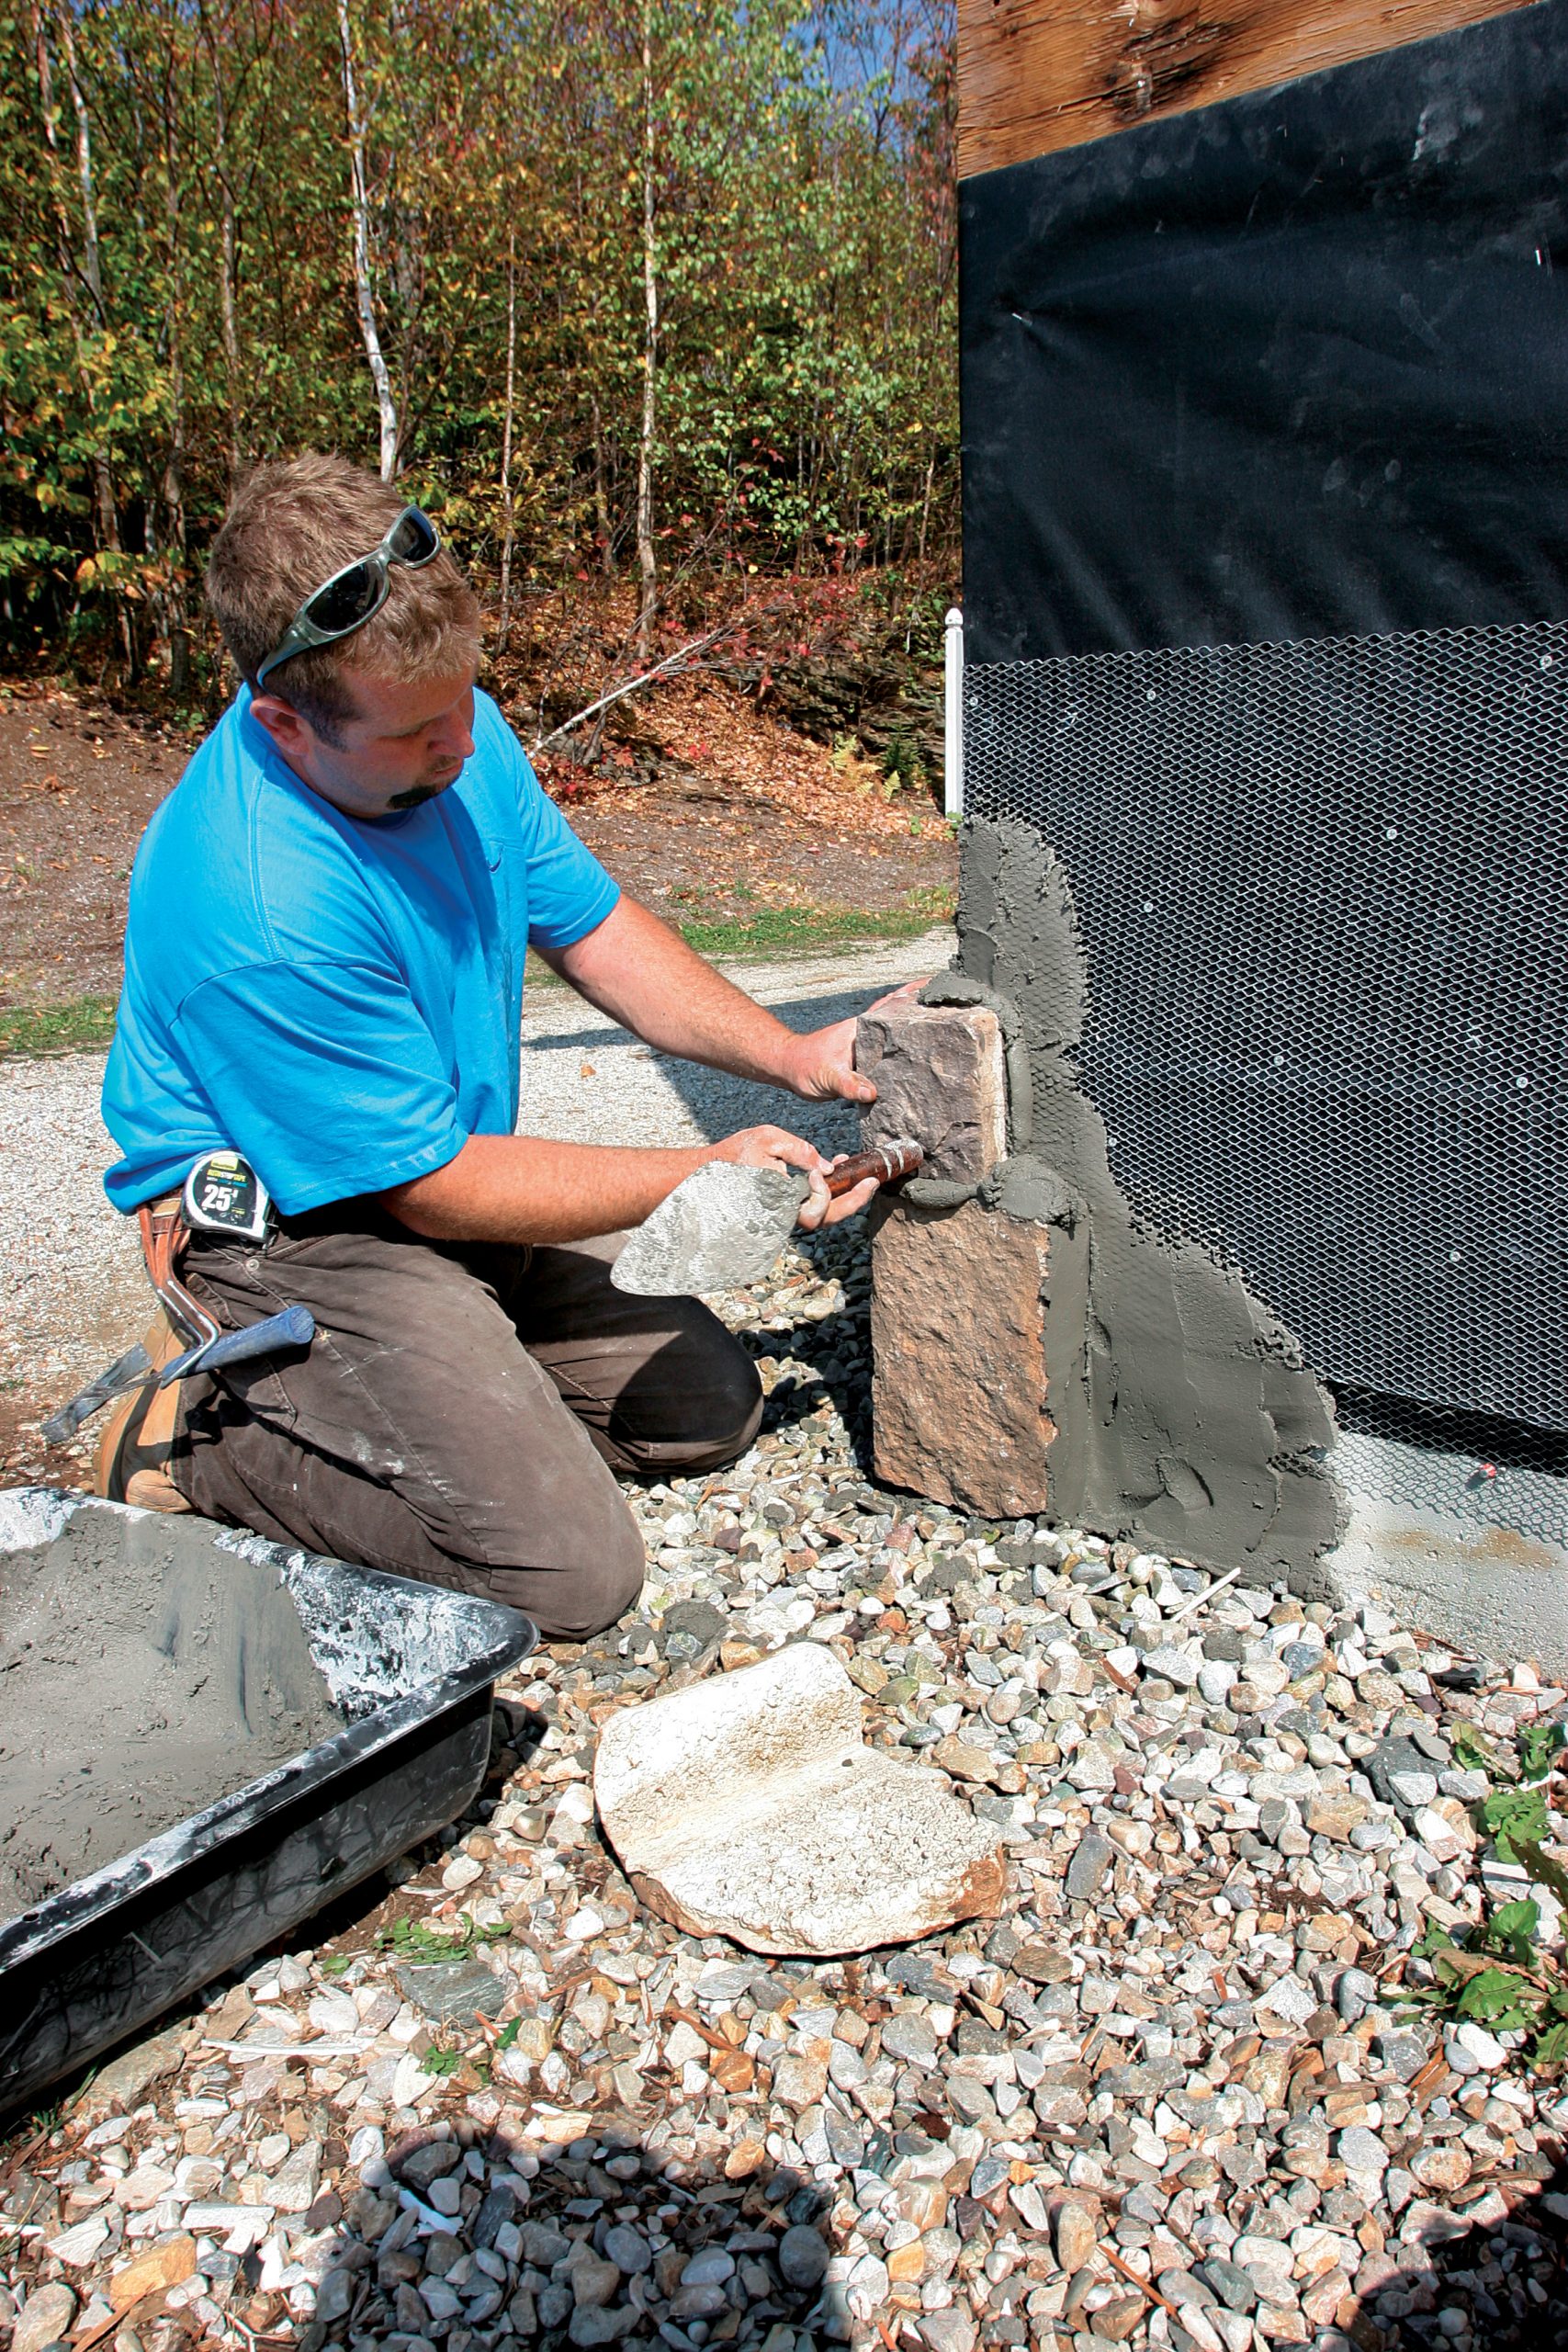
Put the corners up first

Realistic-looking corners can make or break a stone job because they set the stage for the rest of the project and are often the most-visible aspect of the installation. The 90° corner pieces need to be installed carefully. In the photos shown here, I’m installing a short section of stone wainscot, so i was able to use a level to keep the corner plumb. If you’re installing a corner any more than 3 ft. to 4 ft. tall, you should swap a level for a vertical stringline to establish the plane that the stone needs to follow.

More so than the flat pieces, preformed corners seem to be thicker in some spots than others. Keep the corner of the stone lined up vertically, but also make sure to keep it in plane with the field of stones that comes after it. Corner pieces also have a long leg and a short leg. As you work your way up the wall, stagger the legs so that they look natural. i install only two or three corner pieces before letting them set up a bit. Building the corners too high before the mortar has set up can cause the corners to fall off.

pack out the corner for the stone work
Pack out the corner. If you are starting the installation at grade level, pack out the lower section of the foundation wall with mortar until it’s in plane with the rest of the surface to be veneered.

coat the lath and the manufactured stone
Coat the lath and the stone. After spreading a skim coat of mortar over the wire lath, back-butter each corner stone with mortar, and position it by applying firm pressure toward the wall. If you aren’t planning to install stone adjacent to the corners right away, remove the excess mortar before it hardens.

push manufactured stone in and down for a good fit
Push in and down for a nice fit. Place each stone on the wall a bit higher than where its final position will be, then apply pressure in toward the wall and down toward the stones below. Use the handle of your trowel to tap the piece into place. Once The position of the stone looks good, remove excess mortar, and smooth the joints. Then pack the mortar on the exposed sides of the stone to ensure a good bond.

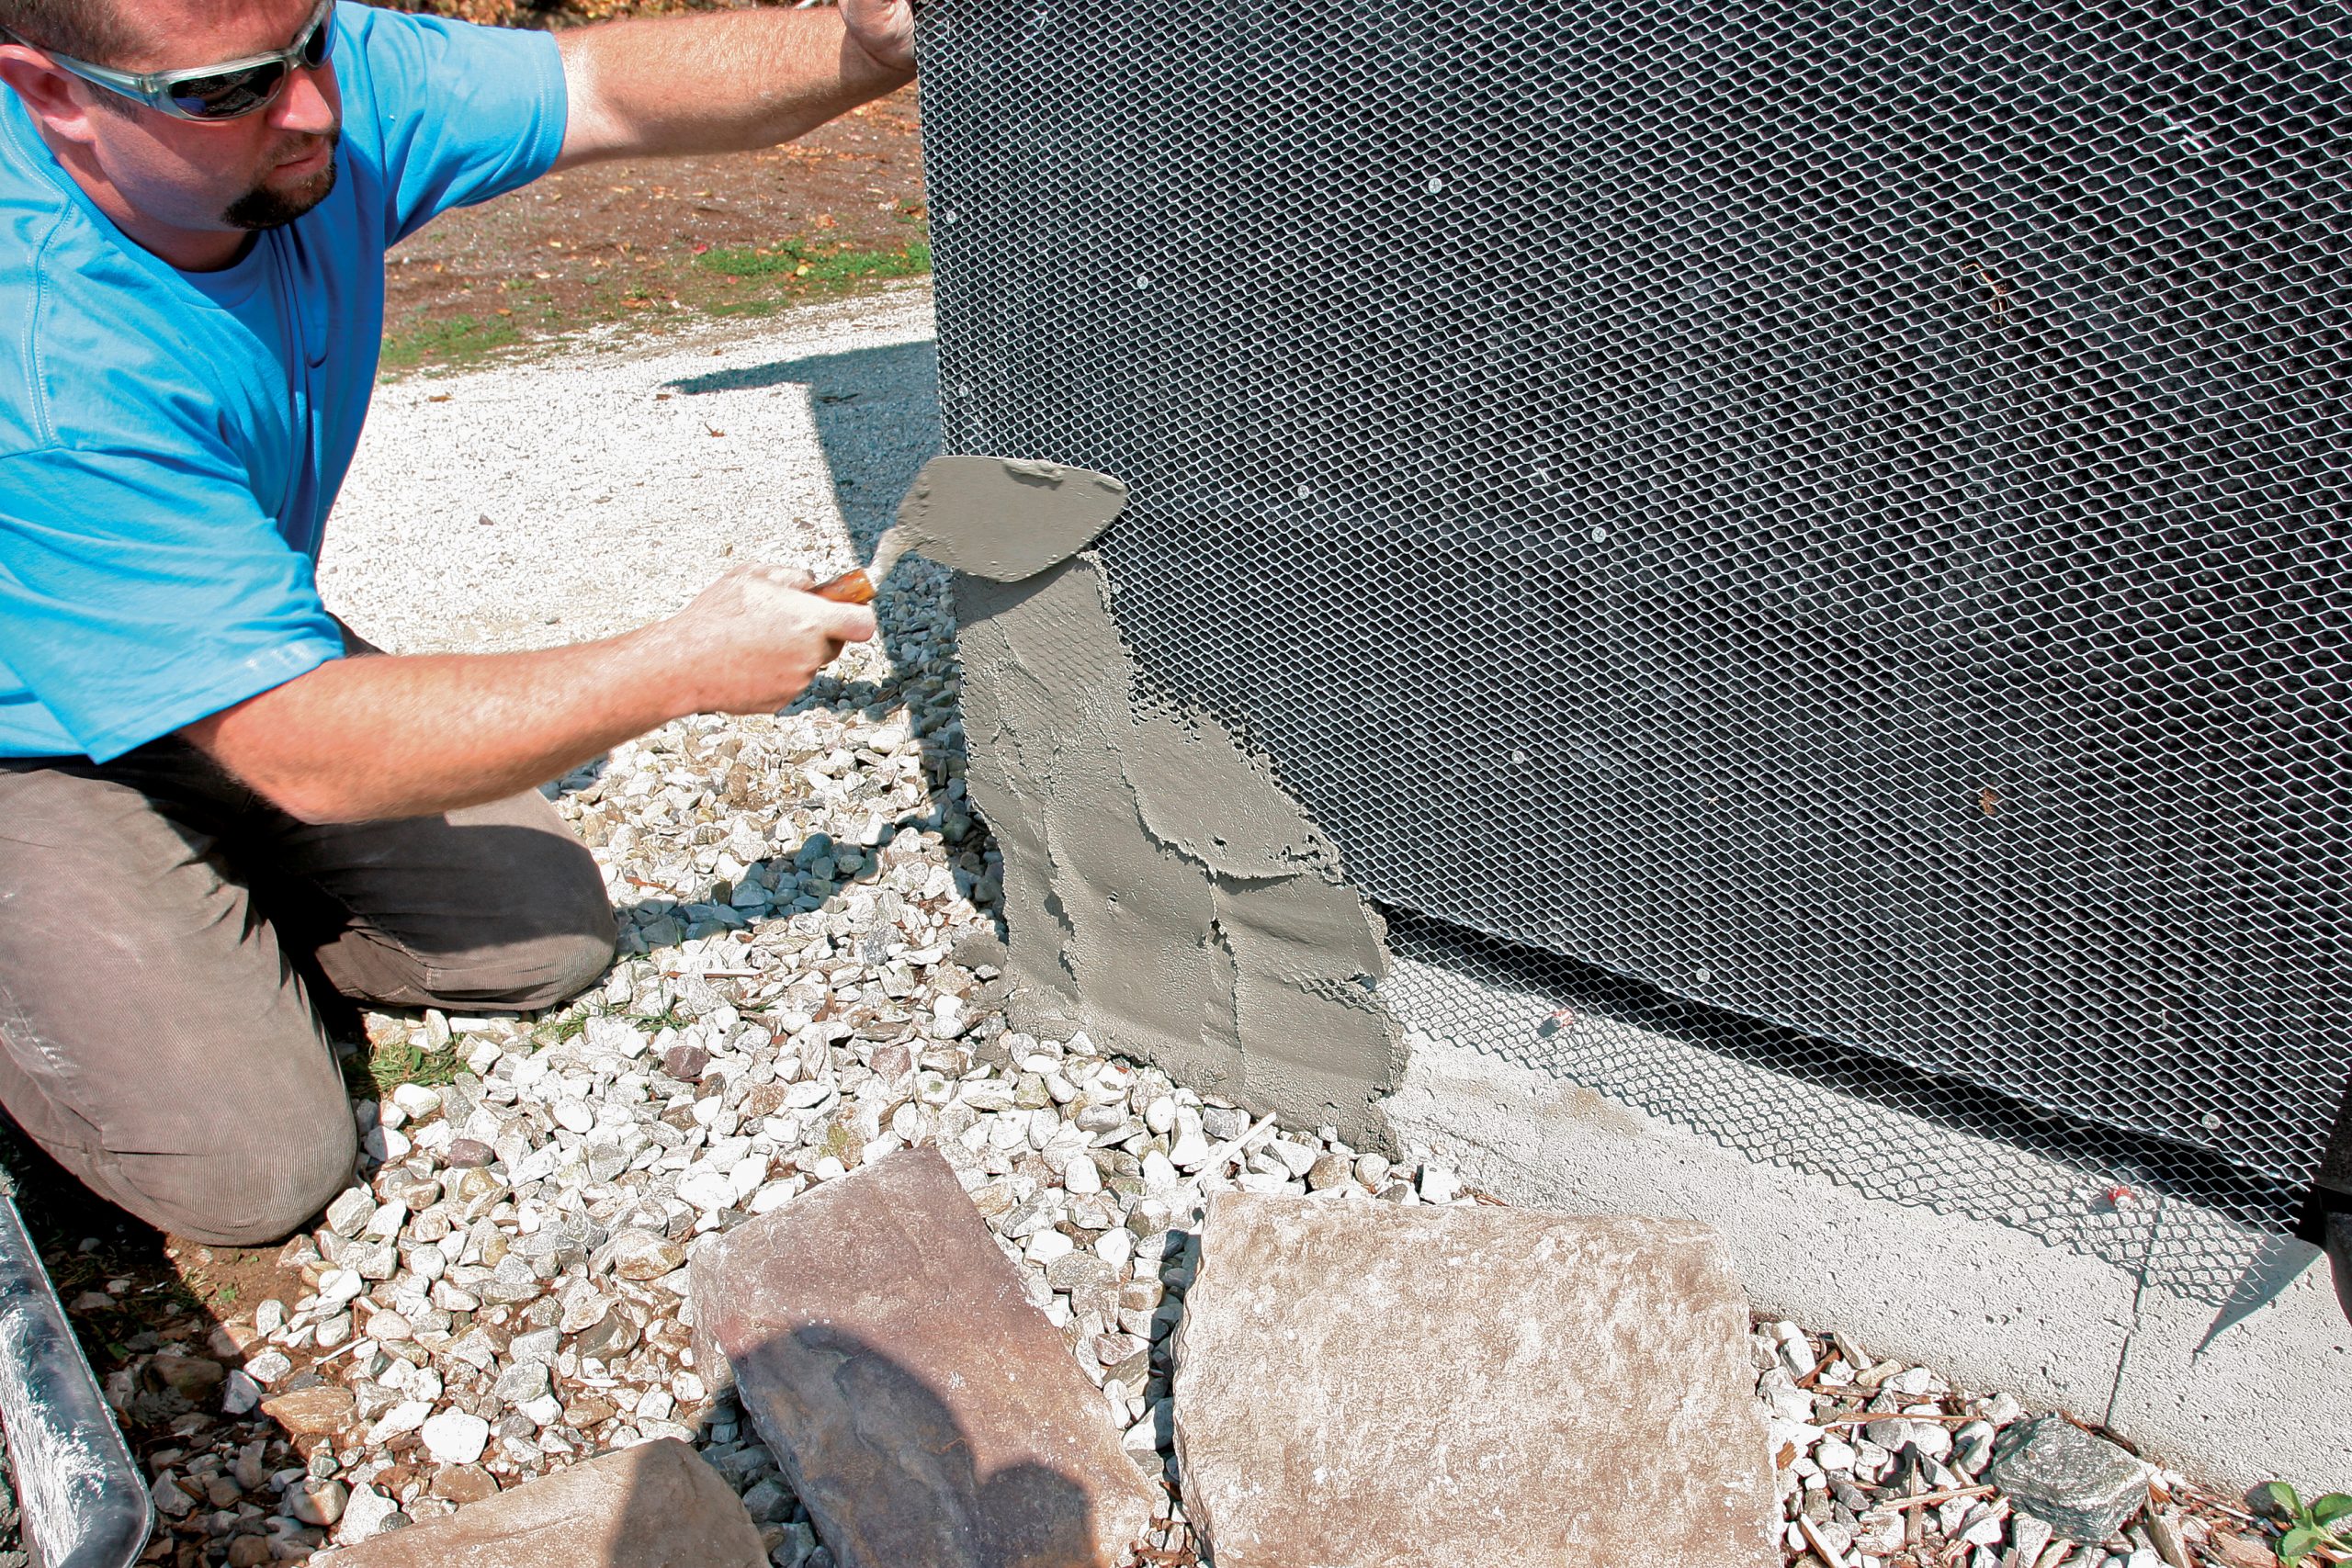
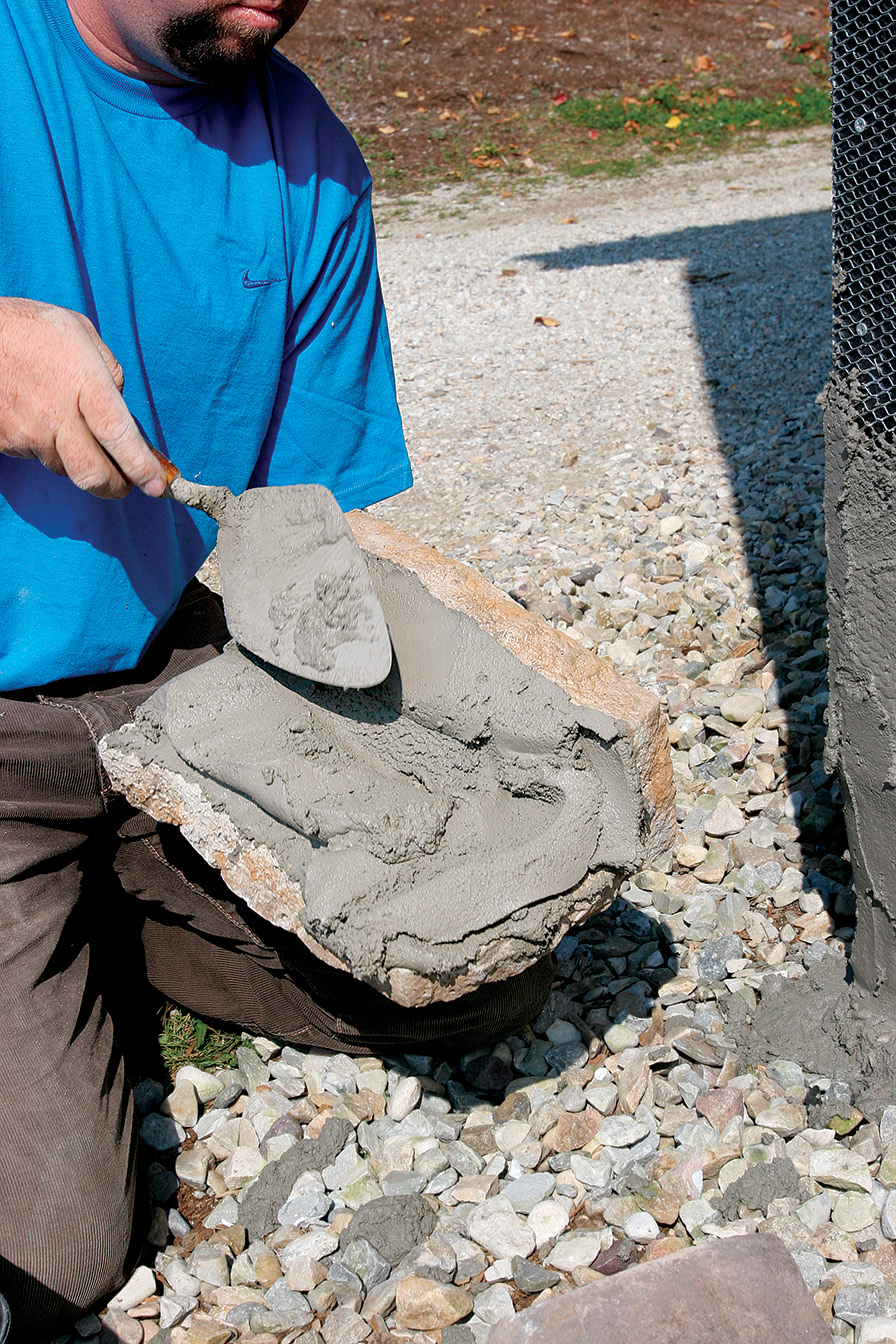
Get the mortar just right. I mix the ingredients until the mortar is smooth and fluffy. Mortar that is too wet will be weak and messy. Mortar that is too dry will be crumbly and won’t provide a strong bond. if the mortar comes out too wet, put it in a dry wheelbarrow, then into dry buckets before using it. this step allows some of the excess water to evaporate.


Tackle the transitions first

Whether you’re working with manufactured stone or the real thing, the most-challenging parts of a stone-veneer job are the outside corners, the stonework around windows and doors, and the other transition areas. The good news is that stone manufacturers have resolved just about all these issues by casting special parts such as sills and headers.

These transition areas are the first parts of a job to complete. along an exterior wall, I typically finish the first 2 ft. to 3 ft. of an outside corner, then work my way toward the center of the wall. The same goes for a doorway, a window, or an inside corner. Where man-made stone meets another material—such as wood, stucco, or a window frame—the typical detail calls for caulk rather than mortar to bridge the gap.

Make the mortar smooth and fluffy

When it comes to mixing mortar, it’s all about consistency. Adding a cupful of this and a shovelful of that can lead to color problems. I mix together one 70-lb. bag of type-n or type-S mortar mix, three 5-gal. buckets of mason’s sand, and approximately 31⁄2 gal. to 4 gal. of water in each batch. If you want to color the mortar, now is the time to add pigment.

To ensure that the mud doesn’t dry too quickly, I often slake it. In other words, after mixing, I let the mortar stand for roughly five minutes so that the sand in the mixture can absorb some of the water. Then I add a bit more water before use.


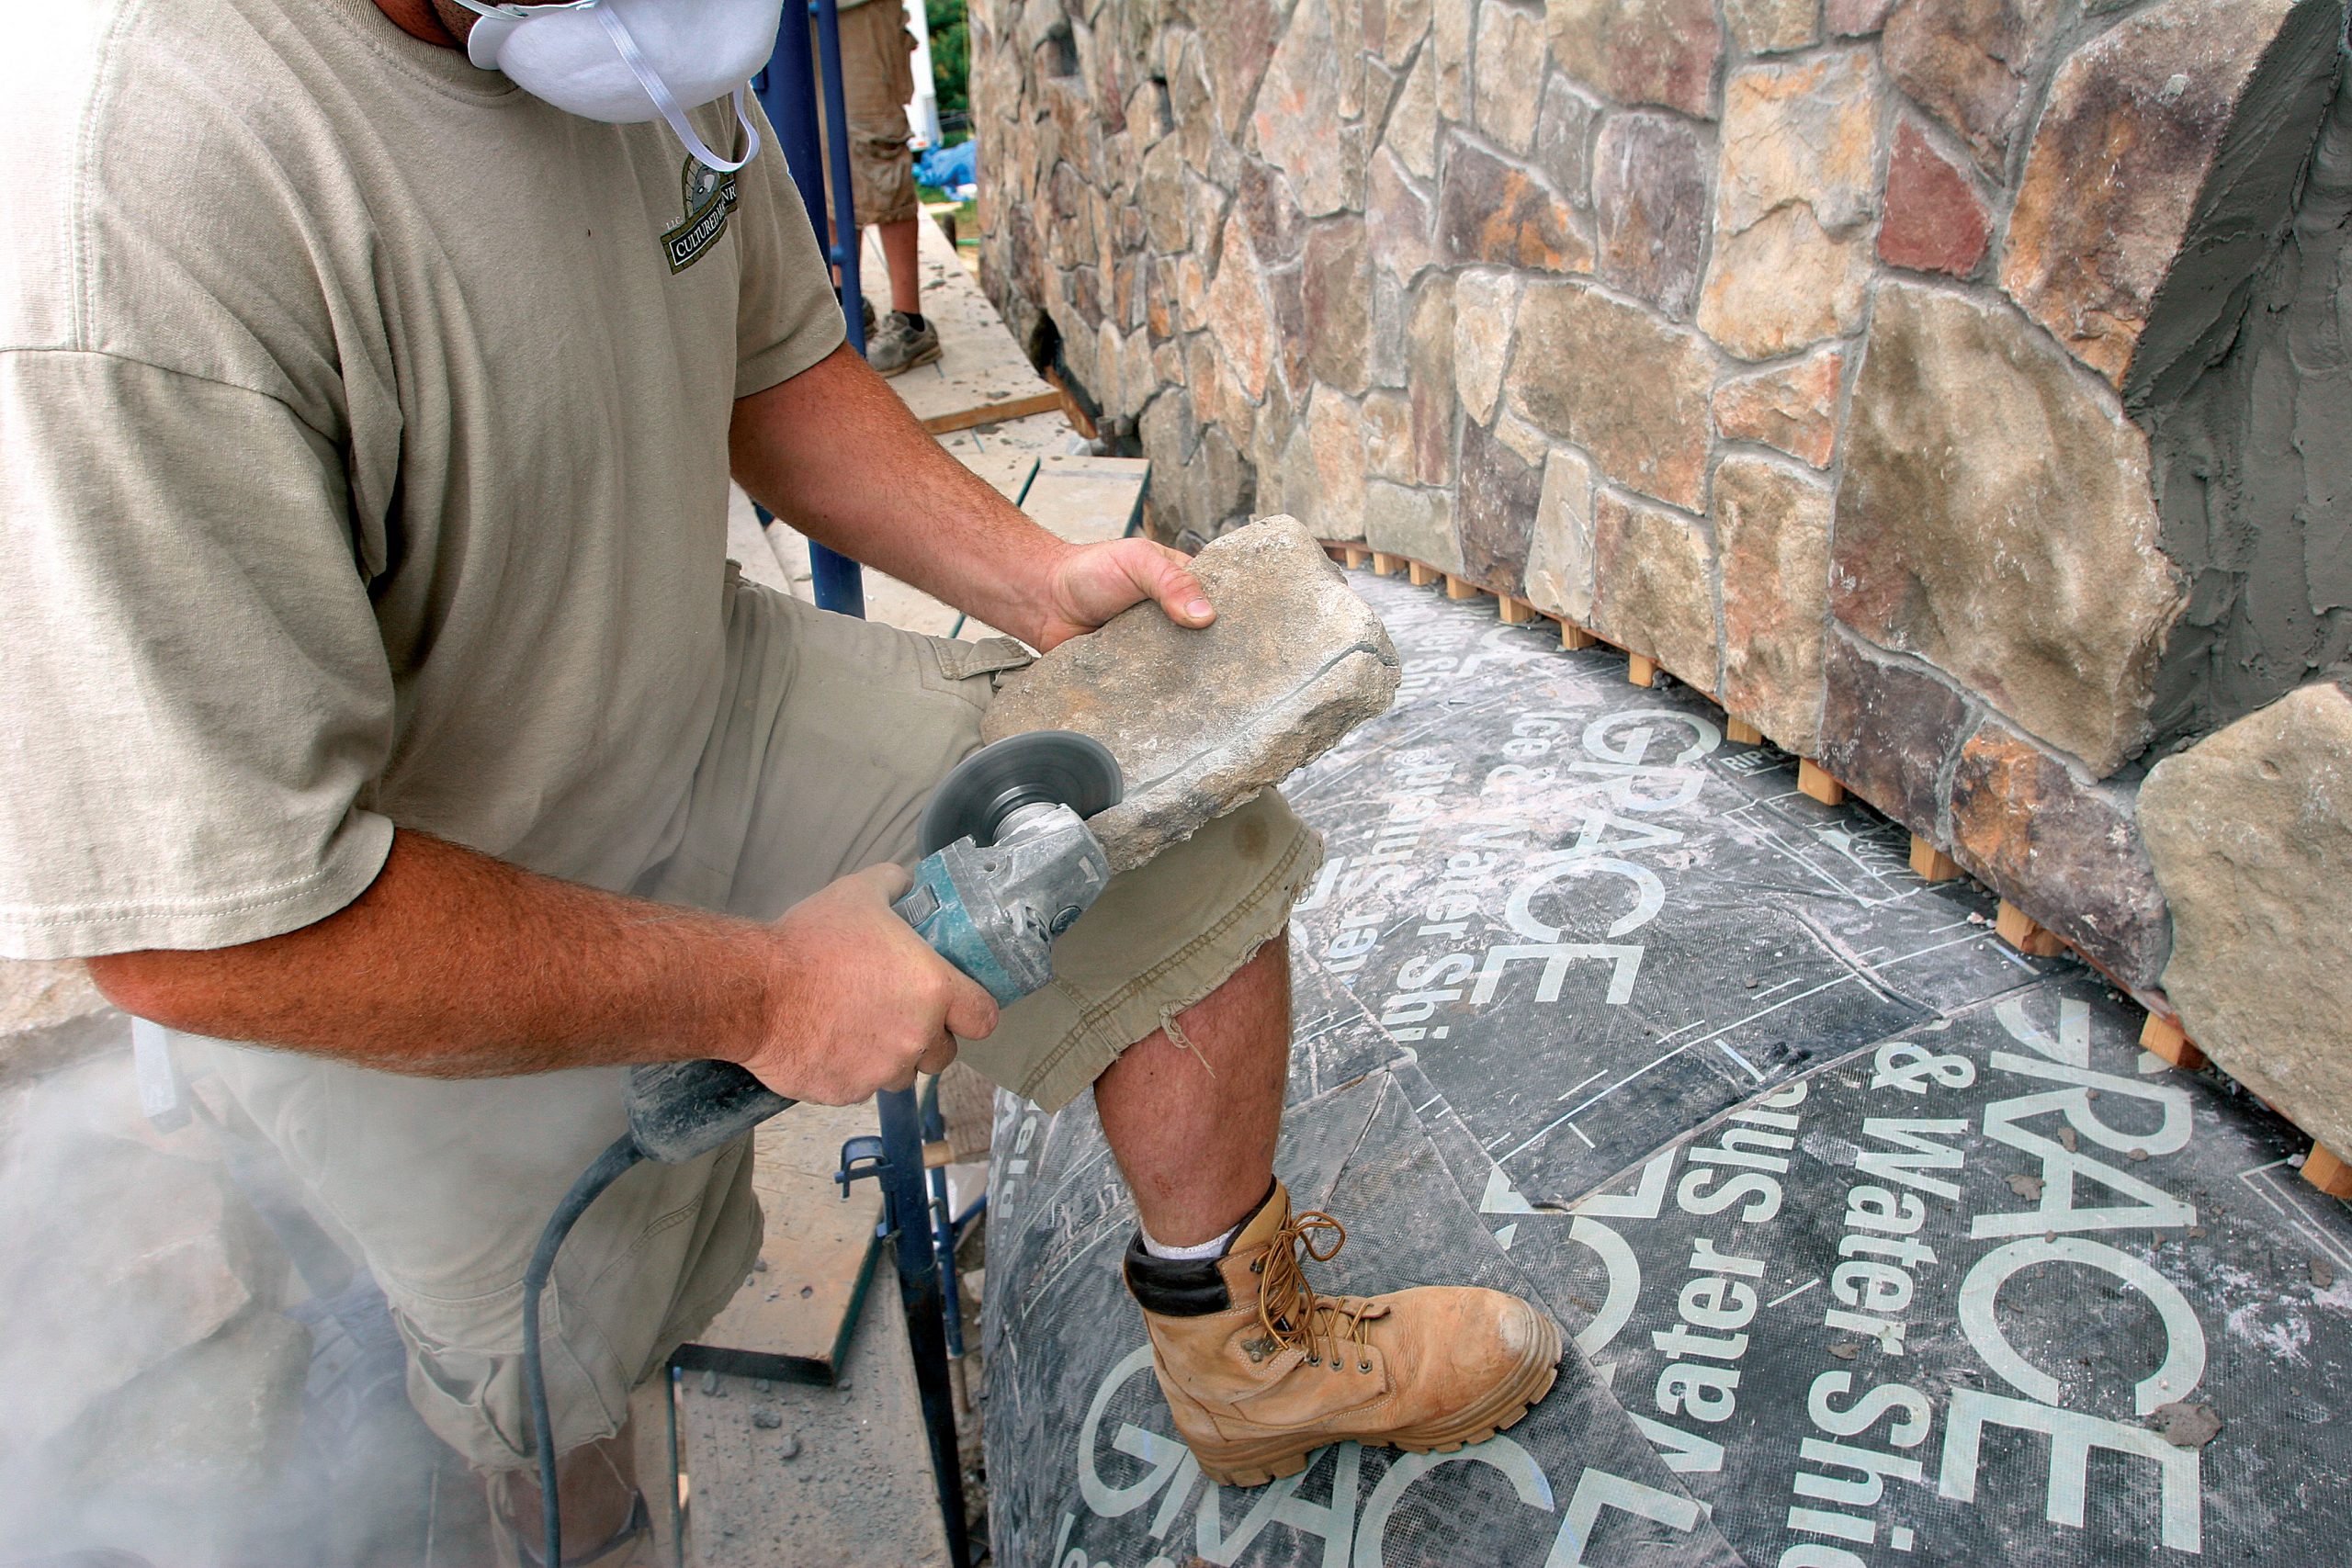
Make the cuts look natural

If I’m installing manufactured stone with visible mortar joints, i like to dry-fit each piece on the wall first. if a piece does not rest neatly against adjoining stones, it needs to be manipulated with a brick hammer, an angle grinder, or both. These tools have a learning curve, so practice on some scraps.

handle small corners of the manufactured stone with a brick hammer
Small corners are best handled with a brick hammer. After marking the area to be removed, use the head of a square-faced brick hammer to break off the bulky back side of the rock at a 45° angle; then use the chisel side of the hammer to pare the stone to the line. Although this technique doesn’t always yield a precise result, the brick hammer is an effective tool, and the resulting broken edges tend to look natural. The chisel side of a brick hammer can dull after lots of use, so I occasionally like to sharpen the point with my angle-grinder blade.

grinder blades
Steer clear of segmented blades. Selecting the right grinder blade is important, and they are not all the same. Segmented blades (2) aren’t great for cut-ting man-made stone because they tend to bounce around and flake the face of the stone. A turbo blade (1) is more precise and has less kickback. Prices start around $15.

feathering the edges of manufactured stone with an angle grinder
Feather the edges. Angle grinders leave a nice, straight cut, but when your goal is a natural look, a straight cut looks out of place. Finish up by feathering the blade of the grinder in and out until the edges of the fresh cut look wavy and more natural.

Leave the stone alone

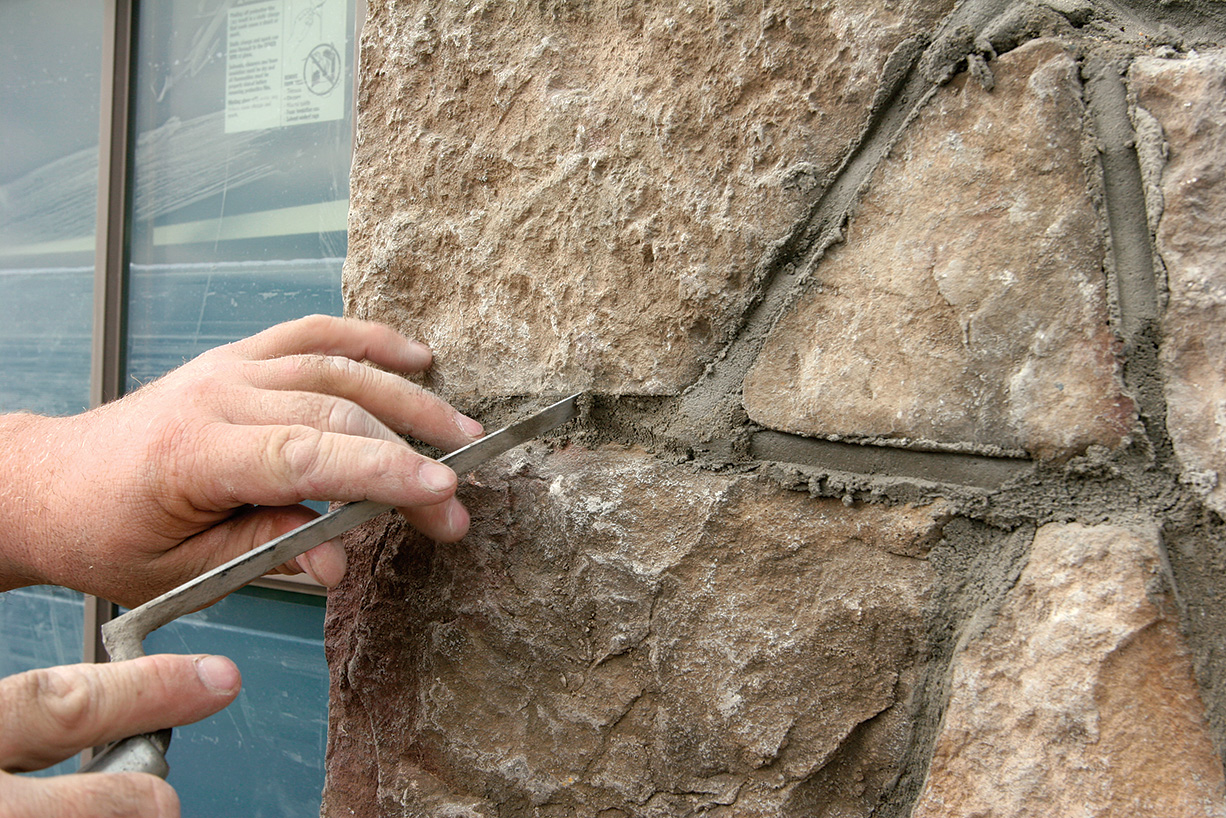
Once the stone is in place on the wall, I grab any oversize globs of wet mortar that could fall off and stain the surrounding stones and use a tuck pointer to pack the joints tightly. Then I leave it alone. If you play with the mortar too much before it has set up, it smears and stains the stones. If you do smear mortar on any stones, you need to wipe them immediately with a damp sponge and some clean water.

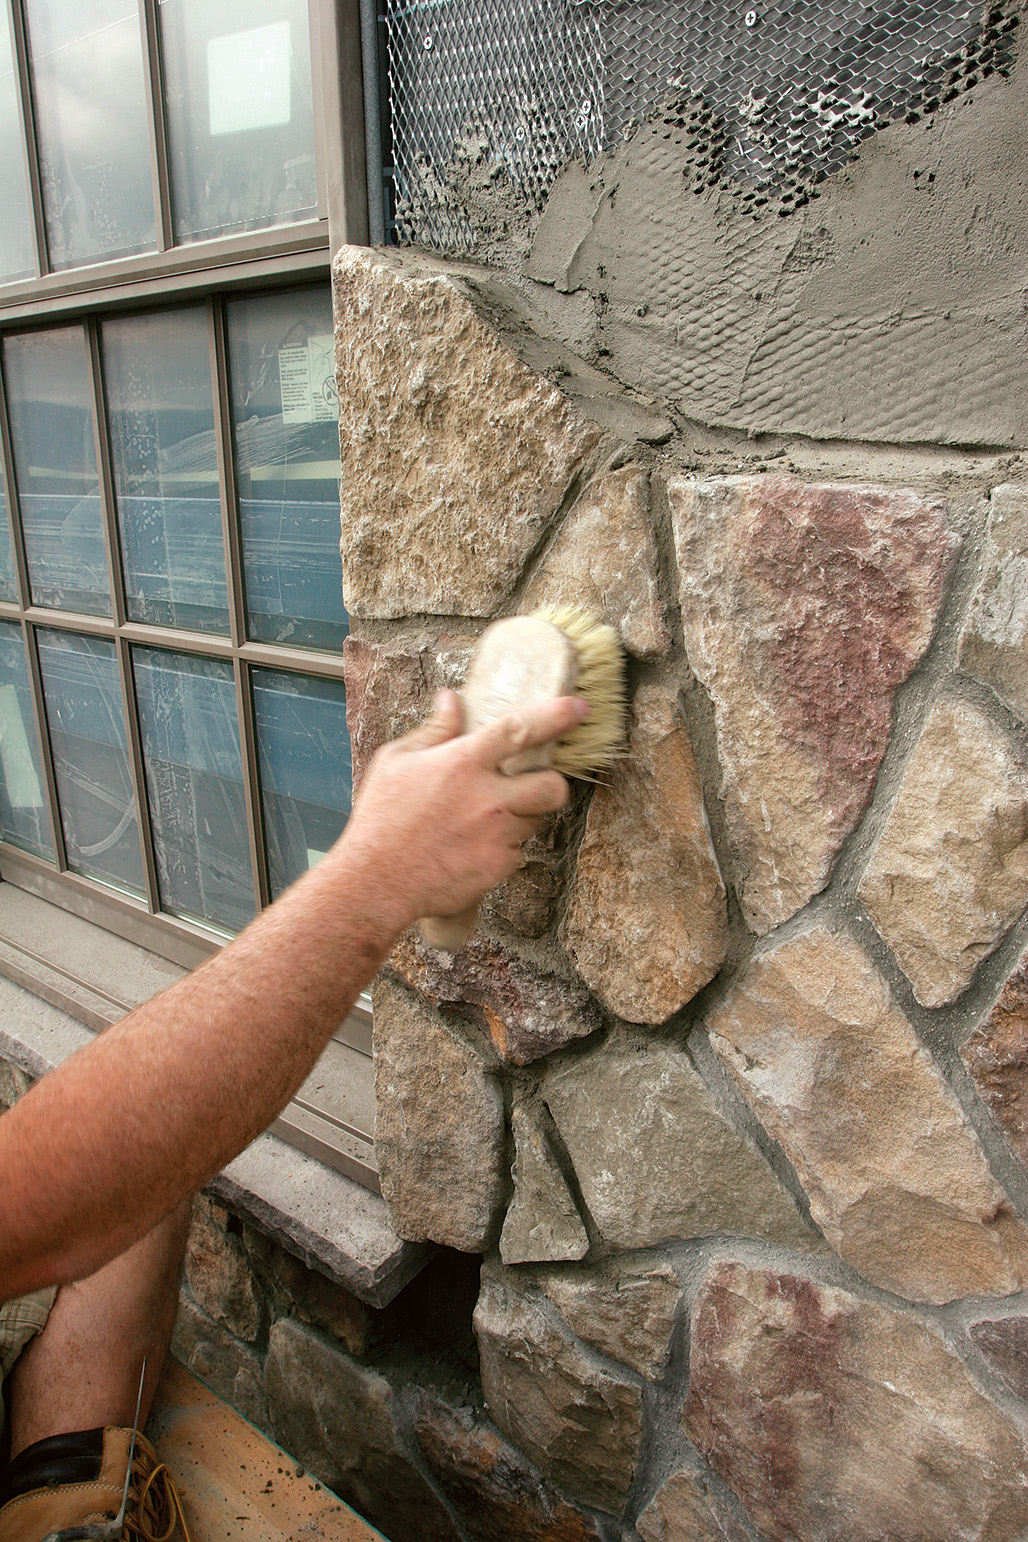
After the mortar has had a little time to set up properly, I use a tuck pointer to scrape off all the loose mortar. When I like the look of the joints, I brush over them lightly with a stiff-bristle brush to create a uniform texture. If the installation work spans more than a single day, I leave the mortar out of the joints on the last stones I set before quitting time, then fill the gaps between stones using a grout bag at the start of the following day.


You’re not done until the mortar is cured

Mortar joints should be cleaned up throughout the day so that they look neat and consistent. If you tool the joints while the mortar is still wet, though, it will smear and dry too shiny and smooth. If you don’t tool them often enough on a hot day, the mortar will set up as is. The amount of time between application and curing, and the frequency of scraping and brushing, depend on sunlight, temperature, the consistency of the mortar, and the substrate you are using.

If it’s between 40°f and 60°f, wait about four hours before scraping and brushing. if it’s between 60°f and 70°f, scrape and brush three times a day; between 70°f and 80°f, four times a day; anything 90°f and above, check every hour, especially if the work is in full sunlight.

Remember, if the last stones you set aren’t ready to be tooled by the end of the day, scrape all the mortar from the joints, and fill them in the following day using a grout bag.

tuck-point for consistent joints
Tuck-point for a consistent joint. Once the joints have set up a bit, use a 3⁄8-in. tuck pointer to scrape off any bits of mortar, and rake the joints to a consistent finish. If you need to add mortar to the joint, do so now, using the tuck pointer to pack it in place.

finish with a stiff bristle brush
Finish with a stiff-bristle brush. After raking the joints, brush both the surface of the stones and the mortar with a stiff-bristle brush. Never use a wet brush or a wire brush on man-made stone.

For more photos, illustrations, and details, click the View PDF button below:


View PDF
Previous: Take the Fear out of Brick Veneer Next: How To Install Stone Veneer over a Concrete Wall

Guide

Siding & Exterior Trim

Chapter

Installing Siding

Sign up for eletters today and get the latest how-to from Fine Homebuilding, plus special offers.

Signing you up...

This site is protected by reCAPTCHA and the Google Privacy Policy and Terms of Service apply.
See all newsletters
See all newsletters

View Comments

  1. ariana_stewart | Aug 20, 2024 06:55am | #1

    I've recently explored World of Stones' website and was highly impressed with their range of Natural Paving Stone products. They offer an incredible selection that enhances any outdoor space with both durability and aesthetic appeal. If you're looking for top-quality natural stone solutions, I highly recommend checking them out! Their products not only meet but exceed expectations in terms of both design and functionality. Visit World of Stones to discover more about their fantastic offerings. https://worldofstones.com/

Log in or create an account to post a comment.

Sign up Log in

Become a member and get full access to FineHomebuilding.com

Siding & Exterior Trim

Siding & Exterior Trim

Trusted, comprehensive guidance from the pros for choosing, installing, and repairing siding and exterior trim

View Project Guide

View All Project Guides »

Become a member and get unlimited site access, including the Siding & Exterior Trim Project Guide.

Start Free Trial

Choosing Siding
  • Materials
  • Design Options
Installing Siding
  • Siding Basics
  • Lap Siding
  • Shingle Siding
  • Board & Batten
  • Fiber Cement and Composite Siding
  • Vinyl Siding
  • Masonry Claddings
Choosing Exterior Trim
  • Trim Materials
  • Trim Design
Installing Exterior Trim
  • Trim Basics
  • Roof Eaves Trim
  • Corner Boards
  • Corbels & Brackets
  • Window & Door Trim
Repairing Siding & Trim
  • Trim Repairs
  • Siding Repairs

Fine Home Building

Newsletter Sign-up

  • Fine Homebuilding

    Home building tips, offers, and expert advice in your inbox.

  • Green Building Advisor

    Building science and energy efficiency advice, plus special offers, in your inbox.

  • Old House Journal

    Repair, renovation, and restoration tips, plus special offers, in your inbox.

Signing you up...

This site is protected by reCAPTCHA and the Google Privacy Policy and Terms of Service apply.
See all newsletters

Follow

  • Fine Homebuilding

    Dig into cutting-edge approaches and decades of proven solutions with total access to our experts and tradespeople.

    Start Free Trial Now
    • Facebook
    • Instagram
    • X
    • LinkedIn
  • GBA Prime

    Get instant access to the latest developments in green building, research, and reports from the field.

    Start Free Trial Now
    • Facebook
    • YouTube
  • Old House Journal

    Learn how to restore, repair, update, and decorate your home.

    Subscribe Now
    • Facebook
    • Instagram
    • X

Membership & Magazine

  • Online Archive
  • Start Free Trial
  • Magazine Subscription
  • Magazine Renewal
  • Gift a Subscription
  • Customer Support
  • Privacy Preferences
  • About
  • Contact
  • Advertise
  • Careers
  • Terms of Use
  • Site Map
  • Do not sell or share my information
  • Privacy Policy
  • Accessibility
  • California Privacy Rights

© 2025 Active Interest Media. All rights reserved.

Fine Homebuilding receives a commission for items purchased through links on this site, including Amazon Associates and other affiliate advertising programs.

  • Home Group
  • Antique Trader
  • Arts & Crafts Homes
  • Bank Note Reporter
  • Cabin Life
  • Cuisine at Home
  • Fine Gardening
  • Fine Woodworking
  • Green Building Advisor
  • Garden Gate
  • Horticulture
  • Keep Craft Alive
  • Log Home Living
  • Military Trader/Vehicles
  • Numismatic News
  • Numismaster
  • Old Cars Weekly
  • Old House Journal
  • Period Homes
  • Popular Woodworking
  • Script
  • ShopNotes
  • Sports Collectors Digest
  • Threads
  • Timber Home Living
  • Traditional Building
  • Woodsmith
  • World Coin News
  • Writer's Digest
Active Interest Media logo
X
X
This is a dialog window which overlays the main content of the page. The modal window is a 'site map' of the most critical areas of the site. Pressing the Escape (ESC) button will close the modal and bring you back to where you were on the page.

Main Menu

  • How-To
  • Design
  • Tools & Materials
  • Video
  • Blogs
  • Forum
  • Project Guides
  • Reader Projects
  • Magazine
  • Members
  • FHB House

Podcasts

  • FHB Podcast
  • ProTalk

Webinars

  • Upcoming and On-Demand

Podcasts

  • FHB Podcast
  • ProTalk

Webinars

  • Upcoming and On-Demand

Popular Topics

  • Kitchens
  • Business
  • Bedrooms
  • Roofs
  • Architecture and Design
  • Green Building
  • Decks
  • Framing
  • Safety
  • Remodeling
  • Bathrooms
  • Windows
  • Tilework
  • Ceilings
  • HVAC

Magazine

  • Current Issue
  • Past Issues
  • Magazine Index
  • Subscribe
  • Online Archive
  • Author Guidelines

All Access

  • Member Home
  • Start Free Trial
  • Gift Membership

Online Learning

  • Courses
  • Project Guides
  • Reader Projects
  • Podcast

More

  • FHB Ambassadors
  • FHB House
  • Customer Support

Account

  • Log In
  • Join

Newsletter

Get home building tips, offers, and expert advice in your inbox

Signing you up...

This site is protected by reCAPTCHA and the Google Privacy Policy and Terms of Service apply.
See all newsletters
See all newsletters

Follow

  • X
  • YouTube
  • instagram
  • facebook
  • pinterest
  • Tiktok

Join All Access

Become a member and get instant access to thousands of videos, how-tos, tool reviews, and design features.

Start Your Free Trial

Subscribe

FHB Magazine

Start your subscription today and save up to 81%

Subscribe

We hope you’ve enjoyed your free articles. To keep reading, become a member today.

Get complete site access to expert advice, how-to videos, Code Check, and more, plus the print magazine.

Start your FREE trial

Already a member? Log in

Privacy Policy Update

We use cookies, pixels, script and other tracking technologies to analyze and improve our service, to improve and personalize content, and for advertising to you. We also share information about your use of our site with third-party social media, advertising and analytics partners. You can view our Privacy Policy here and our Terms of Use here.

Cookies

Analytics

These cookies help us track site metrics to improve our sites and provide a better user experience.

Advertising/Social Media

These cookies are used to serve advertisements aligned with your interests.

Essential

These cookies are required to provide basic functions like page navigation and access to secure areas of the website.

Delete My Data

Delete all cookies and associated data