A Better Way to Tile a Big Floor
A high-tech membrane minimizes the chances for cracked tile or grout failure.
Synopsis: Tiling a big floor can be a big headache. If the floor below the tile moves, you may wind up with cracked grout lines or worse, cracked tile. Professional tile installer Tom Meehan starts with an uncoupling membrane made by Schluter Systems that allows the subfloor to move without affecting the tile. Tom also gives tips for laying out a big floor so that it looks best and minimizes waste. You’ll also learn how to install an expansion joint, another key to the success of a big tile floor.
There are buildings in Europe with tile floors that are in perfect shape after more than 1000 years. However, on this side of the pond, tile floors routinely fail after less than 10 years. What did the Europeans of the first millennium know about tile that we have yet to learn?
New material for an old system
The answer is that Europeans developed what is known as an uncoupling system. The system began with a bottom layer of mortar covered by a thin layer of sand. The tile then was set into another layer of mortar on top of the sand. As the building settled and shifted over the years, the sand separated the tile from the floor below, allowing the tile to float on top, unaffected by the building’s movement.
Without an uncoupling system, the tile floors of today move when the building moves. Results can include loose grout, loose tile, and in extreme cases, cracked tile as the floor surface under the tile moves and shifts, especially if the floor is big.
In the past, I’ve had pretty good luck by first making sure that the subfloor was thick enough, then applying felt paper, wire lath, and a layer of mortar before installing the tile. But that was a lot of extra work, extra materials, and extra thickness being added to the tile floor. Eventually, I started using a product from Schluter Systems (www.schluter.com), called Ditra, which applies ancient European concepts using some 21st-century materials.
Start with a sound floor
Adding a membrane under the tile may be a great way to lengthen the life of a tile installation, but the floor below has to be structurally sound. There are formulas for determining if a floor has too much deflection, but I’ve also learned to rely on feel. Too much give when I jump on the floor tells me that it probably needs strengthening.
Whenever possible, I check the framing below the floor to make sure the size and spacing of the joists are correct for the span of the floor. I’ve even been known to add extra support columns under bouncy floors.
The membrane goes down quickly
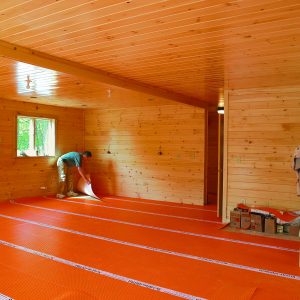
Before I begin installing tile, I roll out and cut pieces of membrane for the whole floor. It’s OK to use small pieces in areas such as thresholds to make the installation easier. If I’m putting down a heat mat for a radiant floor, I install it before the membrane. The membrane helps to distribute heat from the mat, and it protects the mat if a tile ever needs to be replaced.
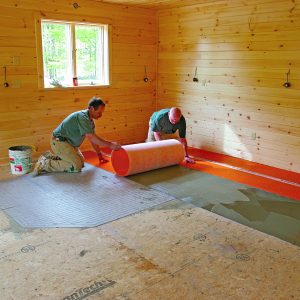
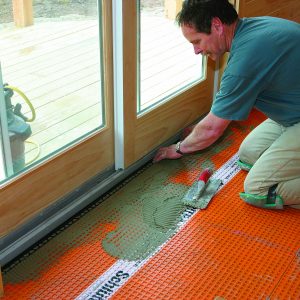
I snap chalklines for each course of tile before it’s installed to help guide me so that I don’t spread more thinset mortar than necessary. For an installation over a wood subfloor, I use a latex-modified thinset that bonds well to the fabric side of the membrane. I start with a skim coat of thinset, pushing it into the pores of the wood with the straight edge of the trowel. Right away, I spread a second layer of mortar with a 3⁄16-in. by 1⁄4-in. V-notched trowel.
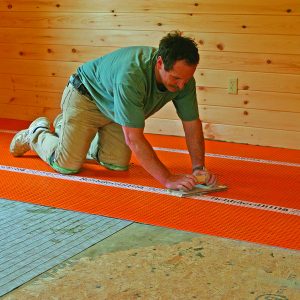
I keep the trowel lines going in one direction so that pockets or voids don’t form, which could prevent the membrane from bonding properly. Then I roll the membrane into the fresh mortar and push it out flat. Once the membrane is in position, I use either a 75-lb. linoleum roller or a wooden float to press it into the mortar and establish the bond (bottom photo). Push out any excess thinset that may make the floor uneven.
Spread out the membrane
Plan tile layout for best look and least waste
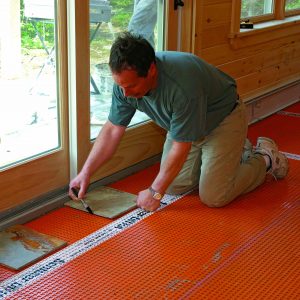
Once the first tile goes down, there’s no turning back, so I take as much time as I need to get the layout right. This floor tile is 12×12 Turkish slate. It varies slightly in size and thickness, and has an uneven cleft face.
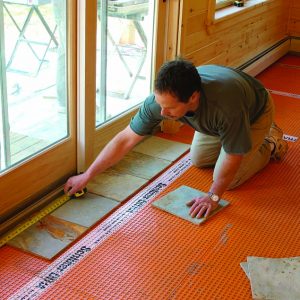
In this room, the focal point is the sliding door, so I began my layout there by measuring three courses from that wall and snap-ping a chalkline across the room. Next, I dry-fit a row of tiles in front of the door to see what cuts I’d end up with beside the slider and at the two sidewalls. I found that centering the tile on the middle of the door left 11-in. pieces on both sides of the room for minimal waste. Before lifting the tiles in front of the door, I marked the center tile’s edge.
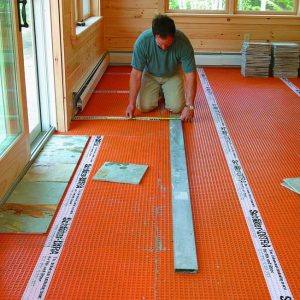
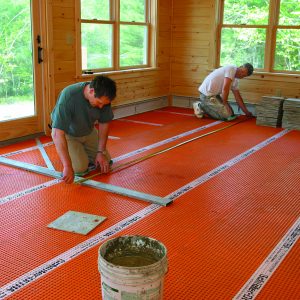
Once I have the line across the room and the line for the center course of tile, I project a perpendicular line down the middle of the room with a straightedge and a 3-4-5 A-Square (C.H. Hanson Tool Co.; www.asquaretools.com). Measuring off the sidewalls, I extend the centerline to the other end of the room and snap a chalkline. I confirm that the line is perpendicular to the first line between the sidewalls, and when I’m satisfied, I trace over the chalkline with a water-proof marker.
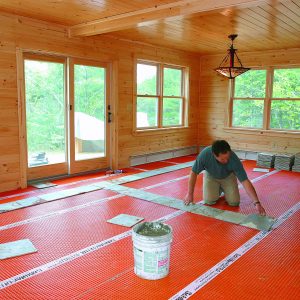
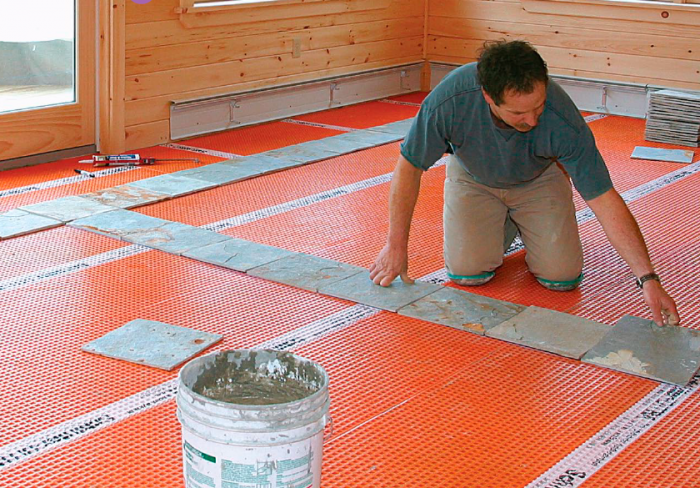
As a final check, I lay out one course of tile along both perpendicular lines without mortar. As I pick up the tile, I mark every three courses and snap parallel chalk-lines at each mark to keep the courses running straight and true.
Layout: Tiling starts with careful layout
Dry-fitting a couple of tile courses enables you to determine the best layout and mark up the floor with layout lines.
Tile locks into membrane
I install the tiles over the Ditra using a dry-set thinset mortar instead of latex-modified thinset. Dry-set, or nonmodified, mortar is easier to work with, is easier to clean up, and is about one-third the price of good latex-modified thinset mortar.
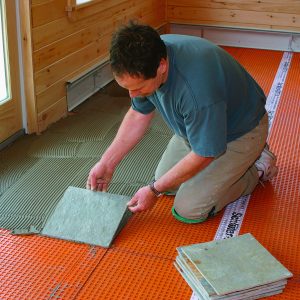
Because the slate is uneven and has voids in its surface, I spread the thinset with a coarse 3⁄8-in. square-notched trowel. Before I comb it with the notched side of the trowel, I push the thin–set with the straight edge of the trowel to key it into the recessed dovetailed edges of each square in the membrane. Then I go back over the thinset with the notched side of the trowel, again keeping the lines moving in just one direction.
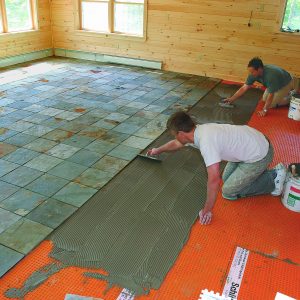
The first tile determines the position of every tile in the floor, so I set it at the point where the two layout lines intersect. As I work down the floor, I apply thinset to an area in which I can set tile within about 15 minutes, usually about 30 sq. ft. at a time. For each set of courses, I install the first tile at the intersection of the layout lines. As each tile goes in, I apply a little downward pressure and slide the tile into place, which helps to lock the tile into the layer of thinset.
Because these tiles vary in thickness, I butter the backs of thinner tiles with a little thin-set to bring them to the height of the other tiles. If a tile is extremely irregular in either shape or thickness, I put it aside for cuts or to be used in a closet.
As with most stone tile, each piece varies in shade and color. To keep color variations consistent across the floor, I work with tile from several boxes at a time. If a tile happens to have a color that is too extreme, I set it aside.
Setting Tile: Expansion joints let a big floor flex
Expansion joints, recommended every 20 ft. to 24 ft. or wherever tile butts against a wall surface, such as in front of a sliding door, allow the tile to expand and contract with changes in temperature.
Expansion joints give tile extra breathing room
In large floors, expansion joints should be installed every 20 ft. to 24 ft. Without expansion joints, there’s an increased risk of cracks as the tile expands and contracts due to temperature changes.
The expansion joints I use (also made by the Schlüter Company) are available L-shaped for along walls, or T-shaped for between tile courses. A section of L-shaped expansion joint was needed in front of the sliding doors, where it also helps to prevent the tile and grout from cracking as the door is opened and closed repeatedly.
Because this room is just over 24 ft. long, I put a T-shaped expansion joint between two courses roughly in the middle of the room. Once I determine where the joint will be, I press it into the thinset, measuring to keep the joint at the right dis-tance from the previous course. I trowel a little thinset over the flange before setting the tile.
I like to lay tile before base-board goes in, so I leave a 1⁄4-in. expansion gap along the walls for seasonal tile movement. The baseboard will hide the gap when it’s installed. If the base is in before I tile, I can put L-shaped expansion joints around the perimeter of the floor.
Seal tile before you grout
After all the tile is in, but before it’s grouted, I give the floor a thorough cleaning. I not only wash the surface of the tile, but I also remove any thinset that is too high in the joints between the tiles. The thinset should be at least 1⁄8 in. below the surface of the tile.
After the tile is clean, I wipe the first of two coats of sealer onto the tile with a rag to avoid getting sealer into joints. I prefer Miracle Sealants Porous Plus (800-350-1901; www.miraclesealants.com). Because slate is porous and has an irregular surface, the sealer makes cleaning off grout easier.
To spread the grout and push it deep into the joints, I begin with the grout trowel at a 30° angle. Next, I scrape the residue off the tiles with the trowel at a 60° angle. Finally, I remove excess grout by dragging the trowel across the tiles and joints at a 45° angle to avoid pulling the grout out of the joints. Because of the uneven edges of the slate tile, I use the palm of my hand to bevel the grout between tiles as I spread it.
After the grout has set up, I wipe down the tile with terrycloth to remove grout crumbs. Then I clean the tile with cool, clean water and a sponge. Cleaning requires extra diligence to remove all the grout from the uneven surface of the slate. Finally, after I’ve finished cleaning the floor, I let it sit for 24 to 48 hours, then apply a second coat of sealer with a sponge. On a large floor, I usually use a pump sprayer on the final coat.
Grouting: Seal, grout, then seal again
Sealing stone tile before grouting helps to keep the grout from sticking and makes cleanup easier.
- Applying the first coat of sealer with a rag keeps it from going into open grout joints.
- The author pushes a large volume of grout to make sure it is packed deep into all the joints.
- To bridge the uneven edges between the stone tiles, a gloved palm shapes the grout into a bevel.
- The second coat of sealer seals the grout and adds extra protection to the stone tile.
This article appears in Fine Homebuilding issue #173 titled “A New Way to Tile a Big Floor”.
For more photos, drawings, and details, click the View PDF button below:

