FHB Logo Facebook LinkedIn Email Pinterest Twitter X Instagram Tiktok YouTube Plus Icon Close Icon Navigation Search Icon Navigation Search Icon Arrow Down Icon Video Guide Icon Article Guide Icon Modal Close Icon Guide Search Icon Skip to content
Subscribe
Log In
  • How-To
  • Design
  • Tools & Materials
  • Restoration
  • Videos
  • Blogs
  • Forum
  • Magazine
  • Members
  • FHB House
  • Podcast
Log In

Fine Homebuilding Project Guides

Tiling

Guide Home
  • Selecting Tile
  • Tools & Techniques
  • Installation Materials
  • Preparation
  • Tiling Floors
  • Tiling Walls & Backsplashes
  • Tiling Showers
  • Grouting, Sealing & Caulking
  • Maintenance & Repair
How-To

Backsplash Repair and Prep

Patch any holes and flatten the wall before installing a tile backsplash.

By Robin Nicholas, Michael Schweit
  • X
  • facebook
  • linkedin
  • pinterest
  • email
  • add to favorites Log in or Sign up to save your favorite articles

Careful repair of holes and smoothing of bumps and valleys are important, because a flat surface will affect both the ease of installation and the final look of your tile. The smaller the tile you plan to install, the more defects show (every bump shows with small glass mosaic tiles). If you install larger rustic (irregular) tiles, wall irregularities are less noticeable.

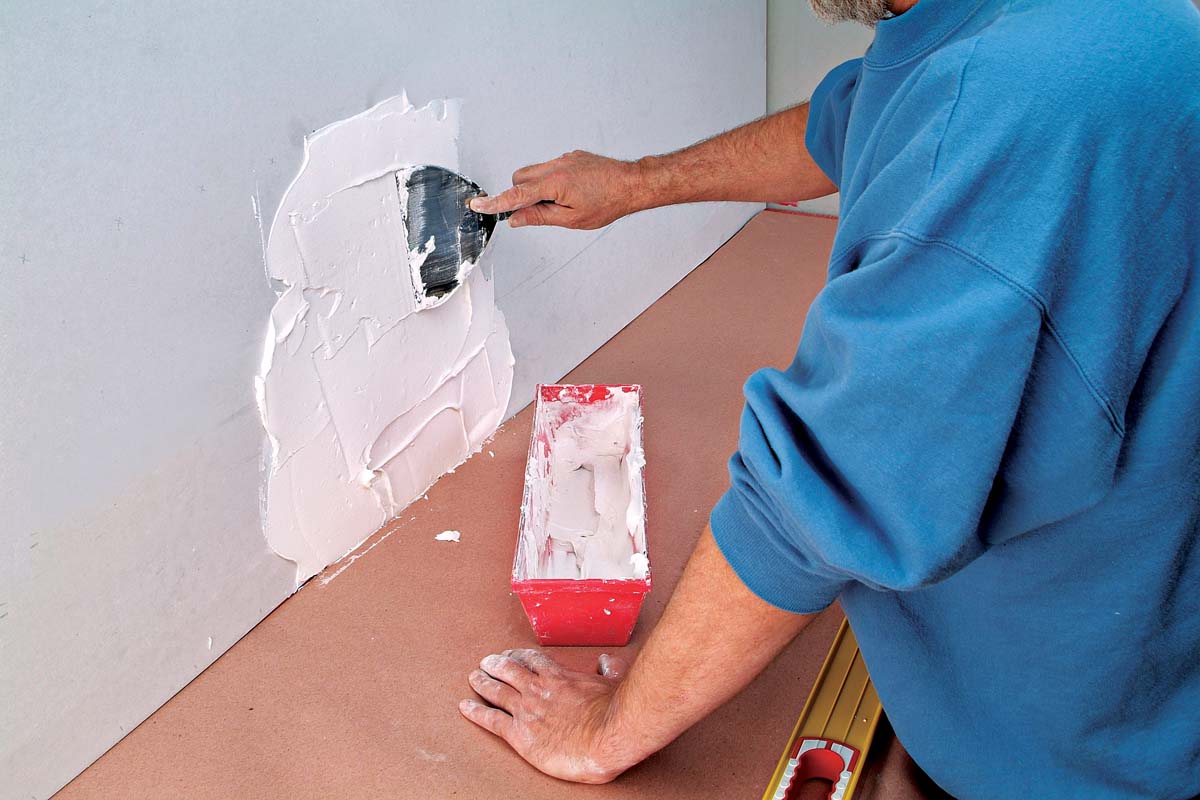
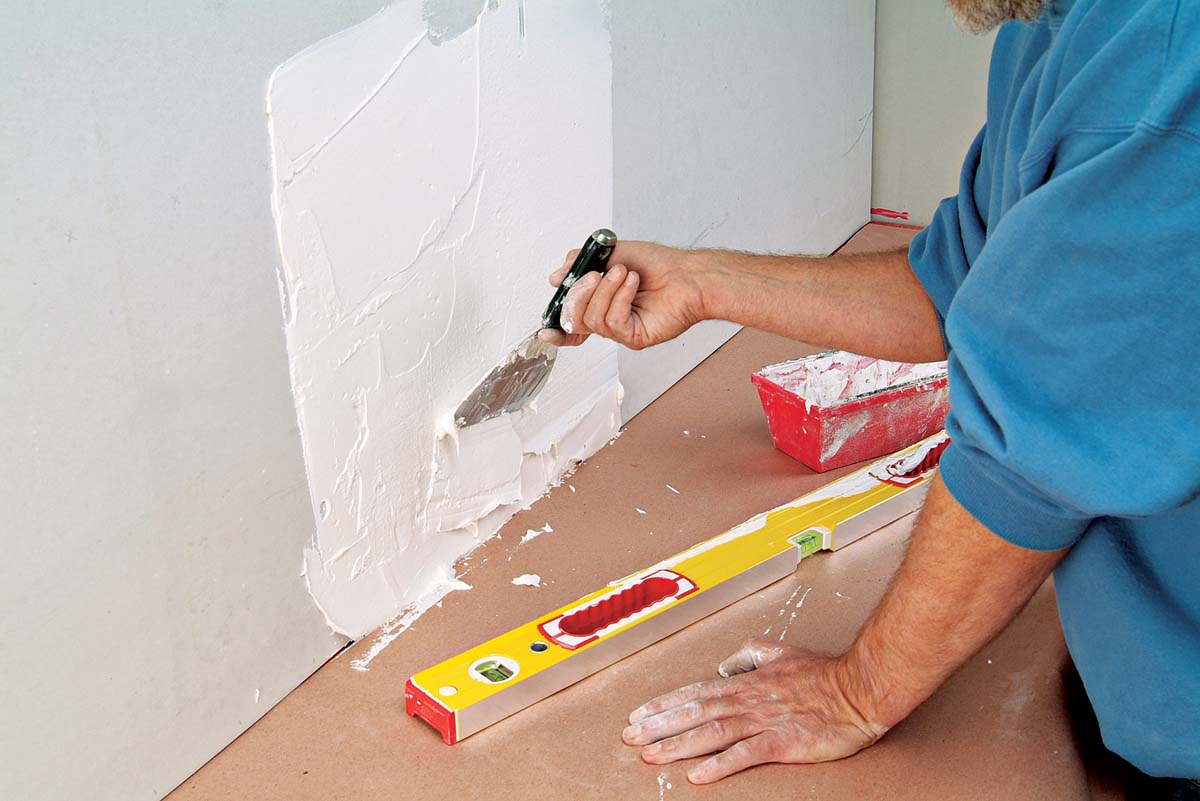
To repair holes in your backsplash wall, use a fast-setting drywall compound or plaster repair mortar. Mix the powder with water (per the directions on the bag) and spread it with a putty knife 1. Fill each hole, then lightly scrape it flat with the putty knife, switching to a wider knife if necessary 2. If you find areas of drywall that flex excessively or are so soft that you can put your thumb through them, those sections will need to be replaced.

Cut out the bad section along the studs on both sides of the repair area 3, then across the top and bottom. Remove the defective piece 4 and clean up the edges of the hole alongside the studs. Measure the hole and cut a new piece of drywall to fit it 5. If the new section is thinner than the existing wall thickness, add shim stock to the studs to make the patch flush with the wall. Screw the patch in place with drywall screws and 6‚ tape the joints around the patch with drywall tape, to add additional strength 7.

Patch holes throughout the wall with a quick-drying compound.
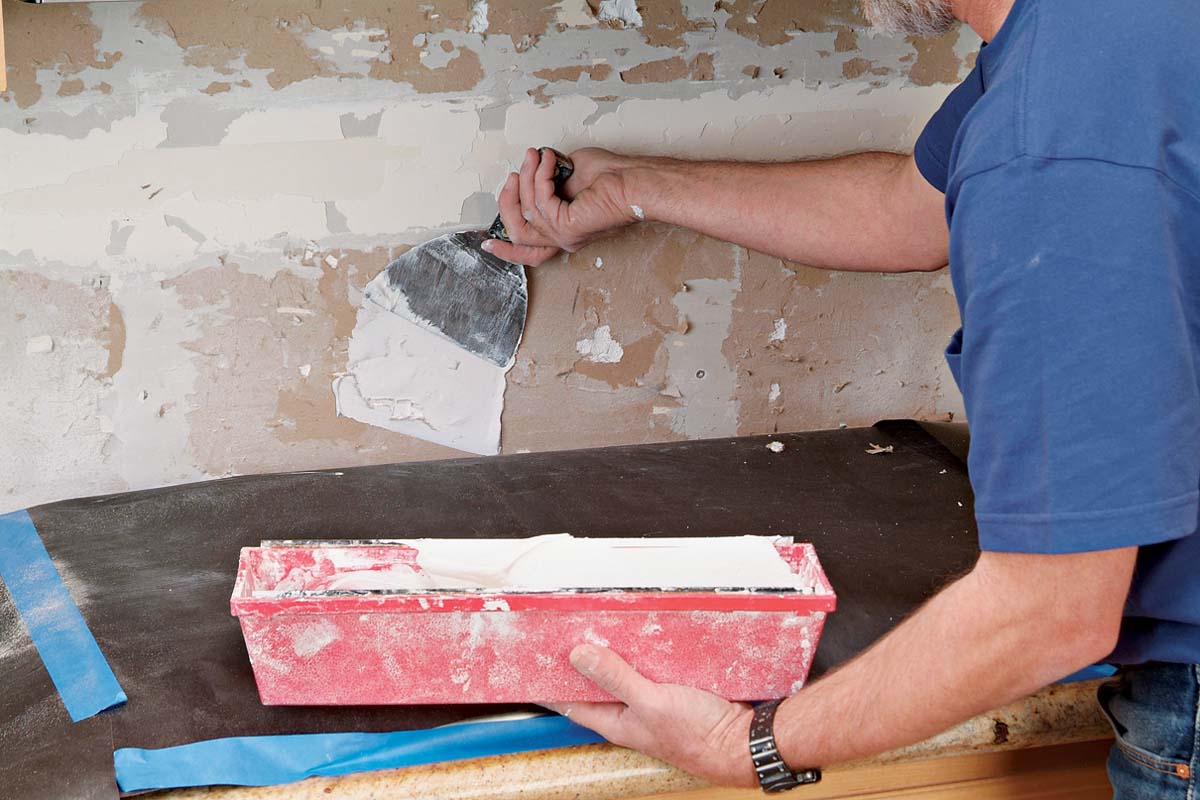
1. Patch holes throughout the wall with a quick-drying compound.
Smooth large areas of applied compound with a broad knife.
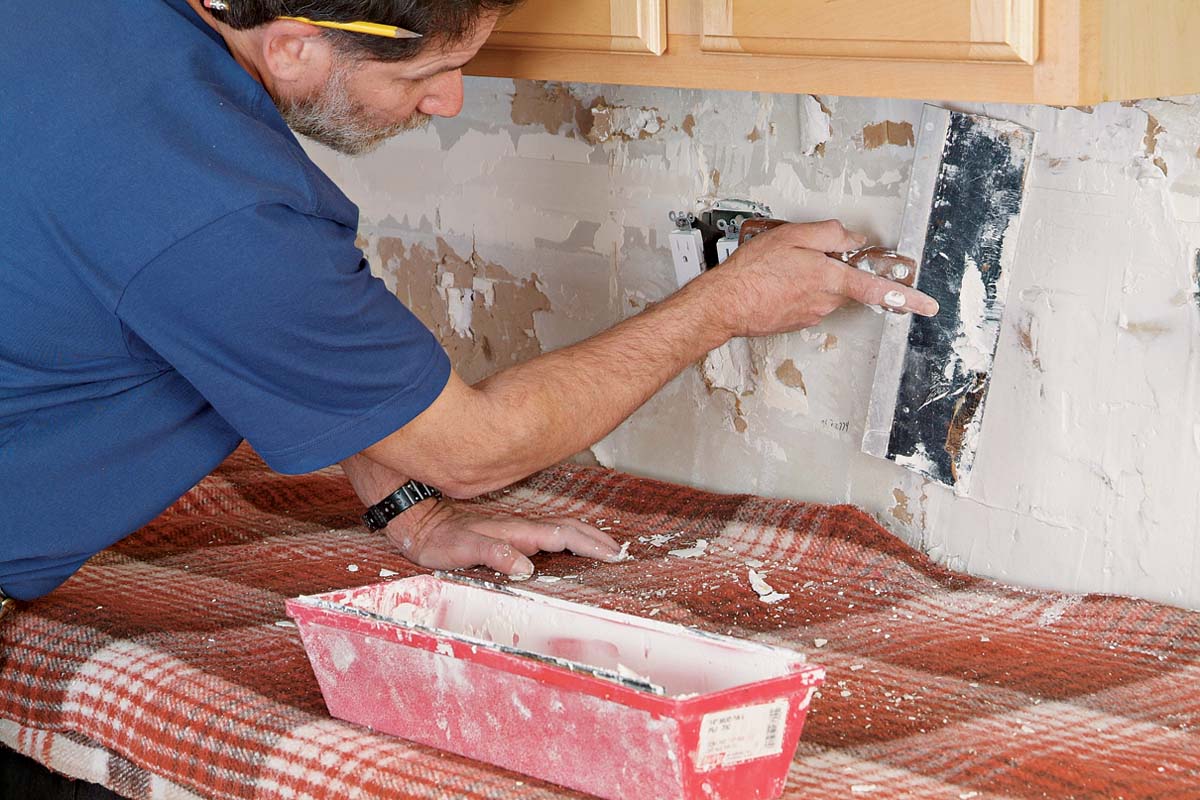
2. Smooth large areas of applied compound with a broad knife.
Cut out the damaged area of drywall with a razor knife.
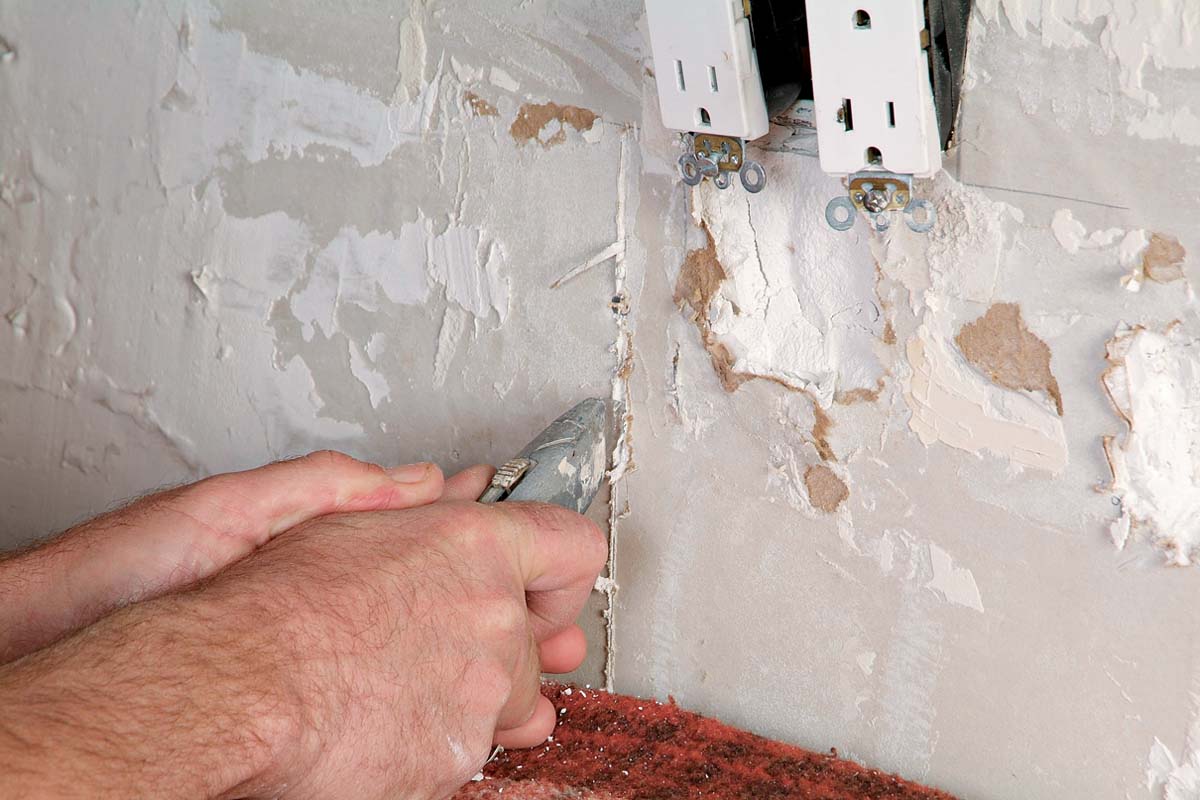
3. Cut out the damaged area of drywall with a razor knife.
Remove damaged section of wall by pulling it out carefully.
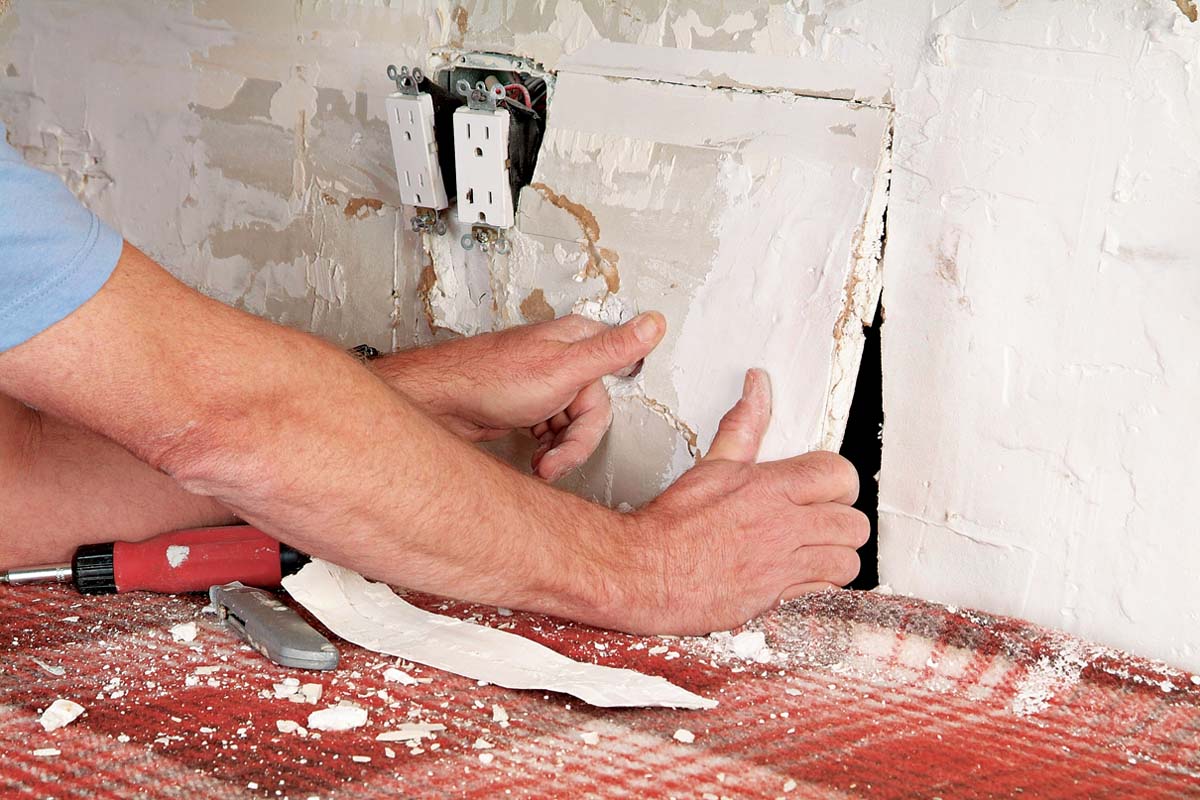
4. Remove damaged section of wall by pulling it out carefully.
Measure the size of the opening for a new drywall patch.
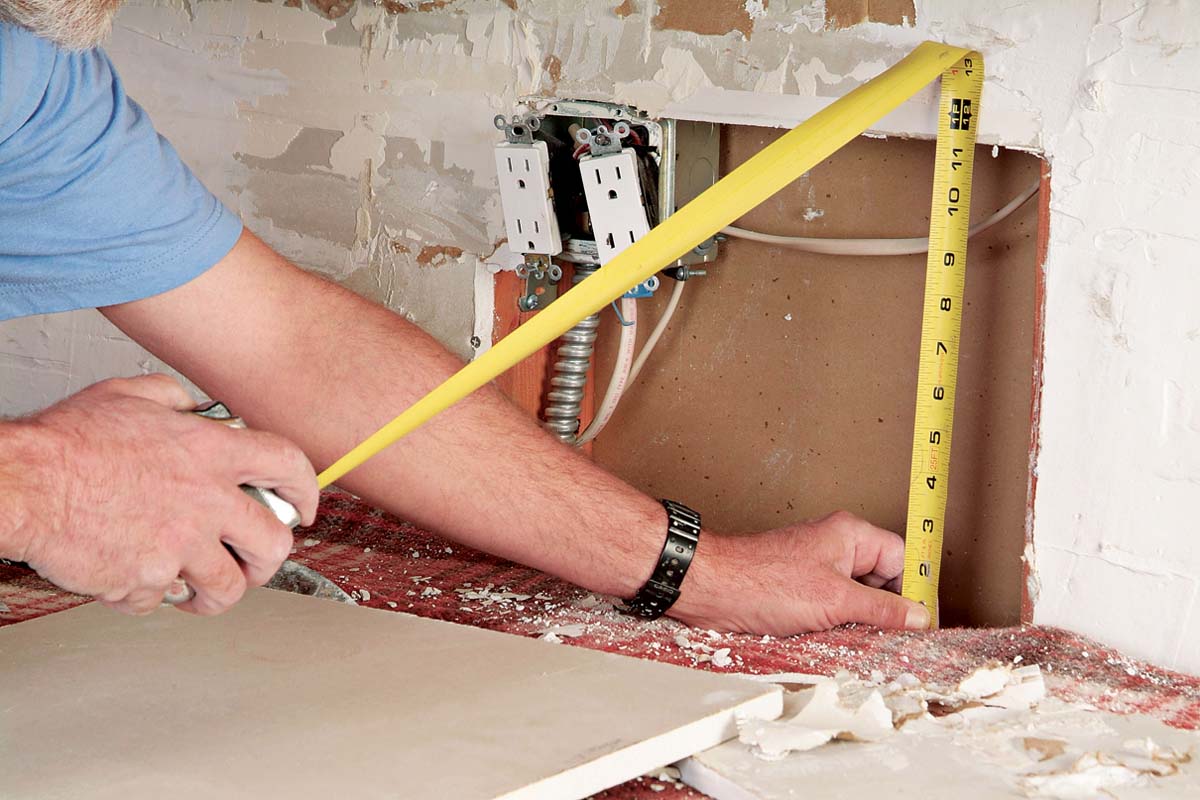
5. Measure the size of the opening for a new drywall patch.
Screw the new drywall patch firmly into the studs.
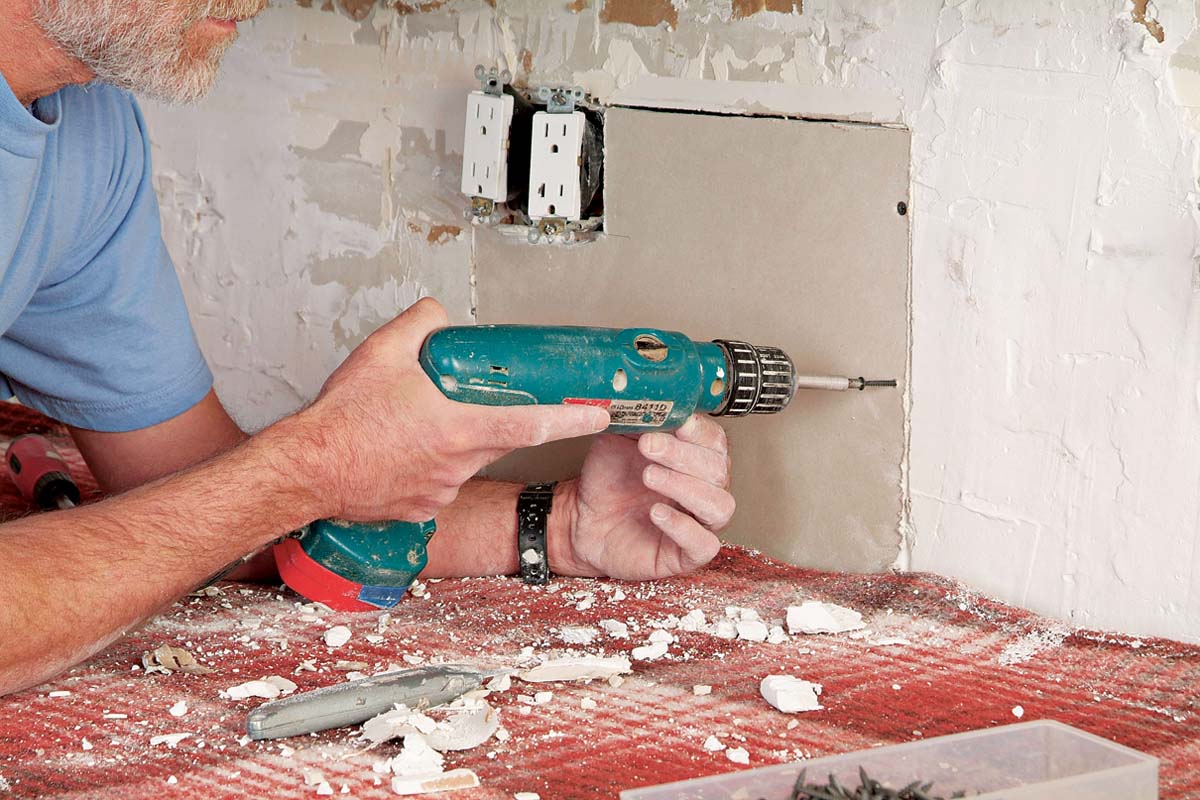
6. Screw the new drywall patch firmly into the studs.
Tape the drywall joints with self-adhesive mesh tape.
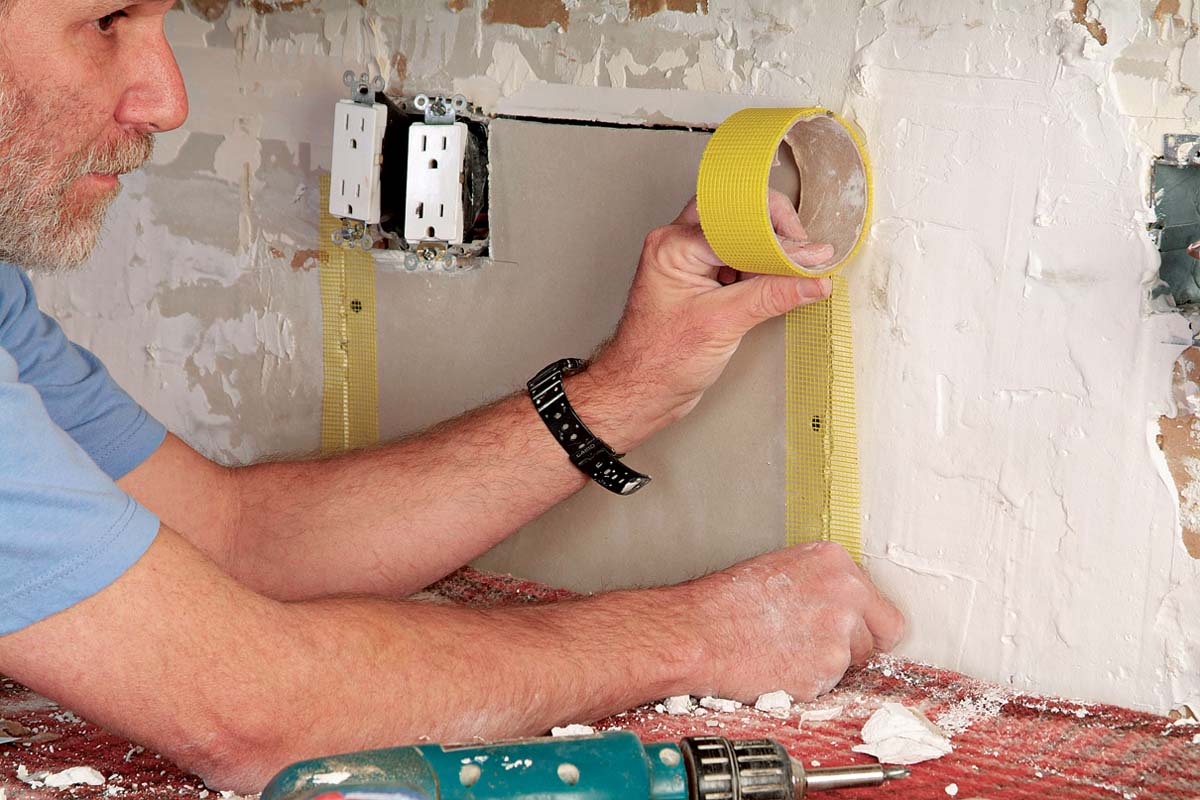
7. Tape the drywall joints with self-adhesive mesh tape.

Flattening the Wall

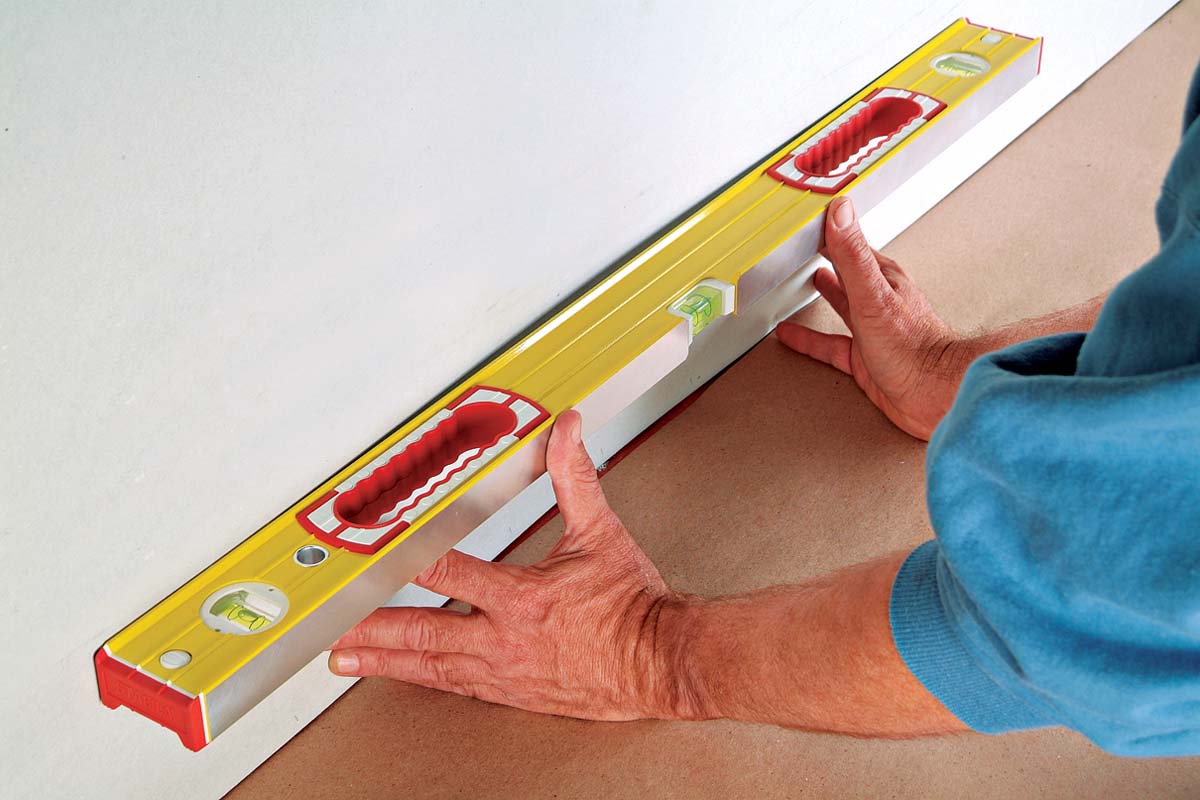
For a good-looking tile installation, the backsplash wall should be flat, without big hills and valleys. Check for flatness by placing a straightedge or level across the area and marking the low areas 1. Fill these areas by applying a quick-setting wall patch material 2. We use 20-minute drywall patch for drywall areas, quick-setting plaster patch for plaster walls, and SpeedSet thinset for brick or concrete block walls. Use a straightedge or level to screed (skim) off excess material 3. After letting the patch material firm up, apply more to any areas that are still low 4. Screed off again and allow the surface to dry completely 5. If your backsplash falls behind a sink area, you should now waterproof the wall by applying a liquid antifracture membrane. Applying a membrane is also necessary if you plan to install glass tile.

When installing small tiles (2 in. sq. or less), check the wall for bumps and valleys.
1. When installing small tiles (2 in. sq. or less), check the wall for bumps and valleys.
Fill the hollows in the wall surface with a quick-setting compound
2. Fill the hollows in the wall surface with a quick-setting compound.
Screed off excess compound before it hardens, using a level.
3. Screed off excess compound before it hardens, using a level.
Fill any low spots that are left with additional compound.
4. Fill any low spots that are left with additional compound.
A nice flat wall, all ready for setting tile.
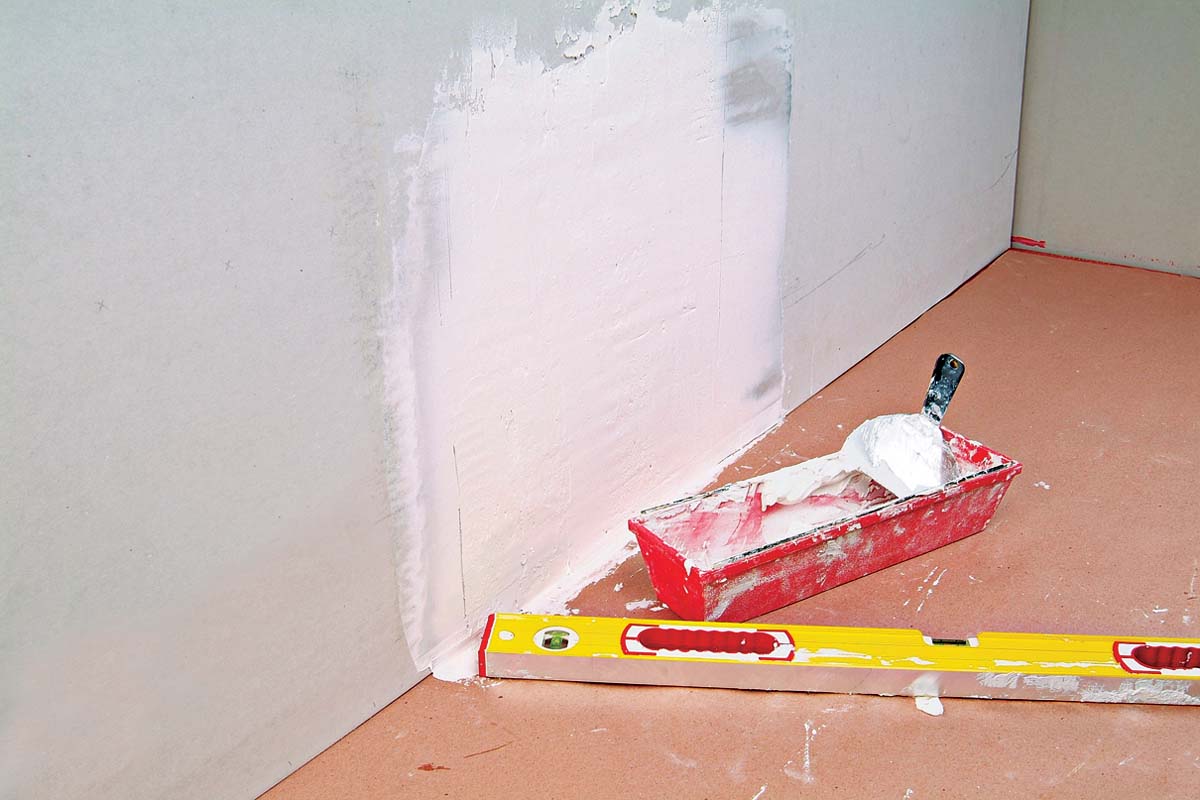
5. A nice flat wall, all ready for setting tile.

Tiling Complete, 2nd EditionExcerpted from Tiling Complete, 2nd Edition by Robin Nicholas and Michael Schweit.

Available in the Taunton Store and at Amazon.com.

Previous: Prepping a Bathroom for Tile Next: Tiling over Different Substrates

Guide

Tiling

Chapter

Preparation

Sign up for eletters today and get the latest how-to from Fine Homebuilding, plus special offers.

Signing you up...

This site is protected by reCAPTCHA and the Google Privacy Policy and Terms of Service apply.
See all newsletters
See all newsletters

Log in or create an account to post a comment.

Sign up Log in

Become a member and get full access to FineHomebuilding.com

Tiling

Tiling

Trusted, comprehensive guidance from the pros for a great-looking tile job in any room of the house

View Project Guide

View All Project Guides »

Become a member and get unlimited site access, including the Tiling Project Guide.

Start Free Trial

Selecting Tile
  • The Basics
  • Tile Options
Tools & Techniques
  • Job-Preparation Tools
  • Cutting Tiles
  • Setting & Grouting Tools
Installation Materials
  • Membranes & Substrates
  • Adhesives & Mortars
  • Grout
  • Sealers & Caulk
  • Spacers, Hardware & Trim
Preparation
  • The Prep Job
  • Repairs & Surface Prep
  • Installing Backerboard
Tiling Floors
  • Layout & Installation
  • Setting Specialty Tiles
Tiling Walls & Backsplashes
  • Preparation
  • Backsplashes
  • Walls
Tiling Showers
  • Tile Shower Basics
  • Waterproofing
  • Shower Pans
  • Shower Drains
  • Shower Niches
  • Video Series: Tile a Shower
  • Video Series: Tile a Barrier-Free Bathroom
Grouting, Sealing & Caulking
  • Grouting
  • Caulking
  • Sealing
Maintenance & Repair
  • Maintenance
  • Tile Repair
  • Grout Repair

Fine Home Building

Newsletter Sign-up

  • Fine Homebuilding

    Home building tips, offers, and expert advice in your inbox.

  • Green Building Advisor

    Building science and energy efficiency advice, plus special offers, in your inbox.

  • Old House Journal

    Repair, renovation, and restoration tips, plus special offers, in your inbox.

Signing you up...

This site is protected by reCAPTCHA and the Google Privacy Policy and Terms of Service apply.
See all newsletters

Follow

  • Fine Homebuilding

    Dig into cutting-edge approaches and decades of proven solutions with total access to our experts and tradespeople.

    Start Free Trial Now
    • Facebook
    • Instagram
    • X
    • LinkedIn
  • GBA Prime

    Get instant access to the latest developments in green building, research, and reports from the field.

    Start Free Trial Now
    • Facebook
    • YouTube
  • Old House Journal

    Learn how to restore, repair, update, and decorate your home.

    Subscribe Now
    • Facebook
    • Instagram
    • X

Membership & Magazine

  • Online Archive
  • Start Free Trial
  • Magazine Subscription
  • Magazine Renewal
  • Gift a Subscription
  • Customer Support
  • Privacy Preferences
  • About
  • Contact
  • Advertise
  • Careers
  • Terms of Use
  • Site Map
  • Do not sell or share my information
  • Privacy Policy
  • Accessibility
  • California Privacy Rights

© 2025 Active Interest Media. All rights reserved.

Fine Homebuilding receives a commission for items purchased through links on this site, including Amazon Associates and other affiliate advertising programs.

  • Home Group
  • Antique Trader
  • Arts & Crafts Homes
  • Bank Note Reporter
  • Cabin Life
  • Cuisine at Home
  • Fine Gardening
  • Fine Woodworking
  • Green Building Advisor
  • Garden Gate
  • Horticulture
  • Keep Craft Alive
  • Log Home Living
  • Military Trader/Vehicles
  • Numismatic News
  • Numismaster
  • Old Cars Weekly
  • Old House Journal
  • Period Homes
  • Popular Woodworking
  • Script
  • ShopNotes
  • Sports Collectors Digest
  • Threads
  • Timber Home Living
  • Traditional Building
  • Woodsmith
  • World Coin News
  • Writer's Digest
Active Interest Media logo
X
X
This is a dialog window which overlays the main content of the page. The modal window is a 'site map' of the most critical areas of the site. Pressing the Escape (ESC) button will close the modal and bring you back to where you were on the page.

Main Menu

  • How-To
  • Design
  • Tools & Materials
  • Video
  • Blogs
  • Forum
  • Project Guides
  • Reader Projects
  • Magazine
  • Members
  • FHB House

Podcasts

  • FHB Podcast
  • ProTalk

Webinars

  • Upcoming and On-Demand

Podcasts

  • FHB Podcast
  • ProTalk

Webinars

  • Upcoming and On-Demand

Popular Topics

  • Kitchens
  • Business
  • Bedrooms
  • Roofs
  • Architecture and Design
  • Green Building
  • Decks
  • Framing
  • Safety
  • Remodeling
  • Bathrooms
  • Windows
  • Tilework
  • Ceilings
  • HVAC

Magazine

  • Current Issue
  • Past Issues
  • Magazine Index
  • Subscribe
  • Online Archive
  • Author Guidelines

All Access

  • Member Home
  • Start Free Trial
  • Gift Membership

Online Learning

  • Courses
  • Project Guides
  • Reader Projects
  • Podcast

More

  • FHB Ambassadors
  • FHB House
  • Customer Support

Account

  • Log In
  • Join

Newsletter

Get home building tips, offers, and expert advice in your inbox

Signing you up...

This site is protected by reCAPTCHA and the Google Privacy Policy and Terms of Service apply.
See all newsletters
See all newsletters

Follow

  • X
  • YouTube
  • instagram
  • facebook
  • pinterest
  • Tiktok

Join All Access

Become a member and get instant access to thousands of videos, how-tos, tool reviews, and design features.

Start Your Free Trial

Subscribe

FHB Magazine

Start your subscription today and save up to 70%

Subscribe

You have 1 free article remaining.

Get complete site access, including thousands of videos, how-to tips, tool reviews, and design features.

Start your FREE trial

Already a member? Log in

We hope you’ve enjoyed your free articles. To keep reading, become a member today.

Get complete site access to expert advice, how-to videos, Code Check, and more, plus the print magazine.

Start your FREE trial

Already a member? Log in

Privacy Policy Update

We use cookies, pixels, script and other tracking technologies to analyze and improve our service, to improve and personalize content, and for advertising to you. We also share information about your use of our site with third-party social media, advertising and analytics partners. You can view our Privacy Policy here and our Terms of Use here.

Cookies

Analytics

These cookies help us track site metrics to improve our sites and provide a better user experience.

Advertising/Social Media

These cookies are used to serve advertisements aligned with your interests.

Essential

These cookies are required to provide basic functions like page navigation and access to secure areas of the website.

Delete My Data

Delete all cookies and associated data