
Tips and Techniques for Installing Glass Tile
Professional tilesetter Tom Meehan explains why installing glass is trickier than ceramic tile, and he shows how to get the job done right.
Synopsis: Glass tile is beautiful but different from ceramic tile in some fundamental ways. In this article, a professional tilesetter explains the best adhesives to use, when to remove the paper facing (timing is critical here,) and proper grouting technique. A big sidebar delivers an overview of glass-tile types and manufacturers.
It has been used for centuries, but until recently, glass tile was relegated to museums and specialty shops. Today, it comes in an array of styles, from iridescent mosaics to luminous squares of recycled and sandblasted beer bottles. Tile shops like mine see glass-tile sales double every year. However, lots of folks are in for a shock if they try to install it like ceramic tile: The thin-set and its application are different; the paper backing for small tiles is stuck to the front, not to the back of the tiles; and timing becomes an important part of the job.
 |
 |
Layout needs room to move
On this particular job, the shower area was to be covered with 1-in. tiles grouped into 12-in. square sheets. When I work with small tiles, I try to make sure that the backerboard is smooth and flat; any imperfections will show as bumps in the tile. This phenomenon is especially true of glass tiles, which catch the light even more than ceramic or stone. Once I’ve installed the backerboard, I seal the joints between the sheets with thinset and mesh tape, and smooth any bumps with a steel floating trowel and thinset. The thinset should set overnight before the tile is installed.
When laying out a back wall, don’t be tempted to squeeze the sheets together so that you can get a full tile and avoid cutting. Believe it or not, glass tiles expand and contract with changes in temperature, much more so than ceramic tiles. Direct sunlight can heat tiles enough to make them move. If tiles are too tight, any movement can make them pop off the wall or crack—or even crack the backerboard. I try to leave 1/4in. of space in each corner; intersecting walls hide the gap.
I begin the layout with a level horizontal line halfway up the back wall, equivalent to an even course of tile, which in this case worked out to be 48 in. from the top of the tub. This horizontal line serves not only as a reference for spacing but also, as you’ll see later, marks the extent of the first round of applying the glass tile. Next, I measure up to determine the width of the row at the ceiling. Anything over a half-piece works well, and I can adjust the cut to make up the difference when the ceiling is uneven.
Thinset? Make mine extra-sticky
Because it’s vitreous, glass doesn’t absorb liquid like ceramic tile, and it requires a higher grade of acrylic or latex-modified thinset to bond to the backerboard. Most glass tile manufacturers specify what brands of thinset to use; on this job, I used Durabond Superflex. Because the tile often is translucent, the thinset should be white; gray mixes darken the tile’s color. Any pattern the trowel leaves in the thinset will show through, too, so the thinset must be spread and leveled with a 3/16-in. V-notch trowel, then smoothed out.
I start laying the tile sheets from the level line, then work down rather than working with a full sheet off the tub. If the tub is out of level, it’s easier to adjust the cuts as measured from the course above. Once I press the sheets into the thinset and finish the half-wall, I use a block of wood and a hammer to bed the tile fully and evenly into the thinset. You also can use a beater block (a wooden block padded on one side with a piece of rubber, available from most tile distributors) and a rubber mallet. I make any cuts with a wet saw fitted with a diamond blade; a pair of tile nippers is handy to make minor adjustments in a cut.
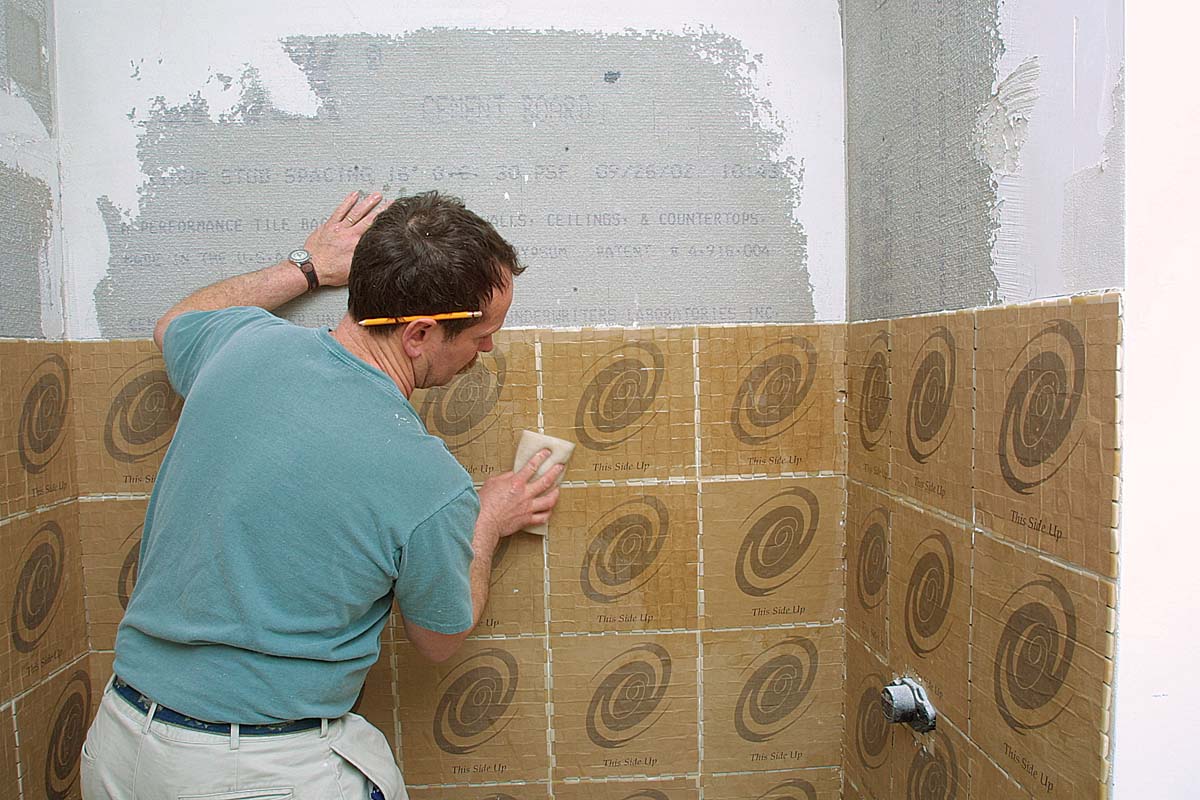
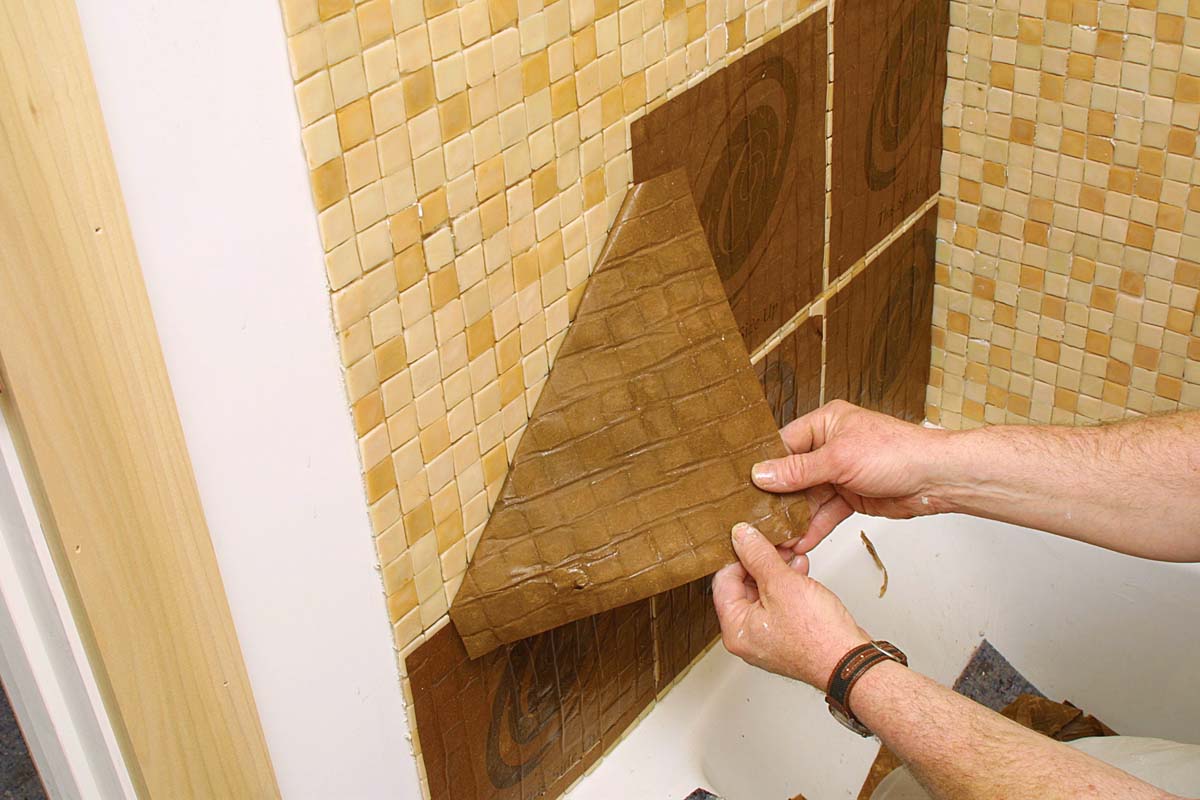
Timing is crucial when removing paper facing
The main reason I don’t install too much glass tile at one time is that while the thinset is wet, I need to move individual tiles and erase any pattern inadvertently created by the 12-in. tile sheets. But first I have to peel off the paper facing carefully so that I don’t disturb the majority of tiles. After waiting 15 or 20 minutes for the thinset to bond, I wet the paper with a sponge and warm water. After a minute or so, the paper can be pulled off slowly downward at an angle. One or two tiles may pop off, but that’s no big deal; I just stick them back in place with a dab of thinset. The trickiest part of this process is that the timing varies according to the room’s temperature and humidity. Heat and dry conditions make the thinset bond faster and give me less time to work, so I start to check the bond in an inconspicuous place after about 10 minutes. If the tiles move around too easily as I peel off a bit of paper, I know that I should wait a few more minutes. Once the paper is off, the glass tiles must be examined to make sure none has slipped. Never wait until the next day to remove the paper; the tiles have to be examined and straightened while the thinset is fresh.
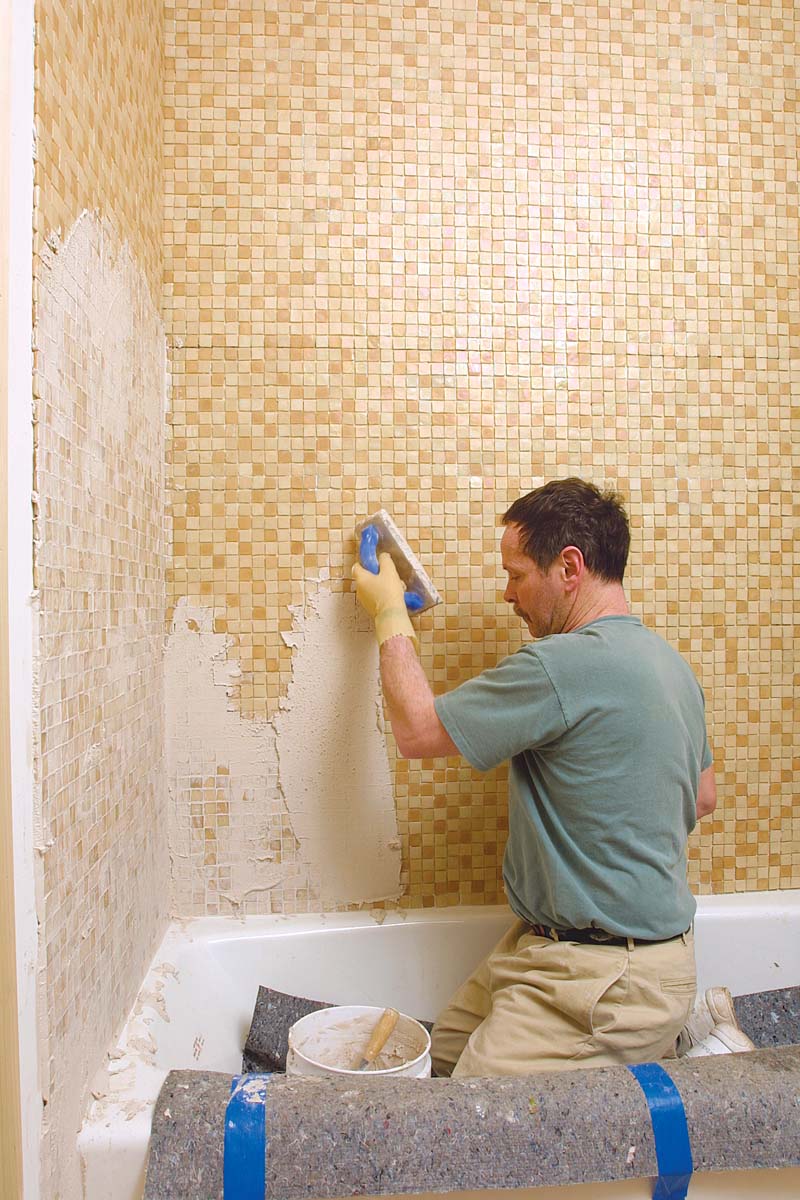
When grouting, less water is better
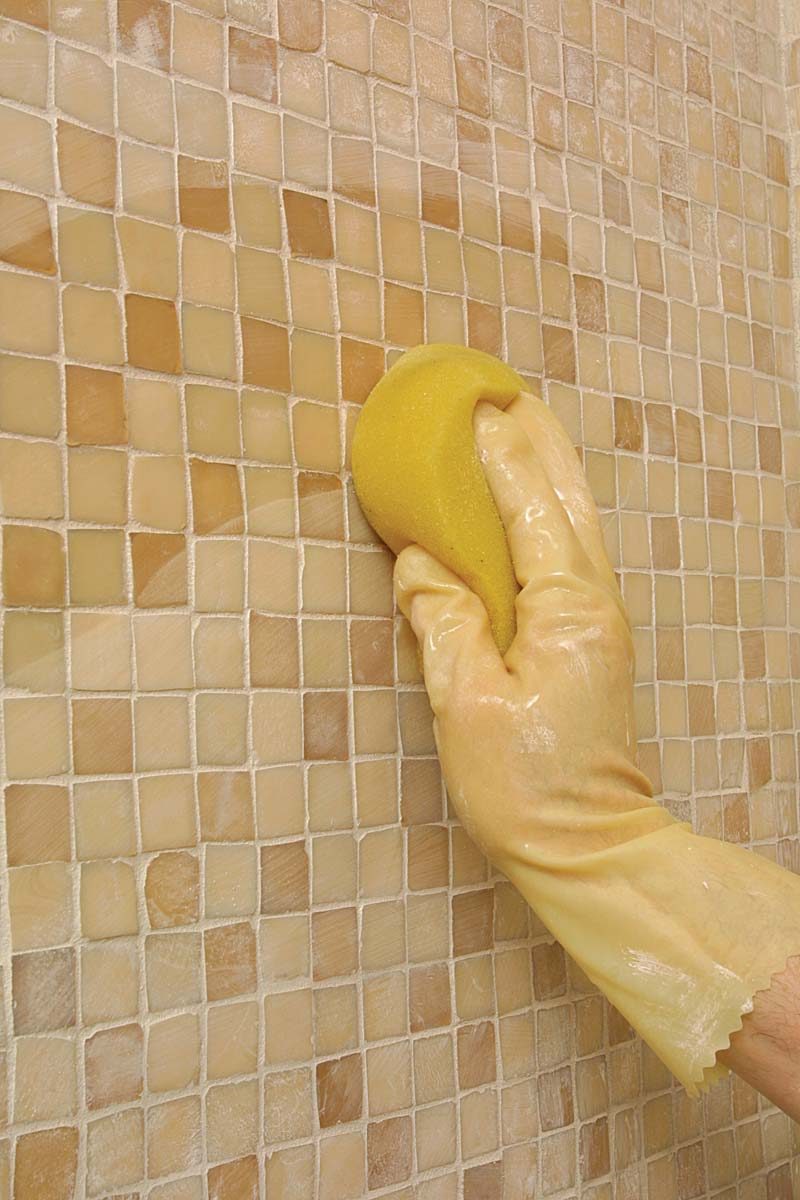
After the thinset has bonded fully for 48 hours, the tile must be washed to prepare it for grouting. I use a nylon-bristle brush and a sponge with warm water to clean any residue or paper backing from the surface of the tile. I use a utility knife to remove any excess thinset in the joints, but I’m careful doing so; glass tile scratches easily.
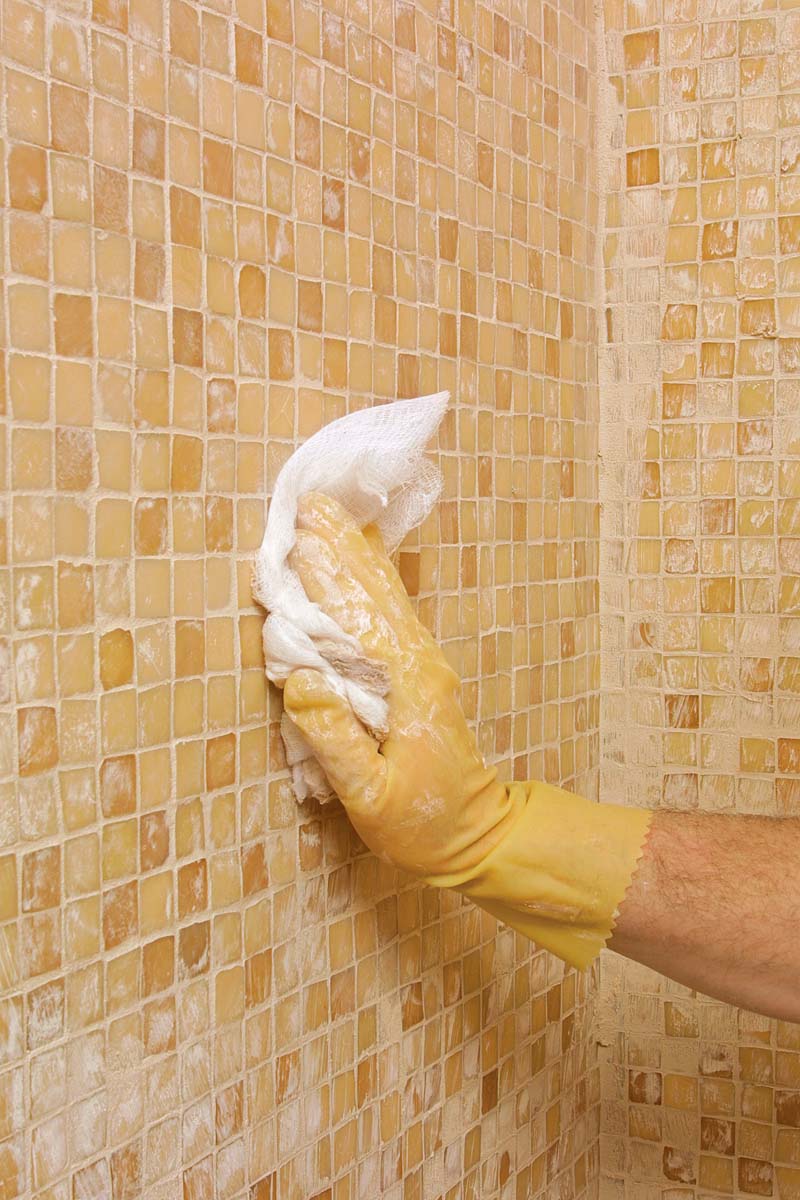
Grouting glass tiles is not difficult, but again, it’s different than grouting ceramic tile. Some manufacturers specify sanded or nonsanded grout; here, I used a recommended sanded grout whose color complemented the tile. After I spread the grout on the walls, I let it set for about 20 minutes; the wait is longer than for ceramic tile because the glass tile doesn’t absorb moisture from the grout. Before starting to clean with water, I use cheesecloth or paper towels to rub down the walls to get rid of any extra grout and to fill in any voids between the tiles. The dry method also lets me clean the surface without adding any extra moisture that might dilute the grout.
Once the tile is clean, I go back over it with clean water and a damp sponge to do a finer cleaning and to reduce any topical film. Less water is better. As in any grouting job, it’s important to strike corners or intersections of wall and tile with a trowel or putty knife to make sure these joints are tight and neat. Once everything is set and a slight film has developed over the tile, I use a rag to bring the glass tile to a shine. I try not to wait more than 15 minutes after sponging; any longer, and the film starts to set up and becomes too hard to remove easily.
Cleaning and sealing are just as important as thinset and grout
A day or two after grouting, I smooth exposed tile edges with a diamond-abrasive pad (Diapad; 3M Inc.; www.3m.com), then clean the tile with a commercial tile cleaner. I wet down the walls before applying the cleaner and also protect any chrome or brass plumbing fixtures with tape and plastic bags. Rather than use stronger cleaners that might compromise the grout, I use a fine nylon scrubbing pad to clean off heavy grout residue. I always give the walls a double rinse to flush away any cleaner residue.
Sealing grout is simple and should not be overlooked; it helps to keep grout lines from absorbing mildew and other stains. I use a wet, clean cloth rag and apply a double coat of sealer on the grout and tile as well. I then towel off the wall with a dry rag. I used Miracle Sealants 511 Impregnator (Miracle Sealants Co.; www.miraclesealants.com; 800-350-1901) on this project. One key to sealing walls is to start from the bottom and work up from floor to ceiling to avoid streaking. Once the sealer is dry, glass-tile maintenance is minimal; I use dish soap and water to clean it on a regular basis.
Troweling
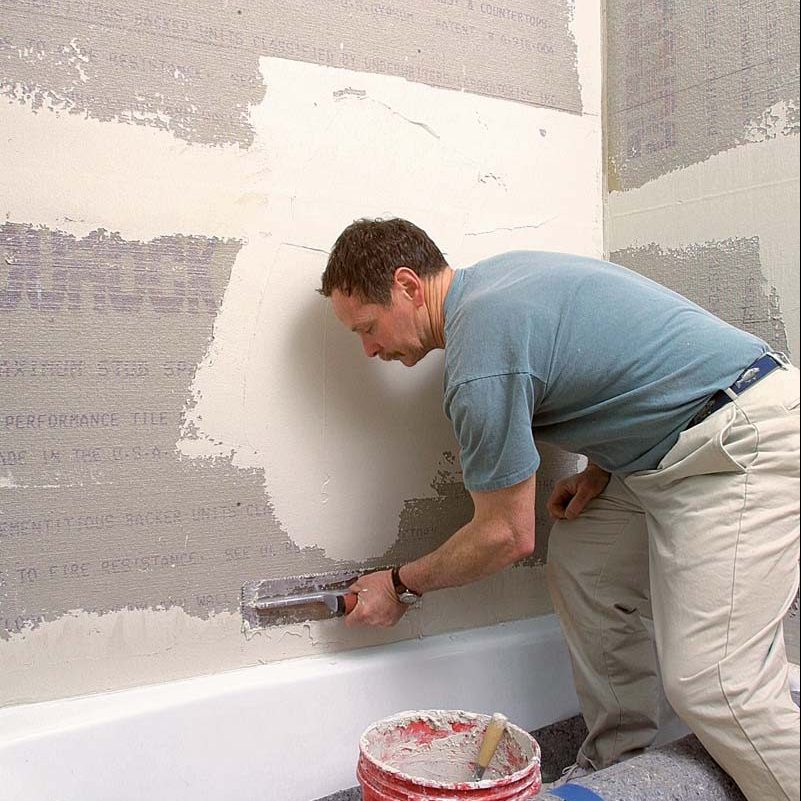 |
1. Spread thinset on the wall |
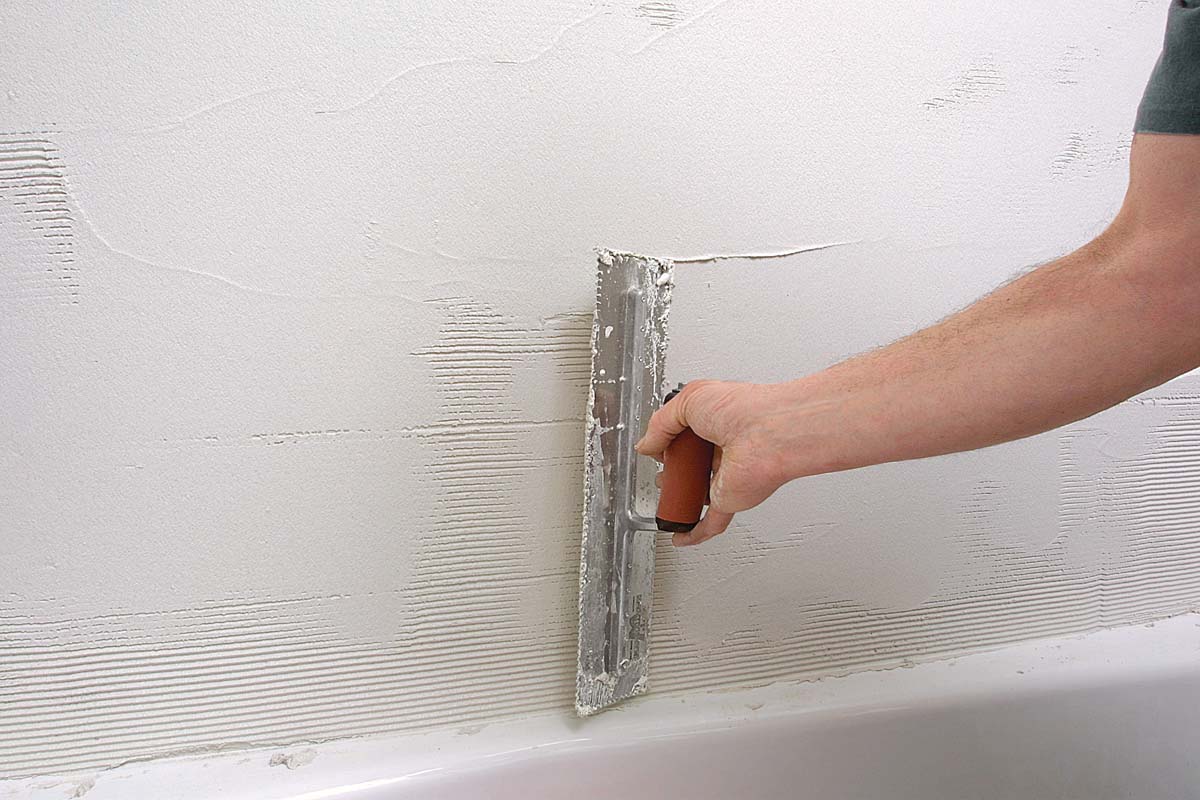 |
2. Even out the thinset |
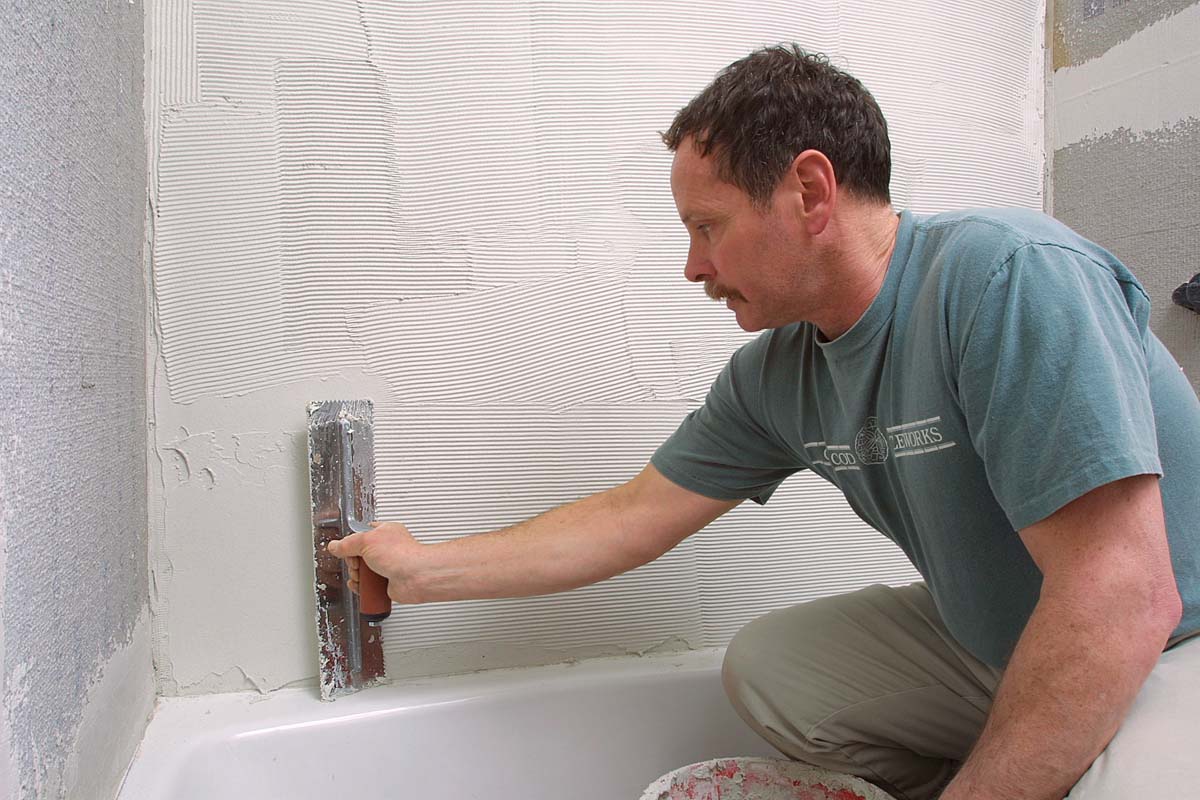 |
3. Smooth the ridges |
Setting
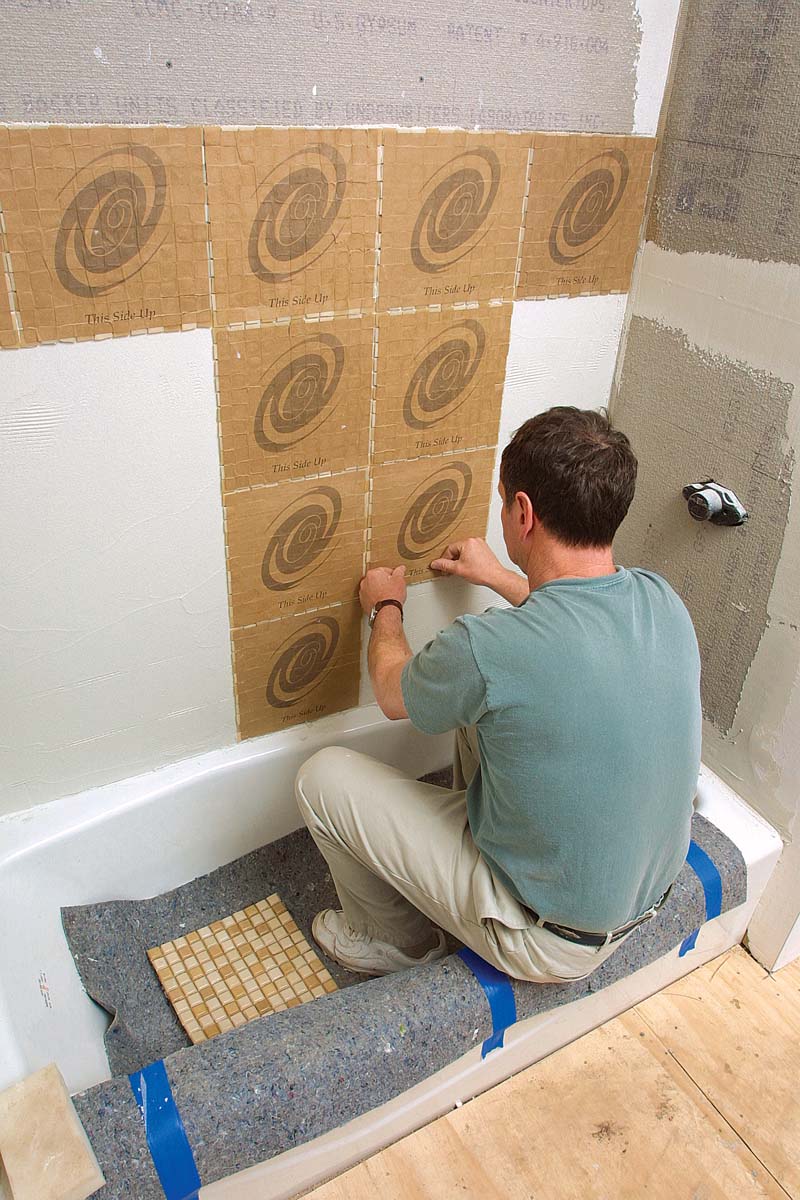 |
1. Set the tile |
 |
2. Dampen the paper |
 |
3. Peel carefully |
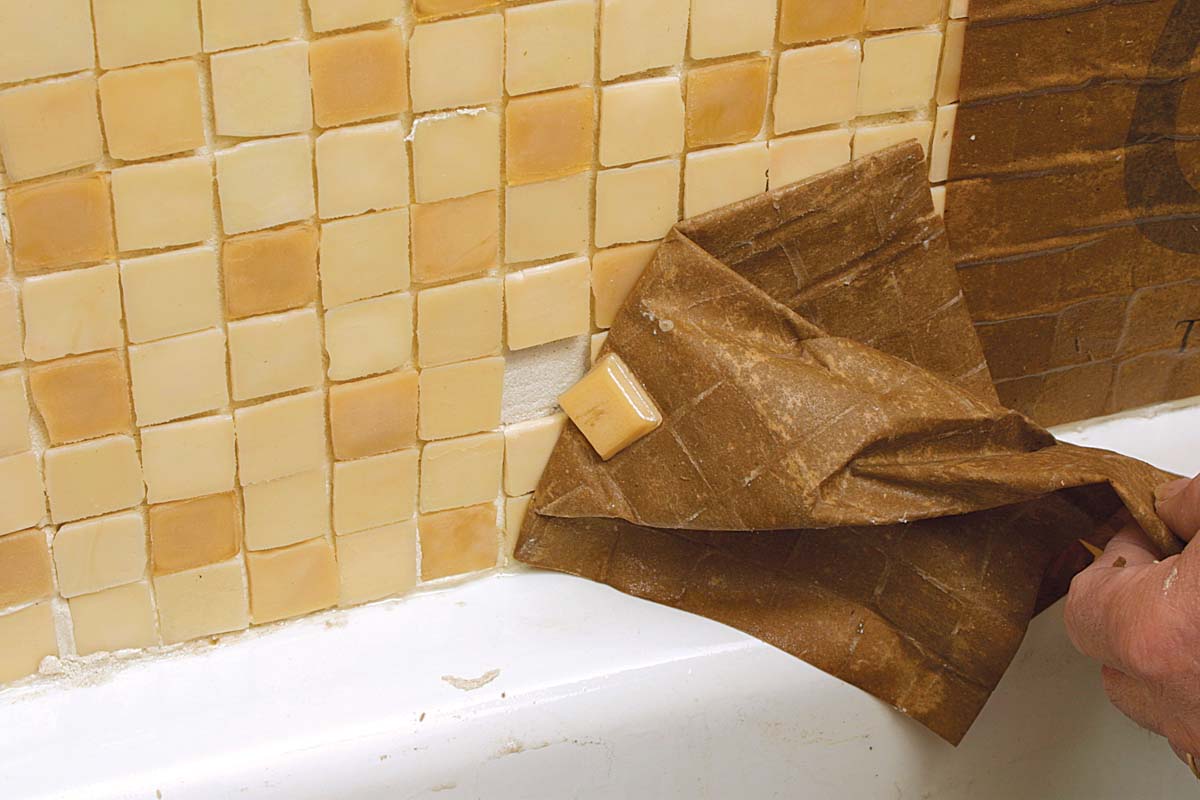 |
4. Make an easy fix |
Grouting
 |
1. Pack the seams |
 |
2. Wipe the excess |
 |
3. Clean the tile |
A peek into the world of glass tile
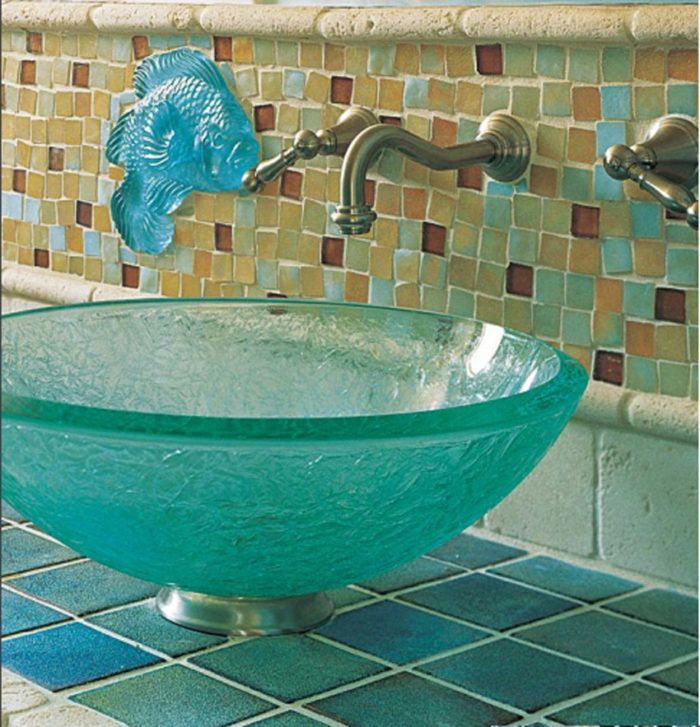
Glass tile is versatile stuff; it’s available in styles that range from clear to opaque, from glossy and iridescent to the eroded look of beach glass. Colors range from gaudy lollipop primaries to muted earth tones and just about every shade in between. Commonly seen in sheets of 1-in. squares, glass tile now is made in sizes that approximate ceramic tiles (2-in., 4-in., and even 12-in. squares), rectangles, textured borders, and tiny mosaics. And like ceramics, it can be used on walls, counters, and floors, although glass tiles used on floors should have a matte finish or texture that makes them slip-proof. One big factor to consider: Glass is more likely to show scratches than ceramics or stone; finishes applied to the tile are susceptible to scratches, too. Prices range from $10 to $30 per sq. ft. for some of the more common field tiles to upward of $100 per sq. ft. for custom tiles.
Texture with a variety of color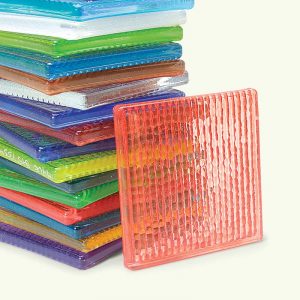
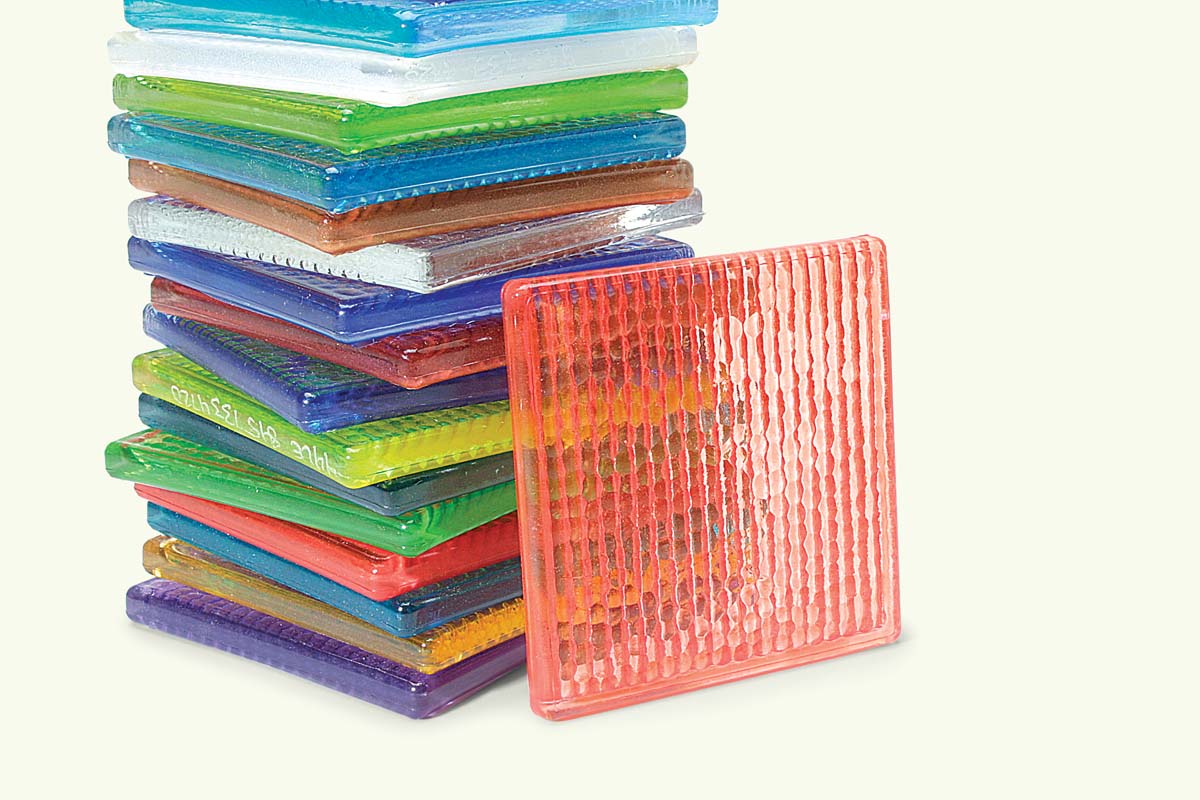
These 4-in.-sq. clear-glass tiles have textured faces and ribbed backs; a glaze bonded to the tile back gives them their color. The cost runs about $60 to $80 per sq. ft. The company also offers a higher-end integral color tile and custom designs. Architectural Glass Inc. www.architecturalglassinc.com 845-733-4720
Iridescence 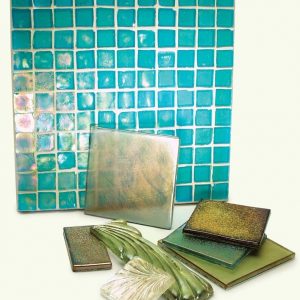
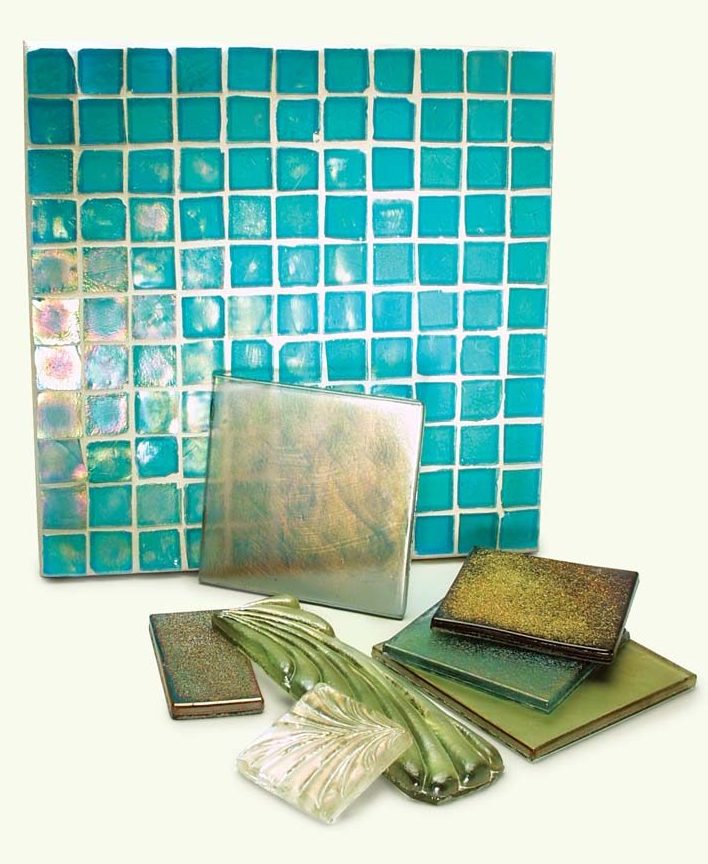
Oceanside offers a variety of tile with an 85% recycled content, ranging from 1-in.-sq. mosaics to 5×5 field tiles, specialty borders, and decorative single tiles. Many feature a metallic glaze that’s applied to the surface of the tile; a good example is the tile featured on the cover. Prices for most mosaics and field tiles are in the range of $25 to $30 per sq. ft. Oceanside Glasstile www.glasstile.com 760-929-4000
Earth tones in recycled glass 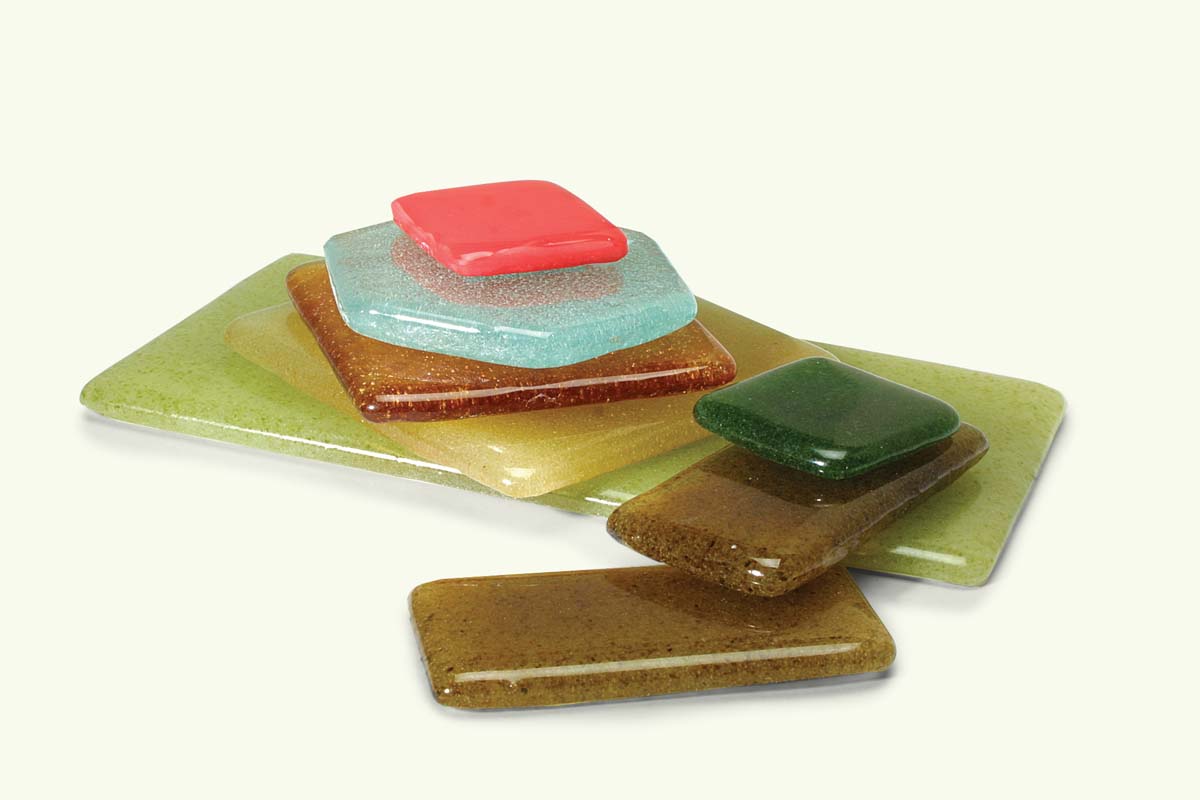
Made from 100% recycled content, Bedrock tiles are available in many sizes, from 2-in. squares to 5×10 rectangles to hexagonal shapes. Finish can be glossy or matte, but the color is integral and ranges from clear to solidly opaque. Price is about $90 per sq. ft. Bedrock Industries www.bedrockindustries.com 877-283-7625
Solid colors in mosaics 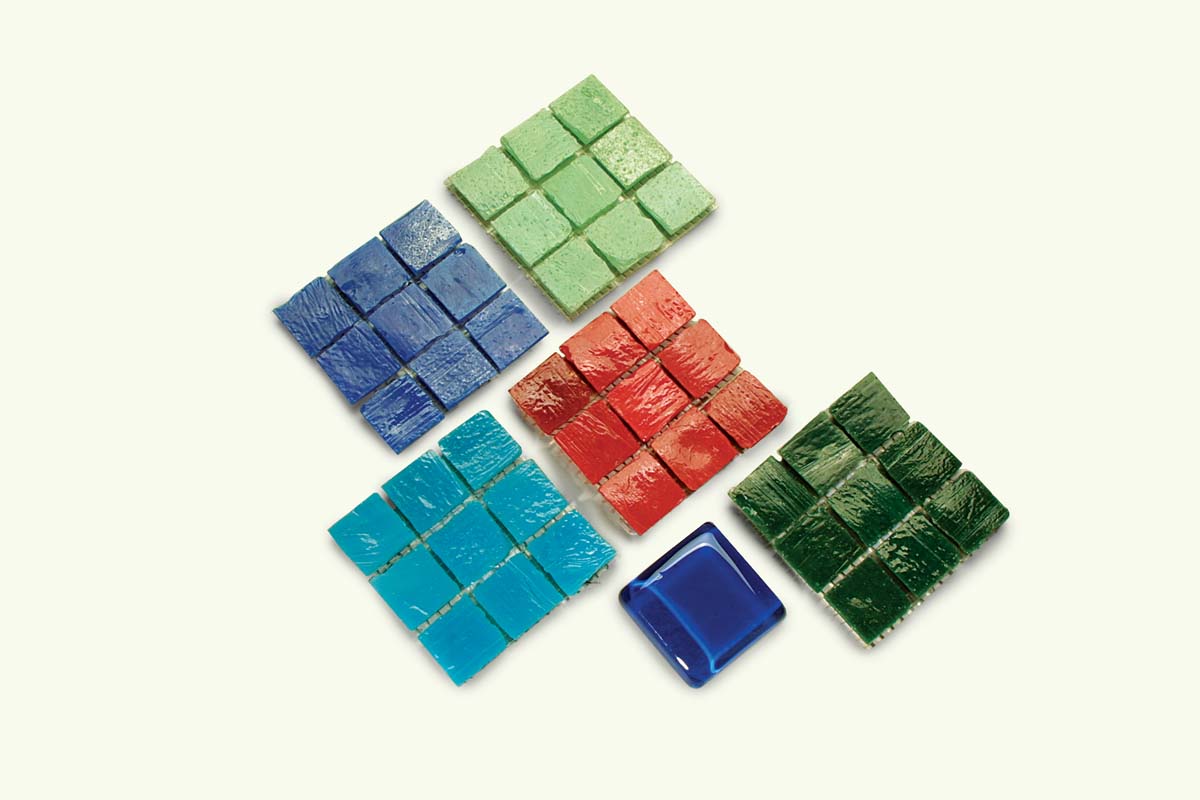
Hakatai sells mesh-backed mosaics (instead of paperfaced) in 3 ⁄4-in. and 1-in. sizes in many opaque and solid colors, priced from $8 to $11 per sq. ft. They also offer 2-in. squares of clear glass with color fired onto the tile back and irregularly shaped pebbles, both priced at $24 per sq. ft. Hakatai Enterprises Inc. www.hakatai.com 541-552-0855
Broad palette of recycled color
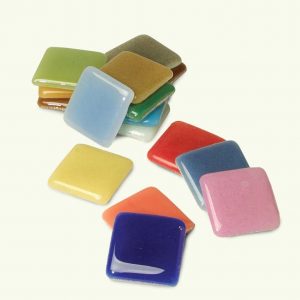
Sandhill makes mosaic, field, and specialty tile from 100% recycled glass in 36 different shades of integral color, glossy or matte. They also offer custom border and mosaic designs. The price for stock tiles is about $60 per sq. ft. Sandhill Industries www.sandhillind.com 208-345-6508
For more photos and information on how to install glass tiles, click the View PDF button below.
Fine Homebuilding Recommended Products
Fine Homebuilding receives a commission for items purchased through links on this site, including Amazon Associates and other affiliate advertising programs.

A Field Guide to American Houses

All New Bathroom Ideas that Work

Graphic Guide to Frame Construction
