FHB Logo Facebook LinkedIn Email Pinterest Twitter X Instagram Tiktok YouTube Plus Icon Close Icon Navigation Search Icon Navigation Search Icon Arrow Down Icon Video Guide Icon Article Guide Icon Modal Close Icon Guide Search Icon Skip to content
Subscribe
Log In
  • How-To
  • Design
  • Tools & Materials
  • Restoration
  • Videos
  • Blogs
  • Forum
  • Magazine
  • Members
  • FHB House
  • Podcast
Log In

Fine Homebuilding Project Guides

Tiling

Guide Home
  • Selecting Tile
  • Tools & Techniques
  • Installation Materials
  • Preparation
  • Tiling Floors
  • Tiling Walls & Backsplashes
  • Tiling Showers
  • Grouting, Sealing & Caulking
  • Maintenance & Repair
How-To

Laying Large Tile

Large-format tiles have their own set of rules — install them like standard tiles and watch the job fail.

By Isaak Mester Issue 268 - June/July 2017
  • X
  • facebook
  • linkedin
  • pinterest
  • email
  • add to favorites Log in or Sign up to save your favorite articles

As a second-generation remodeling contractor, I’ve seen a lot of design trends. One that seems to have staying power is large-format tile — that is, any tile with at least one edge more than 15 in. long. Whether they’re 16×16, 18×18, or plank style, open any home-design magazine and chances are you will see large-format tiles.

Most of the techniques used to install larger tile will be familiar to anyone who’s ever set smaller tile. Laying out the tile is similar, cutting it is the same except that you need a bigger saw (which can be rented), and grouting it is no different. However, some normal procedures used for installing smaller tile take on heightened importance when working with large-format tile, and there are several differences that are crucial to both the final look and to the longevity of the floor.

Flaws in the substrate can cause any tile floor to fail, but their effect is greater with large-format tile. Also, regular thinset mortar can’t support the size and weight of large-format tile. Large tile exaggerates lippage (variations in the height of adjoining tiles). While inconsistent mortar application and setting pressure are the leading causes of lippage, tile warpage plays a role. Most tile will be warped to some degree, but the size of large-format tile exaggerates warpage. Especially when laying tile in a running bond pattern, where the end of one row aligns with the centers of neighboring rows, installers need to rely on grout joints wide enough to disguise the problem, and even then it can be impossible to achieve an acceptable level of lippage without using a clamping system.

The good news is that although large-format tiles have their own rulebook, manufacturers and the Tile Council of North America (tcnatile.com) offer helpful solutions. Address the above concerns, and you’re well on your way to creating a durable and stylish floor.

Prep the substrate

The substrate is the most important part of any tile floor, but according to the Tile Council of North America (TCNA), “As tile size increases, the effect of substrate irregularities is compounded.” Larger tiles can be more prone to cracking from subfloor flex, and because of the length of their sides, a substrate that isn’t flat makes it much harder to avoid lippage. Getting to flat may mean sanding high spots or using floor-leveling compound. Installing an uncoupling membrane or backerboard is also a good way to isolate the tile from movement in the framing, which helps prevent cracking. The National Tile Contractors Association and the TCNA each specify deflection, flatness, and subfloor thickness in their manuals, and also provide specifications for mortars and other details.

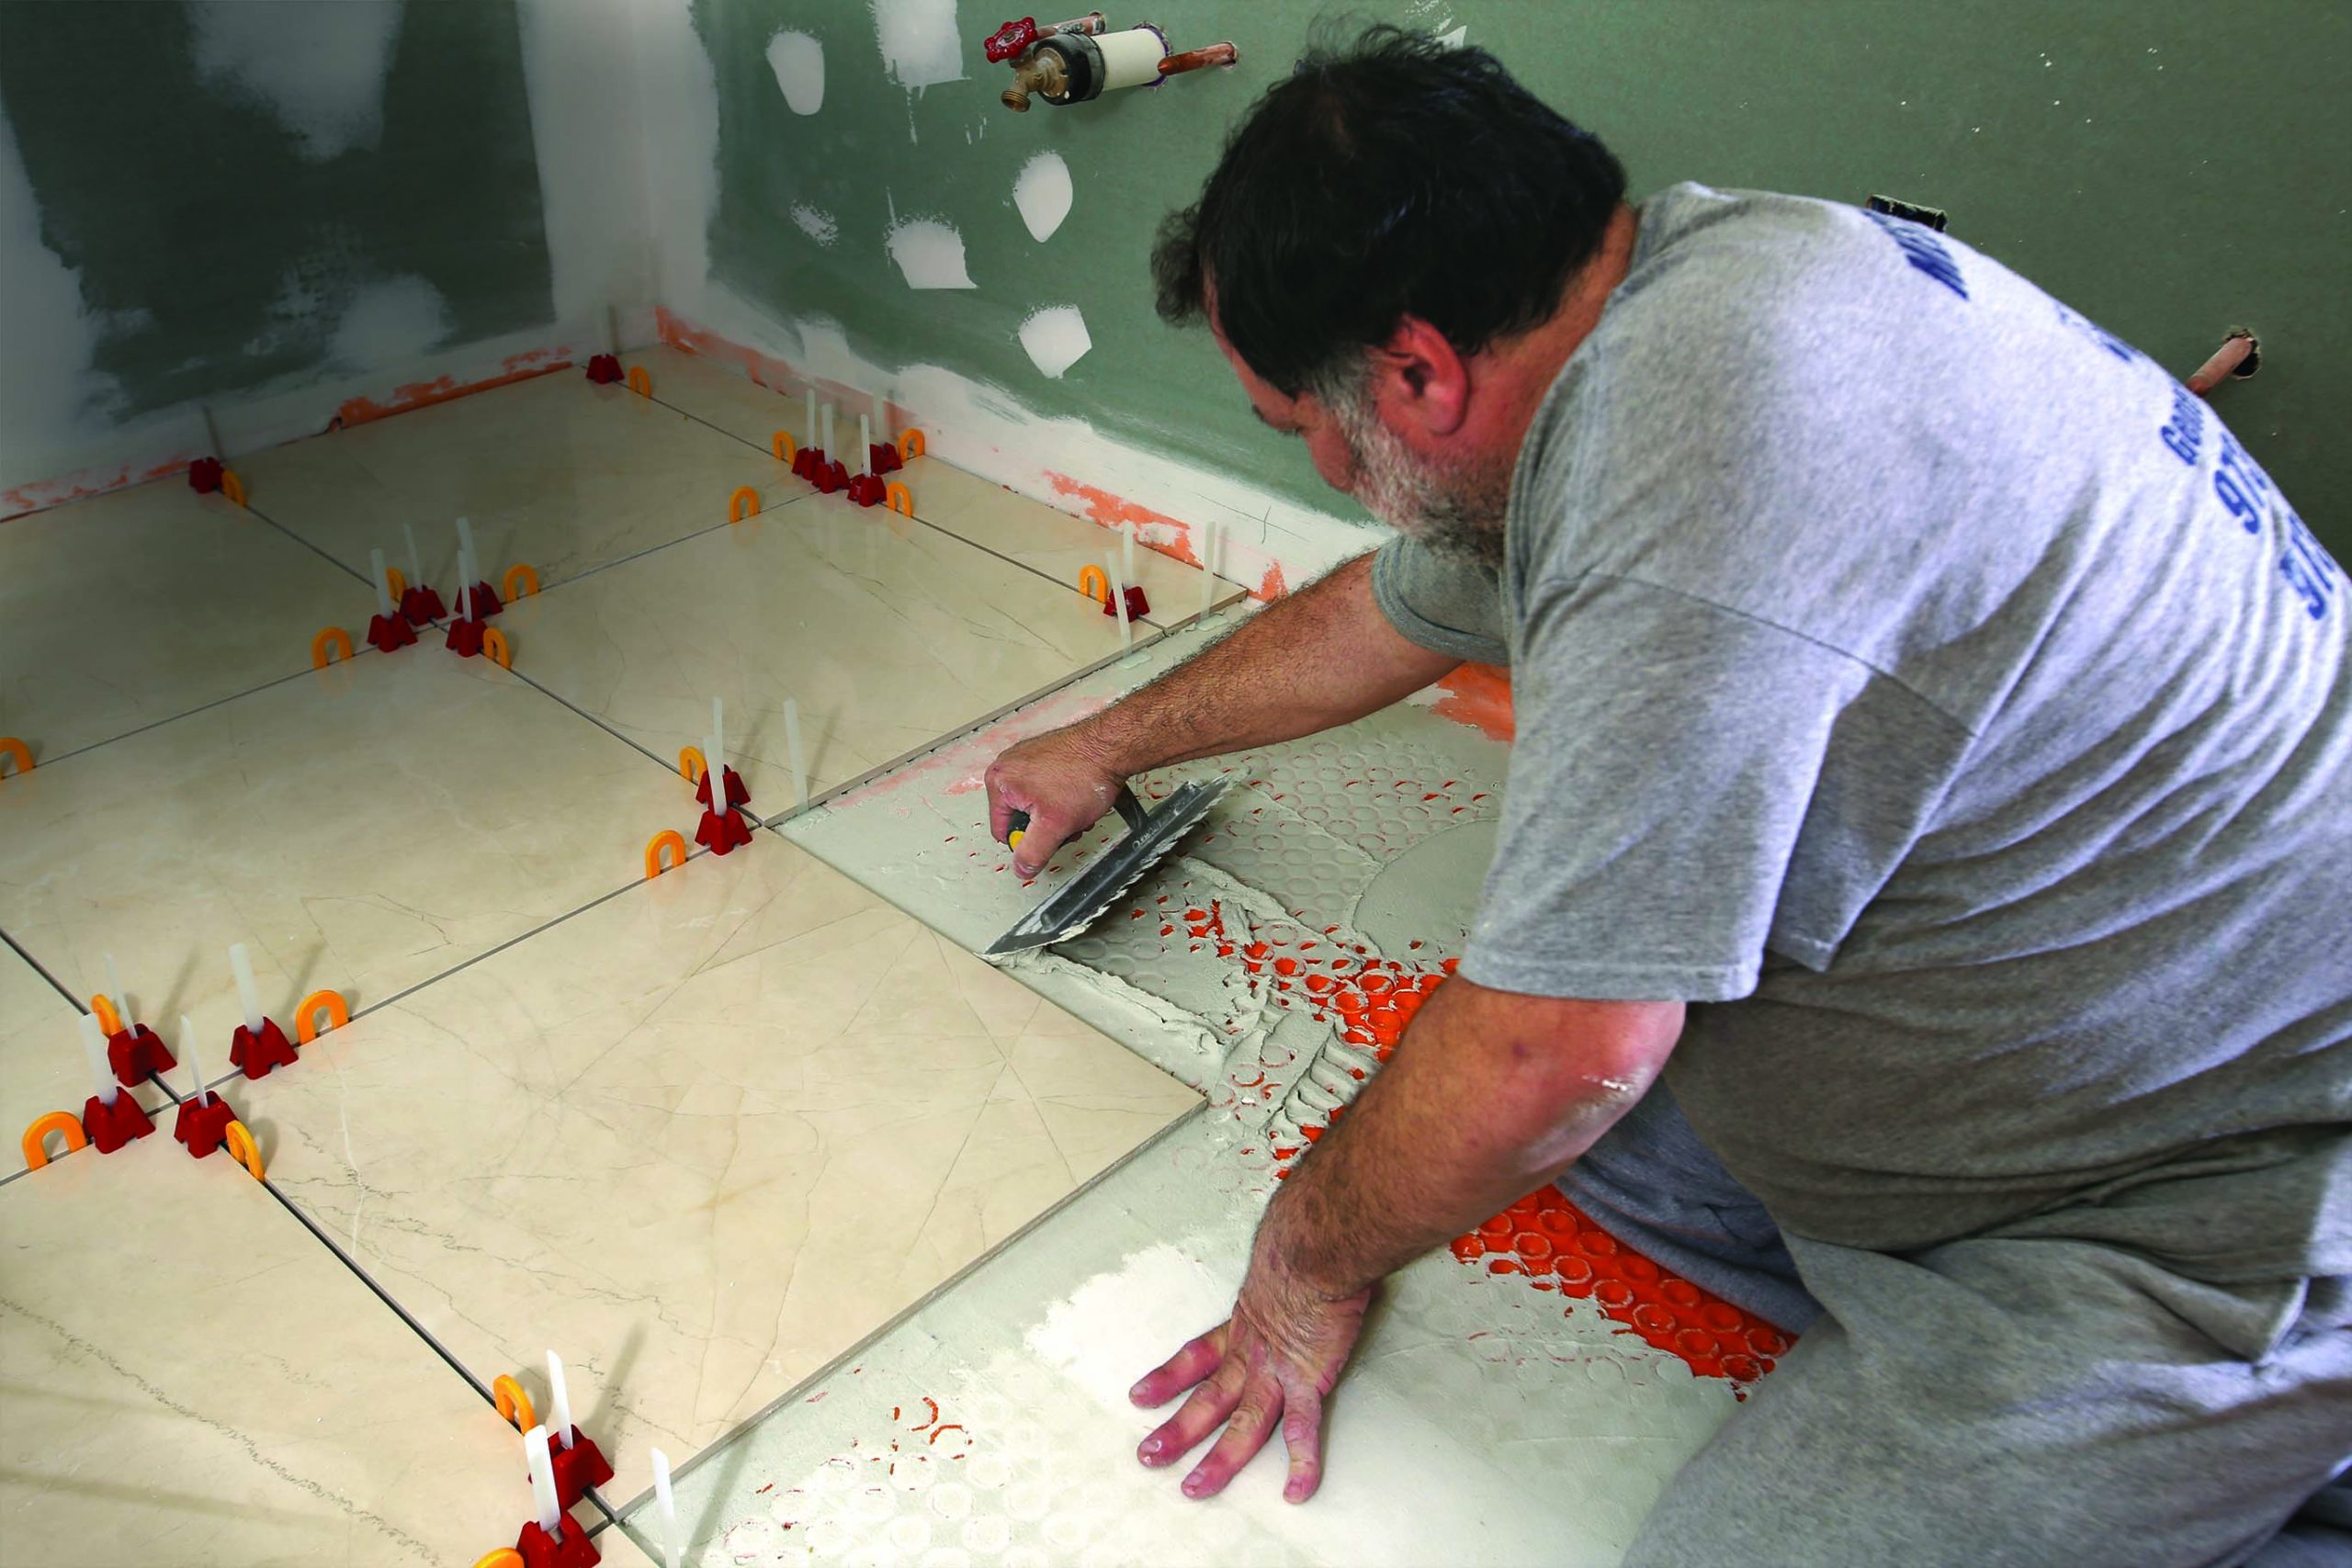
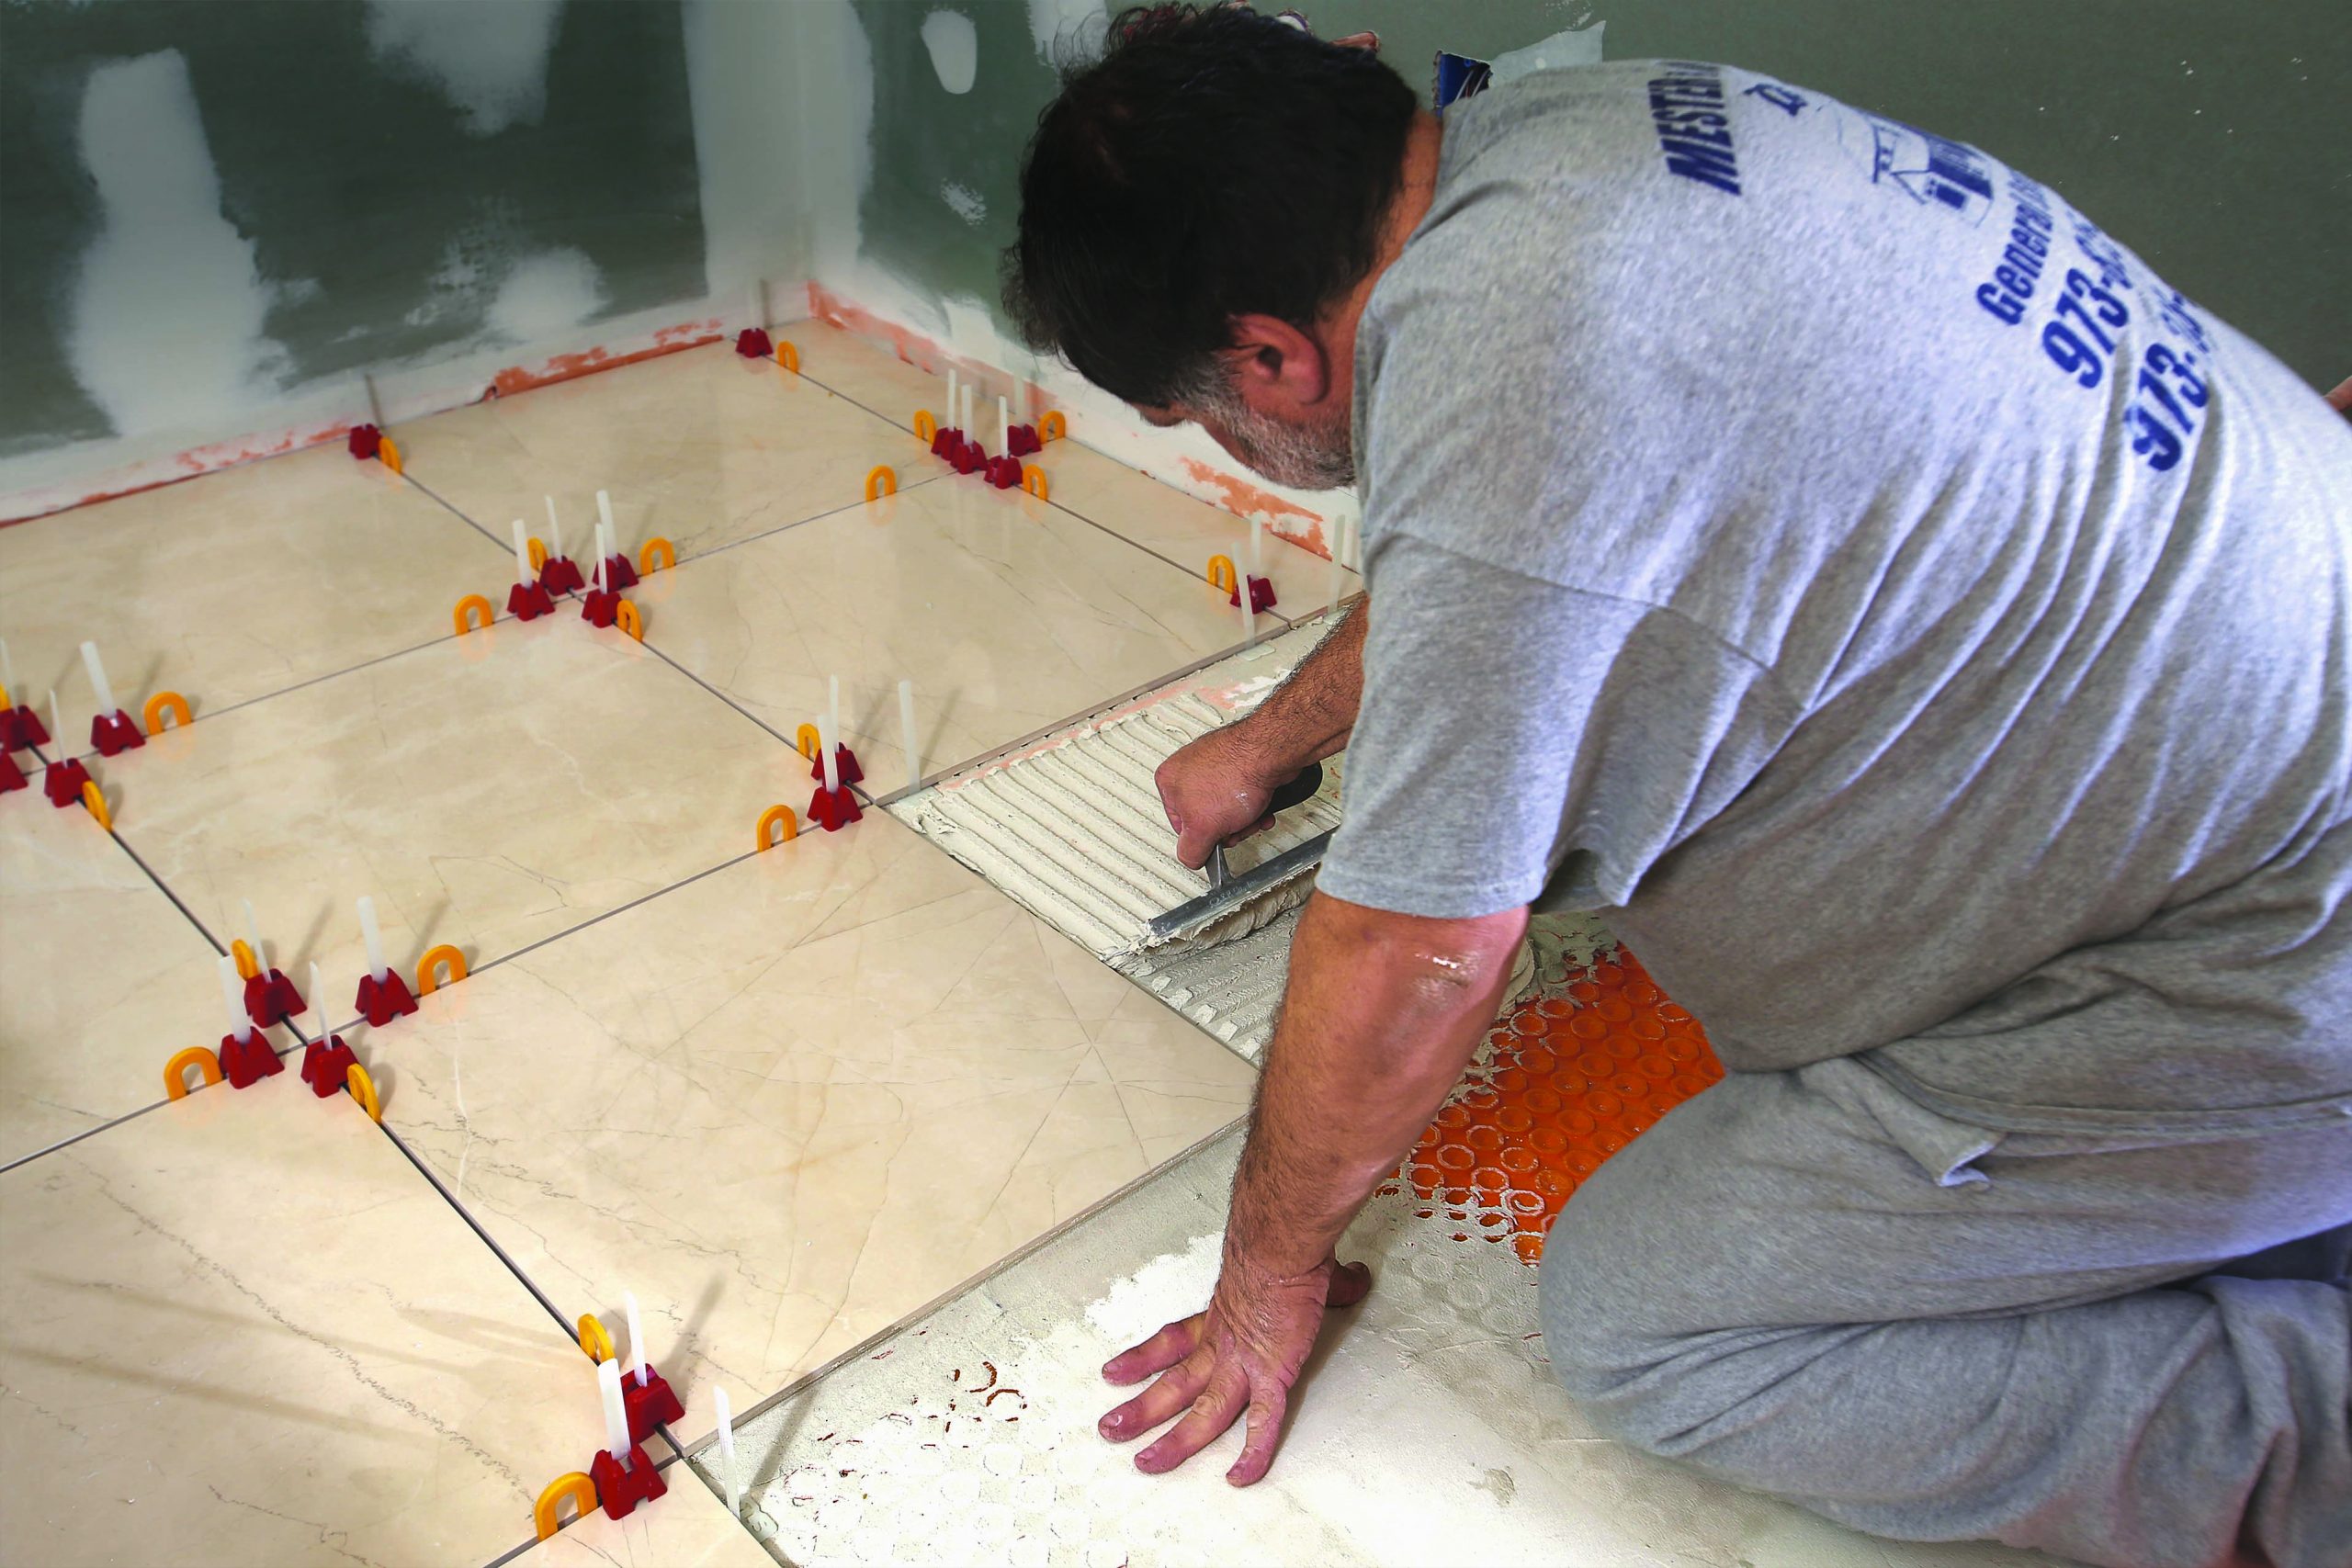
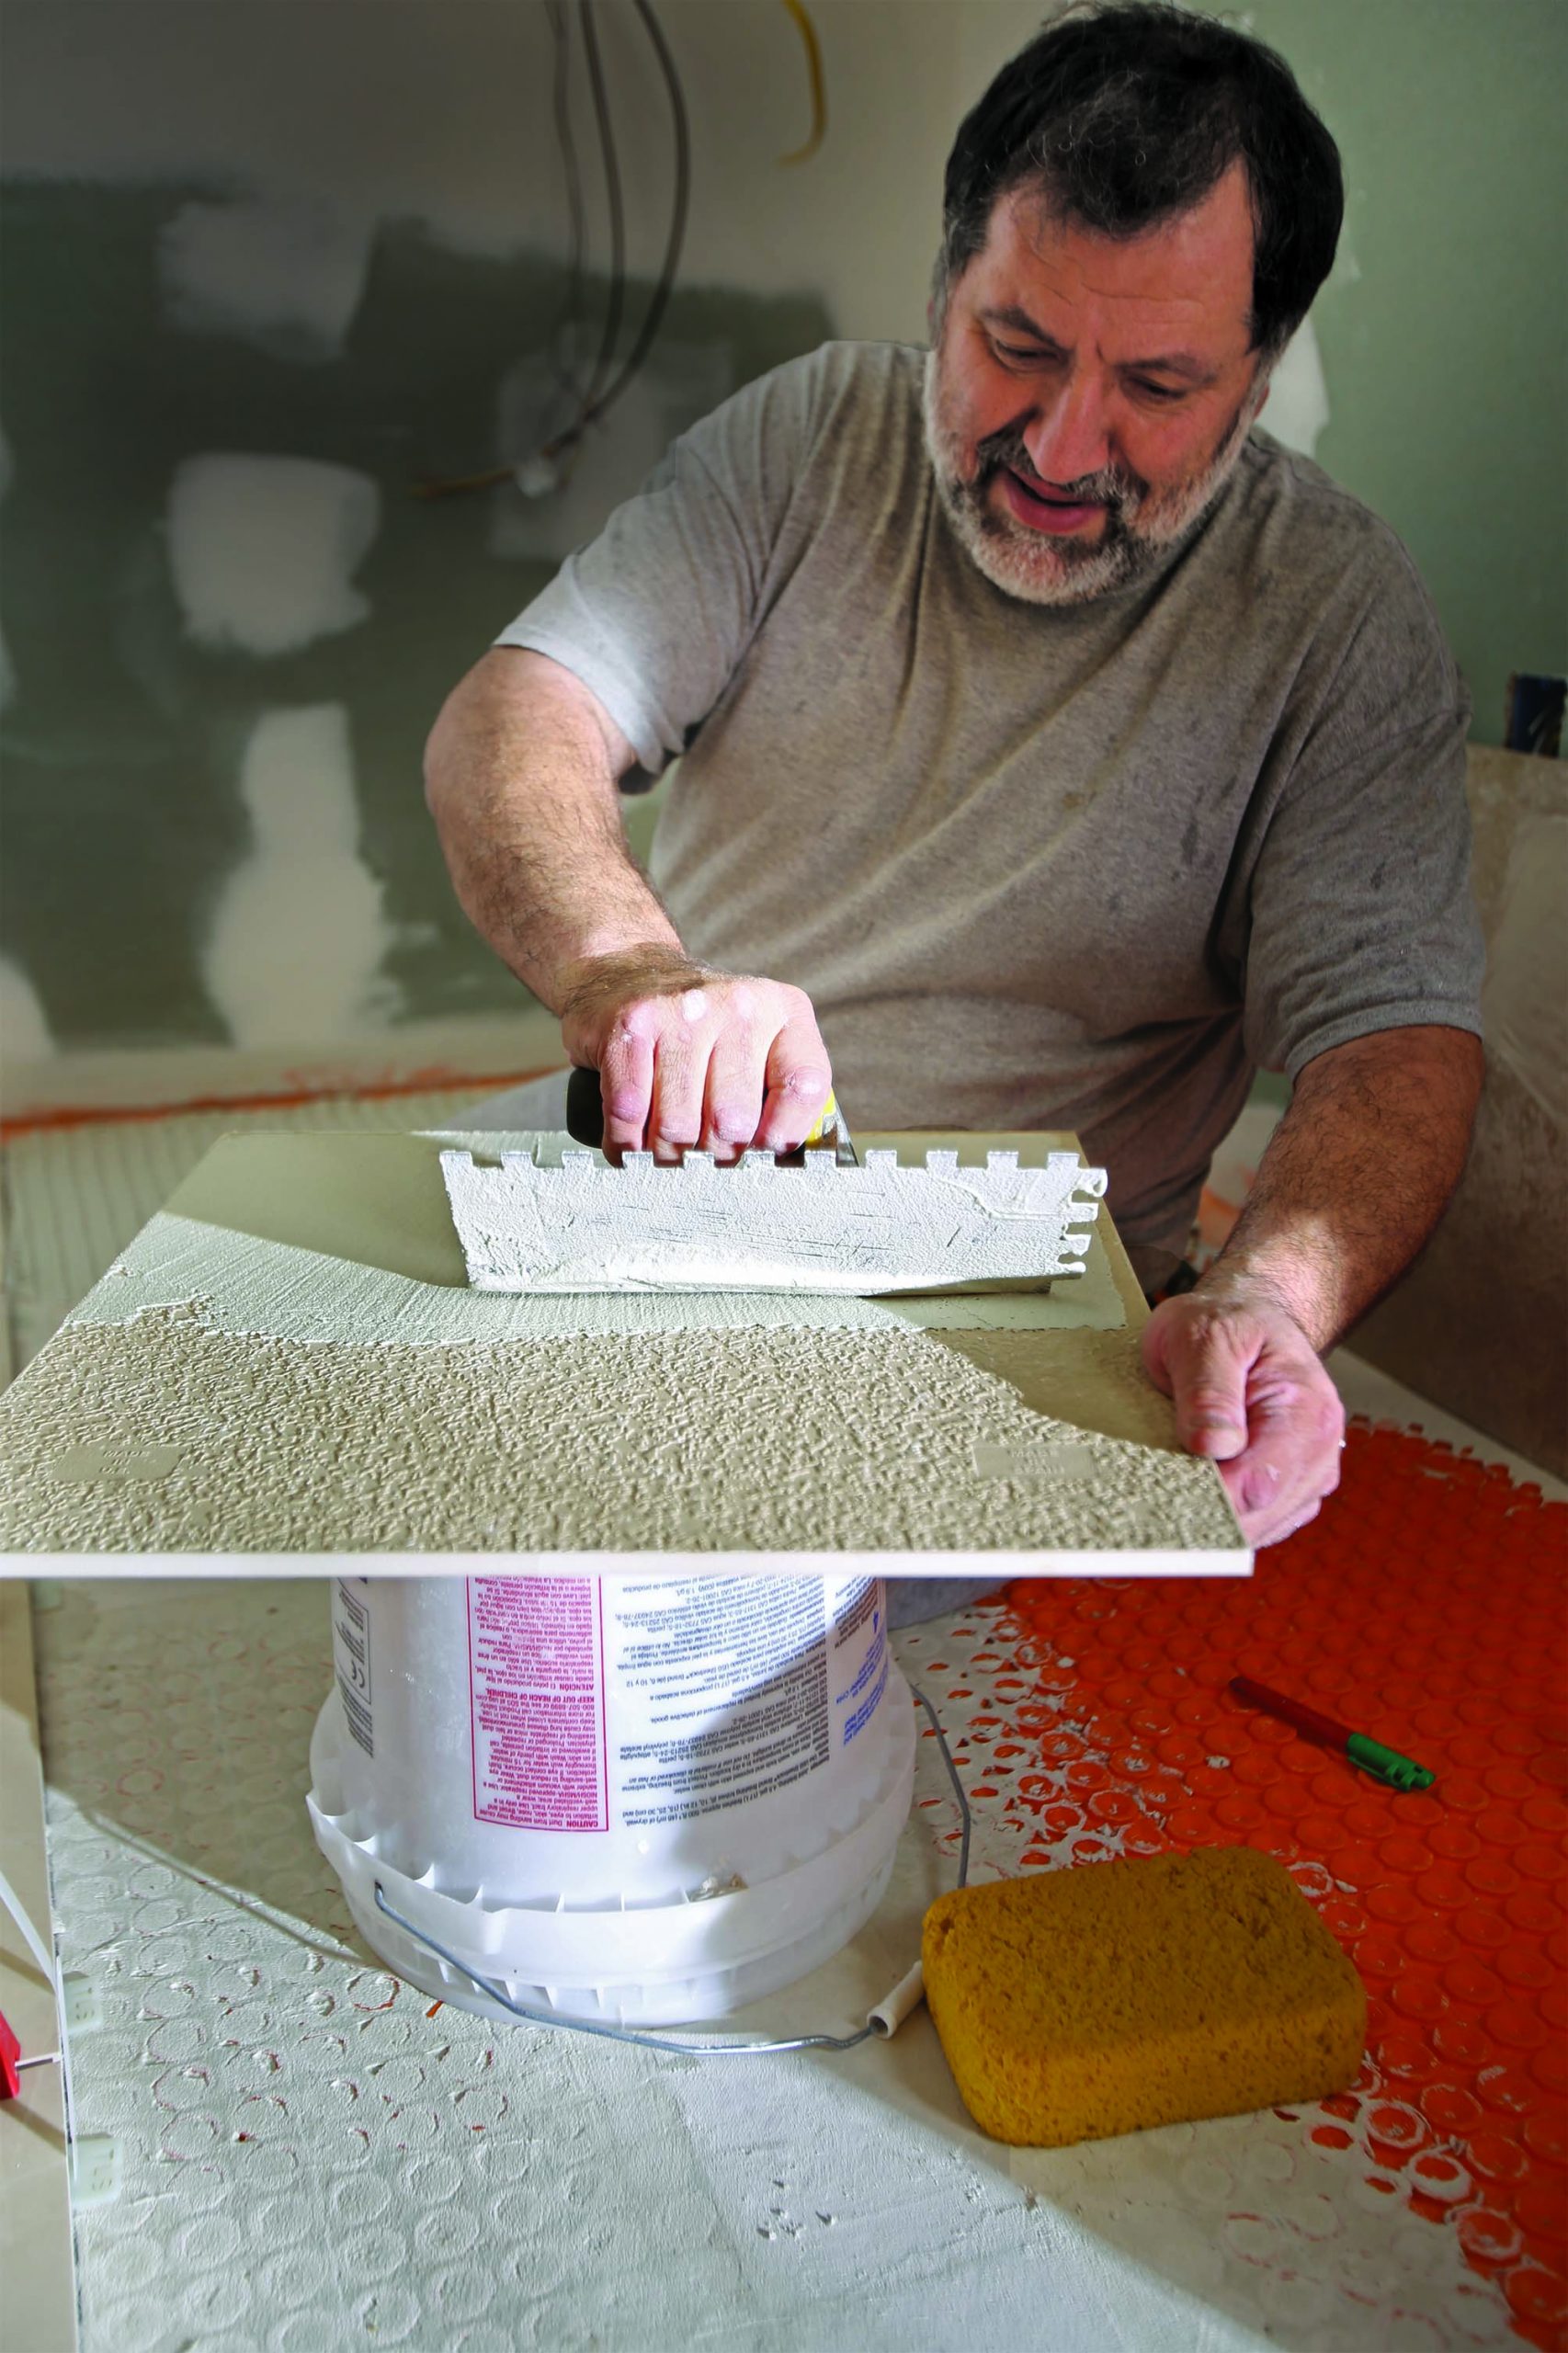
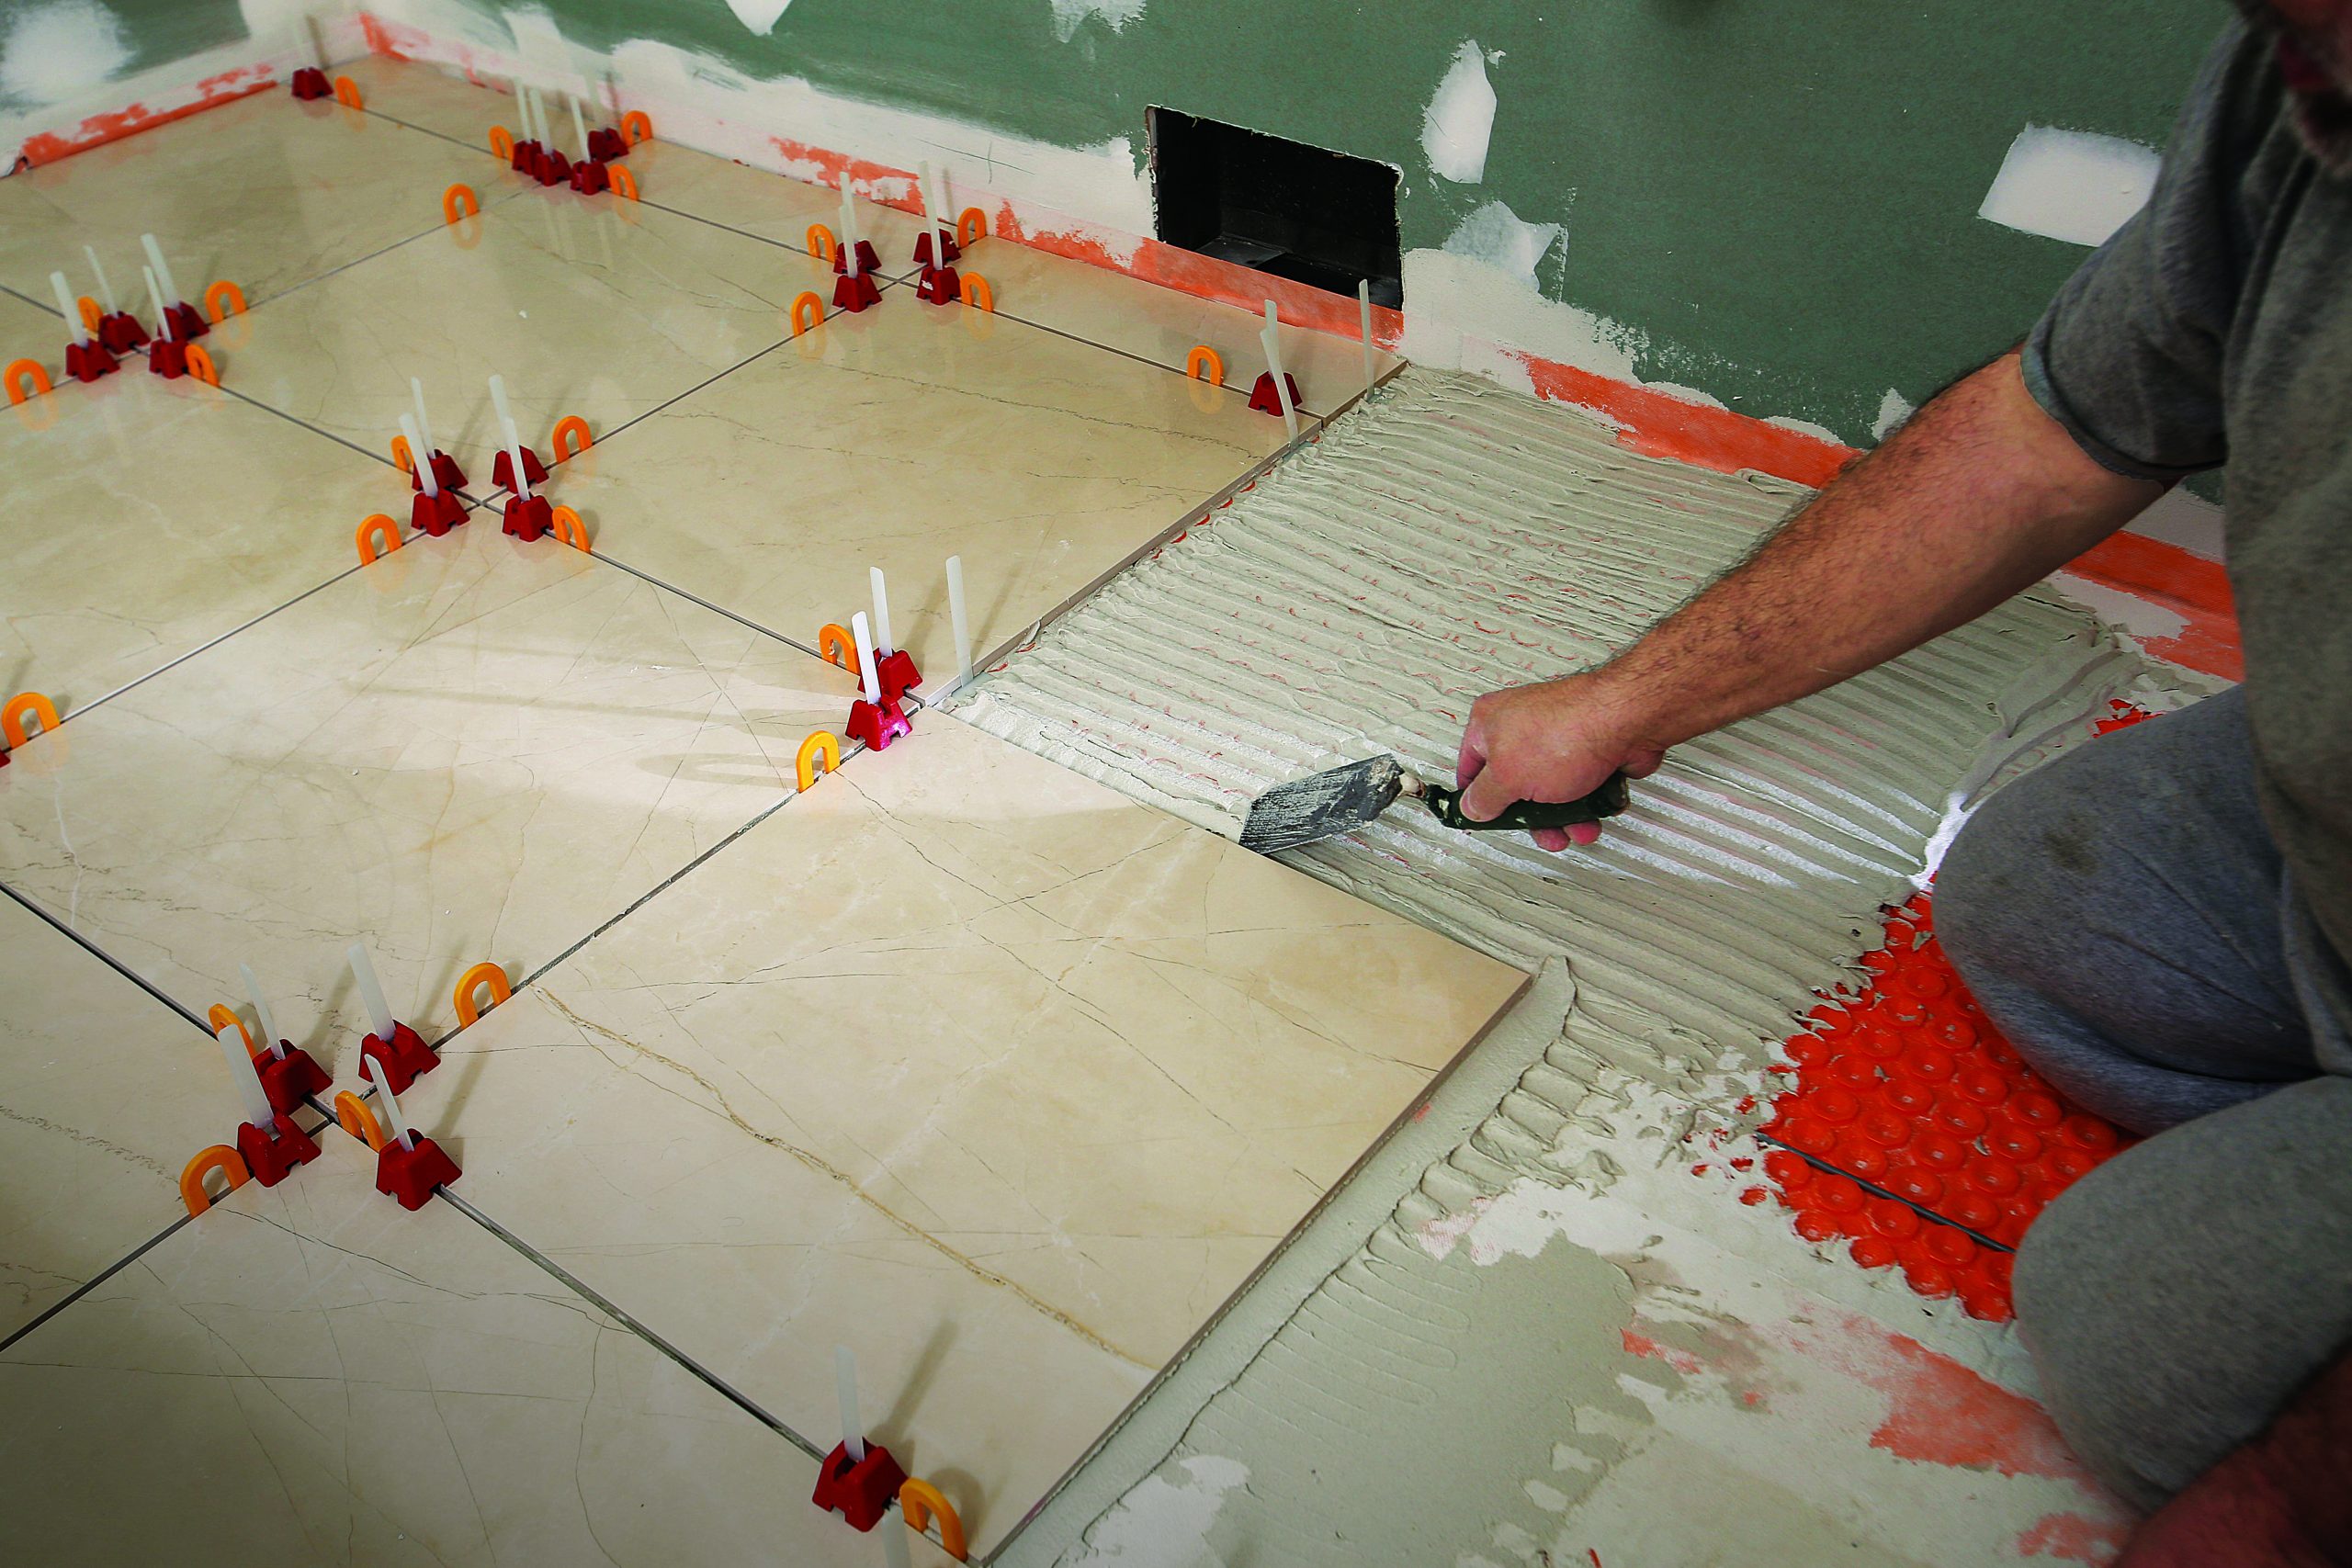
Four steps to mortar application

When setting large-format tile, correct mortar selection is extremely important. use lHt (large, heavy tile) mortar, which is also called medium-bed mortar, because it will not sink down under the weight of the tile. regular mortar will compress as it sets and cause lippage between the tile edges. With a cement-board underlayment, you must use a latex-modified lHt mortar, but setting tile over plastic underlayment usually calls for non-modified mortar. Here i used mapei’s Kerabond t mortar, but laticrete, custom Building products, and tec all manufacture non-modified mortars I’ve used successfully.

large tile
1 Burnish the mortar. Use the flat side of the trowel to completely fill the voids in the underlayment with mortar.

spread mortar for tile
2 Comb it out. After spreading the mortar in a uniform direction, set one end of the tile perpendicular to the furrows, then drop it in place so it pushes the air out and beds fully.

back butter with flat trowel
3 Be sure to back-butter. Flat-trowel a thin coat of mortar on the back of the tile to fill voids and ensure the mortar on the floor has full contact with the tile.

clean as you are laying tile
4 Clean as you go. After setting each tile, use a margin trowel to remove excess mortar from joints and edges that could interfere with grouting.

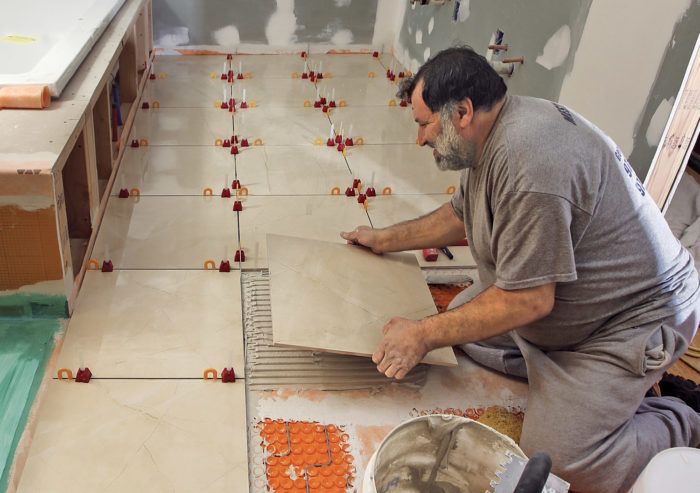
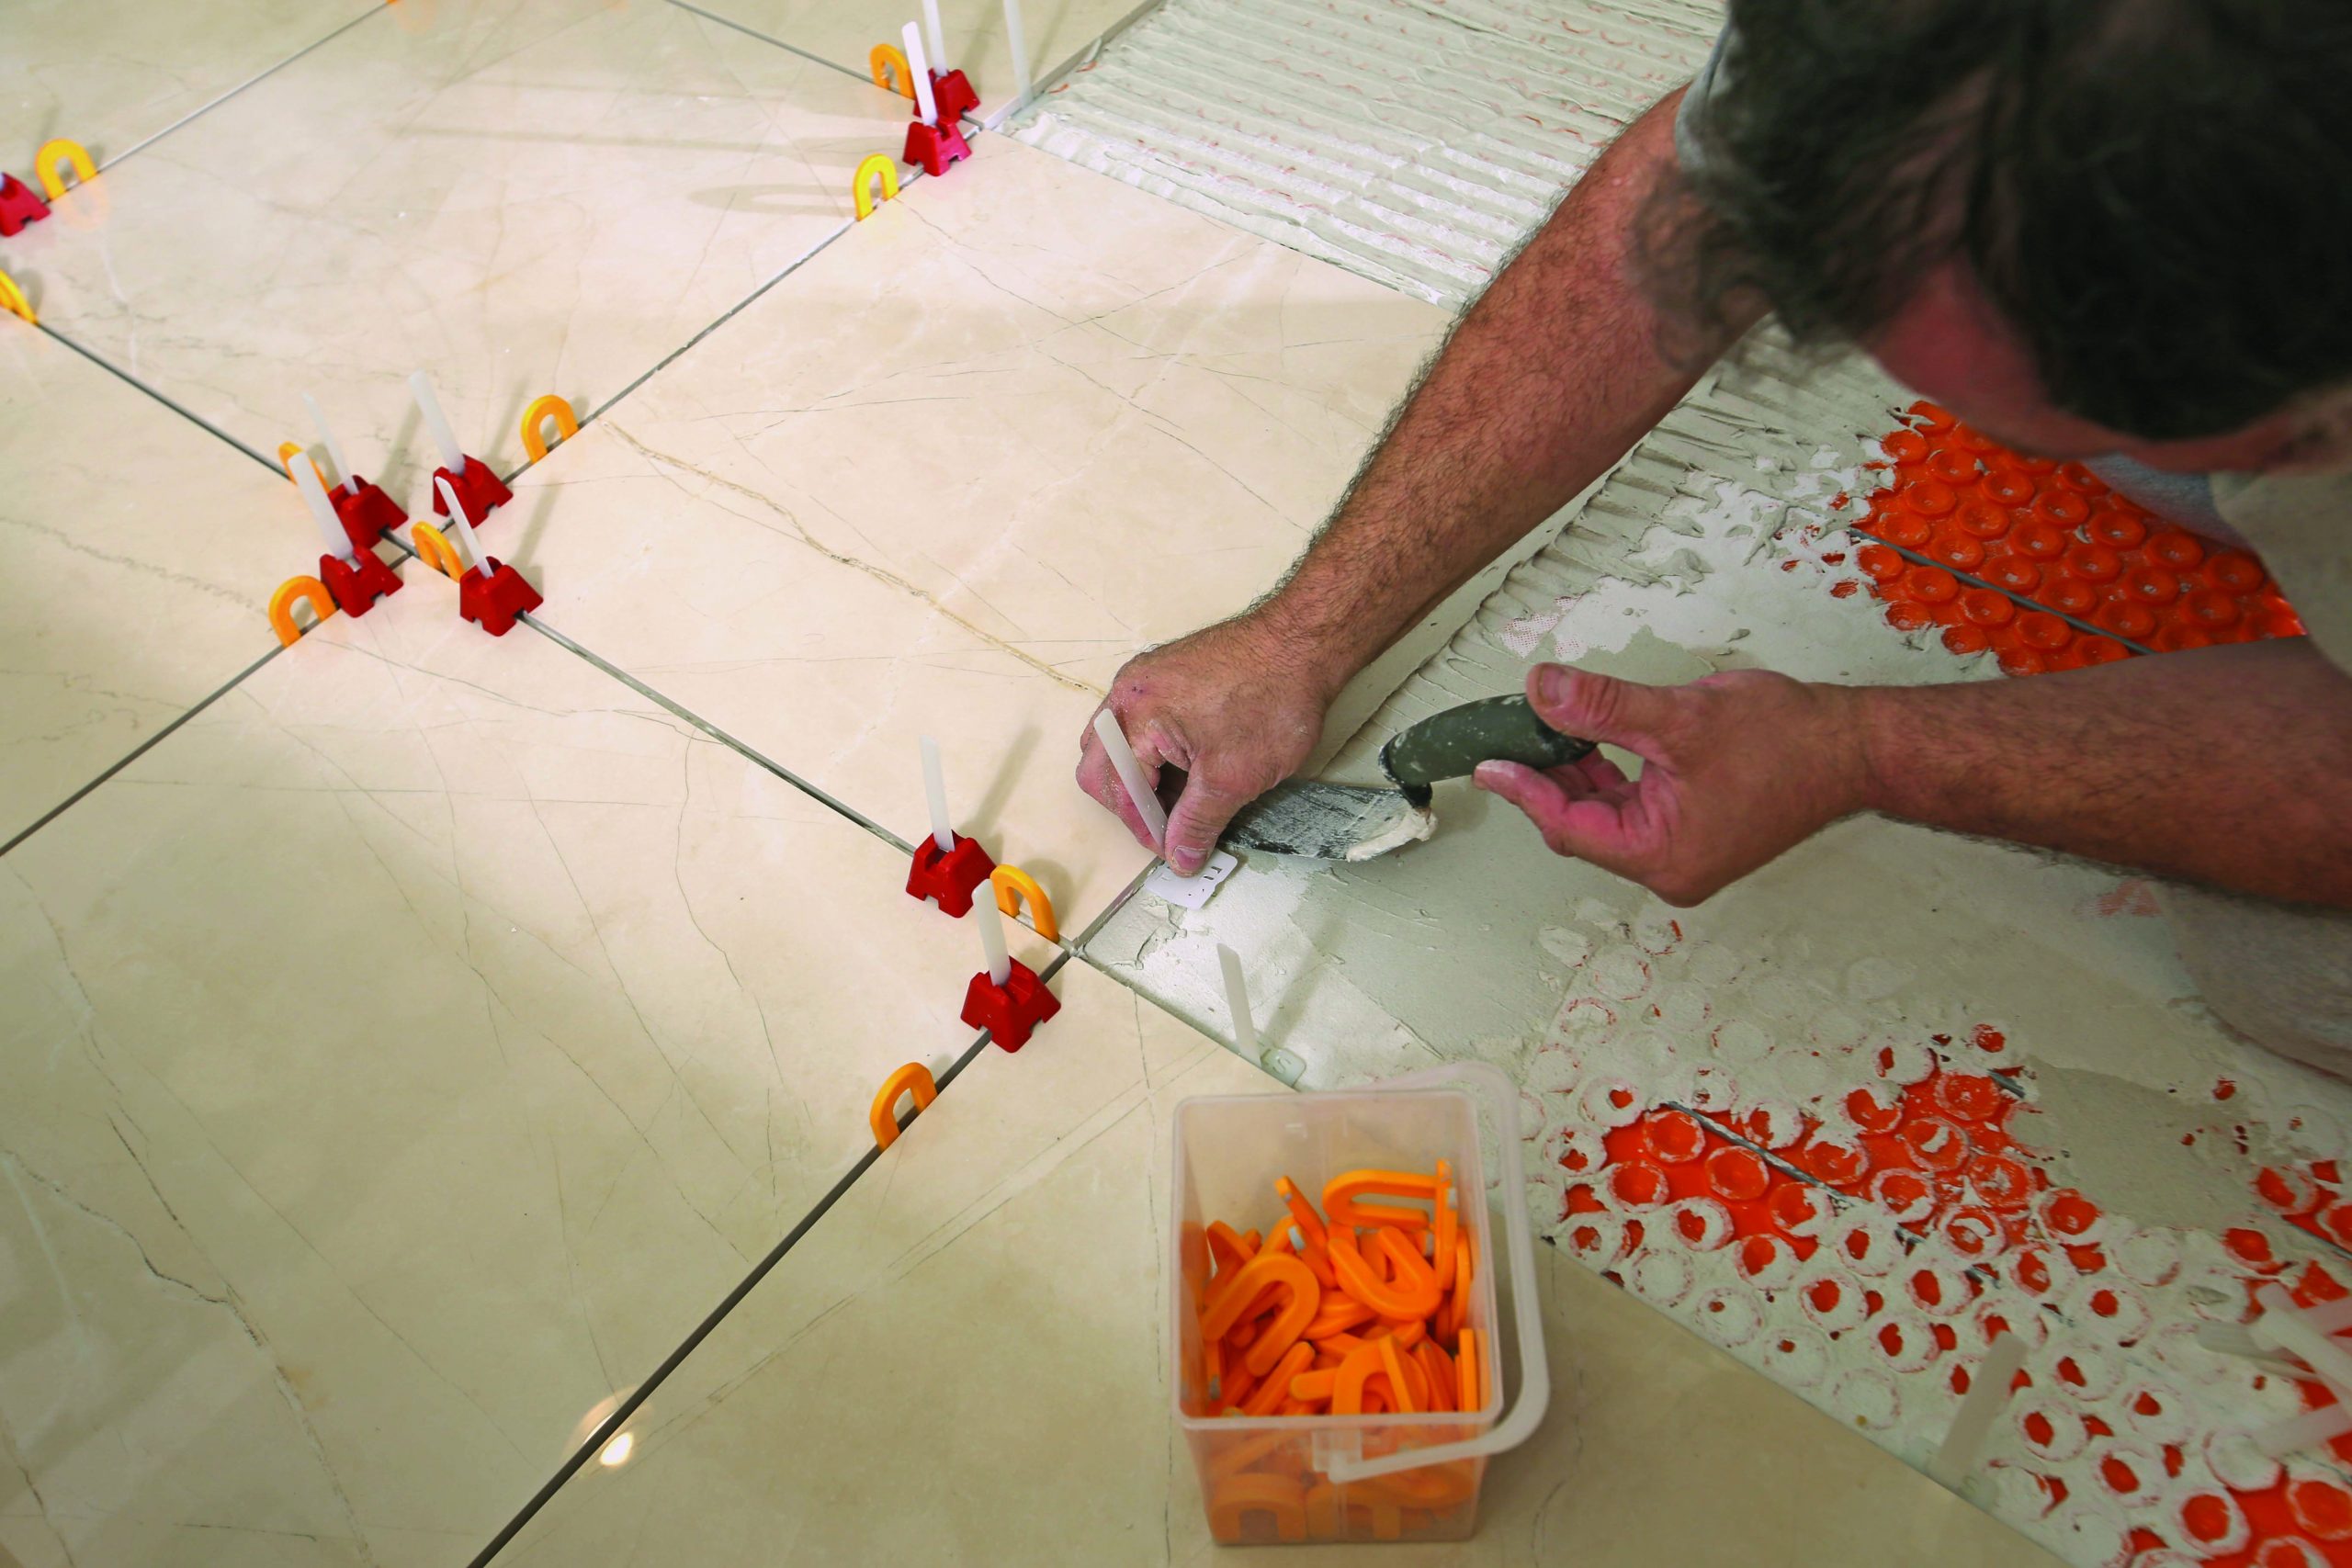
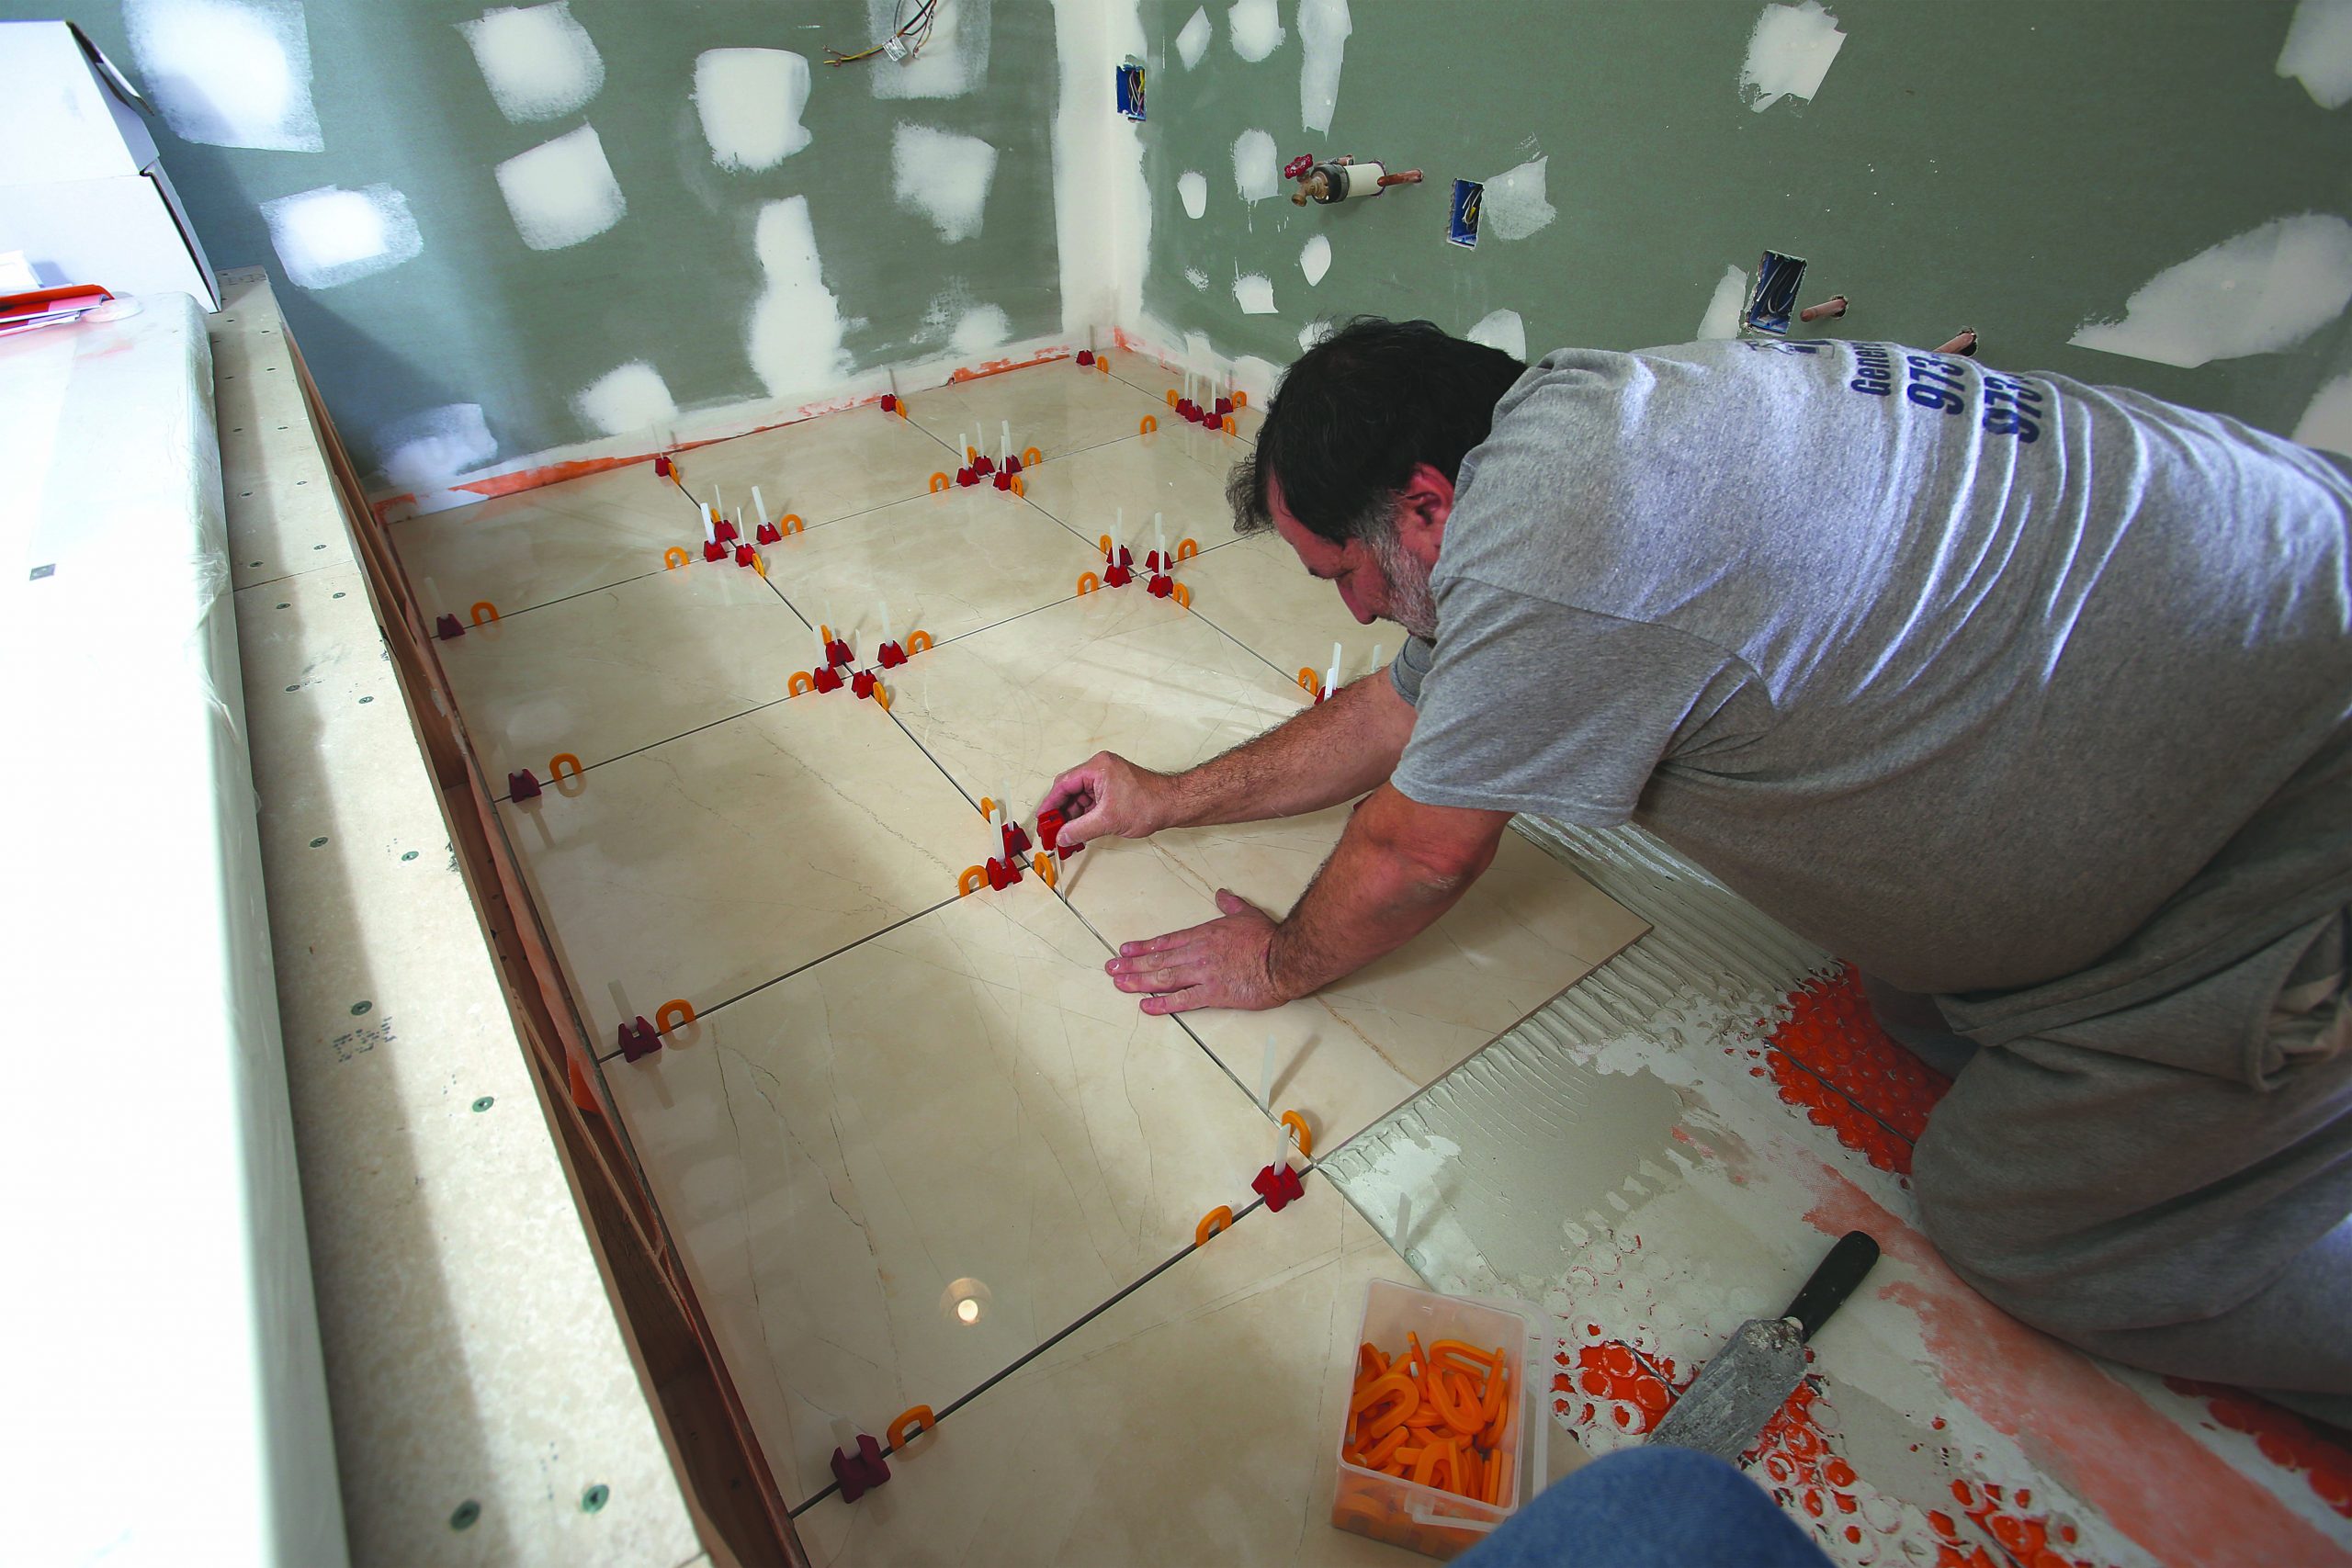
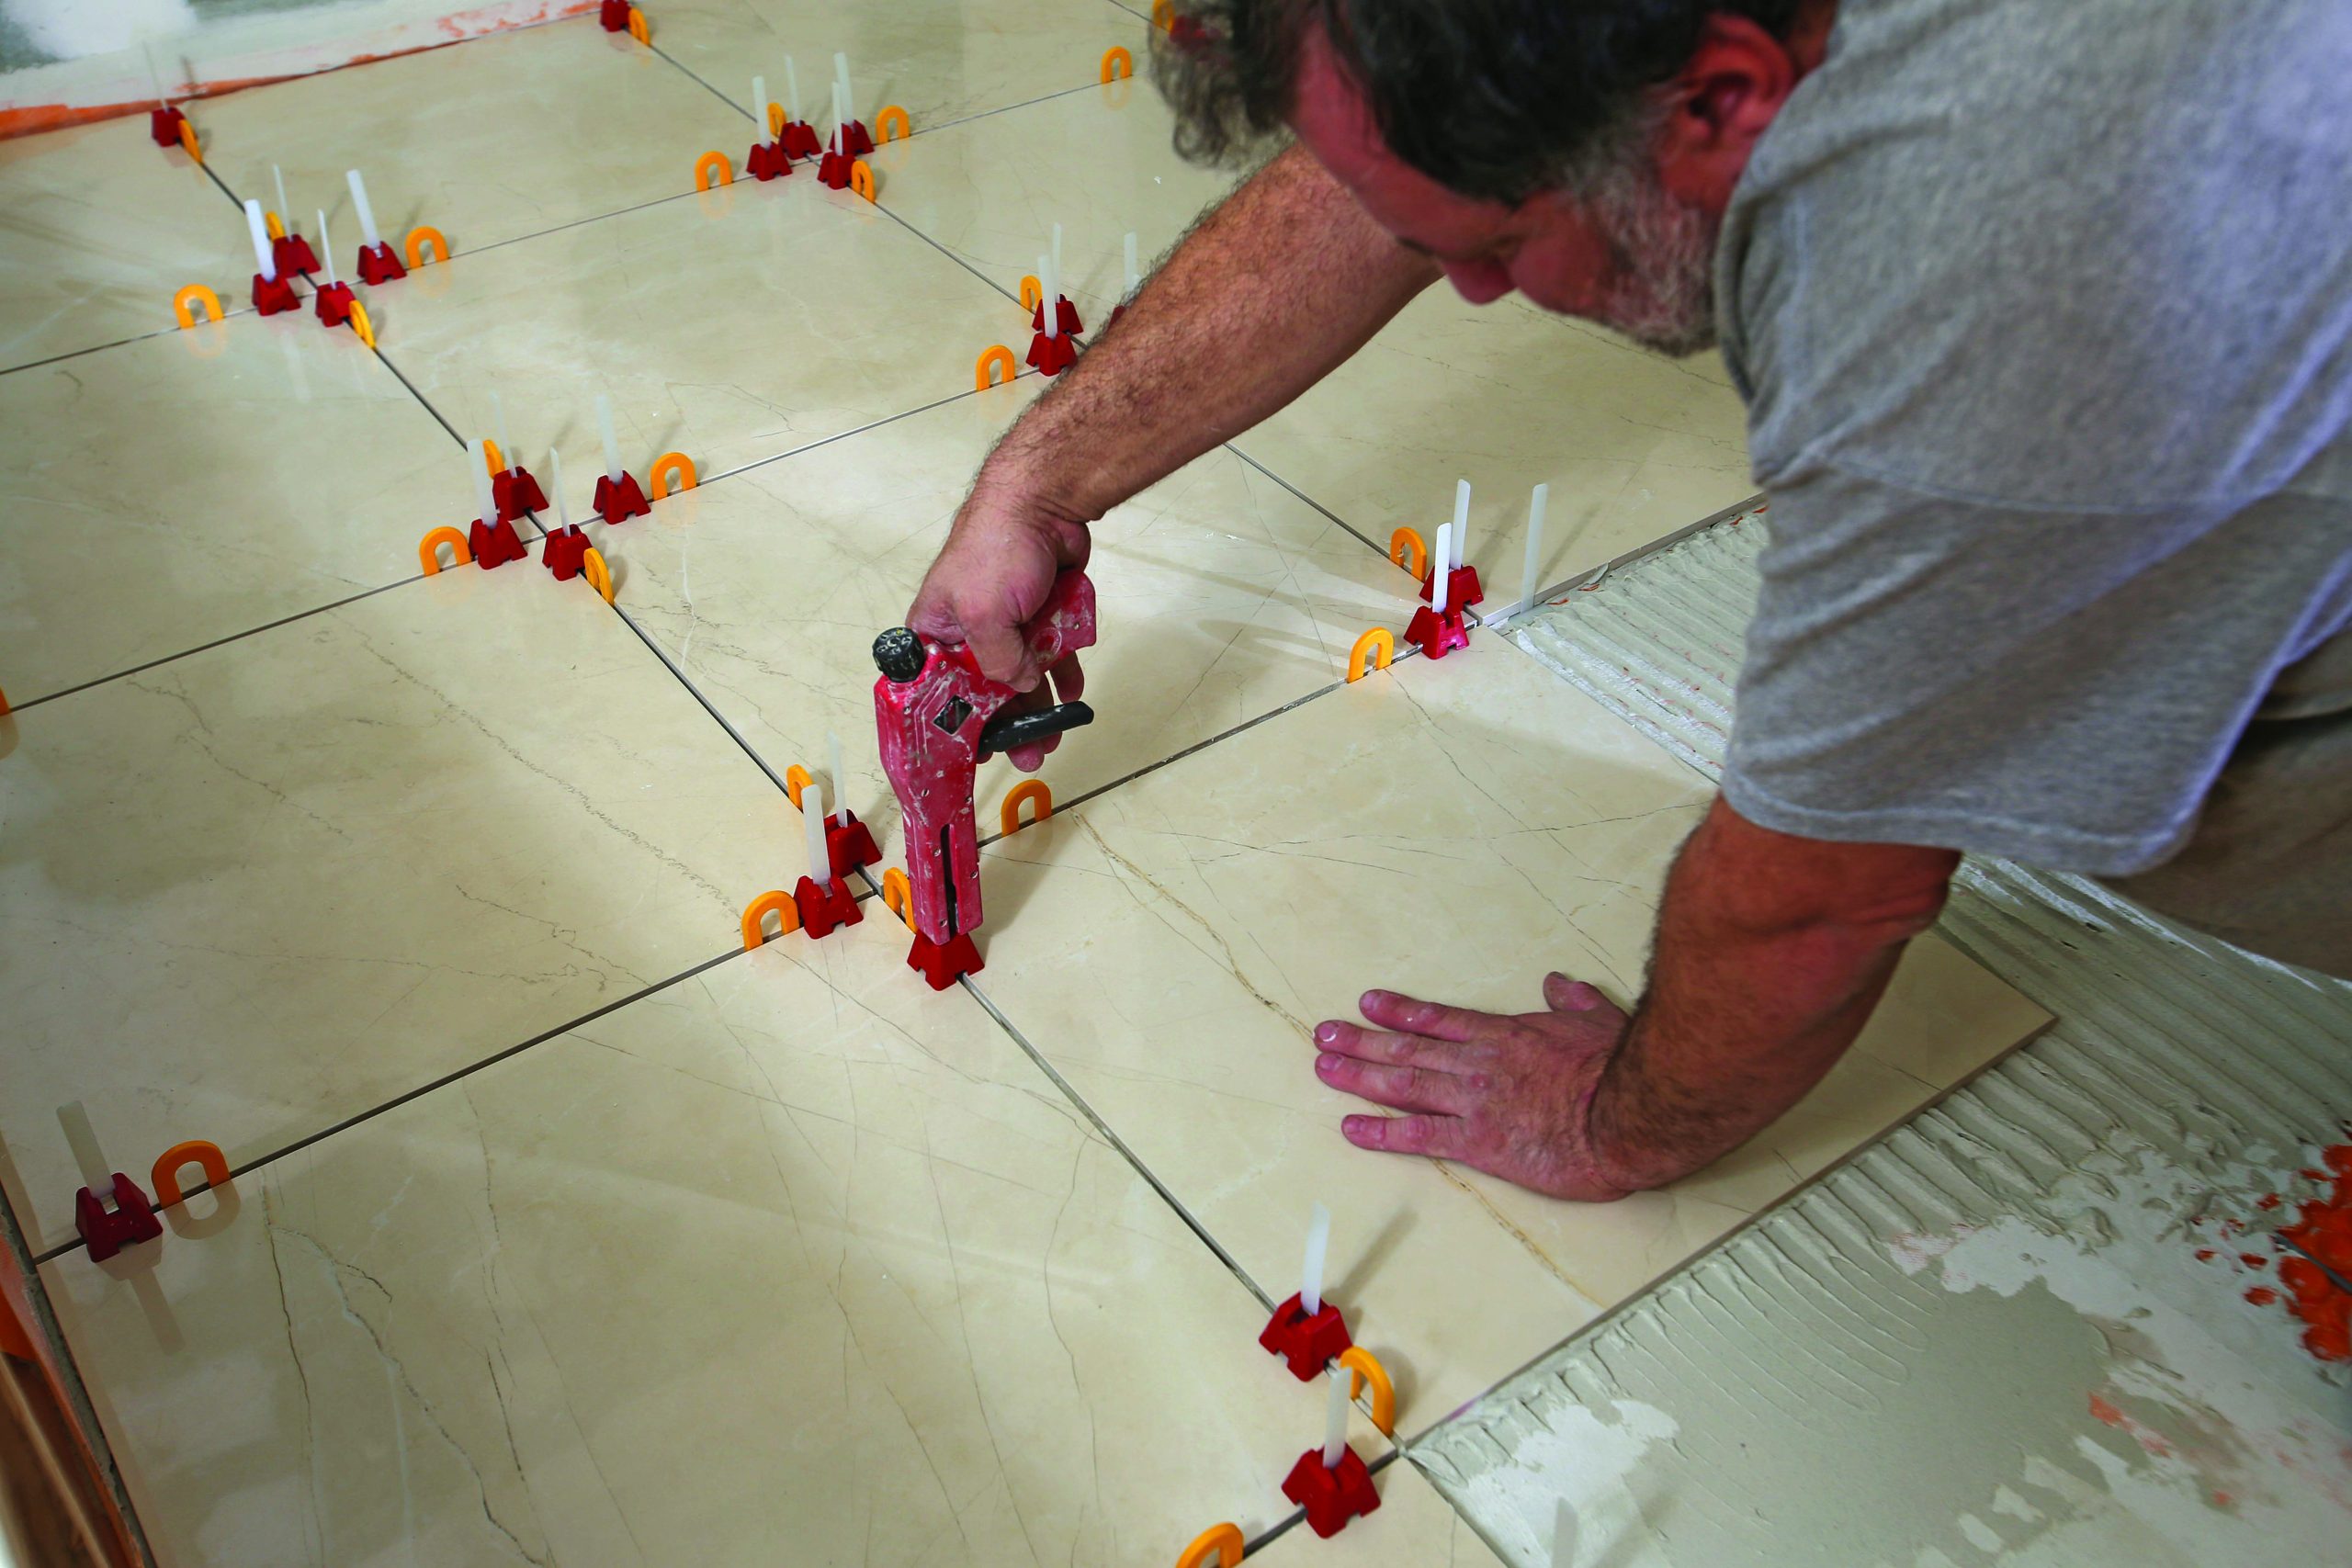
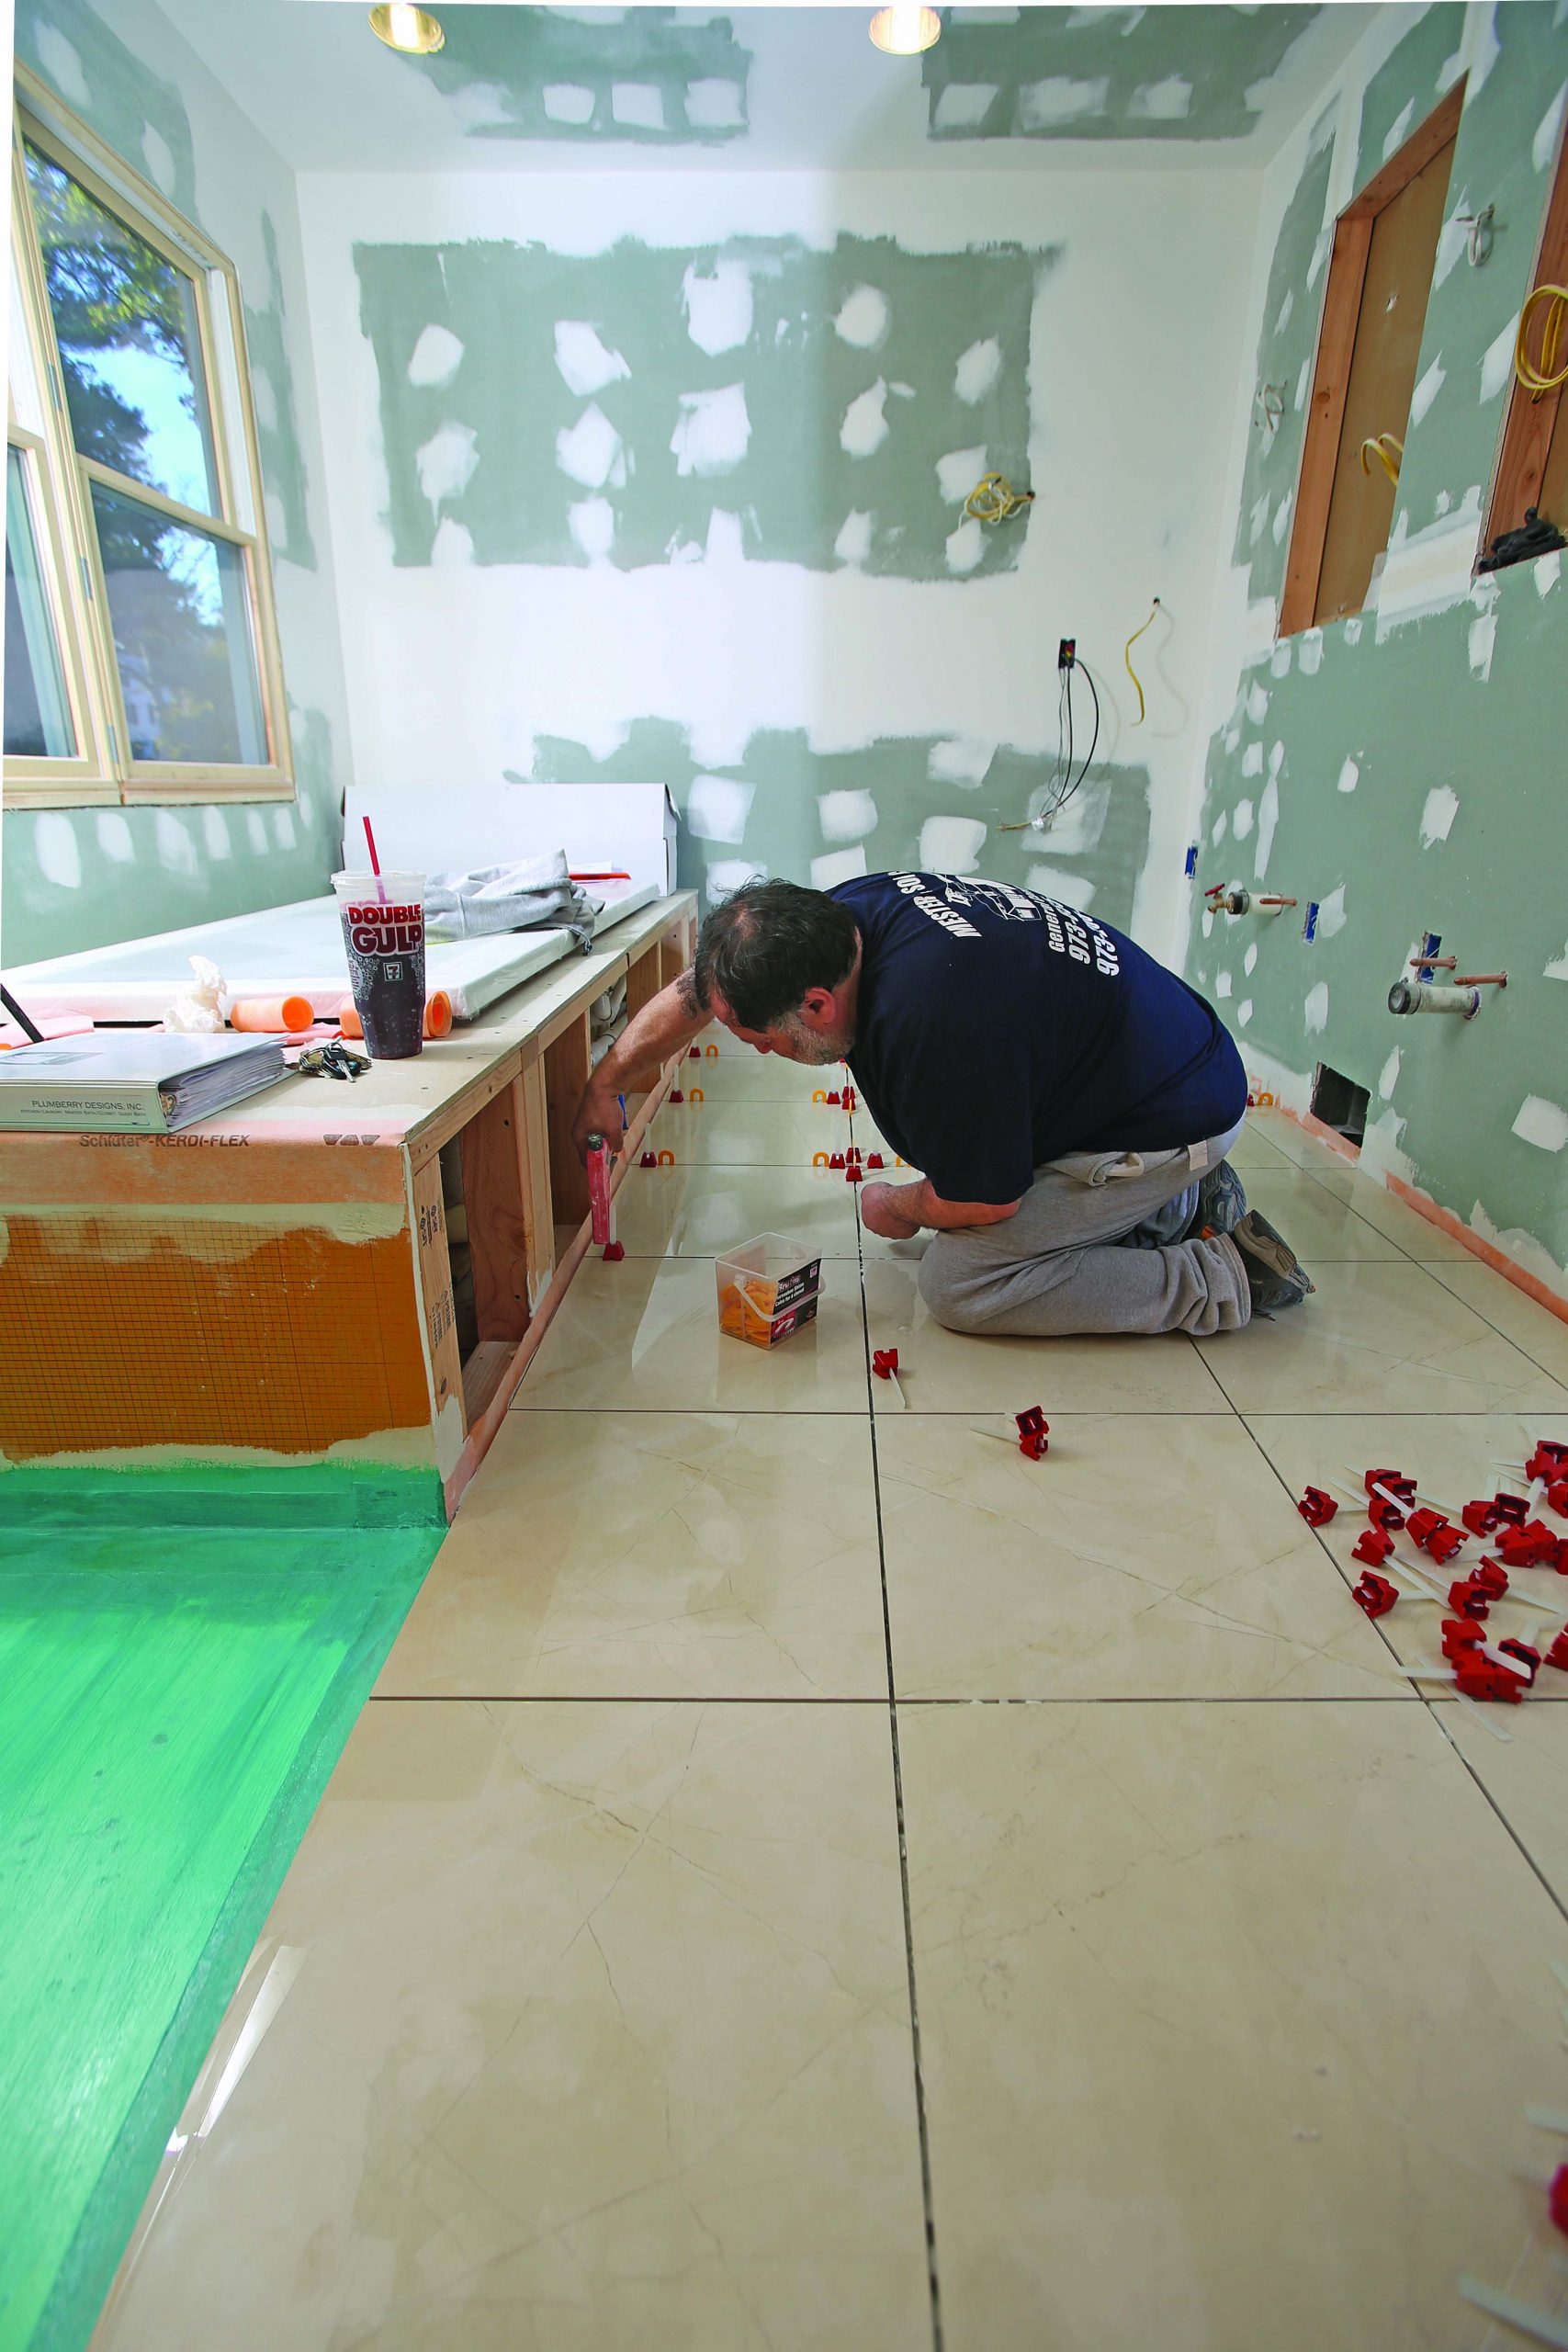
Clamp the tile edges to avoid lippage

Any warpage in large-format tile is magnified by its size and made more apparent by narrow grout lines. (Plus, if you’re using square-edged tile, there’s no roundover that might disguise lippage.) Mortar shrinks as it dries, so a floor that may have been perfectly flat after installation at 4 p.m. won’t be flat by 7 a.m. the next day. To help avoid lippage, various manufacturers make leveling systems that ensure your tile achieves a flat finish by holding it in plane as the mortar sets. All of the systems have some kind of base that is slipped below the tile into the fresh mortar, and some way of pulling against that base with a strap. I like the Tuscan Leveling System, which uses a clamping tool to pull the clamp tight, similar to how a nylon cable tie works. Other systems work by driving a wedge through the strap and against the tile or by threading a plastic nut down the strap, but I’ve found that those systems can scratch softer tile. All of the systems have some means of breaking the strap off below the tile after the mortar has dried, leaving the base in place to be hidden by grout.

slip strap under tile
1 Slip in the strap. Lift the tile slightly with a margin trowel to help keep from pushing mortar out with the strap.

cap the strap
2 Cap the strap. Place the special cap that allows the strap to be pulled up, but captures it so it can’t move backward.

tight clamp for laying tile
3 Tighten the clamp. Use a proprietary gun to pull up the strap while holding the cap down, creating clamping force to draw the tiles into plane.

break off the strap
4 Break off the strap. After the mortar has set, use a second setting on the gun to pull hard enough on the strap to break it at its connection to the base.

From Fine Homebuilding #268

For more photos, illustrations, and details, click the View PDF button below:


View PDF
Previous: A Better Way to Tile a Big Floor Next: Offsetting Tile Joints to Add Visual Interest

Guide

Tiling

Chapter

Tiling Floors

Sign up for eletters today and get the latest how-to from Fine Homebuilding, plus special offers.

Signing you up...

This site is protected by reCAPTCHA and the Google Privacy Policy and Terms of Service apply.
See all newsletters
See all newsletters

View Comments

  1. BobboMax | Jan 08, 2020 09:35pm | #1

    Tile isn't flat (duh!) so let's assume it's curved and that a 12" tile and a 24" tile have the same curvature- that is, if you put a 12" ruler against the concave side, you'll get the same lippage, say 1/16". The ruler imitates a flat substrate (yeah, sure.) Now if you put a 24" ruler on the 24" tile, you'll get FOUR times the lippage, 1/4".

    It's a bit surprising, but you can prove it to yourself with a garage floor, a string and a pencil. Draw a large arc, say 60" radius. Now, starting from the same point on the arc, strike 2 more arcs, one with 12" of string, the next with a 24" radius. Draw the 2 straight lines from the original point on the arc to the two points at 12" and 24". Now measure the maximum distance from each straight line to the original arc- you'll get about 5/16" on the 12" line, about 1-1/4 on the 24" line. That is, 4 times the lippage.

Log in or create an account to post a comment.

Sign up Log in

Become a member and get full access to FineHomebuilding.com

Tiling

Tiling

Trusted, comprehensive guidance from the pros for a great-looking tile job in any room of the house

View Project Guide

View All Project Guides »

Become a member and get unlimited site access, including the Tiling Project Guide.

Start Free Trial

Selecting Tile
  • The Basics
  • Tile Options
Tools & Techniques
  • Job-Preparation Tools
  • Cutting Tiles
  • Setting & Grouting Tools
Installation Materials
  • Membranes & Substrates
  • Adhesives & Mortars
  • Grout
  • Sealers & Caulk
  • Spacers, Hardware & Trim
Preparation
  • The Prep Job
  • Repairs & Surface Prep
  • Installing Backerboard
Tiling Floors
  • Layout & Installation
  • Setting Specialty Tiles
Tiling Walls & Backsplashes
  • Preparation
  • Backsplashes
  • Walls
Tiling Showers
  • Tile Shower Basics
  • Waterproofing
  • Shower Pans
  • Shower Drains
  • Shower Niches
  • Video Series: Tile a Shower
  • Video Series: Tile a Barrier-Free Bathroom
Grouting, Sealing & Caulking
  • Grouting
  • Caulking
  • Sealing
Maintenance & Repair
  • Maintenance
  • Tile Repair
  • Grout Repair

Fine Home Building

Newsletter Sign-up

  • Fine Homebuilding

    Home building tips, offers, and expert advice in your inbox.

  • Green Building Advisor

    Building science and energy efficiency advice, plus special offers, in your inbox.

  • Old House Journal

    Repair, renovation, and restoration tips, plus special offers, in your inbox.

Signing you up...

This site is protected by reCAPTCHA and the Google Privacy Policy and Terms of Service apply.
See all newsletters

Follow

  • Fine Homebuilding

    Dig into cutting-edge approaches and decades of proven solutions with total access to our experts and tradespeople.

    Start Free Trial Now
    • Facebook
    • Instagram
    • X
    • LinkedIn
  • GBA Prime

    Get instant access to the latest developments in green building, research, and reports from the field.

    Start Free Trial Now
    • Facebook
    • YouTube
  • Old House Journal

    Learn how to restore, repair, update, and decorate your home.

    Subscribe Now
    • Facebook
    • Instagram
    • X

Membership & Magazine

  • Online Archive
  • Start Free Trial
  • Magazine Subscription
  • Magazine Renewal
  • Gift a Subscription
  • Customer Support
  • Privacy Preferences
  • About
  • Contact
  • Advertise
  • Careers
  • Terms of Use
  • Site Map
  • Do not sell or share my information
  • Privacy Policy
  • Accessibility
  • California Privacy Rights

© 2025 Active Interest Media. All rights reserved.

Fine Homebuilding receives a commission for items purchased through links on this site, including Amazon Associates and other affiliate advertising programs.

  • Home Group
  • Antique Trader
  • Arts & Crafts Homes
  • Bank Note Reporter
  • Cabin Life
  • Cuisine at Home
  • Fine Gardening
  • Fine Woodworking
  • Green Building Advisor
  • Garden Gate
  • Horticulture
  • Keep Craft Alive
  • Log Home Living
  • Military Trader/Vehicles
  • Numismatic News
  • Numismaster
  • Old Cars Weekly
  • Old House Journal
  • Period Homes
  • Popular Woodworking
  • Script
  • ShopNotes
  • Sports Collectors Digest
  • Threads
  • Timber Home Living
  • Traditional Building
  • Woodsmith
  • World Coin News
  • Writer's Digest
Active Interest Media logo
X
X
This is a dialog window which overlays the main content of the page. The modal window is a 'site map' of the most critical areas of the site. Pressing the Escape (ESC) button will close the modal and bring you back to where you were on the page.

Main Menu

  • How-To
  • Design
  • Tools & Materials
  • Video
  • Blogs
  • Forum
  • Project Guides
  • Reader Projects
  • Magazine
  • Members
  • FHB House

Podcasts

  • FHB Podcast
  • ProTalk

Webinars

  • Upcoming and On-Demand

Podcasts

  • FHB Podcast
  • ProTalk

Webinars

  • Upcoming and On-Demand

Popular Topics

  • Kitchens
  • Business
  • Bedrooms
  • Roofs
  • Architecture and Design
  • Green Building
  • Decks
  • Framing
  • Safety
  • Remodeling
  • Bathrooms
  • Windows
  • Tilework
  • Ceilings
  • HVAC

Magazine

  • Current Issue
  • Past Issues
  • Magazine Index
  • Subscribe
  • Online Archive
  • Author Guidelines

All Access

  • Member Home
  • Start Free Trial
  • Gift Membership

Online Learning

  • Courses
  • Project Guides
  • Reader Projects
  • Podcast

More

  • FHB Ambassadors
  • FHB House
  • Customer Support

Account

  • Log In
  • Join

Newsletter

Get home building tips, offers, and expert advice in your inbox

Signing you up...

This site is protected by reCAPTCHA and the Google Privacy Policy and Terms of Service apply.
See all newsletters
See all newsletters

Follow

  • X
  • YouTube
  • instagram
  • facebook
  • pinterest
  • Tiktok

Join All Access

Become a member and get instant access to thousands of videos, how-tos, tool reviews, and design features.

Start Your Free Trial

Subscribe

FHB Magazine

Start your subscription today and save up to 81%

Subscribe

We hope you’ve enjoyed your free articles. To keep reading, become a member today.

Get complete site access to expert advice, how-to videos, Code Check, and more, plus the print magazine.

Start your FREE trial

Already a member? Log in

Privacy Policy Update

We use cookies, pixels, script and other tracking technologies to analyze and improve our service, to improve and personalize content, and for advertising to you. We also share information about your use of our site with third-party social media, advertising and analytics partners. You can view our Privacy Policy here and our Terms of Use here.

Cookies

Analytics

These cookies help us track site metrics to improve our sites and provide a better user experience.

Advertising/Social Media

These cookies are used to serve advertisements aligned with your interests.

Essential

These cookies are required to provide basic functions like page navigation and access to secure areas of the website.

Delete My Data

Delete all cookies and associated data