An Old-School Path to a Barrier-Free Bathroom
A classic mud job forms the tile base for a modern curbless shower.
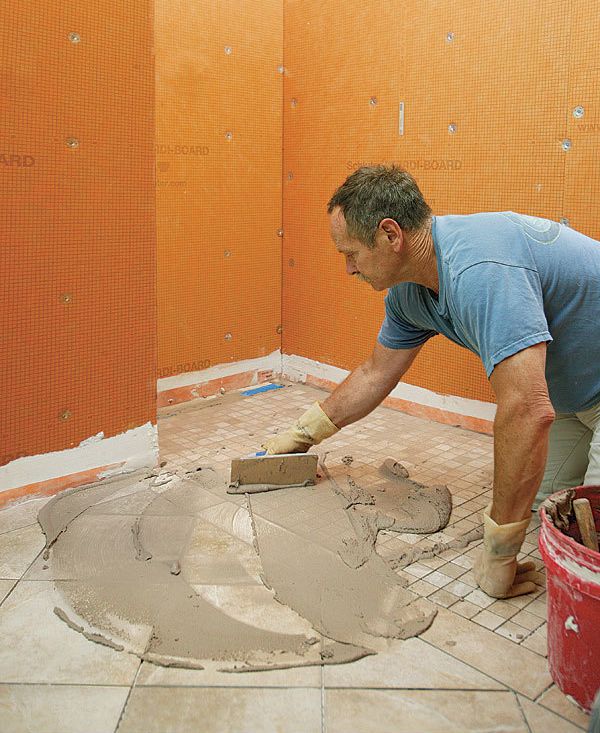
Before tile backerboard became available, setting tile for a shower floor required laying down a substrate of troweled cement mortar, known as a mud job. Veteran tilesetter and frequent Fine Homebuilding contributor Tom Meehan continues to use this method for curbless showers. In this Master Carpenter article, he demonstrates how. He begins by lowering the subfloor in the area of the shower so that he doesn’t have to use so much mortar. There are three ways to do this, and Meehan describes each one. When the subfloor is ready, he puts down a layer of builder’s felt, followed by galvanized diamond-mesh wire lath. After mixing the mortar, Meehan dumps it around the perimeter of the room up to the shower area, tamps it down, and checks to make sure that it’s level. When the perimeter is done, Meehan fills in the interior, screeding the mortar with a level or other straightedge. He then moves to the shower area, where he creates a 3/4-in. pitch down to the drain, marks the location, and sets the drain. To seal the mortar, which is porous, he installs a waterproof membrane, beginning with 5-in. strips split between the floor and the wall. When the perimeter is complete, he moves on to the rest of the floor, making sure to have at least 2 in. of overlap on all seams. At this point, the floor is ready for tile and then grout.
Life is full of uncertainties. You can count on a few things, though, and here’s one of them: Water runs downhill. In a bathroom, the trick is to keep water going toward the drain. Porcelain vessels are good at containment, but switching from a tub to a shower stall changes the game. Curbless showers, which make life easier for folks with special needs, also complicate the issue of the drain.
Before the advent of tile backerboard, tile was set on a substrate of troweled cement mortar, known in the tile world as a mud job. I’ve learned to apply this mud-and-tile method to a curbless shower so that the water goes where it’s supposed to. (For a look at a similar job, see my article “A Sloping Floor for a Barrier-Free Bath,” FHB #185.) For this job, I also installed a linear drain along the far wall, which means that the shower floor is pitched in only one plane, rather than in a bowl shape around a circular drain.
Prep the subfloor first
I begin by lowering the subfloor in the area of the shower so that I don’t have to use as much mortar. There are three options for this step: (1) add an additional layer of 3⁄4-in. plywood around the shower area; (2) notch the floor joists and resheathe the floor; or (3) add cleats to the joists. Whatever option I use, the idea is to lower the floor in the shower area by 3⁄4 in. (Larger showers may require more pitch.) On this job, it was easier to add another layer of plywood to the subfloor.
Next, I put down a layer of #15 builder’s felt, followed by galvanized 2.5-lb. diamond-mesh wire lath to anchor the mortar to the floor. I start nailing in the middle of the room, then push out the mesh to the perimeter as I nail so that the wire doesn’t buckle in the middle.
The floor needs a proper mix
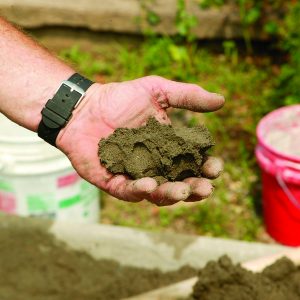
It’s extremely important that the mortar have the right consistency. If it’s too wet, it has no strength; too dry, and it won’t pack down. I start with 25 full shovels of sand for every bag of portland cement. This basic batch unit will cover about 35 sq. ft. at a depth of 11⁄2 in. To arrive at the correct consistency, I use about 5 gal. of water, added in small amounts as I mix.
Trick of the trade
The right mix. One trick to mixing mortar is to use a chopping motion, bringing the hoe up high so that gravity helps to pull it through the dense sand and portland-cement mix. I mix the ingredients twice, once from each side, then add water and mix three more times.
 |
 |
Establish the perimeter
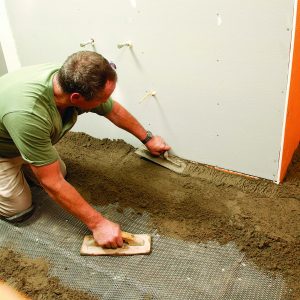
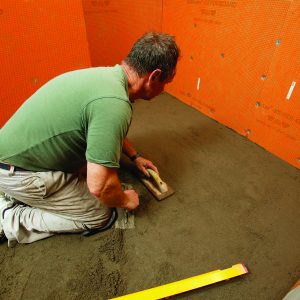
After I’ve mixed the mortar, I fill a 5-gal. bucket and start to dump the mortar around the perimeter of the room, up to the shower area. I tamp it down hard with a steel trowel and use a wooden float to pack the edges, especially the corners. (Be aware of the toilet flange’s location. You don’t want to cover it over and tile it—unfortunately, I know this from experience.) As I pack down the perimeter, I keep checking to make sure that it’s level all the way around the room. I’ll deal with the pitch in the shower once I have this level line as a reference.
At the door threshold, I nail a strip of 1x as a stopping point. When installed, the tile should come flush to the top of the strip. To establish the correct height of the mortar, I create a point 3⁄8 in. below the top of the strip, then check the height with a tile once I’ve laid the mortar. It all depends on how level the floor is, but I usually aim for a perimeter depth of about 1 in. and no less than 3⁄4 in.
Fill and screed to the drain
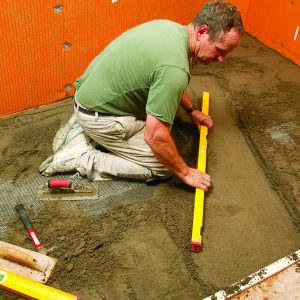
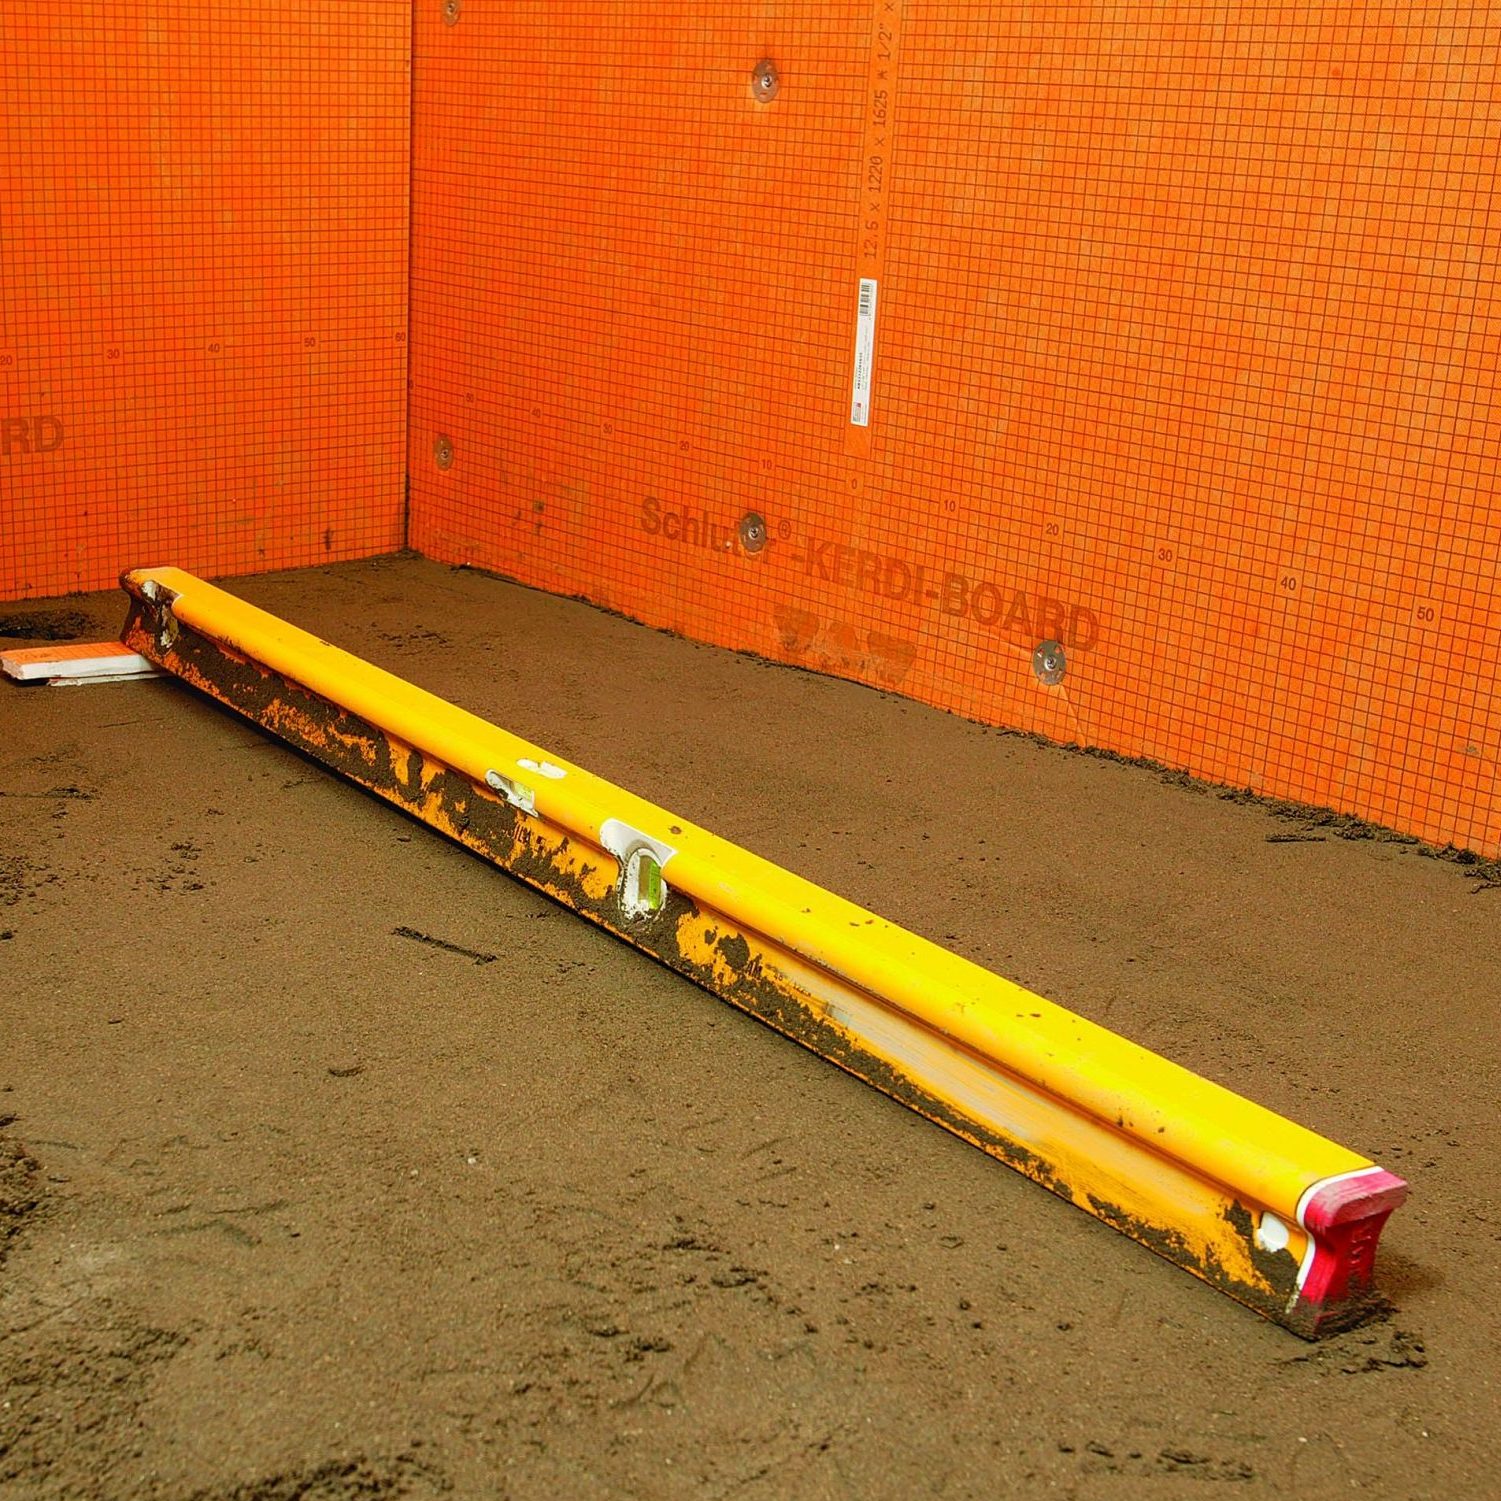
When the perimeter is packed and level, I start to fill in the interior with mortar. Using the perimeter as a guide, I screed the mortar with a straightedge. The key to pulling the straightedge is not to pull it straight but at an angle from the perimeter. I pack everything down with the steel trowel, then smooth the surface with a wooden float in an orbital motion as I go. If there are any low points, I fill them in and pack them down again. I use a steel trowel for a last finishing pass. It’s a good idea to work from inside the room toward the door.
Once I’ve established a level plane in the rest of the room, I start working on the pitched floor of the shower. Here, the out-side edge of the shower is level with the rest of the room. Inside the shower area, I pitch the mortar down to the drain, aiming for a 3⁄4-in. difference in grade from one end to the drain. I use 2×2 tiles in the shower to ease the transition in grade from the shower to the floor, which will be covered in 12×12 tiles.
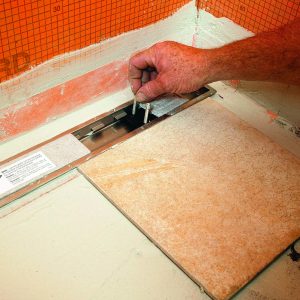
With the pitched floor established in the shower, my next task is to set the drain. For this job, I’m installing a linear drain. Unlike a traditional round drain flange that’s installed before the mortar, this drain is tied into the membrane overlay. Besides its shape, the main difference in a linear drain is that it doesn’t require a flange. Once installed in the floor, it’s tied directly to the drainpipe with a flexible coupling. When the drain fits, I finish the rest of the floor and allow the mud to dry overnight.
Lay the mortar
Using a mortar underlayment makes pitching the floor toward the drain possible. While round drains require the surrounding floor to be bowl-shaped, a linear drain is positioned against the shower’s back wall, so the shower floor needs to slope only in a single plane to the drain.
Protect the floor with a waterproof membrane
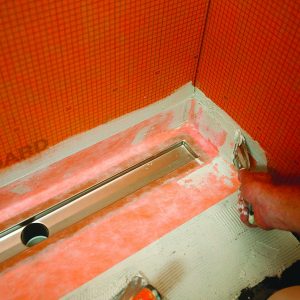
Now that the mortar has set up, I can set the drain and then install a waterproof membrane that seals the porous mortar layer. (I used Schlüter’s Kerdi membrane on this job, but Noble’s NobleSeal and Laticrete’s Hydro Ban are two alternatives.) Using the drain template, I check to see that the space is the right size. The mortar is still relatively soft, so it’s easy to make adjustments with a small trowel. I vacuum up the crumbs, apply the thinset, and install the drain. This whole trough should be level so that water will go to the center drain evenly.
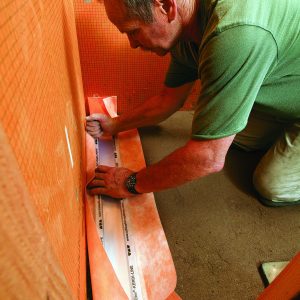
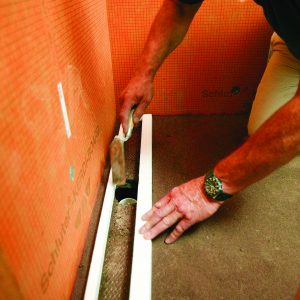
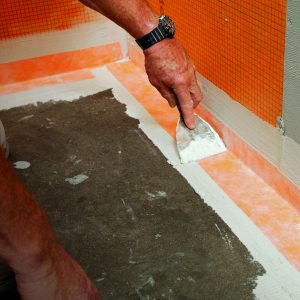
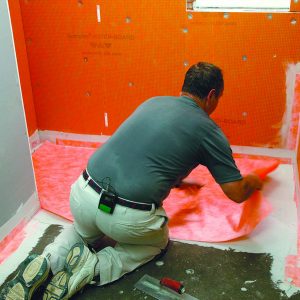
Once the drain is in, I start the membrane process by installing the 5-in. band around the room’s perimeter, splitting it between the wall and the floor. I use a 3⁄16-in. V-notch trowel to spread the thinset, lay out the band, and squeegee out the excess thinset with a drywall knife whose corners have been rounded off. The preformed corners are installed the same way, and I am especially careful to make the inside corners tight against the wall. Next, I cut sheets of mem-brane and dry-fit them around the room, making sure that I have at least 2 in. of over–lap on all seams. I draw a line at the edge so that I apply the thinset only where I need it.
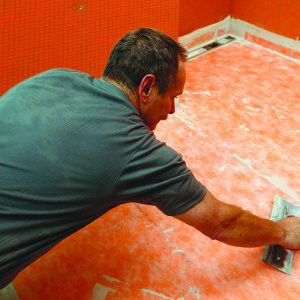
With the sheet back down, I start at the center and work my way toward the outside, first with my hands, then with the drywall knife, pressing out all the voids and air pock–ets. The joints should be nice and tight. The worst thing you can do is start on the out-side from each direction and have the whole thing buckle in the middle. Whatever excess is outside, I flatten down with the trowel. Voids will eventually cause cracks in the tile. In the shower area, I overlap the entire drain flange with the membrane.
Set the linear drain
Tile is the easy part
When I first spread the thinset, I use the back side of the trowel and burnish it over the membrane. I also do this over plywood or any other surface, because rubbing the thin-set deeper into the membrane with the back of the trowel gives you a much better bond. When it’s set and done, I turn over the trowel and use the toothed side, which creates a consistent height for the tile and at the same time allows me to even out any highs or lows that might be in the membrane.
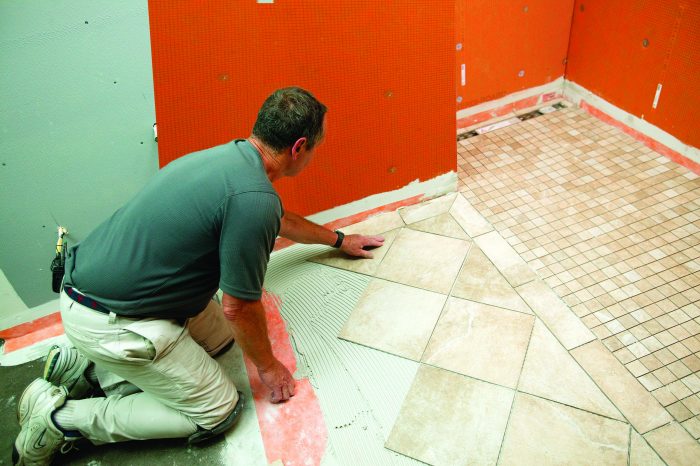
Once the first tile is set in place, the placement of every piece of tile in the room is determined. I use a rubber grout float to pack the tiles down to set the bond and flush up the corners. For this project, the shower area was to be covered with 2×2 tiles, with 12×12 tiles used for the remainder of the floor. Behind the drain, rather than put in a few small pieces with the 2x2s, I cut down 12x12s; I think that’s a better look.
The final step in the floor installation is grout. The grout should be mixed so that it’s workable, but fairly stiff. Too much water weakens grout and can cause color variations. I start in the far corner and spread the grout across the whole floor, let it set for about 15 minutes, then come back and wash it off. The key to trowel work is to hold the trowel at about a 30° angle to the floor so that the grout really gets pushed down into the joints. A second swipe at 60° cleans off the excess. There’s no problem leaving a little bit of excess, because that helps in the cleanup.
Install the membrane
In a perfect world, tile would be flexible
Tiles, especially large tiles, must be installed so that they’re fully supported on a flat surface, or they’ll crack. In situations where the floor is not flat (in a shower stall, for instance), small tiles conform more easily. In this bath and curbless shower, both conditions exist, and rather than use small tiles throughout, I made a transition from large field tiles to small tiles in the shower with intermediate-size tiles that could handle the switch between level and sloped floors. I decided to go with a diagonal layout bordered by 4-in.-wide strips. After bringing the small shower tiles to the edge of the transition, I cut 4-in.-wide strips from the 12×12 tiles and mitered each corner. Next, I cut the big square tiles in half diagonally, which established the pattern for the rest of the floor.
From Fine Homebuilding #233

