FHB Logo Facebook LinkedIn Email Pinterest Twitter X Instagram Tiktok YouTube Plus Icon Close Icon Navigation Search Icon Navigation Search Icon Arrow Down Icon Video Guide Icon Article Guide Icon Modal Close Icon Guide Search Icon Skip to content
Subscribe
Log In
  • How-To
  • Design
  • Tools & Materials
  • Restoration
  • Videos
  • Blogs
  • Forum
  • Magazine
  • Members
  • FHB House
  • Podcast
Log In

Fine Homebuilding Project Guides

Tiling

Guide Home
  • Selecting Tile
  • Tools & Techniques
  • Installation Materials
  • Preparation
  • Tiling Floors
  • Tiling Walls & Backsplashes
  • Tiling Showers
  • Grouting, Sealing & Caulking
  • Maintenance & Repair
How-To

Tiling a Backsplash

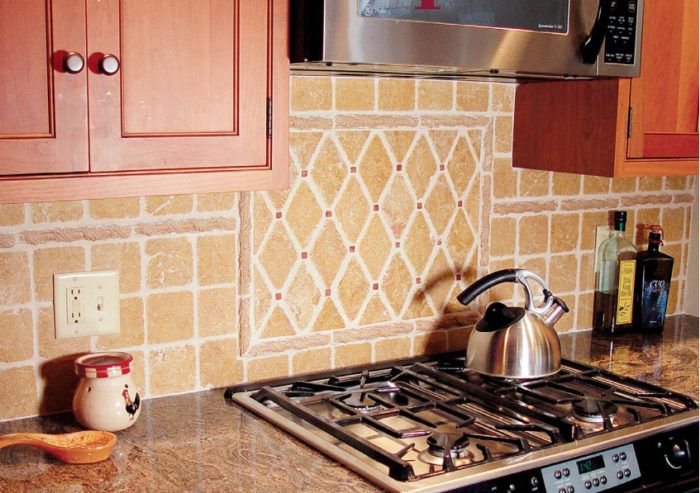
Durable and decorative, a tile backsplash dresses up the wall behind a sink or behind a stove.

By Tom Meehan Issue 167(Kitchens & Baths)
  • X
  • facebook
  • linkedin
  • pinterest
  • email
  • add to favorites Log in or Sign up to save your favorite articles

Synopsis: This excerpt from Tom Meehan’s tiling book, Working with Tile, details the process of installing a tumbled marble splash with mastic over drywall. Layout, installation, and grouting are all covered with photos and text. A sidebar offers tips for tiling around an electrical outlet.

Also, don’t miss Tom Meehan’s Build Like a Pro video series, How to Tile a Backsplash.


Saturday is estimate day at our store, Cape Cod Tileworks. Of the five or six estimates we do on Saturday mornings, at least a third of them are for kitchen backsplashes. Whether the room is new or old, a backsplash is a great opportunity to express a kitchen’s qualities, including color, creativity, boldness, subtlety, and craftsmanship. If you haven’t done a lot of tiling, a backsplash is a great way to get your feet wet.

Layout: a road map for the backsplash

Once the tile has been selected, the next step is layout. For this project, my client chose tumbled-marble tile. Its coarse natural texture makes a particularly nice contrast to a smooth, shiny kitchen countertop, such as granite.

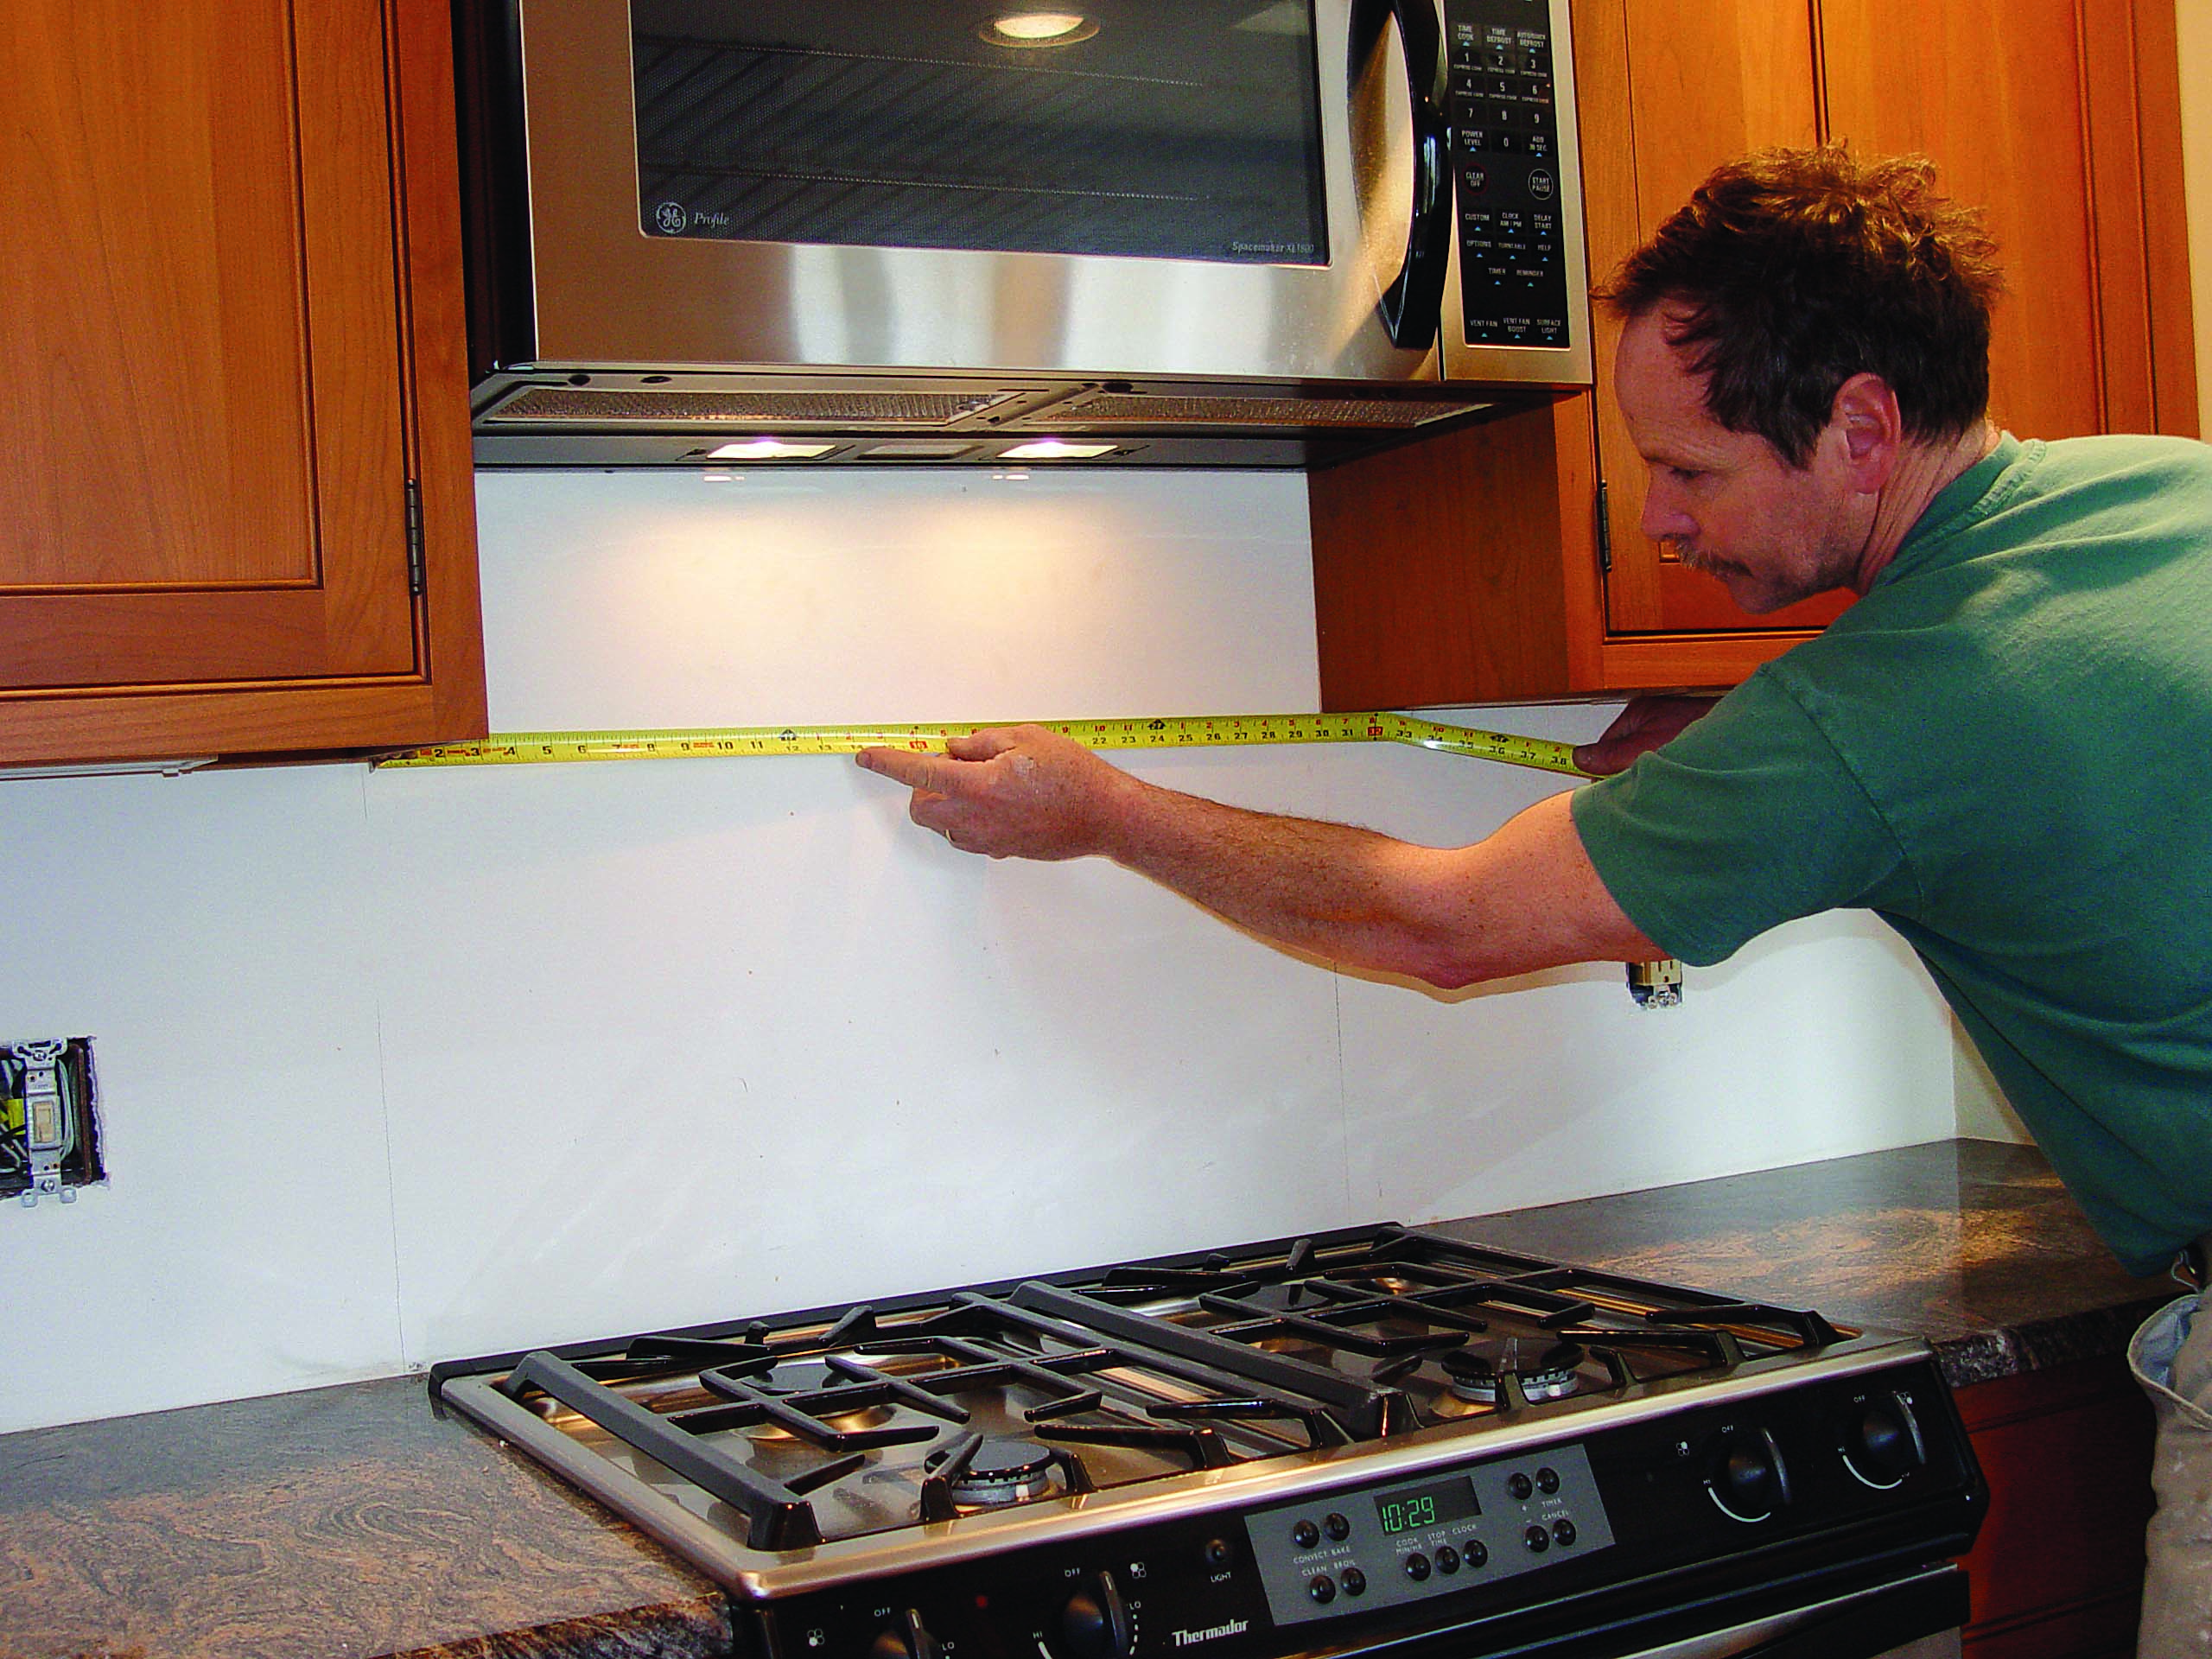
The layout for most of this backsplash is fairly simple: three courses of 4-in. by 4-in. tile topped off by a narrow border; a filler course takes care of the space between the border and the wall cabinets. The challenging part is the patterned area behind the stove. Taller and more intricate than the rest of the backsplash, this area requires a layout that is dead-on accurate. My first step is measuring the exact dimensions of that space.

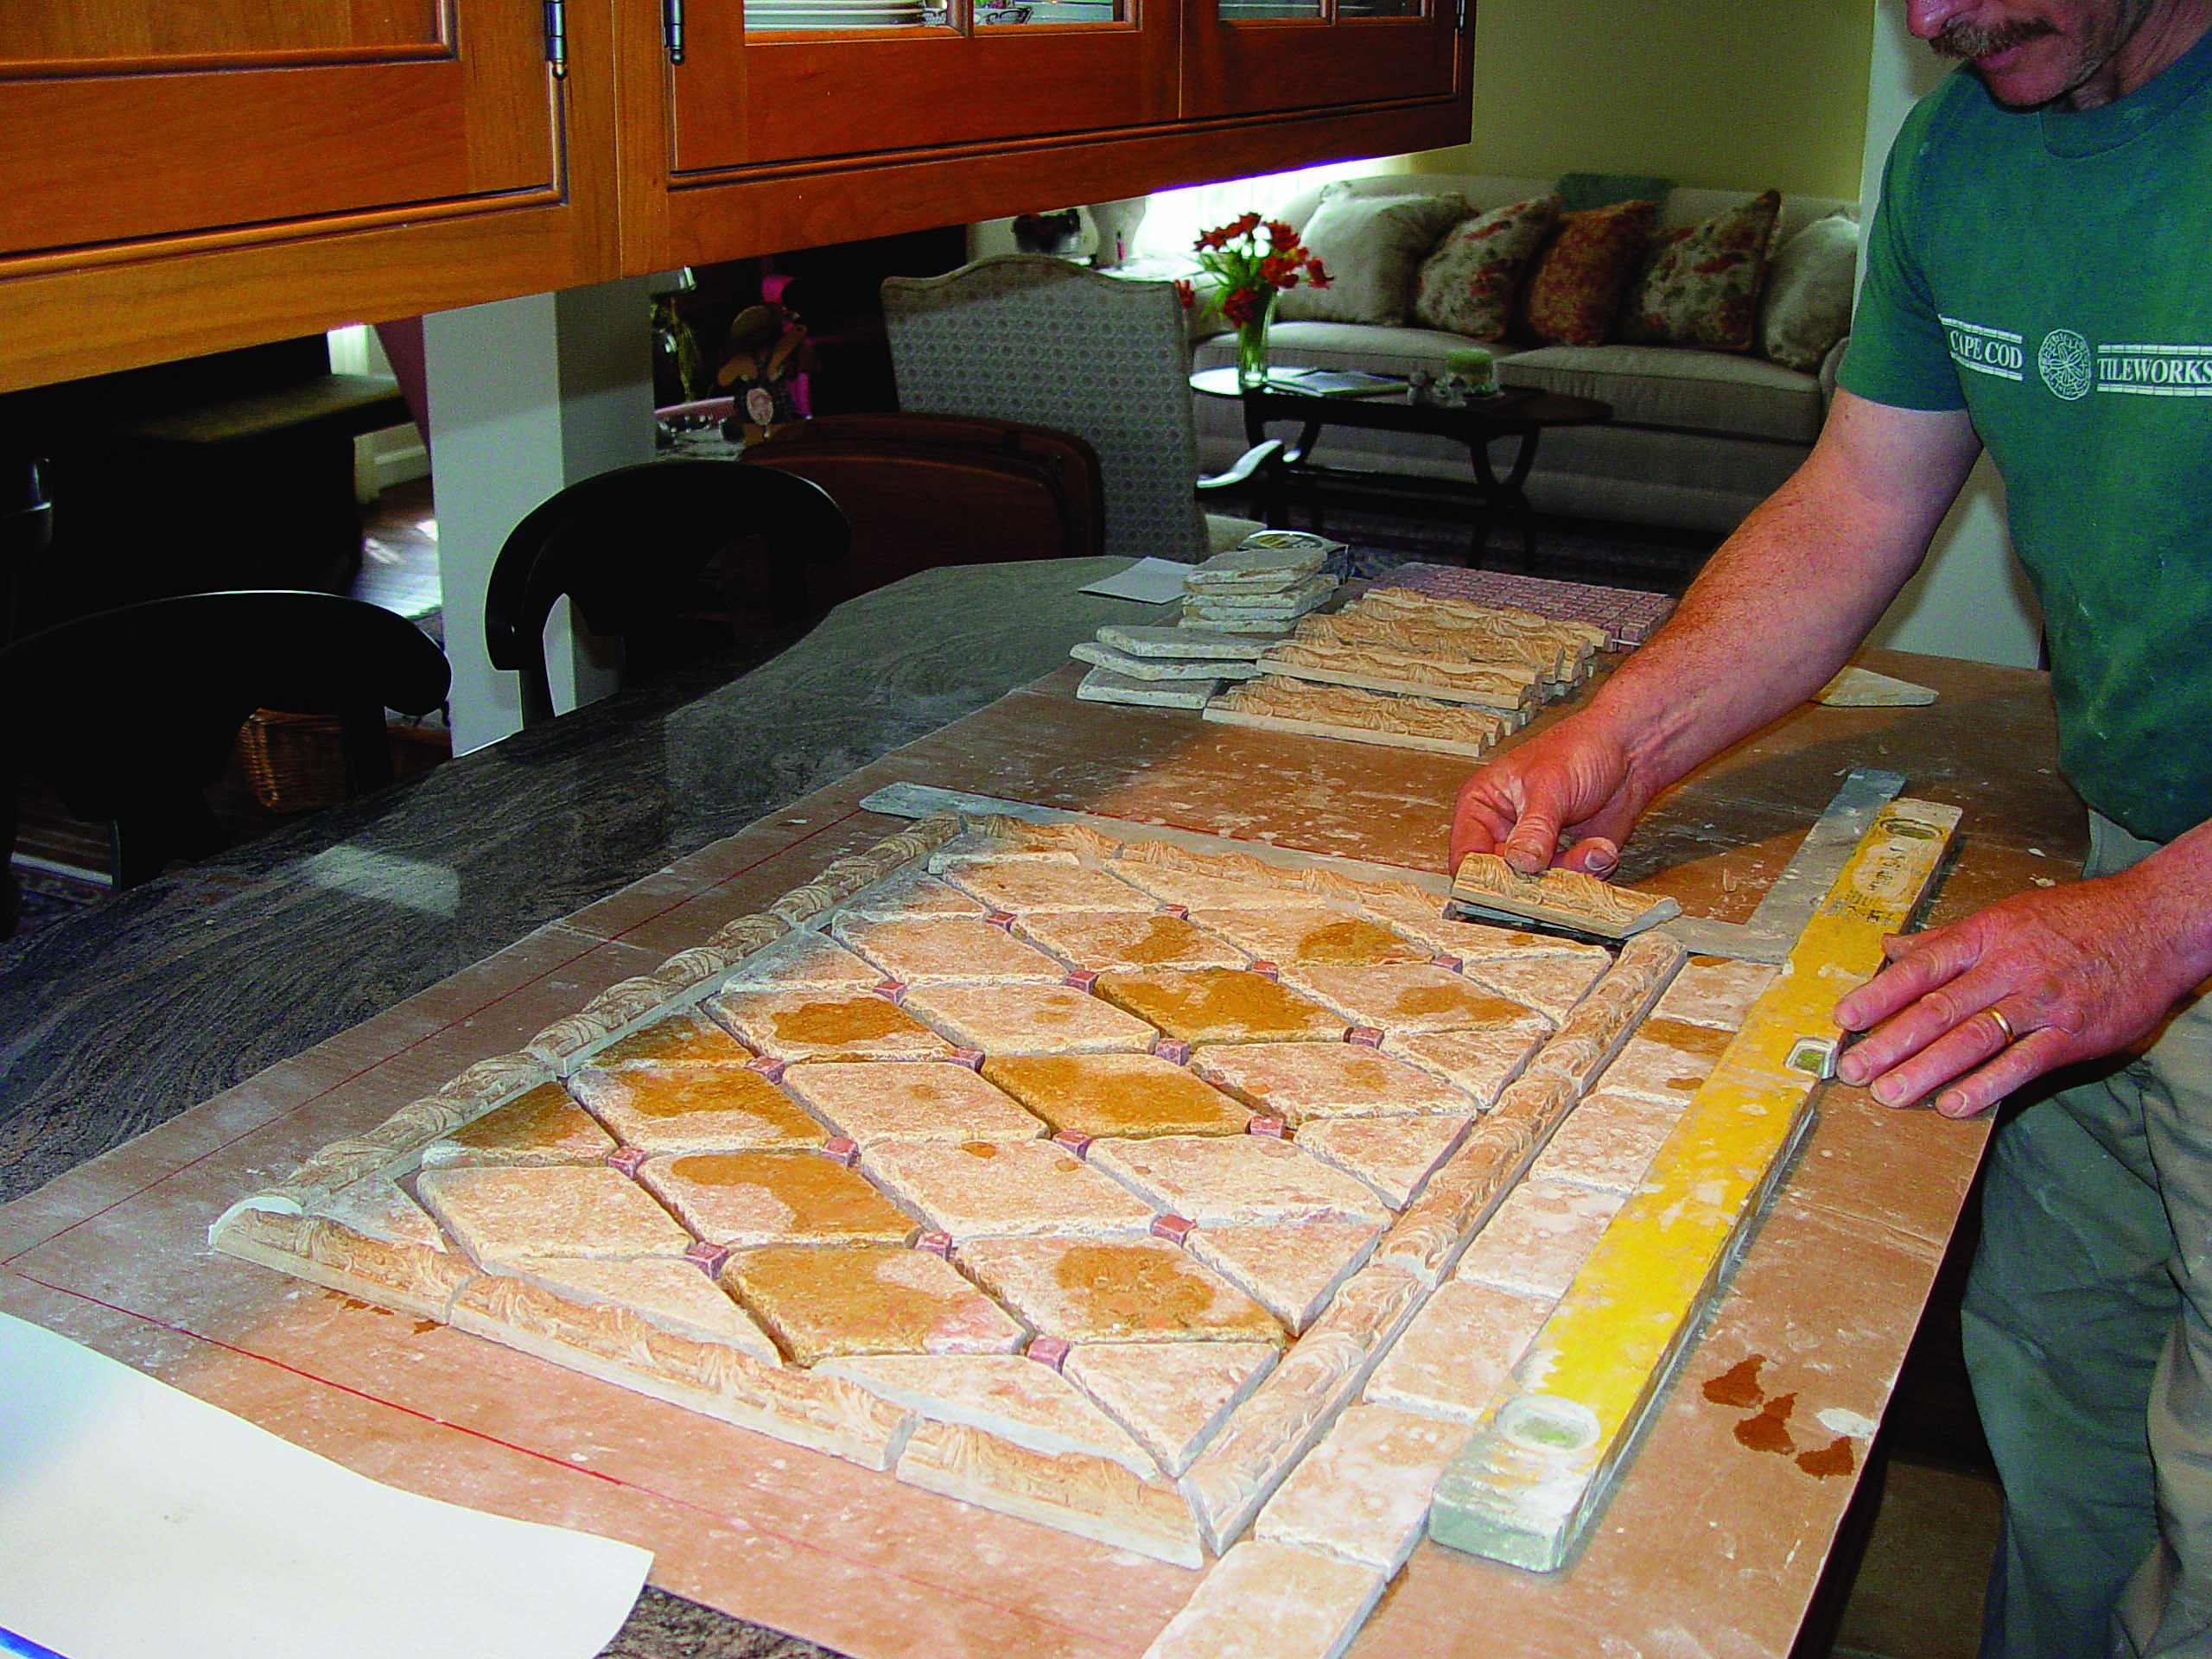
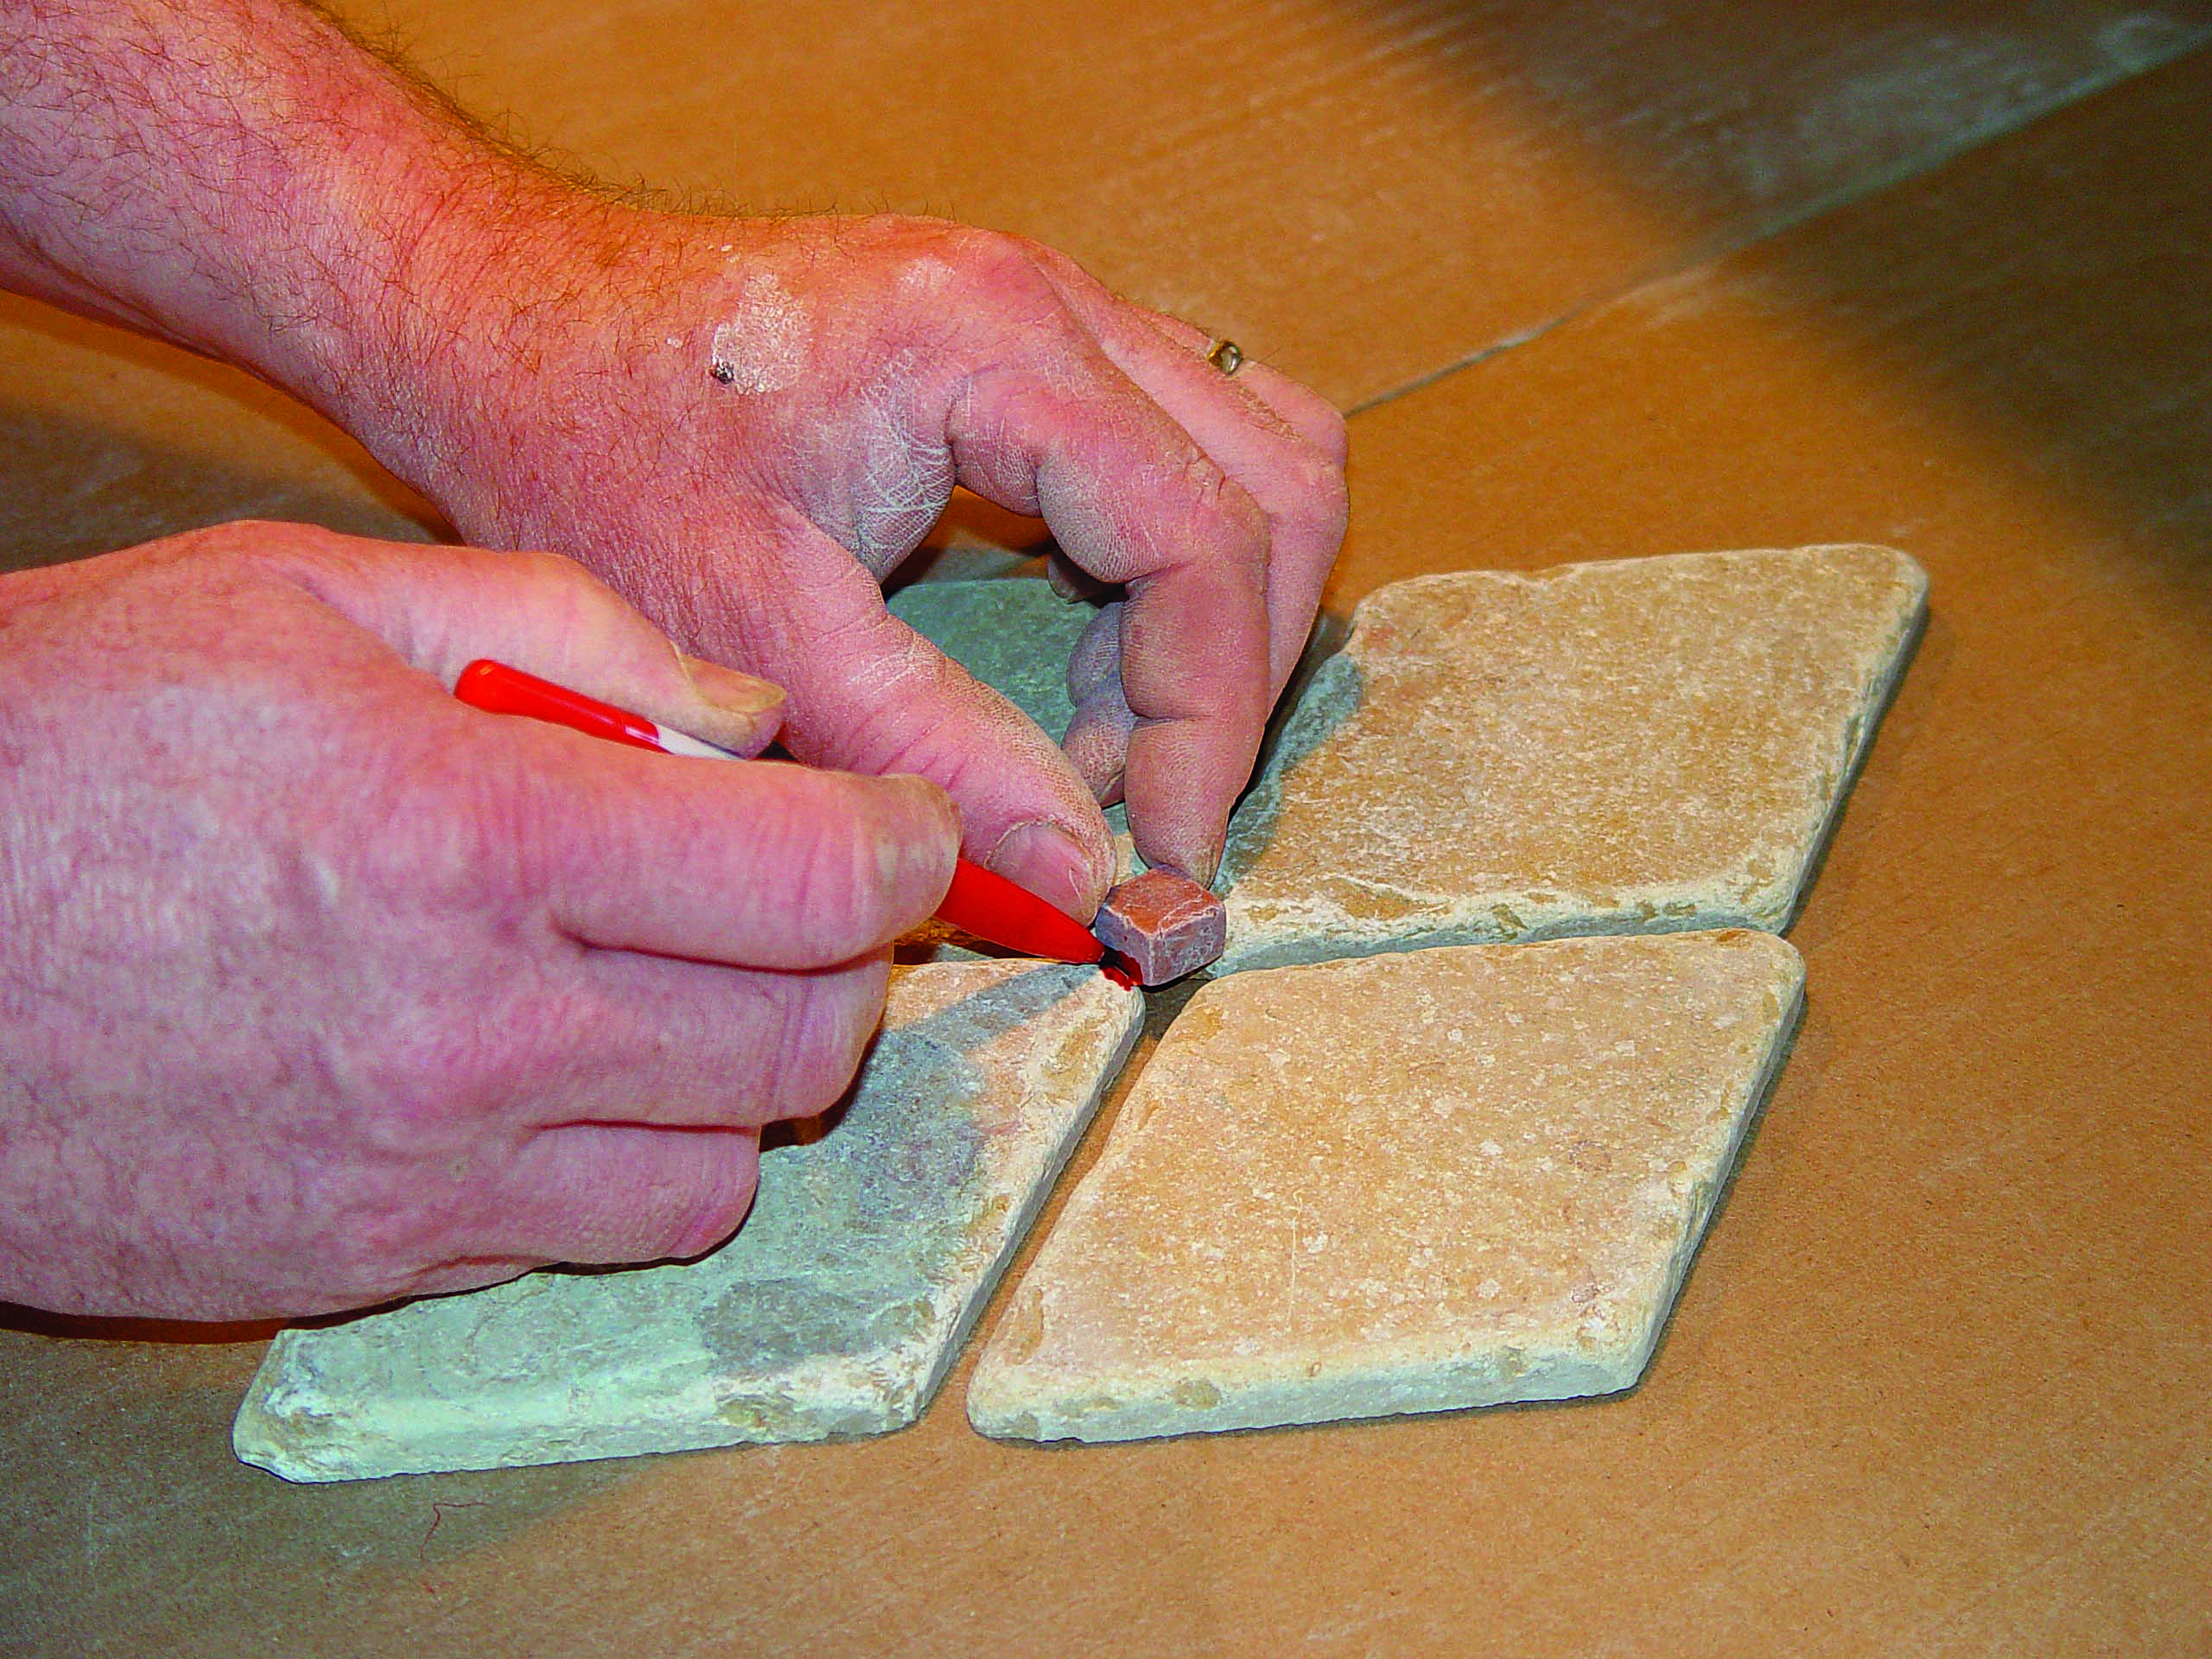
Over the years, I’ve found that doing the layout directly on the wall doesn’t work well. Instead, I draw a full-size layout of the patterned area on a sheet of cardboard. Then I cut and arrange all the tiles as needed to fit the layout. I don’t start to set tile on the wall until the test-fit is complete. This backsplash features small square dots at the intersections of the diamonds. At this point, I mark and cut these types of elements as well.

If a backsplash is interrupted by a window, it looks best if the tiles on each side of the window are the same size, which often means using partial tiles elsewhere. I plan the size and location of these partial tiles to please the eye.

Electrical outlets have to be incorporated into most backsplashes. A symmetrical layout around an electrical box looks best and is the easiest to cut. In extreme cases, the box can be moved for a proper-looking layout.

measuring to tile a backsplash
Test-fit the tiles on a flat surface. For the area above the stove, the author first measures the exact dimensions.

dry-fit for tiling a backsplash
Then he transfers them to a sheet of cardboard, where all the tile is dry-fit.

cut and fit decorative pieces
Decorative elements such as the border and the square accent tiles are cut and fit at this time.

Install the tile in the right order

Before mud and mastic start flying, it’s critical to protect appliances, countertops, and other finished surfaces. For this installation, a rubber shower-pan liner and a piece of cardboard protect the countertop and floors. The rubber liner is great because it can take a little impact if something is dropped on it. It also stays put, unlike a plastic drop cloth.

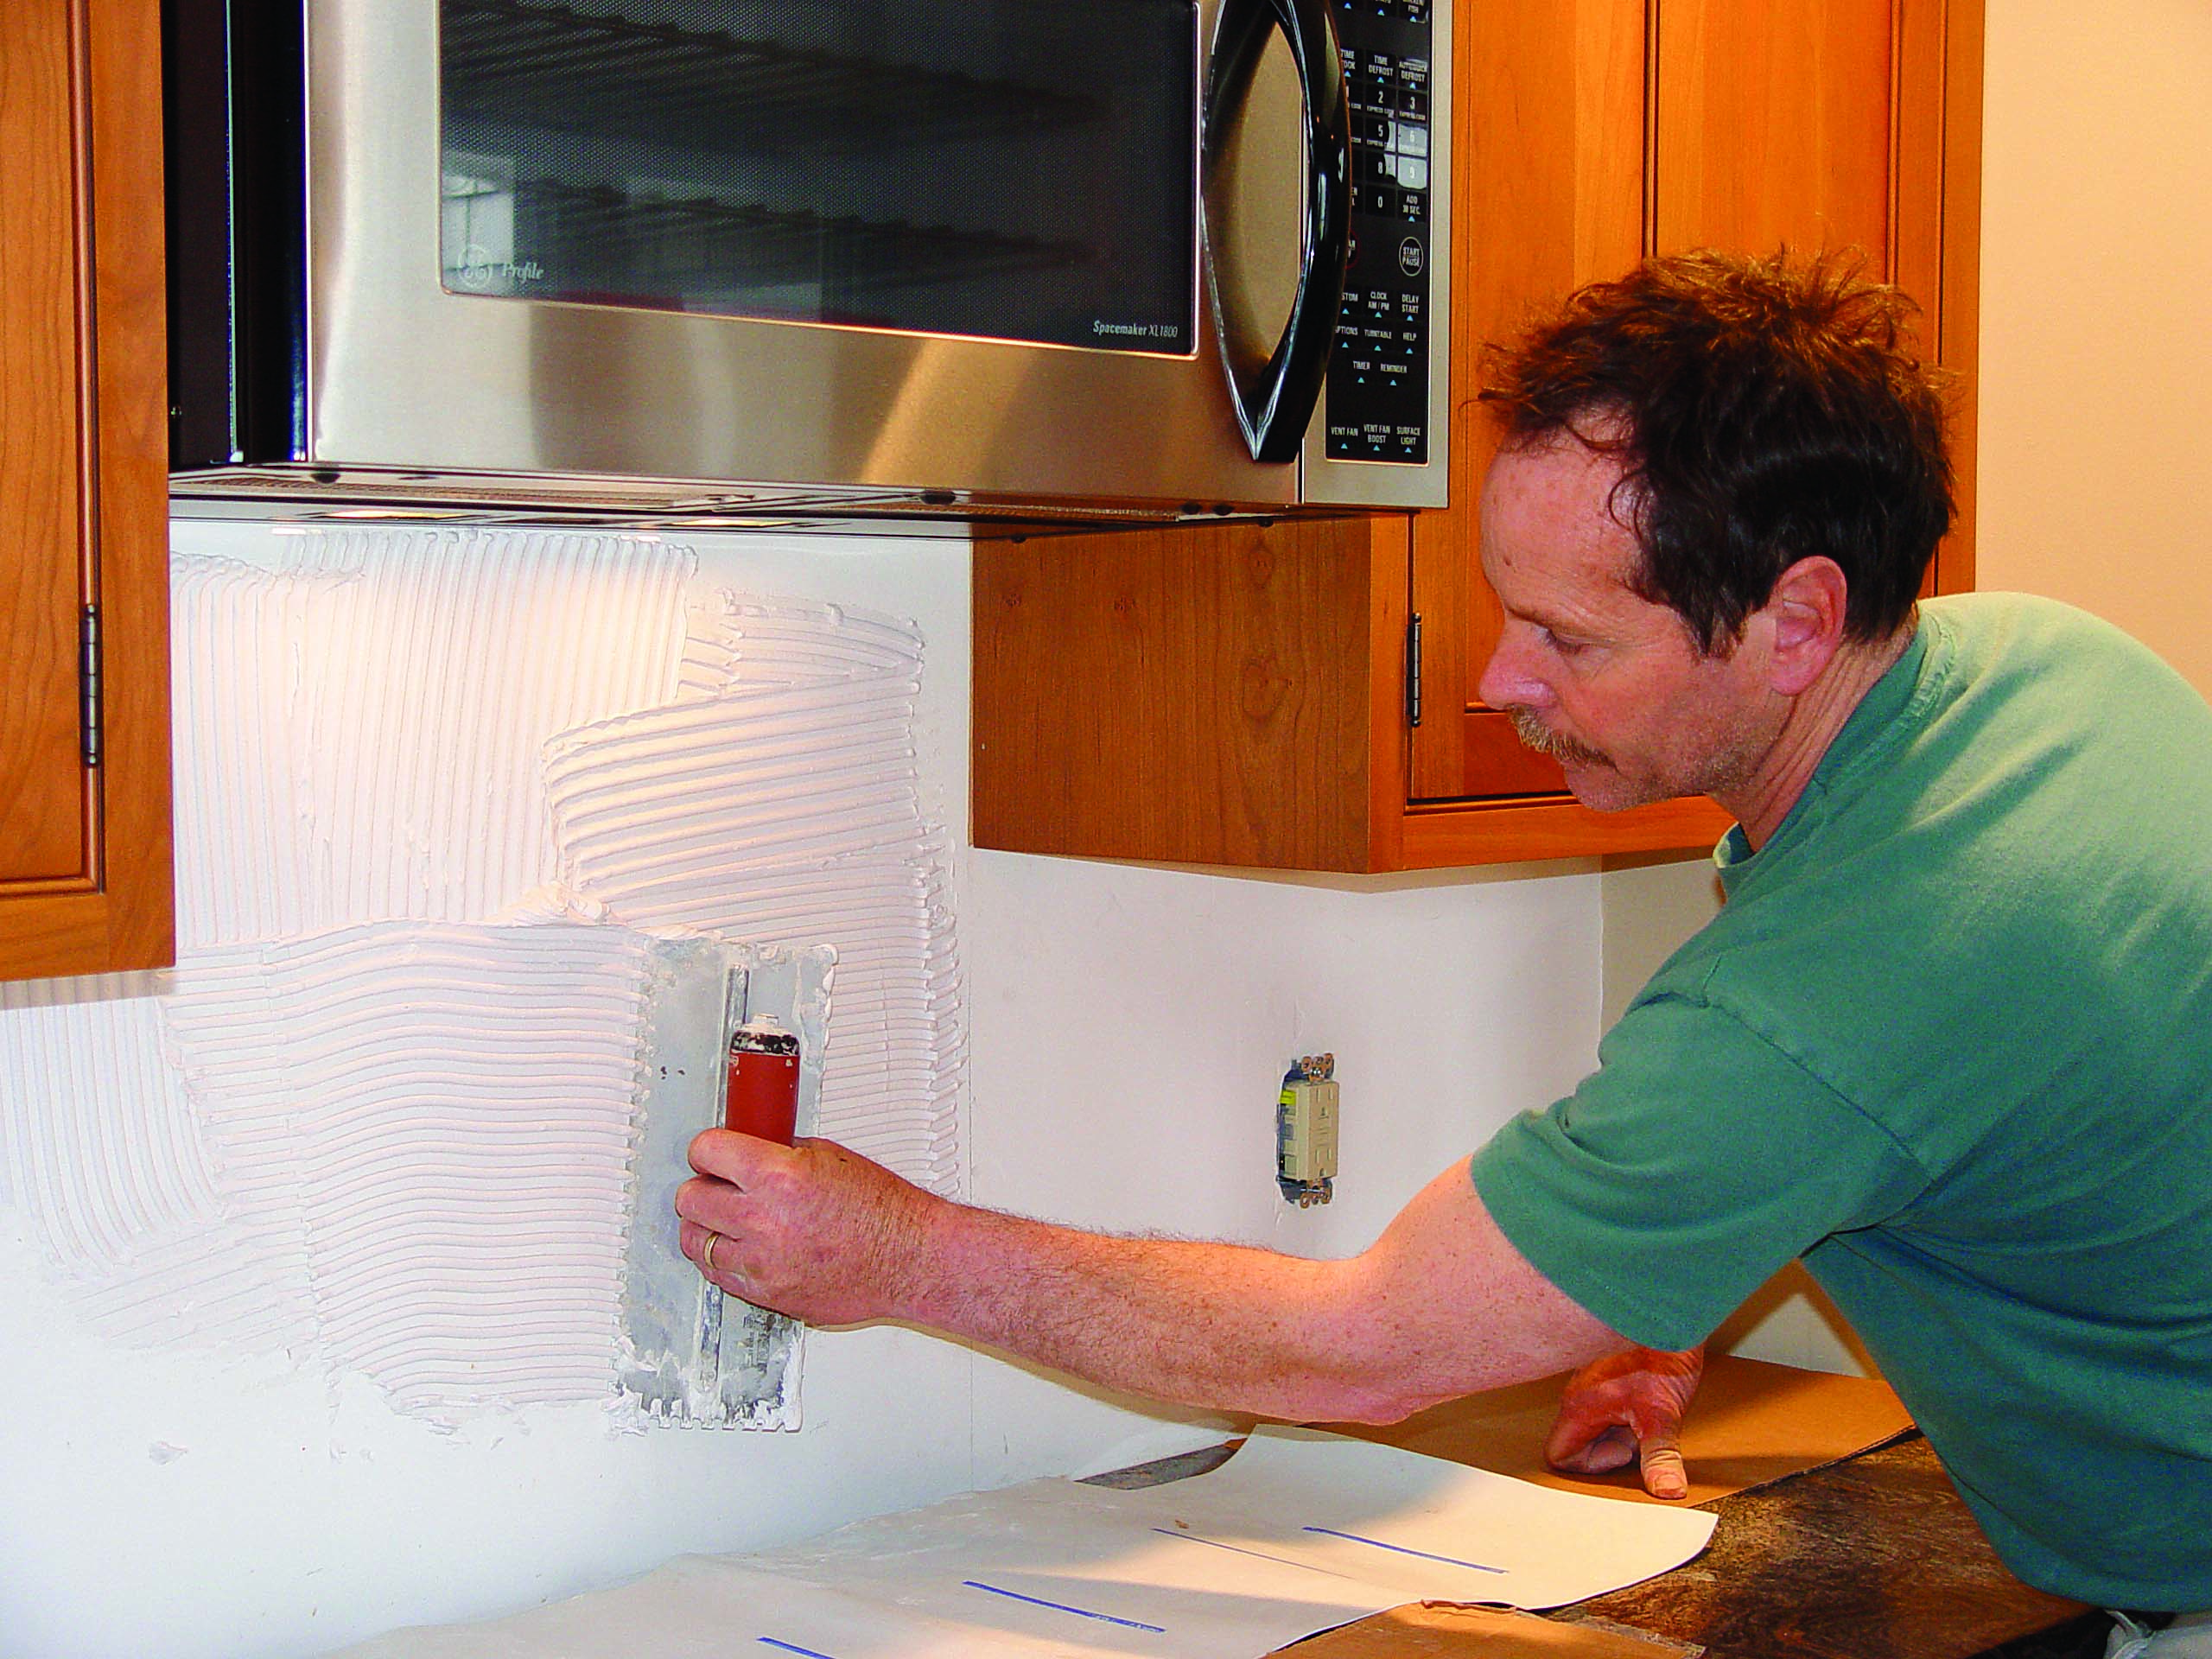
When I’m ready to set tile, I spread all-purpose mastic on the wall using a trowel with 1 ⁄4-in. by 1 ⁄4-in. notches. Because the tumbled marble for this backsplash is a fairly light color, I used non staining white mastic, which prevents the tile from spotting or darkening.

I set the bottom course of tiles for the backsplash first, after putting spacers under the tiles to keep them 1⁄8in. Above the counter. If the counter has to be replaced in the future, this space provides enough room to slip in the new countertop without disturbing the backsplash.

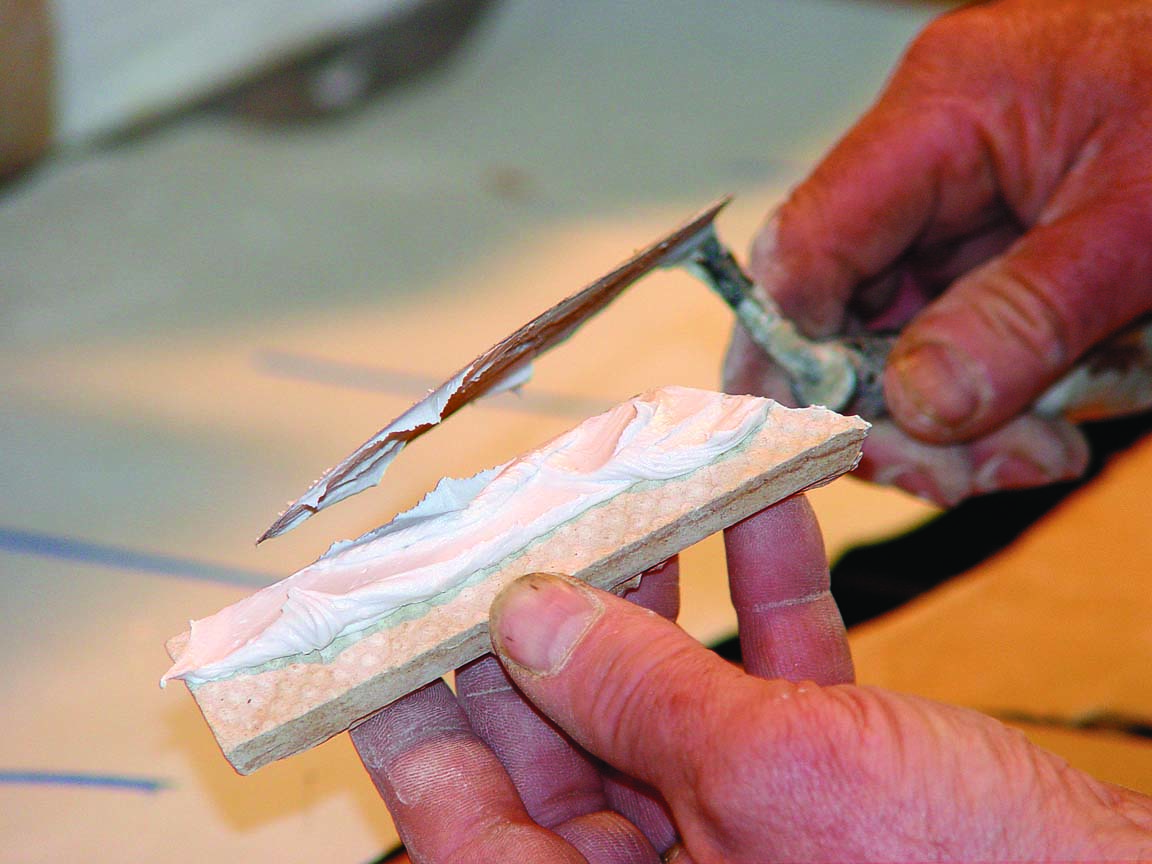
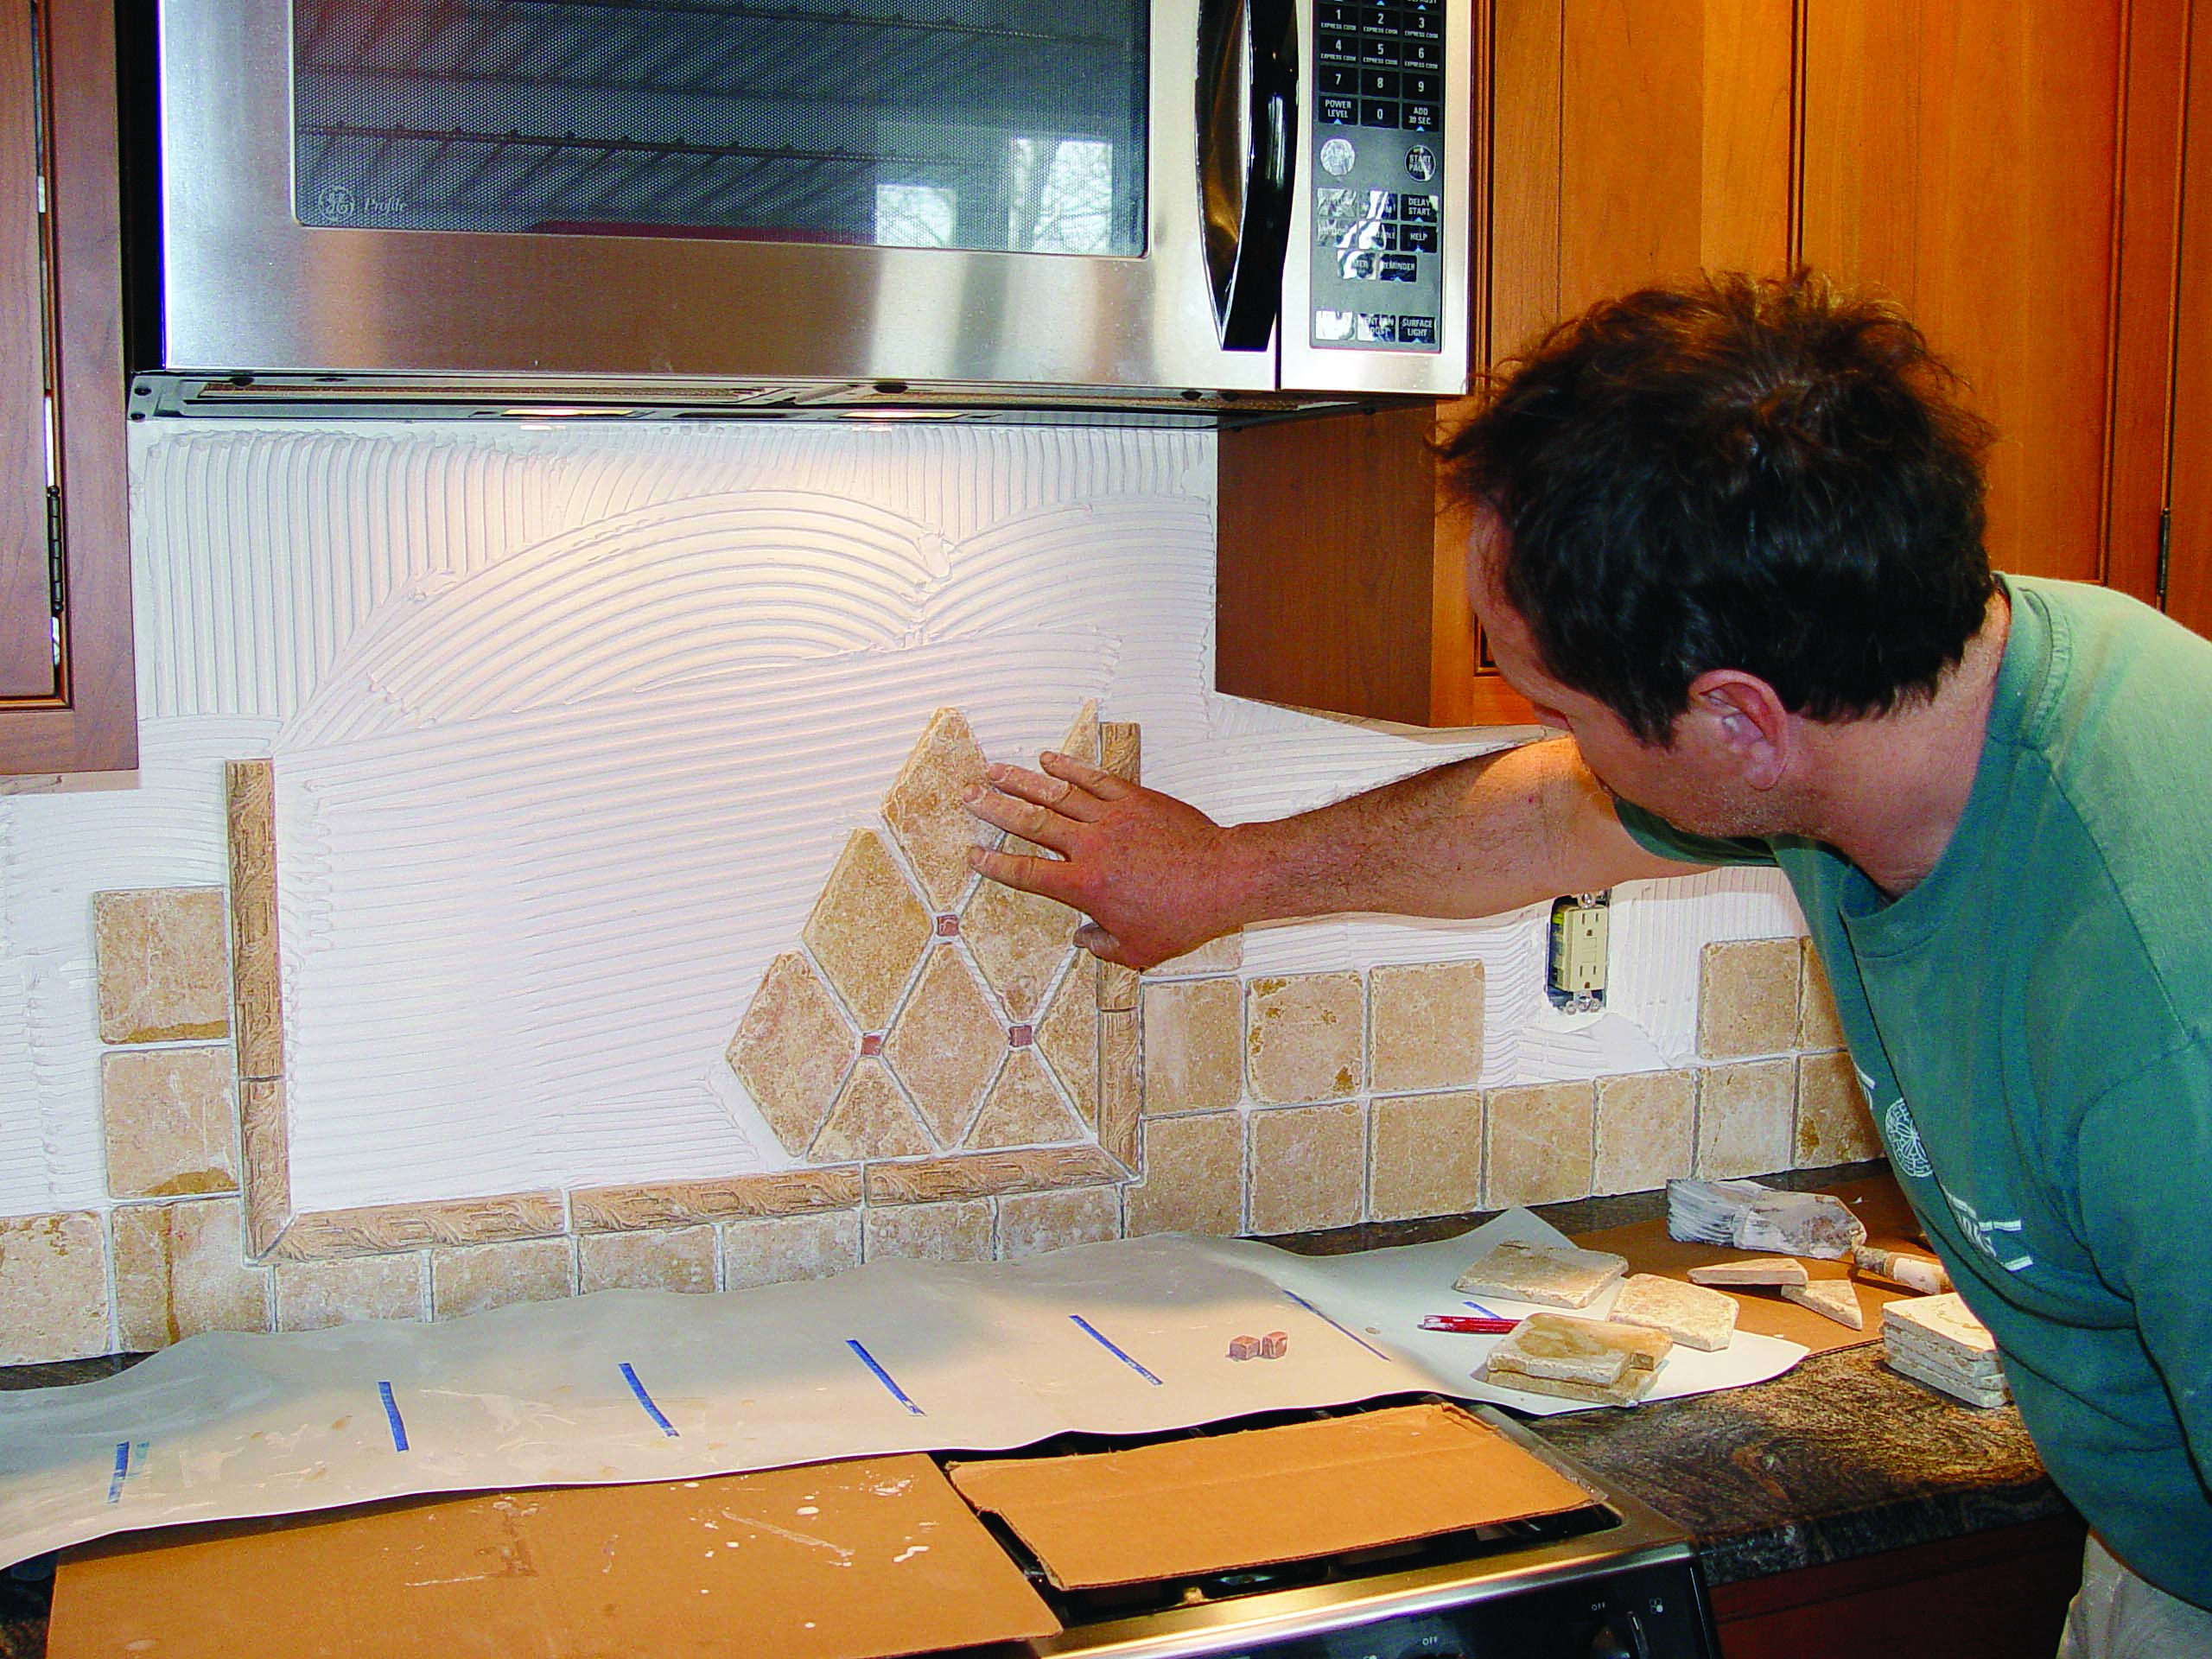
To install each tile, I press it tightly against the wall about 1⁄4in. from its final position, then slide it in place to ensure a tight bond. With the bot-tom course in place, I turn to the trickiest part of the job, the patterned area behind the stove. Border pieces go in first. To create visual interest, I like the border to stand slightly proud of surrounding tiles, a subtle strategy that’s not difficult to do. Before installing each border piece, I butter the back with mastic. When the tile is pressed in place,the extra mastic makes the border stand out slightly from the rest of the tile. Setting a few of the regular backsplash tiles outside the border helps to keep the border pieces straight.

As I place tiles, I make the grout joints roughly 1⁄4in.wide. Because these tiles are irregular, the joint size varies somewhat. Instead of relying on spacers, I shift the tiles slightly as the different sizes require.

For the diamond pattern of the backsplash, I install the tiles in a diagonal sequence to keep them aligned along their longest straight edge. The tiny square accent pieces go in as I set the larger diamond tiles.

Once the stove backsplash is done, the rest of the job goes quickly. The main backsplash is only four courses high,and it’s fairly easy to keep the grout lines level and straight.

As for the cut tiles that fit against the end walls and upper cabinets, I cut them for a tight fit with little or no grout joint. Grout is most likely to crack where different materials meet.

trowel on white mastic for backsplash
Trowel on the mastic. White mastic is the adhesive of choice for this project because a darker color might show through the light-colored tile. The entire backsplash is spread before any tile is set.

border tiling
Start at the border. To make the border tiles stand slightly proud of the rest of the tile, the backs receive a coat of mastic first.

tiling a backsplash
This will cause the tiles to stand out from the rest of the field when they’re pressed into place.

tiling installation
To install a tile, press it against the wall and slide it about 1⁄4in. into position. Align diamond-shaped tiles along their long edges.

Seal the tile before grouting

I leave the tile overnight to let the mastic set up.The next day, I wipe down the backsplash with a good impregnator/sealer, which helps to protect the marble and acts as a grout release. Grouting tumbled-marble tile is a little more difficult than grouting standard glazed tile. Grout tends to catch and collect along the irregular edges and on the surface of tumbled marble as well as in the relief of the border tiles.

I always use sanded grout with tumbled marble. Sand mixes with portland cement to add body and strength to the grout, making it superior at filling the wide joints between irregular tile edges. Border tiles such as the ones in this project also demand a stronger grout because they sit farther out than the rest of the tile.

I mix a stiff but workable batch of grout that won’t fall out of the joints as I float it on in a generous coat. When all the joints are filled, I let the grout sit until it is firm to the touch, usually 15 minutes or so. Then I wipe the tile with a grout sponge dampened with clean water. I make sure to wring out the sponge before wiping the tile; too much water can dissolve the cement and weaken the grout. When cleaning marble tiles, I pay extra attention to rough spots in the marble and to the patterned areas in the border tiles. These areas may need a little more effort to remove excess grout.

After washing it, I let the grout set up for another 15minutes (less, if the room is warmer than normal). Then I use a clean terry-cloth towel to wipe the grout haze off the tile surface. At this point, I also use a putty knife to remove any grout stuck in corners or in other places where I want to see a clean, straight grout line.

The next day, I do a final cleaning with a good tile cleaner. Because some cleaners corrode or stain, I keep the countertop, stove, and sink protected. A day or two after cleaning, I finish the job by applying sealer to the tile and grout. If the tile is stone (as in this case) and I sealed the tile before grouting, an additional coat of sealer also protects the grout. I apply the sealer with a disposable foam brush and give the backsplash behind the stove a couple of extra coats to protect the tile and grout from grease.

Working around an electrical outlet

Symmetrical coverage looks best when tile meets an electrical box. Mark the edges of the box on surrounding tiles and cut them to fit. Cut the tile so that the ears on the outlets and the switches overlap the edges of the tile. Before installing the tiles around the box, back out the screws that secure the outlets and switches. Longer screws may be necessary to make up for the added thickness of the tile.


For more photos and details on tiling backsplash, click the View PDF button below. 

View PDF
Previous: How to Install a Tile Kitchen Backsplash Next: How to Tile a Backsplash: Installing a Tile Mosaic

Guide

Tiling

Chapter

Tiling Walls & Backsplashes

Sign up for eletters today and get the latest how-to from Fine Homebuilding, plus special offers.

Signing you up...

This site is protected by reCAPTCHA and the Google Privacy Policy and Terms of Service apply.
See all newsletters
See all newsletters

Log in or create an account to post a comment.

Sign up Log in

Become a member and get full access to FineHomebuilding.com

Tiling

Tiling

Trusted, comprehensive guidance from the pros for a great-looking tile job in any room of the house

View Project Guide

View All Project Guides »

Become a member and get unlimited site access, including the Tiling Project Guide.

Start Free Trial

Selecting Tile
  • The Basics
  • Tile Options
Tools & Techniques
  • Job-Preparation Tools
  • Cutting Tiles
  • Setting & Grouting Tools
Installation Materials
  • Membranes & Substrates
  • Adhesives & Mortars
  • Grout
  • Sealers & Caulk
  • Spacers, Hardware & Trim
Preparation
  • The Prep Job
  • Repairs & Surface Prep
  • Installing Backerboard
Tiling Floors
  • Layout & Installation
  • Setting Specialty Tiles
Tiling Walls & Backsplashes
  • Preparation
  • Backsplashes
  • Walls
Tiling Showers
  • Tile Shower Basics
  • Waterproofing
  • Shower Pans
  • Shower Drains
  • Shower Niches
  • Video Series: Tile a Shower
  • Video Series: Tile a Barrier-Free Bathroom
Grouting, Sealing & Caulking
  • Grouting
  • Caulking
  • Sealing
Maintenance & Repair
  • Maintenance
  • Tile Repair
  • Grout Repair

Fine Home Building

Newsletter Sign-up

  • Fine Homebuilding

    Home building tips, offers, and expert advice in your inbox.

  • Green Building Advisor

    Building science and energy efficiency advice, plus special offers, in your inbox.

  • Old House Journal

    Repair, renovation, and restoration tips, plus special offers, in your inbox.

Signing you up...

This site is protected by reCAPTCHA and the Google Privacy Policy and Terms of Service apply.
See all newsletters

Follow

  • Fine Homebuilding

    Dig into cutting-edge approaches and decades of proven solutions with total access to our experts and tradespeople.

    Start Free Trial Now
    • Facebook
    • Instagram
    • X
    • LinkedIn
  • GBA Prime

    Get instant access to the latest developments in green building, research, and reports from the field.

    Start Free Trial Now
    • Facebook
    • YouTube
  • Old House Journal

    Learn how to restore, repair, update, and decorate your home.

    Subscribe Now
    • Facebook
    • Instagram
    • X

Membership & Magazine

  • Online Archive
  • Start Free Trial
  • Magazine Subscription
  • Magazine Renewal
  • Gift a Subscription
  • Customer Support
  • Privacy Preferences
  • About
  • Contact
  • Advertise
  • Careers
  • Terms of Use
  • Site Map
  • Do not sell or share my information
  • Privacy Policy
  • Accessibility
  • California Privacy Rights

© 2025 Active Interest Media. All rights reserved.

Fine Homebuilding receives a commission for items purchased through links on this site, including Amazon Associates and other affiliate advertising programs.

  • Home Group
  • Antique Trader
  • Arts & Crafts Homes
  • Bank Note Reporter
  • Cabin Life
  • Cuisine at Home
  • Fine Gardening
  • Fine Woodworking
  • Green Building Advisor
  • Garden Gate
  • Horticulture
  • Keep Craft Alive
  • Log Home Living
  • Military Trader/Vehicles
  • Numismatic News
  • Numismaster
  • Old Cars Weekly
  • Old House Journal
  • Period Homes
  • Popular Woodworking
  • Script
  • ShopNotes
  • Sports Collectors Digest
  • Threads
  • Timber Home Living
  • Traditional Building
  • Woodsmith
  • World Coin News
  • Writer's Digest
Active Interest Media logo
X
X
This is a dialog window which overlays the main content of the page. The modal window is a 'site map' of the most critical areas of the site. Pressing the Escape (ESC) button will close the modal and bring you back to where you were on the page.

Main Menu

  • How-To
  • Design
  • Tools & Materials
  • Video
  • Blogs
  • Forum
  • Project Guides
  • Reader Projects
  • Magazine
  • Members
  • FHB House

Podcasts

  • FHB Podcast
  • ProTalk

Webinars

  • Upcoming and On-Demand

Podcasts

  • FHB Podcast
  • ProTalk

Webinars

  • Upcoming and On-Demand

Popular Topics

  • Kitchens
  • Business
  • Bedrooms
  • Roofs
  • Architecture and Design
  • Green Building
  • Decks
  • Framing
  • Safety
  • Remodeling
  • Bathrooms
  • Windows
  • Tilework
  • Ceilings
  • HVAC

Magazine

  • Current Issue
  • Past Issues
  • Magazine Index
  • Subscribe
  • Online Archive
  • Author Guidelines

All Access

  • Member Home
  • Start Free Trial
  • Gift Membership

Online Learning

  • Courses
  • Project Guides
  • Reader Projects
  • Podcast

More

  • FHB Ambassadors
  • FHB House
  • Customer Support

Account

  • Log In
  • Join

Newsletter

Get home building tips, offers, and expert advice in your inbox

Signing you up...

This site is protected by reCAPTCHA and the Google Privacy Policy and Terms of Service apply.
See all newsletters
See all newsletters

Follow

  • X
  • YouTube
  • instagram
  • facebook
  • pinterest
  • Tiktok

Join All Access

Become a member and get instant access to thousands of videos, how-tos, tool reviews, and design features.

Start Your Free Trial

Subscribe

FHB Magazine

Start your subscription today and save up to 81%

Subscribe

We hope you’ve enjoyed your free articles. To keep reading, become a member today.

Get complete site access to expert advice, how-to videos, Code Check, and more, plus the print magazine.

Start your FREE trial

Already a member? Log in

Privacy Policy Update

We use cookies, pixels, script and other tracking technologies to analyze and improve our service, to improve and personalize content, and for advertising to you. We also share information about your use of our site with third-party social media, advertising and analytics partners. You can view our Privacy Policy here and our Terms of Use here.

Cookies

Analytics

These cookies help us track site metrics to improve our sites and provide a better user experience.

Advertising/Social Media

These cookies are used to serve advertisements aligned with your interests.

Essential

These cookies are required to provide basic functions like page navigation and access to secure areas of the website.

Delete My Data

Delete all cookies and associated data