
Tiling a Large Floor Area
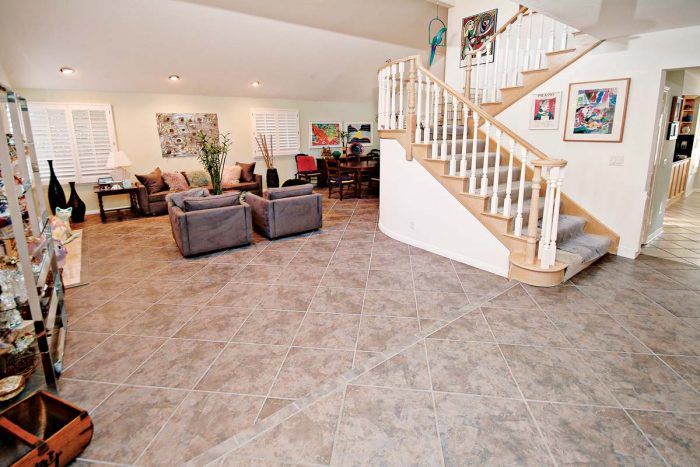
Tile pros Robin Nicholas and Michael Schweit provide a complete guide to installing large tiles on the diagonal across an entry area and living room.
Once you’ve prepared your substrate and laid out your project, the actual setting of a tile floor is fairly straightforward and easy. Most tiles are set using the same methods and routines. However, there are particular techniques that can make tile setting an easier process and ensure a solid, long-lasting floor. In this chapter, we’ll guide you through the process of laying a tile floor, from mixing and applying the thinset, to setting the tile, to installing base tiles and transitions with other flooring. If you follow the guidelines given here, you’ll be pleased with the professional-looking results.
Tiling an Entry Area
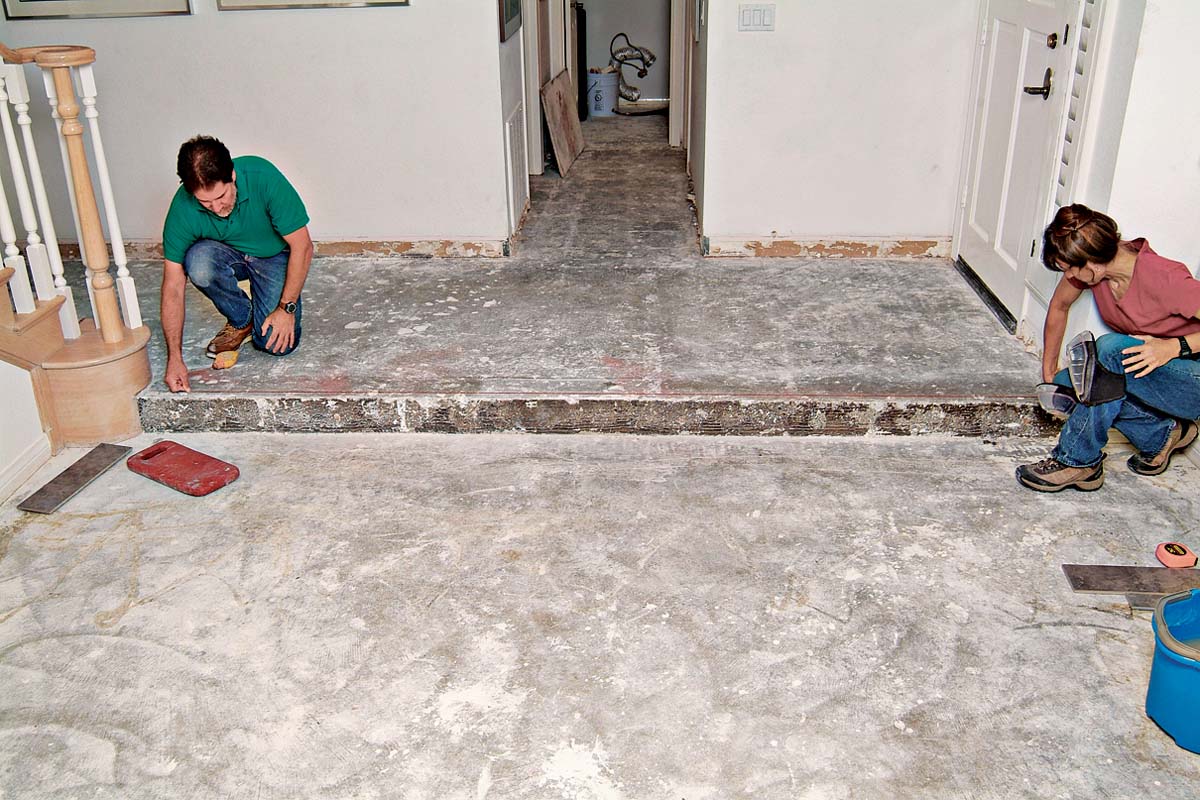
Whether you are tiling a simple rectangular room with a single doorway, or a large, multilevel space with several doors and halls branching off of it, most of the basic tile-laying procedures you need to follow are very much the same. The large porcelain (18 in. sq.) tiles on this floor were laid in several stages: first, the entry area; then the main floor; next, the step and riser; and, finally, the cut tiles around the perimeter. Before tile setting started, we prepared the substrate (a concrete slab).
We also planned the tile layout of the entire space, designed to yield a clean design, with the diagonally set tiles flowing across the entry area and into the living room.
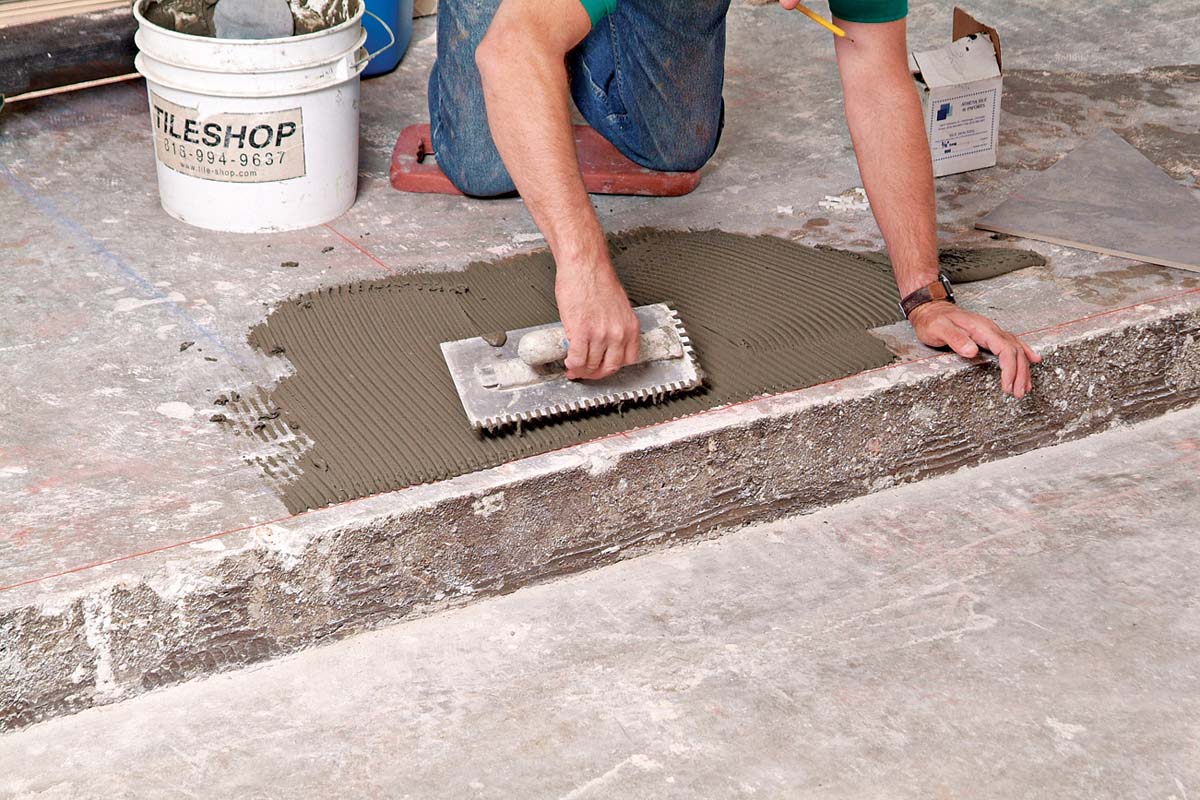
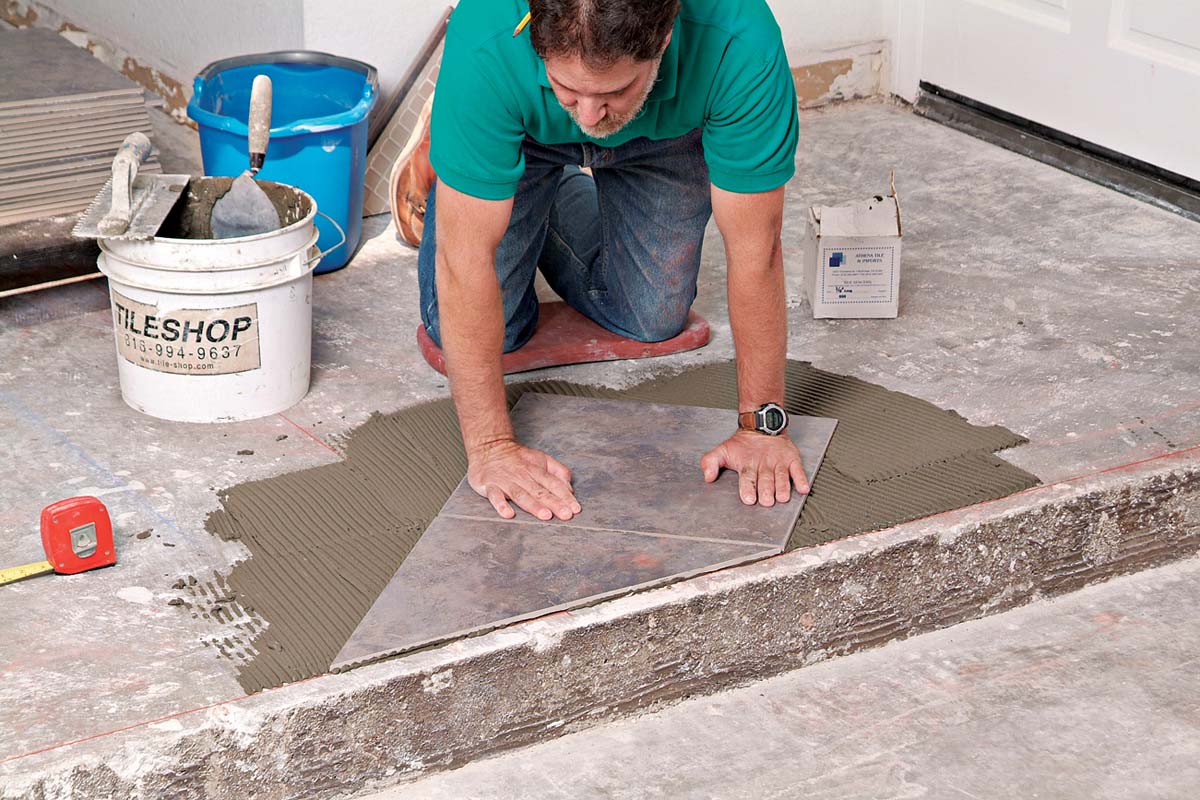
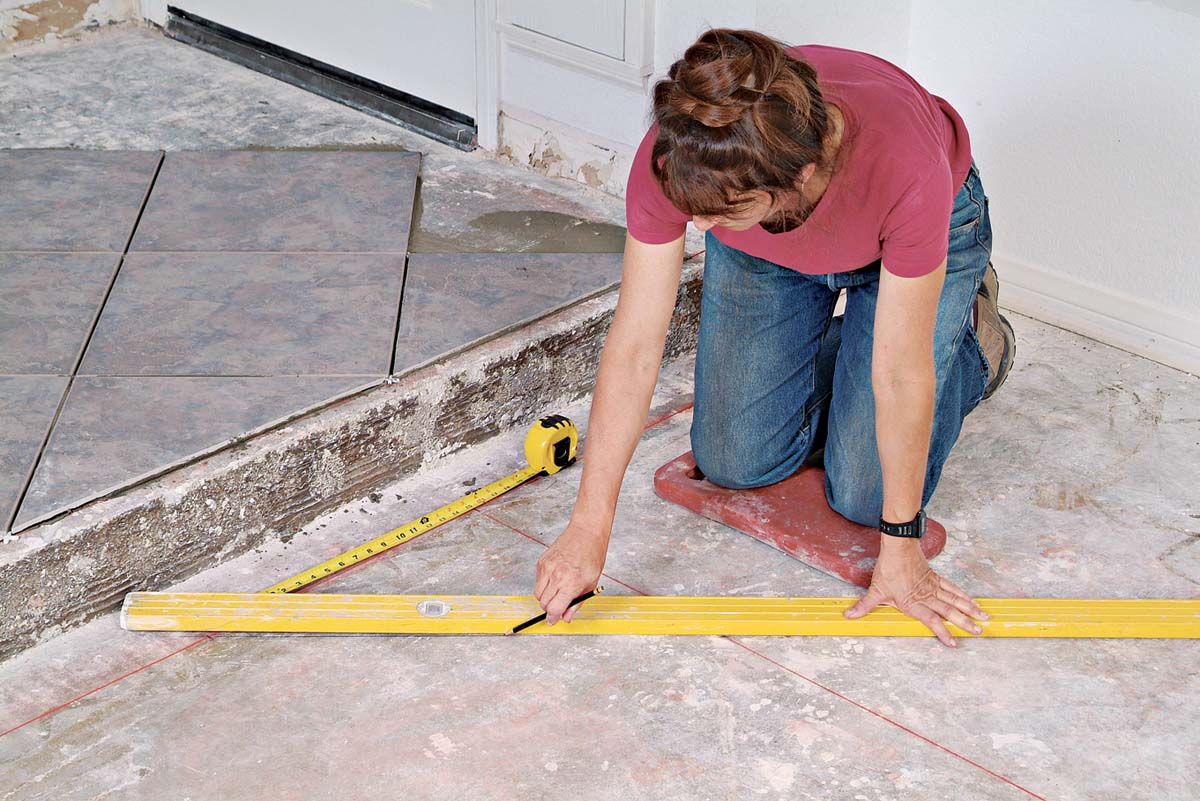
For this project, begin by snapping a chalkline to mark where the first row of tile is set at the edge of the steps 1, and a perpendicular line to mark the center of the layout 2. Then, spread and comb the area with thinset 3.
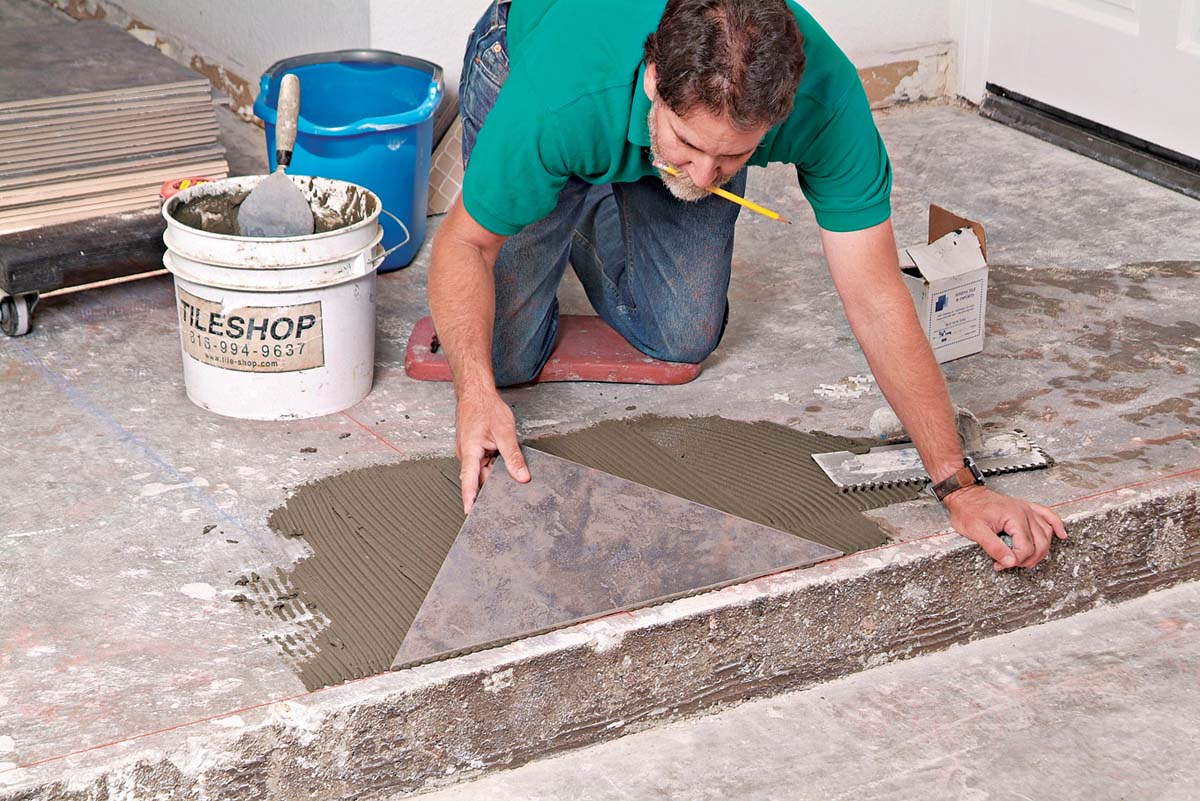
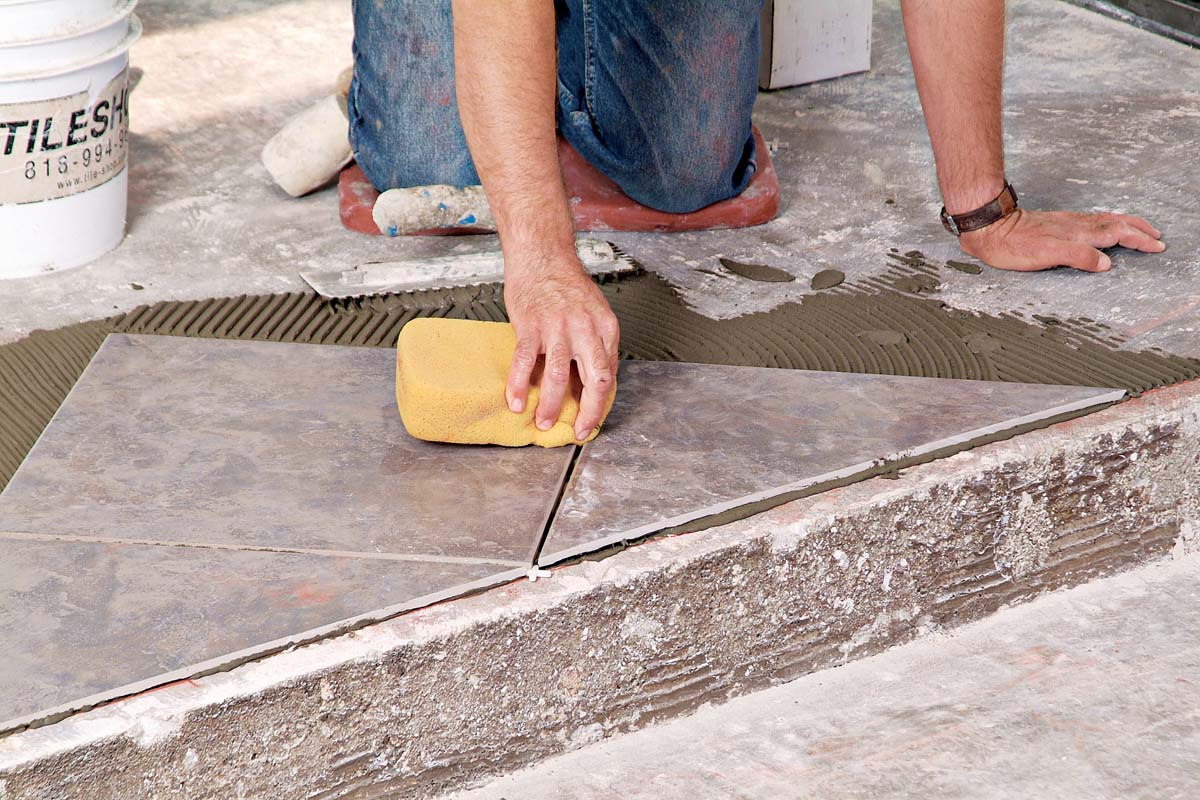
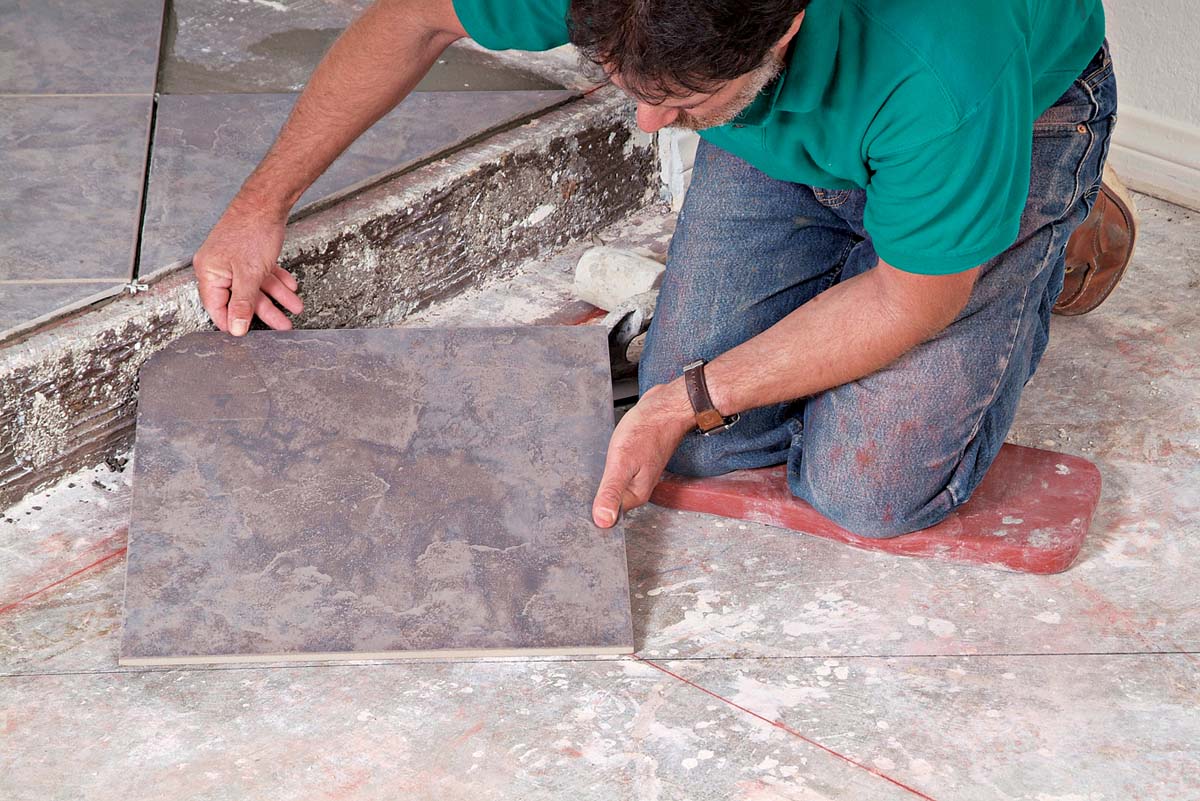
The first tile, cut in half diagonally, is set where the two chalklines intersect, with its apex and cut edge lined up with the lines 4. Add tile spacers at the corners of the first tile, then set the next tile against it 5. Continue to spread thinset and set subsequent tiles, making sure that the long edges of diagonal half tiles are butted up to the chalkline 6. Firmly tap the tiles in place with your fist or a mallet 7. Tap each tile in several locations to distribute the force and ensure that the entire tile is securely bonded. If a tile sets low, use a margin trowel and suction-cup lifter to remove it, then add additional thinset as needed 8. To keep your grout joints clean while you work, occasionally pull a spacer through the joints to scoop out the excess thinset between them 9. Use a sponge to wipe any remaining thinset from the face of the tile 10. As the rows of tile reach the walls and doorways, leave the spaces for cut tiles for now; we find it easier and faster to set only whole tiles, and set the cut tiles later.
| TRADE SECRET: The best way to embed each tile fully in thinset is to slide it down and move it with a motion that’s perpendicular to the ridges of thinset. |
 |
1. A long chalkline provides a reference line for setting the first row of entry tiles and the bullnose trim to be set on the edge of the step. |
 |
2. A chalkline snapped down the center of the hallway marks the center of the tile pattern in the entry area. |
 |
3. Thinset is spread and combed in the area where the first tile is to be set, at the intersection of the chalklines. |
 |
4. The first half tile begins the diagonal layout pattern that will run across the entire floor. |
 |
5. Subsequent tiles are set aligned to the first tile, with spacers between them to maintain even grout joints. |
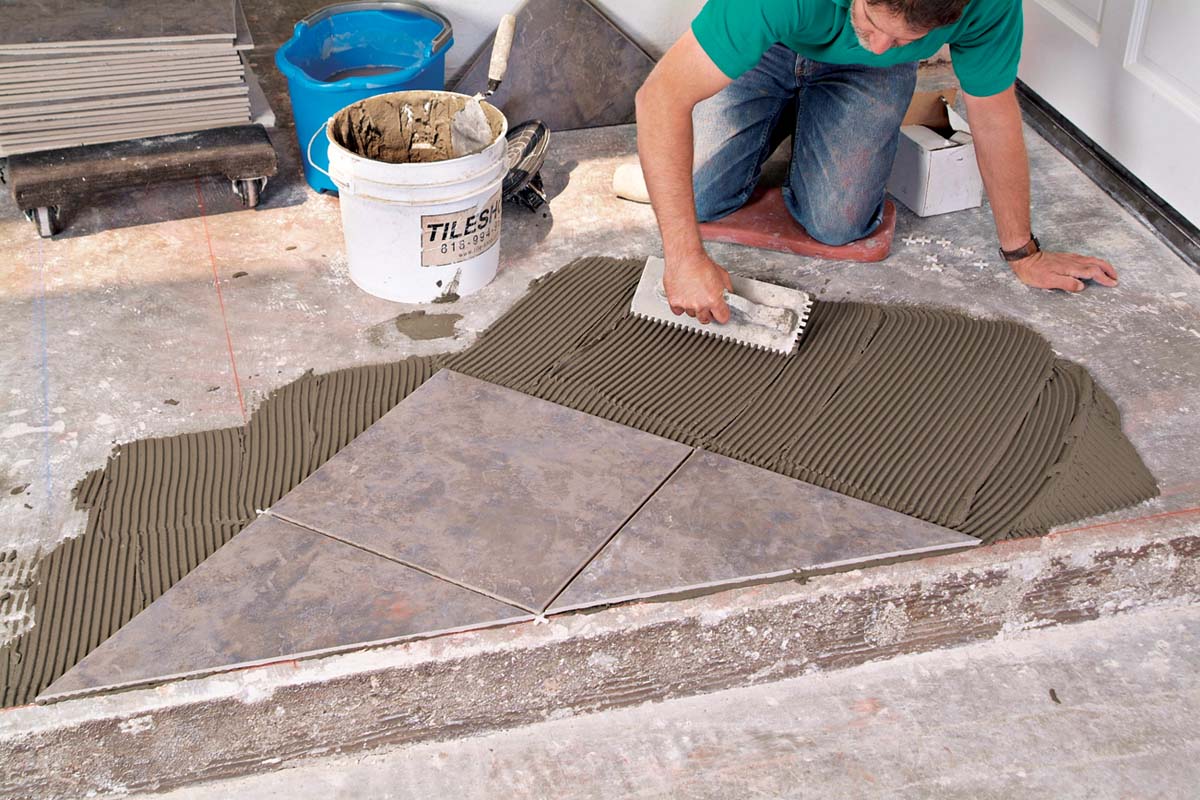 |
6. Combing thinset in one direction for each new section provides good adhesion for the next tiles. |
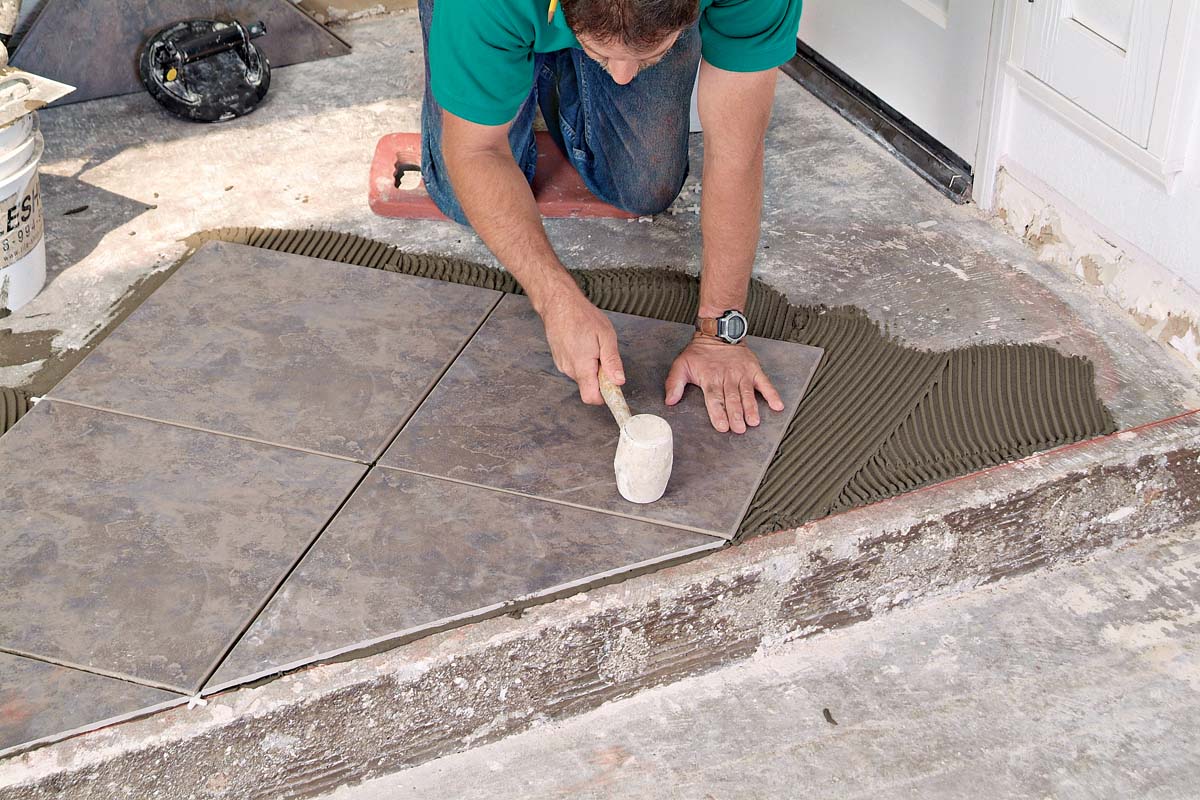 |
7. Tap on the tile with your mallet in several locations to help embed the tile in the thinset. |
 |
8. A margin trowel and suction lifter make it easy to lift tiles that need a bit more thinset under them. |
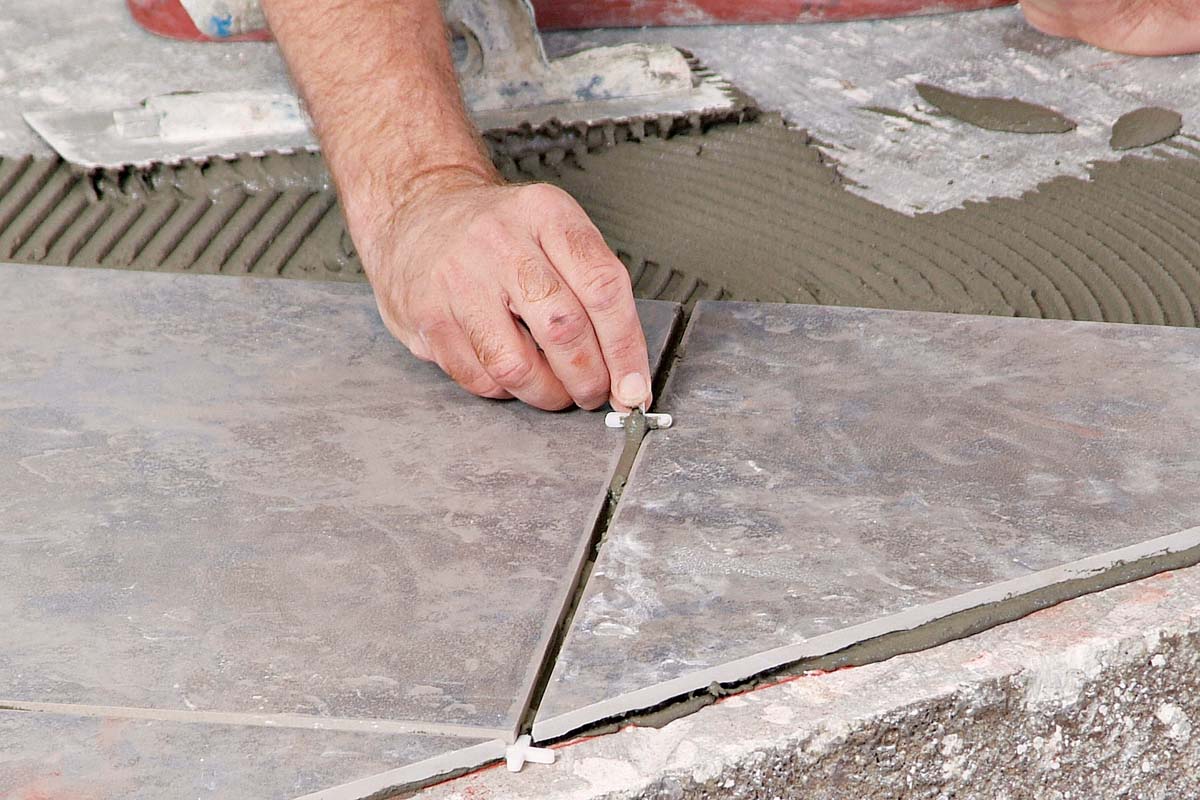 |
9. Use a tile spacer to remove excess wet thinset from between newly set tiles. |
 |
10. Clean up wet thinset drips from the face of the tiles with a damp sponge. |
| Setting Large Tiles
Big tiles—15 in. x 15 in. and larger—and stone tiles weigh substantially more than basic 12-in.-sq. floor tiles. There are two things you can do to make your life easier when setting them: Use large-format thinset and a suction lifter. Large-format thinset has larger sand grains and won’t sag under the weight of big tiles, which helps keep tile edges flush with one another. A suction lifter makes it easier to handle heavy tiles, giving you a handle to grab to help with placement. 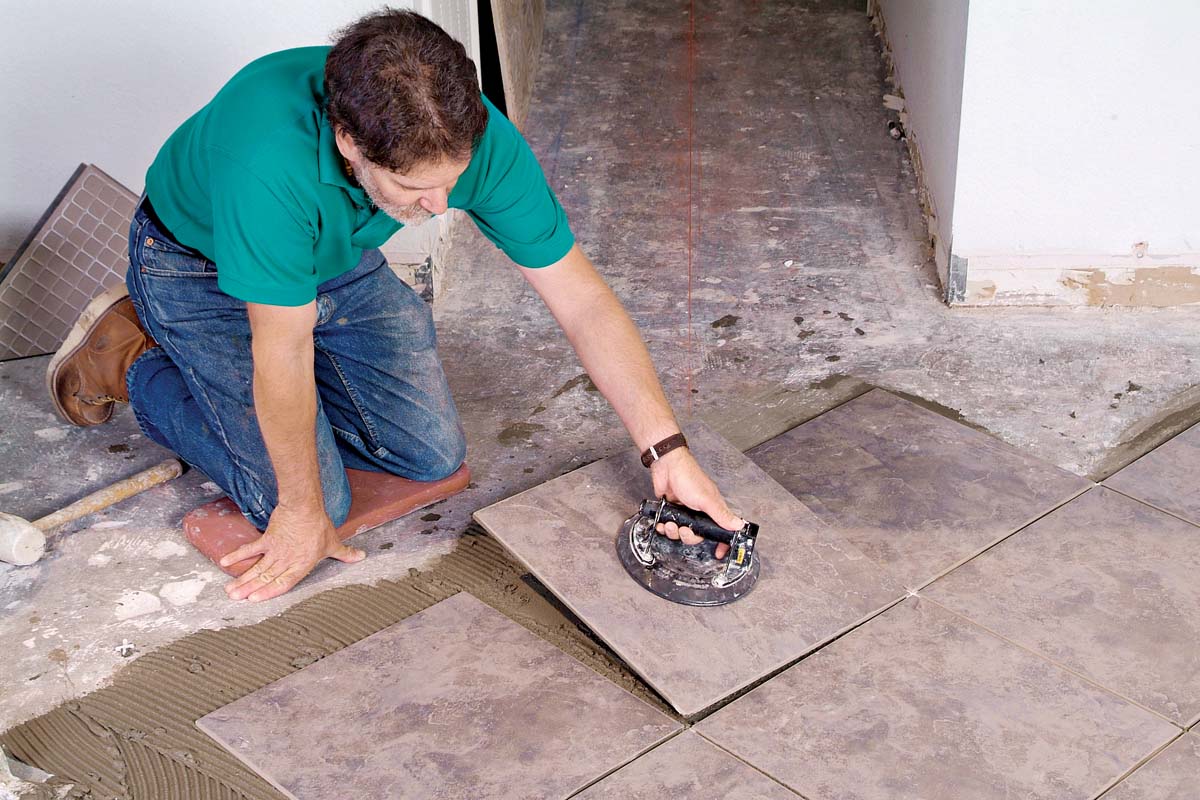 |
Tiling a Room
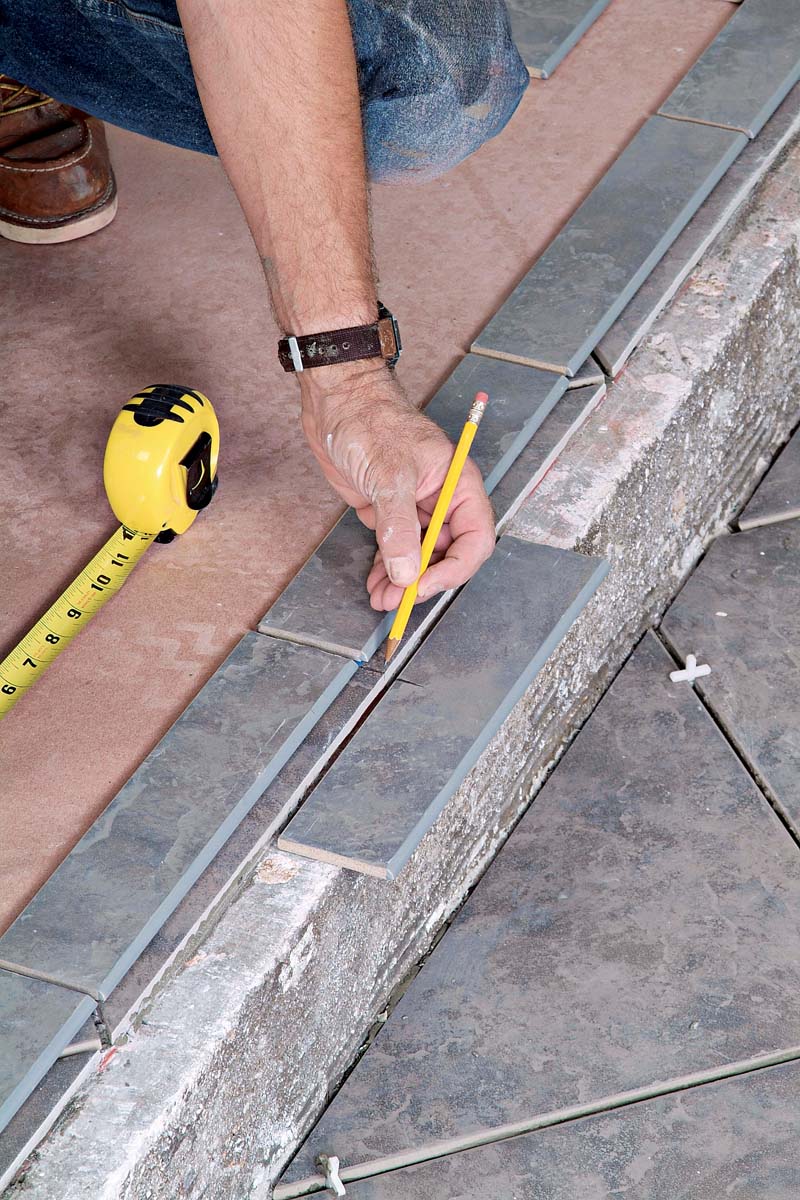
With all full tiles set in the entry area, we’re ready to continue setting tile in the large living room area. The first step is to snap chalklines that allow us to continue the pattern of tiles that we started in the entry area, so the rows of tile and grout joints line up and run straight through the entire space 1. Because the floor steps down from the entryway to the living room, a pair of levels is used to transfer chalklines used to create the necessary layout guides 2, 3.To stay aligned with the pattern, the corner of first tile must be cut before it’s laid 4. Subsequent tiles are then laid, using the edges of the set tiles as a guide; of course, spacers are added to keep the grout lines between the tiles even 5. If there’s more than 1/16 in. of size variation between tiles, we’ll snap additional chalklines to keep the rows straight and true. We place a tile (with spacers) on each end of the last-set row 6 and snap a line at their edges. This process is repeated for each row until all the full-size tiles are set 7.
 |
1. Careful layout ensures that the rows of diagonally set tile and the grout joints line up all the way across the floor |
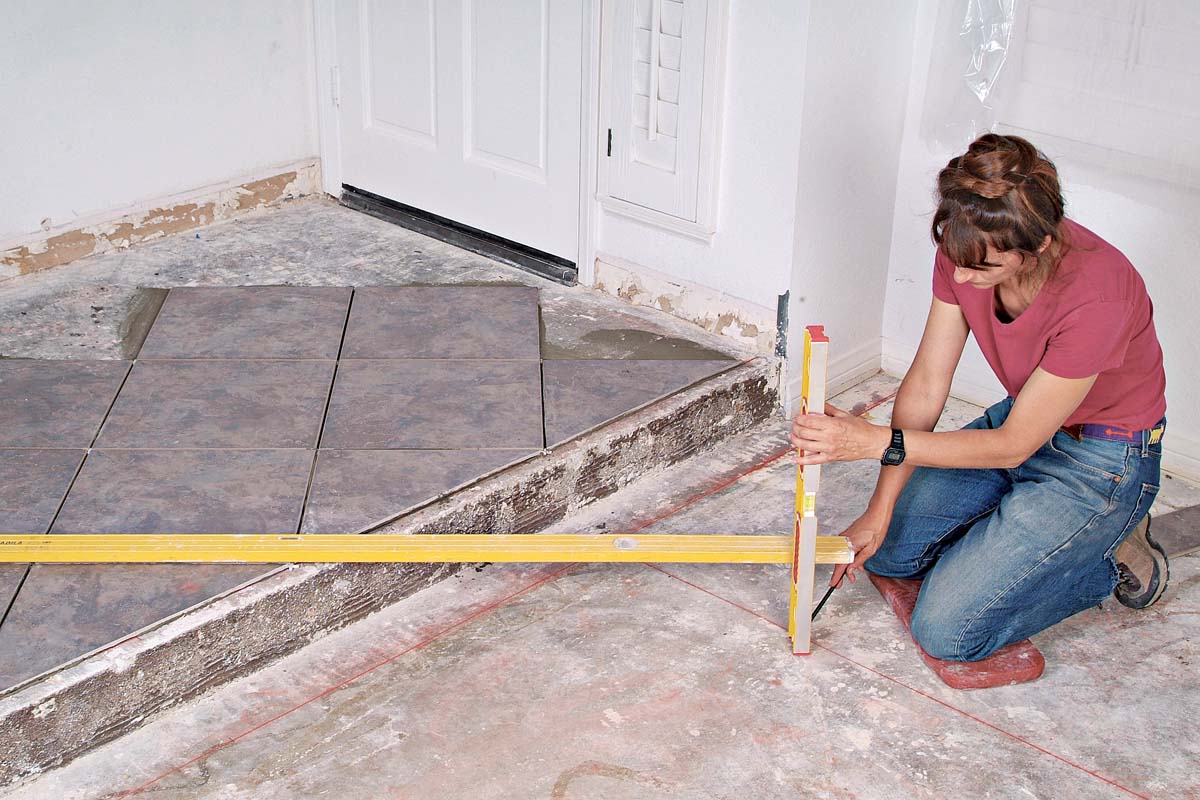 |
2. A long and a short level are used to transfer the layout lines from the entry area to the living/dining room floor. |
 |
3. The layout lines keep the rows of tile running at a perfect 45° angle to the step. |
 |
4. To maintain an even pattern across the stair step, the first tile on the lower level must be trimmed. |
 |
5. Continue to set full tiles across the floor, using both the edges of the previously set tiles and the chalk layout lines as guides. |
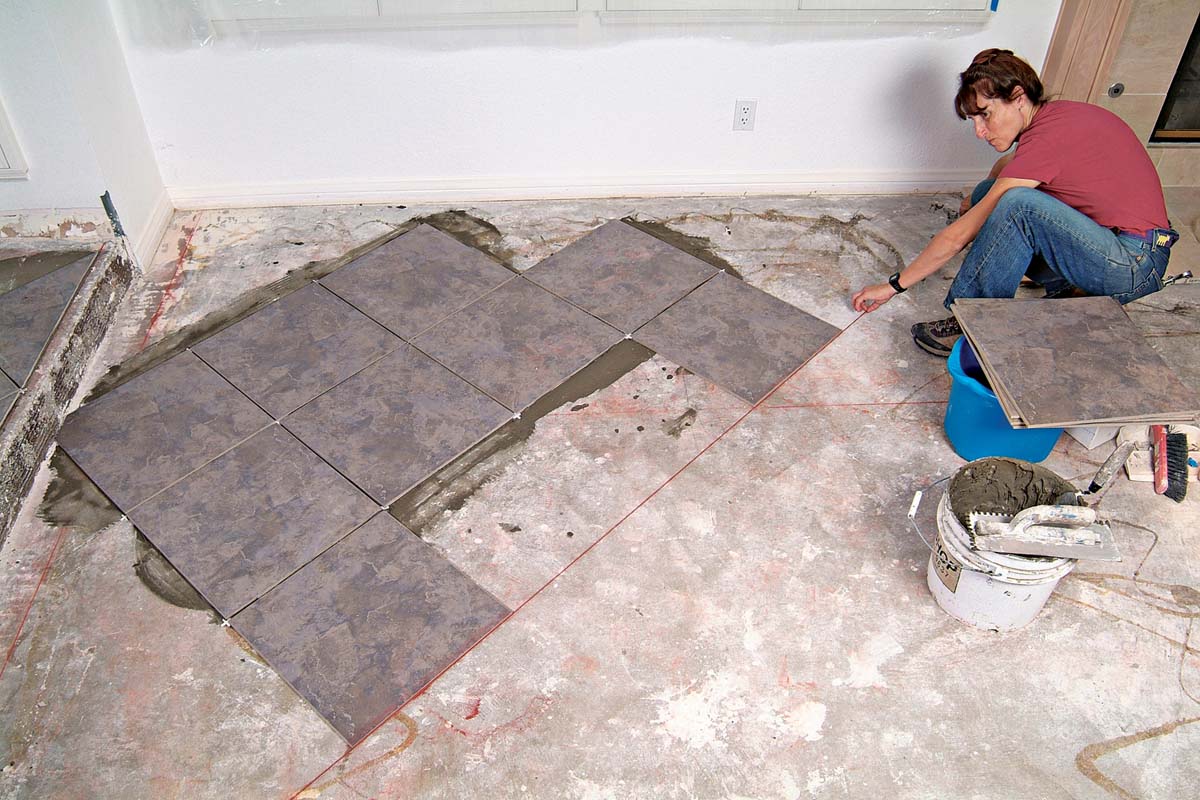 |
6. Additional chalklines serve as a guide to keep subsequent rows of tile straight. |
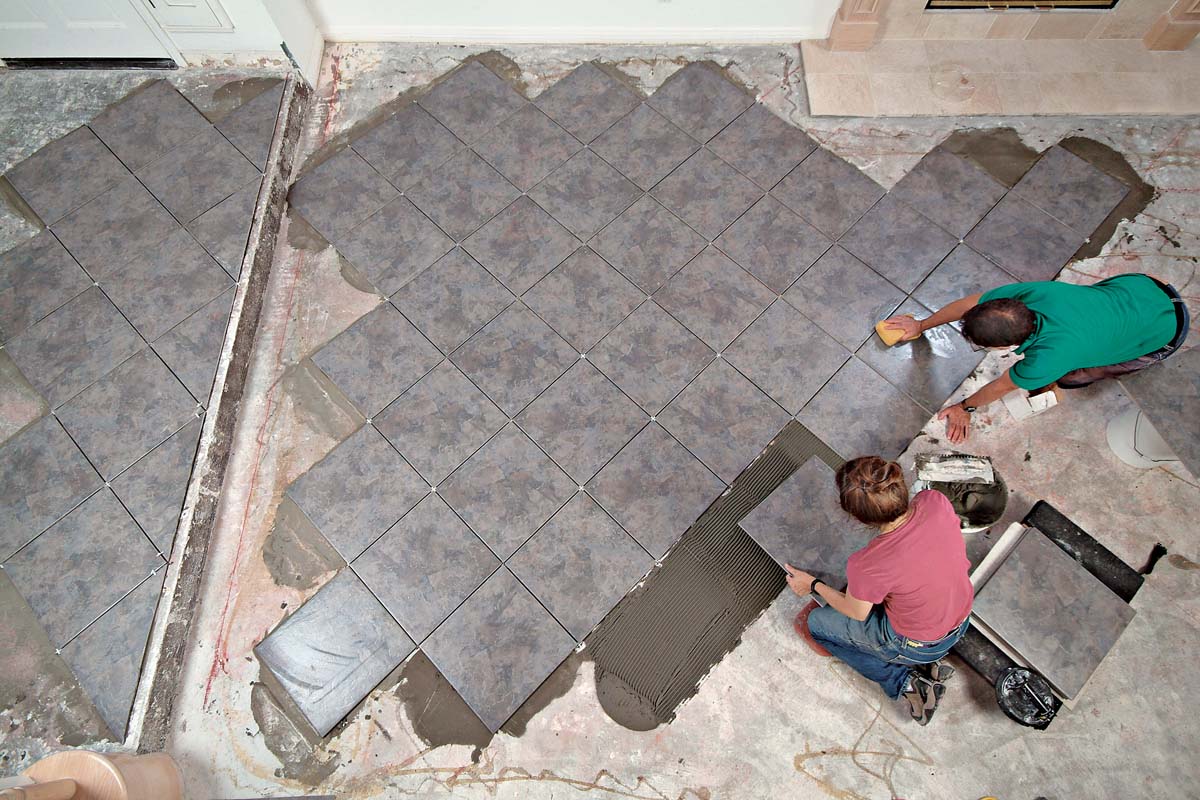 |
7. We set only full tiles across the floor; the cut tiles will be set the next day. |
| TRADE SECRET: To avoid the indignity of tiling yourself into a corner in a room with a single doorway, plan your layout and start setting tiles at the back of the room, working your way out.
Warning : Mixing thinset is a dusty, messy job that’s best done outdoors. Always wear a dust mask and work clothes, as some thinset is bound to splatter—especially if you mix with an electric drill–powered paddle wheel. |
Tiling a Step
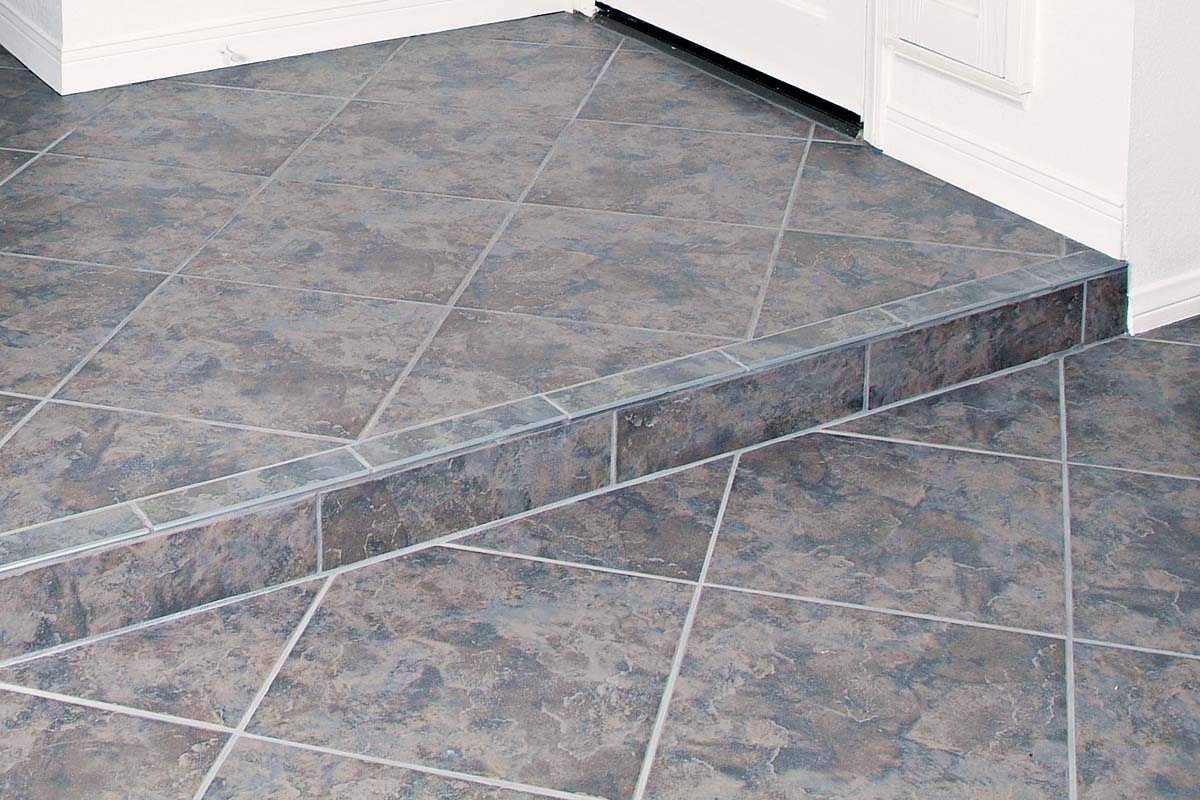
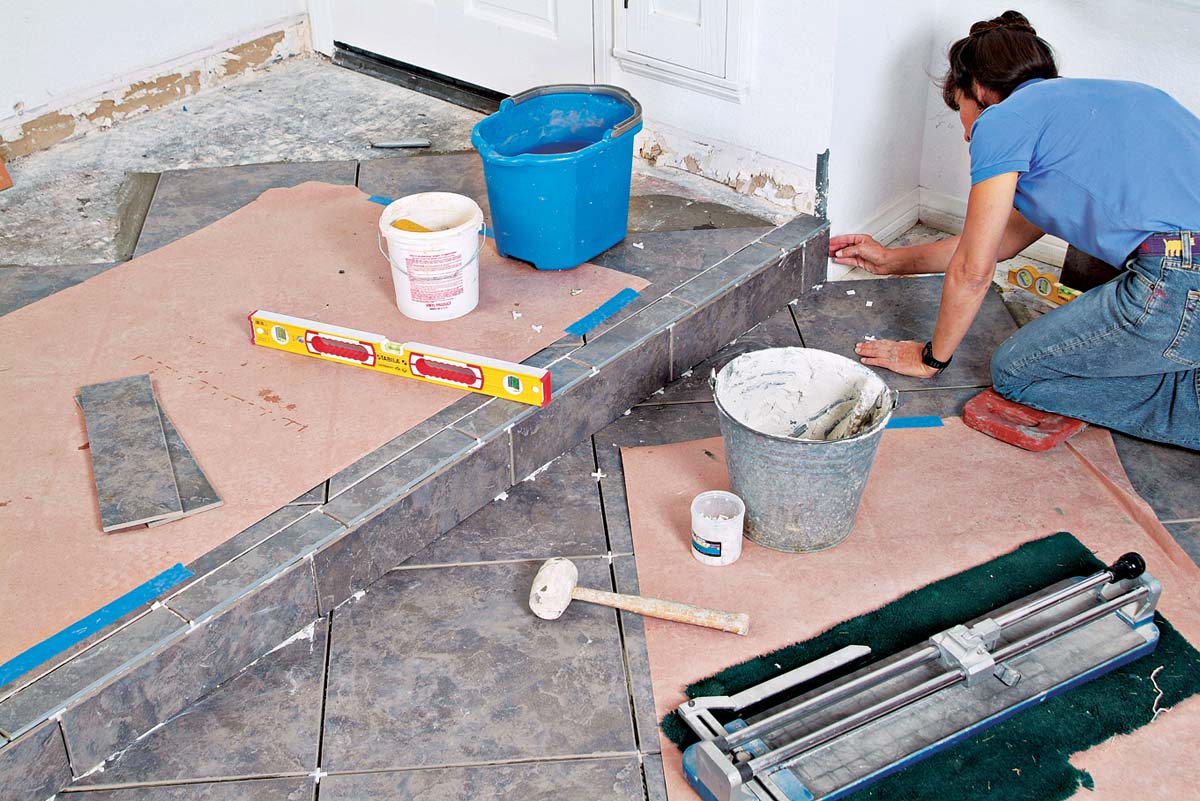
In this example, the step between the entry and the living room is to be tiled, both along its edge and on the face of the step. Stair edges receive more abuse than the rest of the floor; this high-traffic area must be set with extra care.
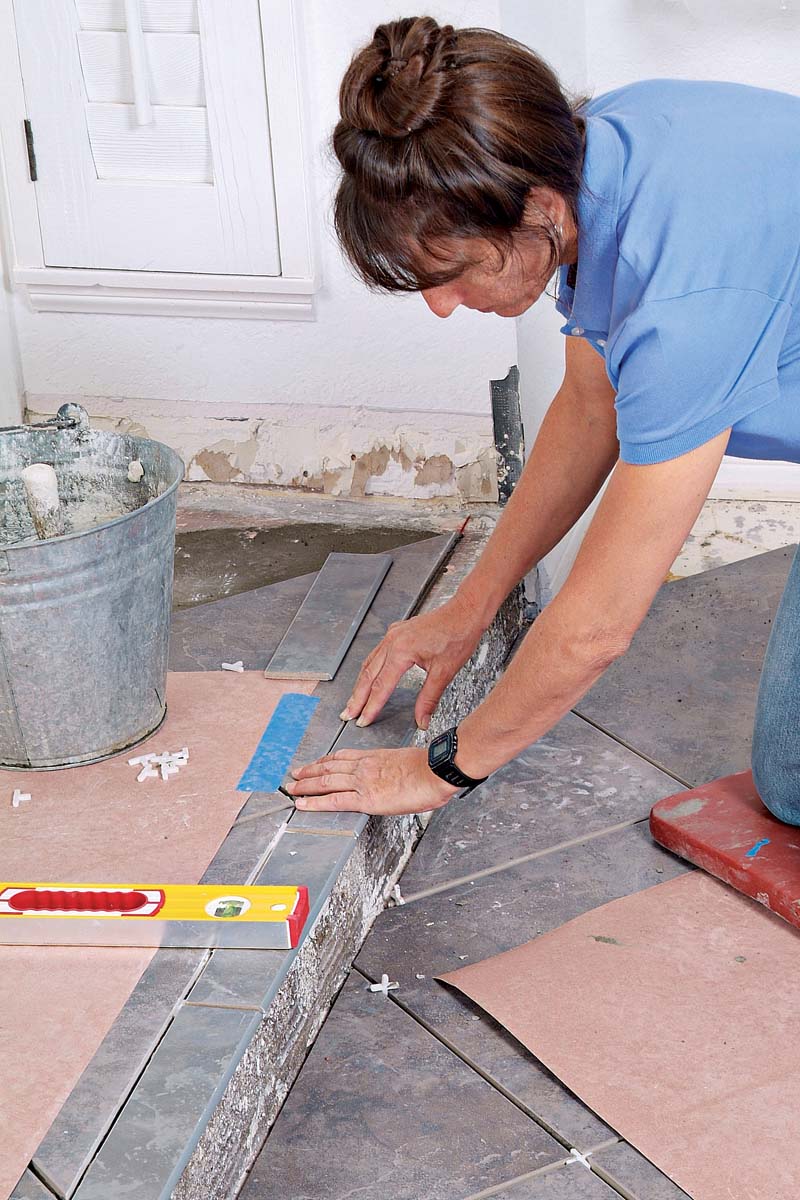
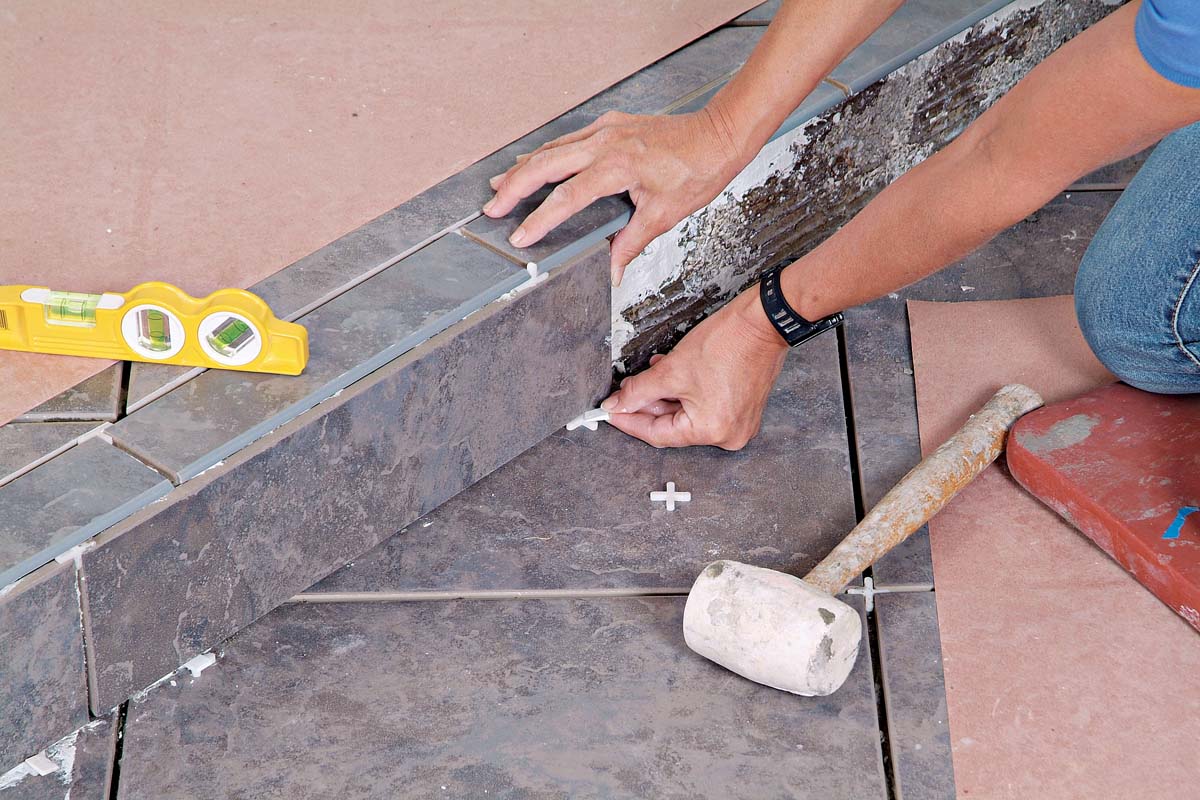
To set the bullnose trim on the edge of the step, start by finding the center of the step to determine where the middle tile will be set. These trim tiles should overhang the edge enough to cover the tops of the vertically set tile on the riser. Then work outwards in both directions 1.
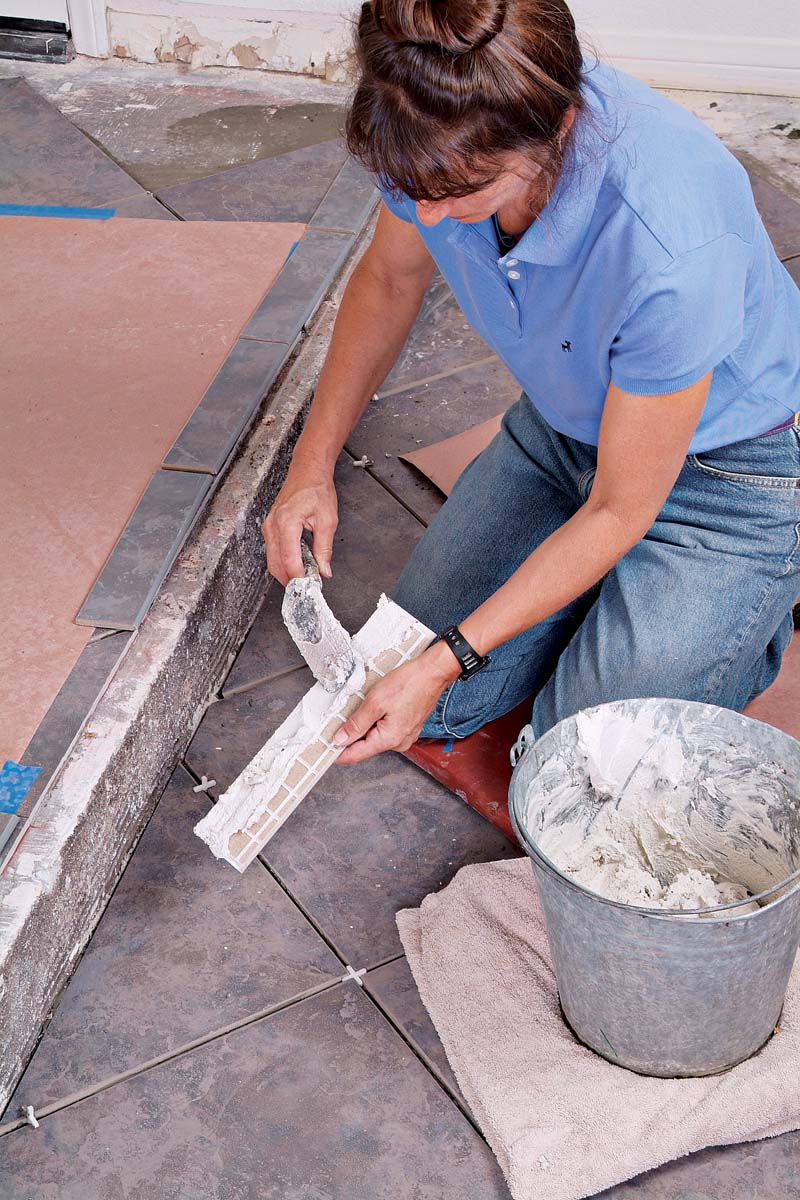
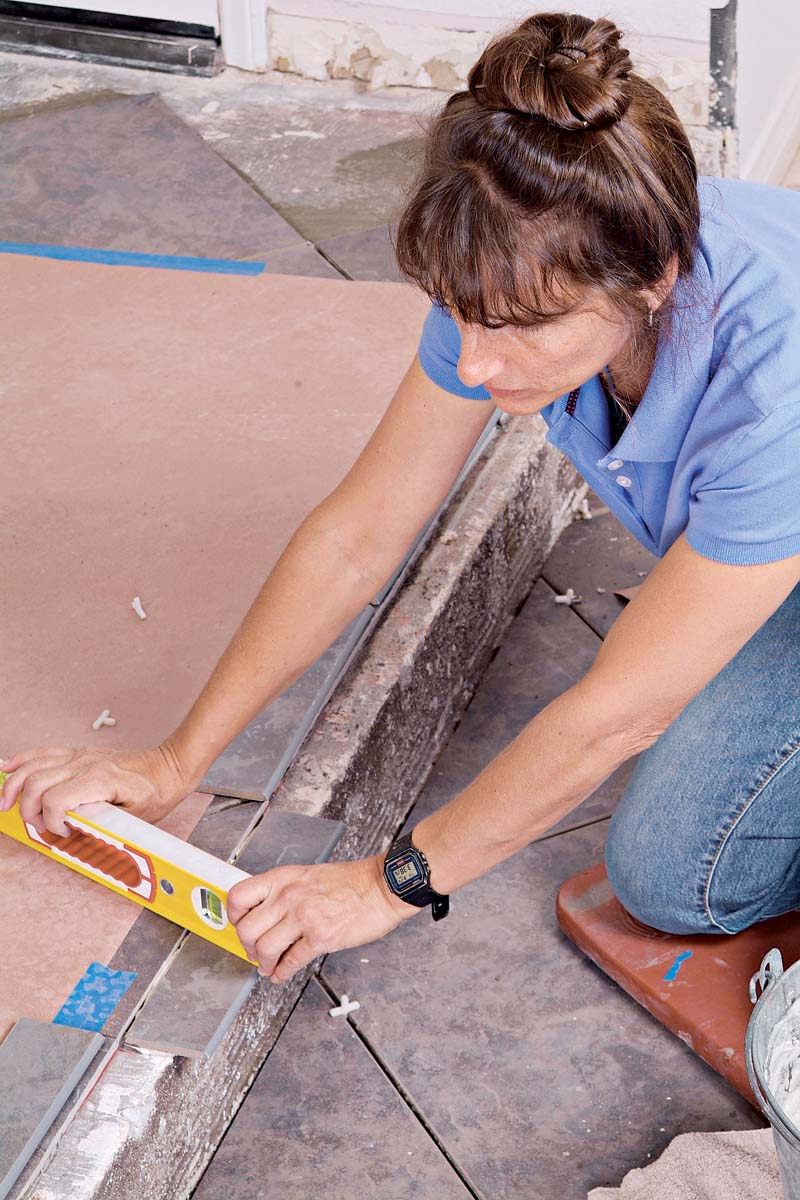
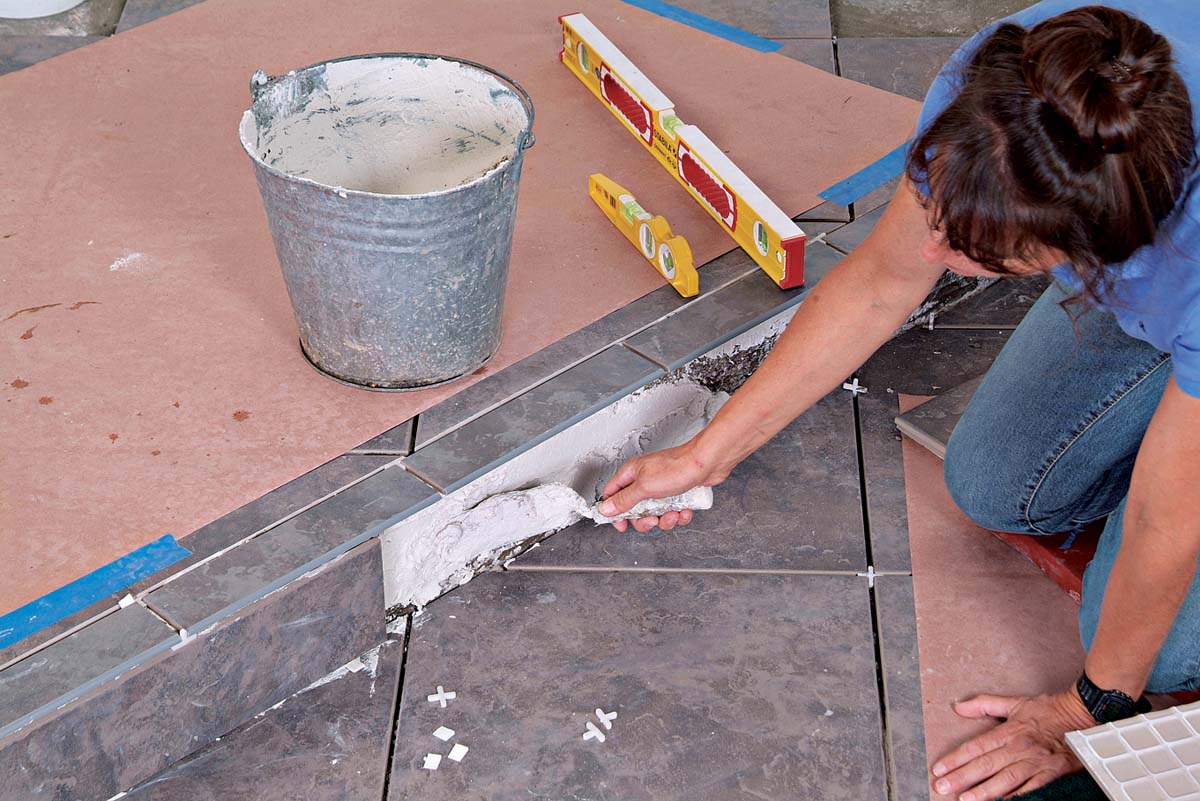
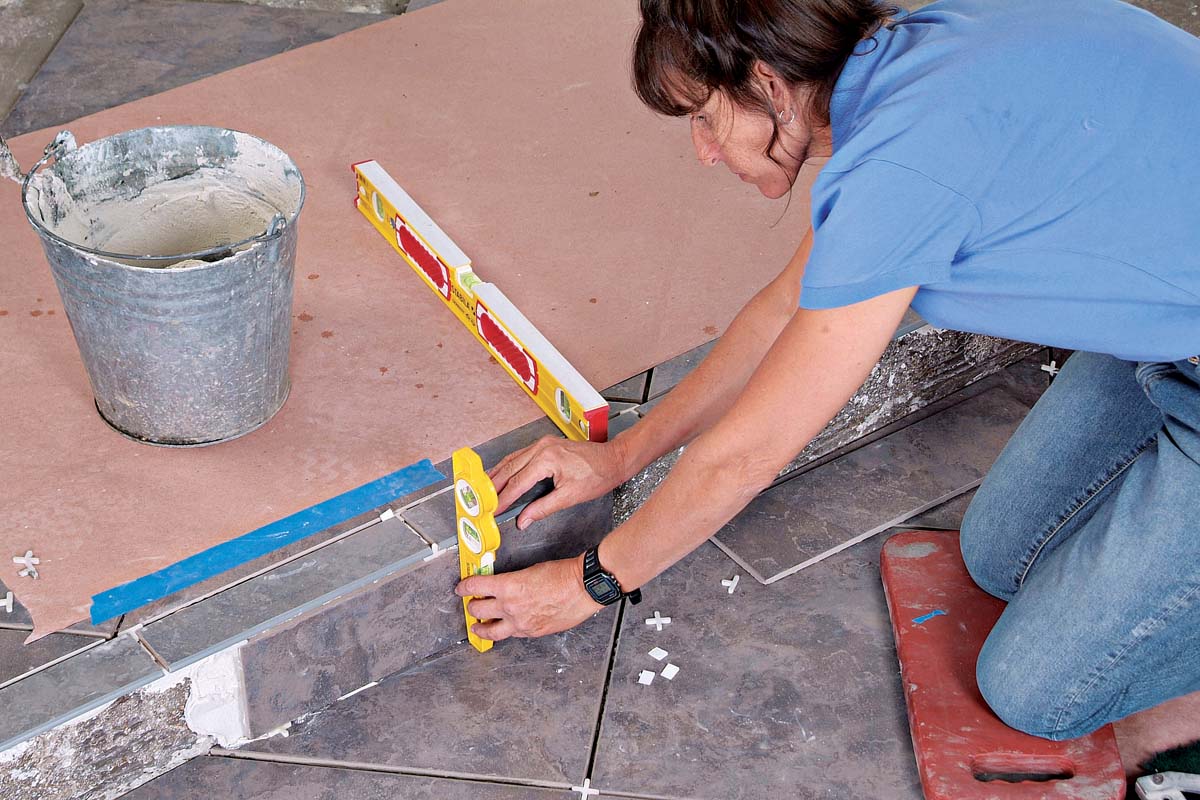
Back-butter and set these tiles, using slightly more thinset than usual 2. Be sure that there are no voids in your thinset; you want to get some squeeze-out to tell you there is enough setting material. Use a level or straightedge to make sure the bullnose tiles are flat and even with the field tiles 3. Scrape away any excess that has oozed under the front edge of the tile 4. Work your way across the step, setting the bullnose and cleaning any extra material from the front 5. Allow these tiles to dry overnight. Cut the face tiles for the stair riser narrow enough to allow a grout joint at the top and the bottom of the tile. Set the tiles by both back-buttering them and adding additional thinset to the riser to make sure they are solidly set 6. Use a torpedo level to make sure each tile is plumb and even with the bullnose tile set above it 7. Add spacers and/or wedges as necessary to adjust the height of the face tiles 8. When you later grout the step and riser, make sure to pack the grout fully into the joints.
 |
The step is tiled with a bullnose edge on top and a cut tile on the face of the riser. |
 |
1. Use the center of the entry layout to determine the best layout pattern for the bullnose step trim. |
 |
2. Back-buttering each bullnose trim tile ensures that its bond with the concrete floor will be strong. |
 |
3. Use a small level to keep the bullnose tiles flat and even with the adjacent flooring. |
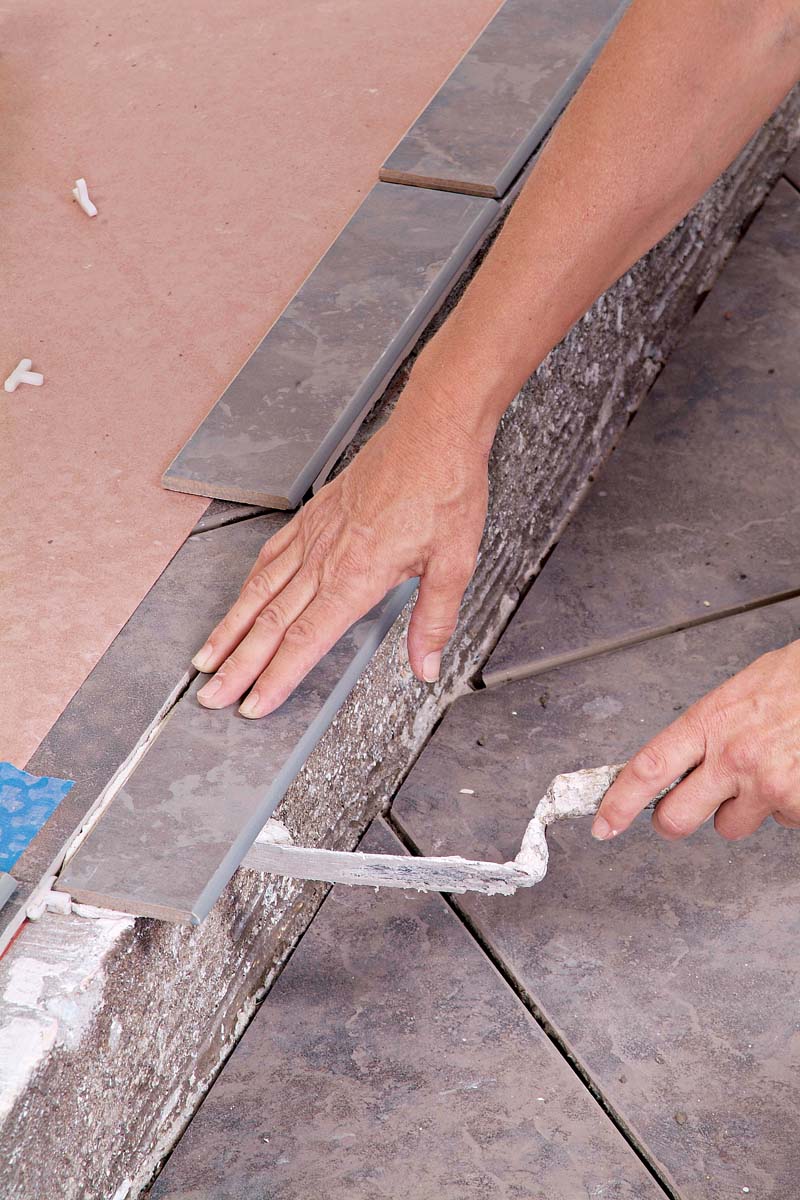 |
4. Use a margin trowel to remove excess thinset from the overhanging edge of the trim tiles. |
 |
5. Continue down the edge of the step, setting the bullnose tiles level with one another and adding spacers as you go. |
 |
6. Add extra thinset to fill out voids behind the cut tiles that cover the face of the riser. |
 |
7. Use a torpedo level to make sure that the riser tiles are plumb and even with the edge of the bullnose tiles. |
 |
8. Place spacers and/or wedges under the riser tiles to adjust the grout joint at the top and form a caulk joint at the bottom. |
Setting Cut Tiles
Because it’s difficult to lean over freshly set field tiles without shifting them, we recommend scraping off thinset around those tiles, letting them dry, and saving the cuts for the next day. After waiting a full 24 hours, mark and cut the tiles.
Before setting these tiles, place some rosin paper or other protective material over the floor tiles, to protect them against thinset drips. Scrape any dried thinset off the floor around the set tiles using your margin trowel 1. Now dry-fit your cut tile and trim it as necessary with a pair of nippers or a water saw. Also be sure to use a rubbing stone on any cut tile edges that will show. Use a margin or notched trowel to apply thinset to the back of each tile and then set it in place 2, 3. If the tile is too low or too high, add or remove thinset until it fits into place, even with the adjacent tiles.
At doorways, it is easier to cut the bottom of the door casing to make room for the new tile rather than to trim the tile to go around the casing. First, make a shim that equals the thickness of the set floor tile and thinset by laying a scrap of tile atop a piece of thin wood or cardboard. Set the shim on the floor next to the casing, and mark a pencil line. Now use a small handsaw (an undercut or jambsaw works best) to cut the casing at the line 4.
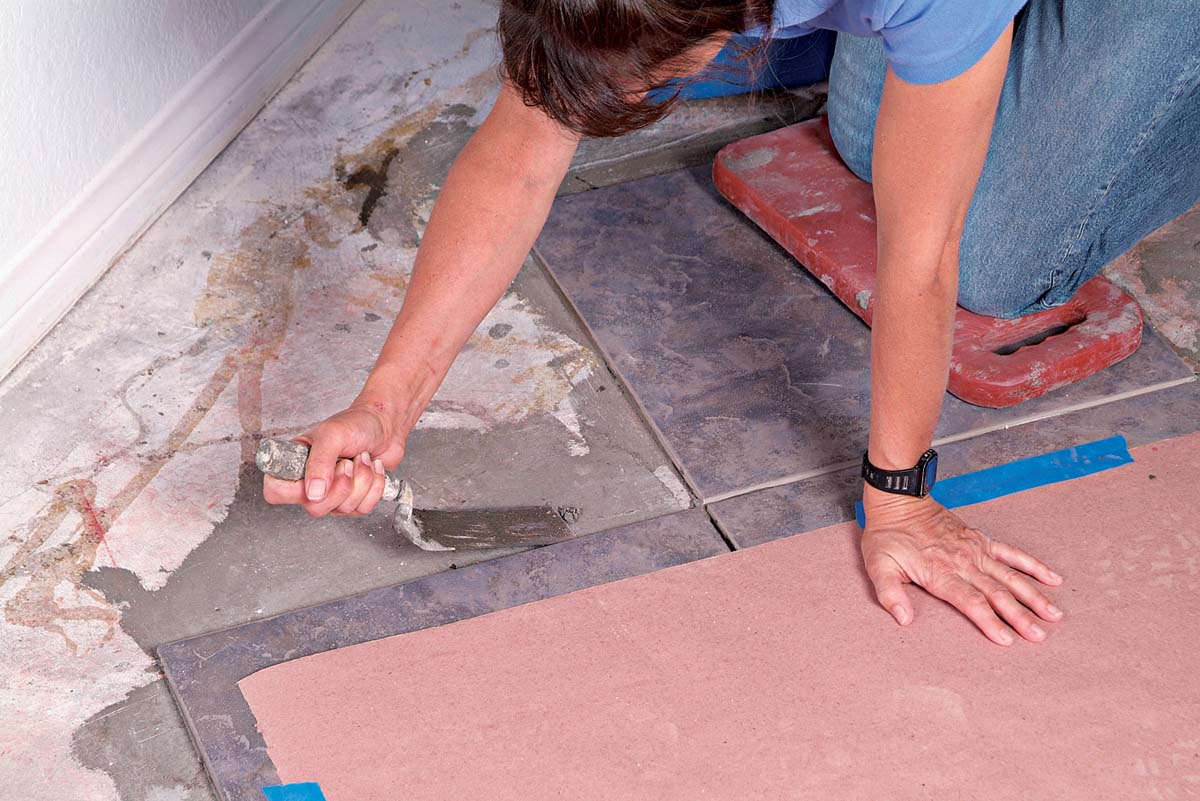 |
1. Clean up any dried thinset you may have left from the previous day before you attempt to fit the cut tiles. |
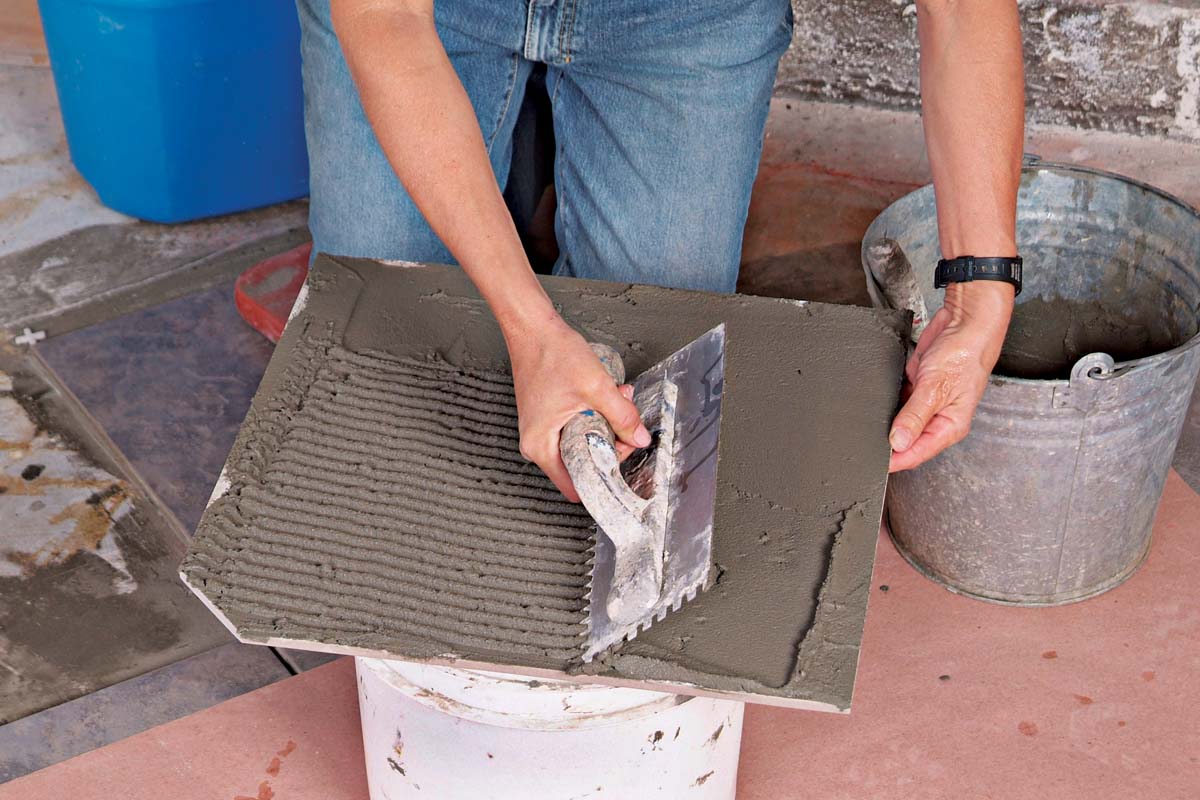 |
2. Comb an even layer of thinset onto the back of the cut tiles with a notched trowel. |
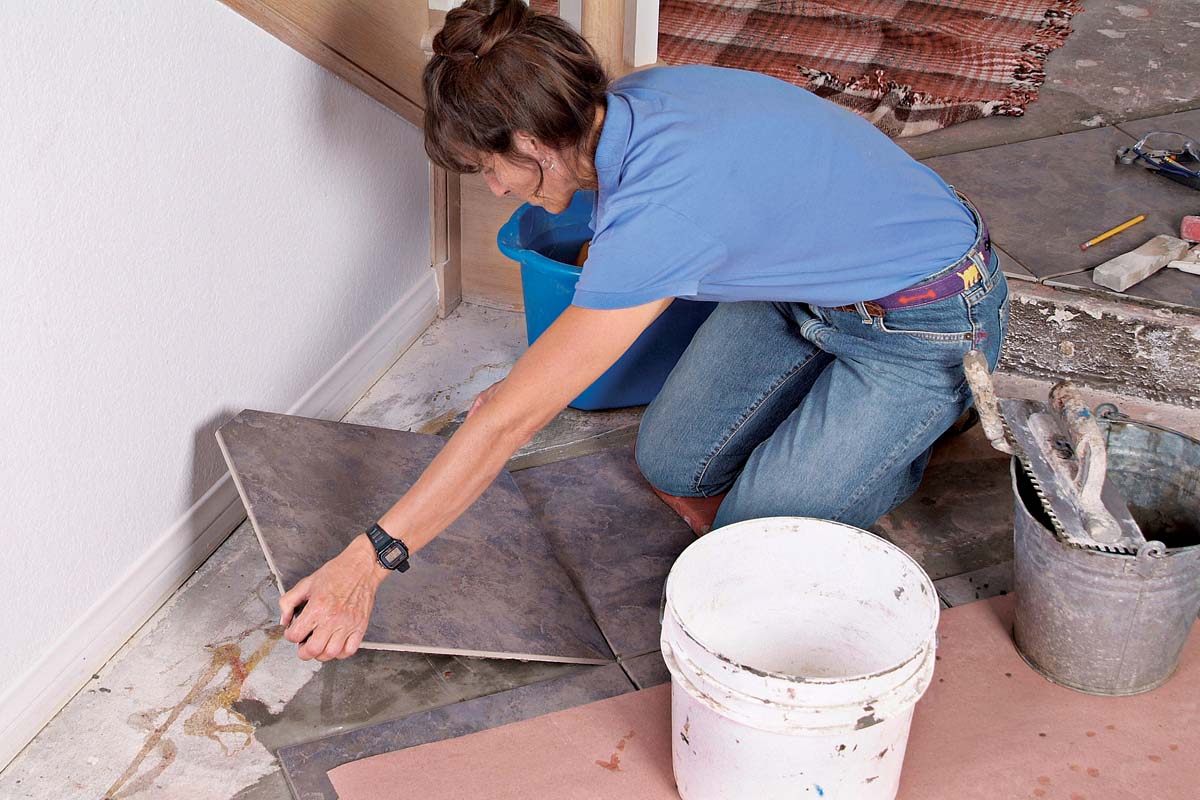 |
3. Carefully lay the back-buttered cut tile in place, aligning and leveling it relative to the adjacent tiles. |
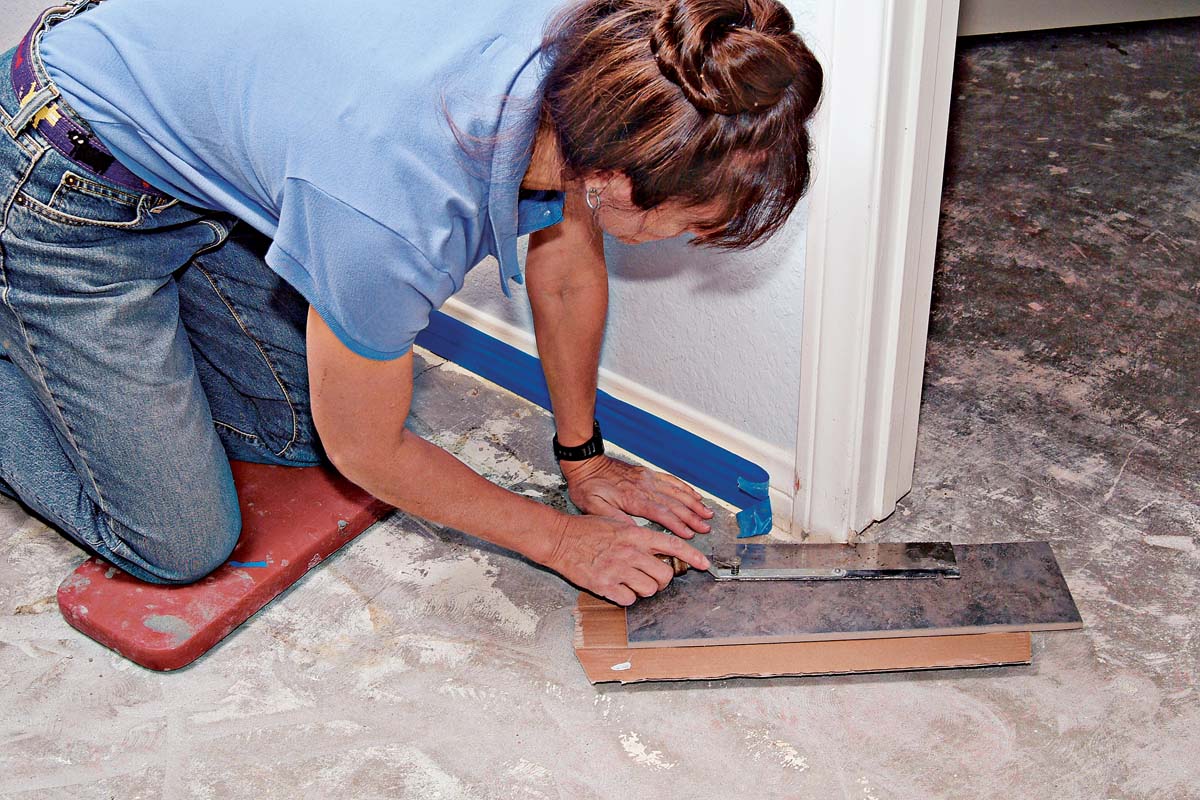 |
4. To set tile around doorways, first cut off the door casing, using a scrap tile, wood, or cardboard shim to support the saw. |
 Excerpted from Tiling Complete, 2nd Edition by Robin Nicholas and Michael Schweit.
Available in the Taunton Store and at Amazon.com.
