
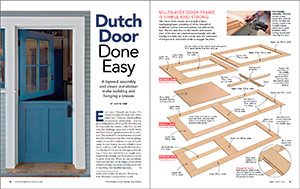
Dutch Door Done Easy
A layered assembly and clever installation make building and hanging this door a breeze.

Synopsis: This article gives details for building and installing a Dutch door using a layered-assembly technique. Illustrations show the dimensions of each layer, and a series of photographs demonstrate the method of building the door (including the sequence of cutting the rabbets to keep the piece stable) and then fitting it into the opening before cutting the door in two and adding weatherstripping and hardware.
Ever since I bought my house, I’ve wanted to replace the back door with a Dutch door. There are a lot of aesthetic and practical justifications—you can get a cooling breeze off the porch while keeping the dog inside, for instance—but there are also some fun challenges associated with the build, and that’s always a good motivator for a craftsman. The method I’ve landed on uses a layered-assembly technique, so you don’t need any plunge routers or mortise machines, or cope-and-stick router-bit sets. Instead, the door is built in three layers, yielding a stiff, strong finished product. I’ve also discovered that the best approach to fitting a Dutch door is to build it as a single piece, hang it in the opening, and then remove it so that it can be cut in two. When the top and bottom halves are put back on the hinges, it’s much less difficult to bring everything into alignment than if everything were installed separately.
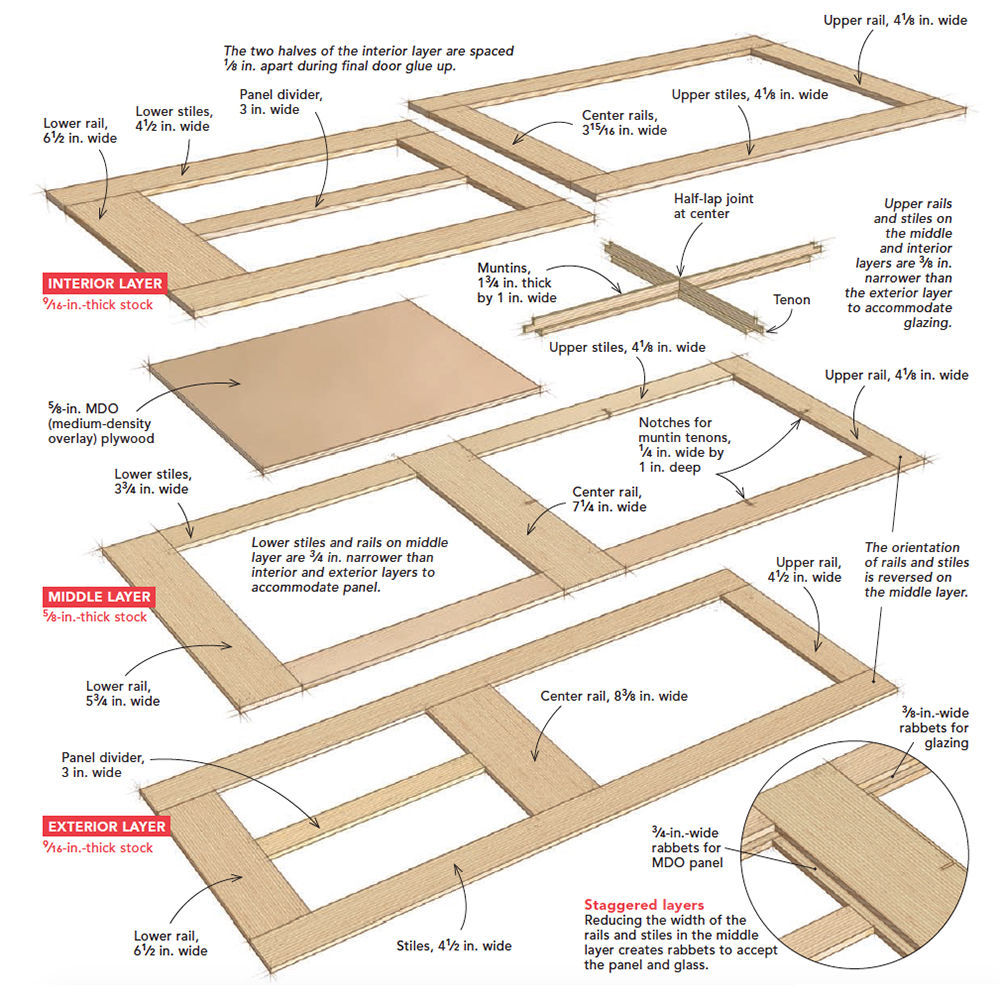
Multilayer door frame is simple and strong
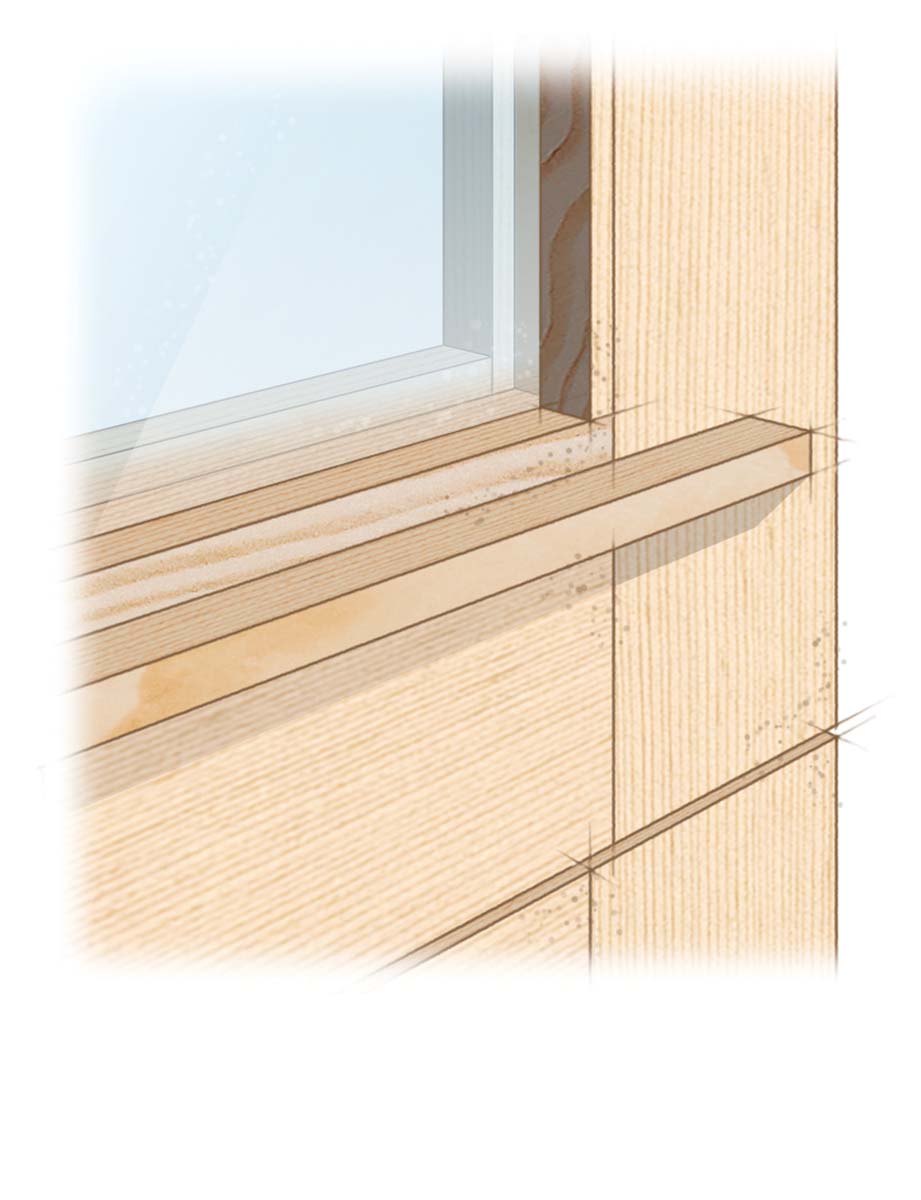
This 13/4-in.-thick exterior door is built in three overlapping layers, providing all of the strength of traditional mortise-and-tenon joinery, but without the fuss. the rails and stiles on the interior and exterior sides of the door are oriented conventionally, with rails butting into stiles, but in the center layer the orientation of the pieces is switched in order to stagger the joints.
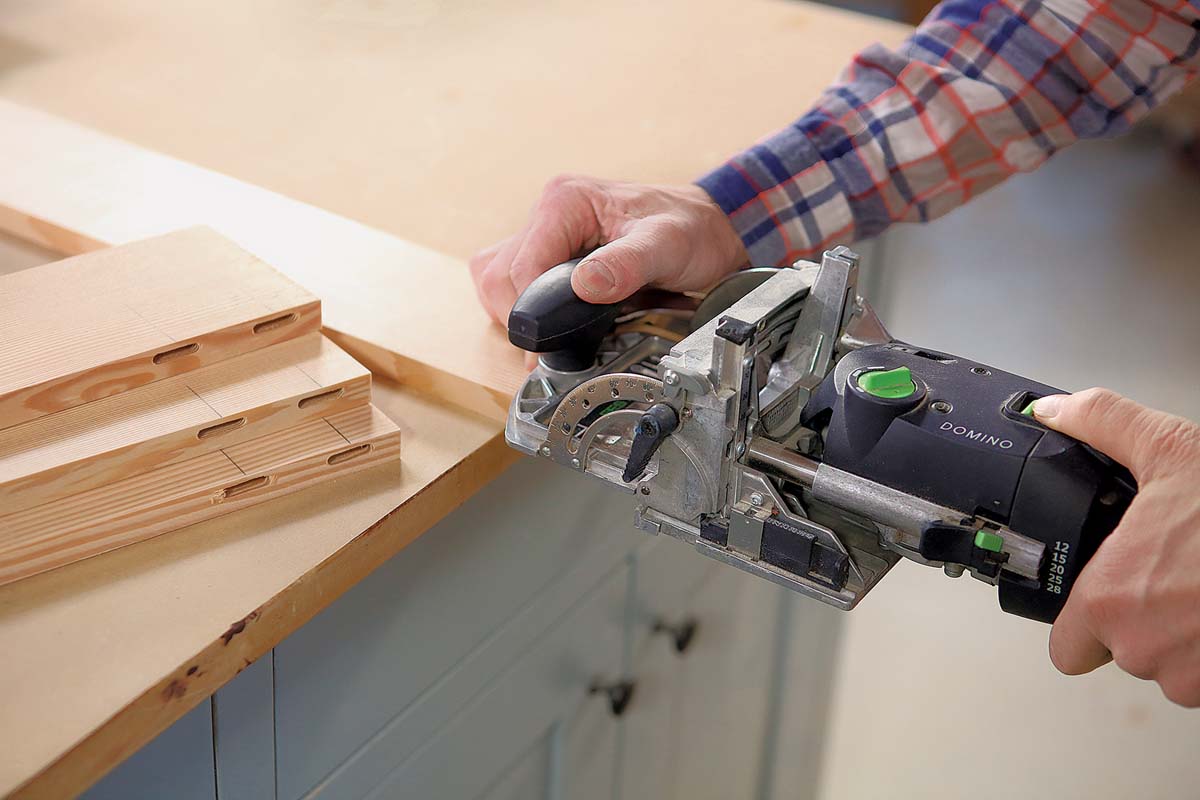 |
Saw-friendly assembly. Although pocket screws would also work for all the rail and stile joinery, I used 5×30 Domino tenons, which won’t cause problems when cutting to size and notching the door. |
Build The Door One Layer At A Time
After cutting all the parts to size and thickness, each layer of the door is assembled separately and eventually laminated together.
 |
 |
|
Notching makes mortises. Make a series of nibble cuts to create notches in the rails and stiles of the middle layer that will accept the muntin tenons. |
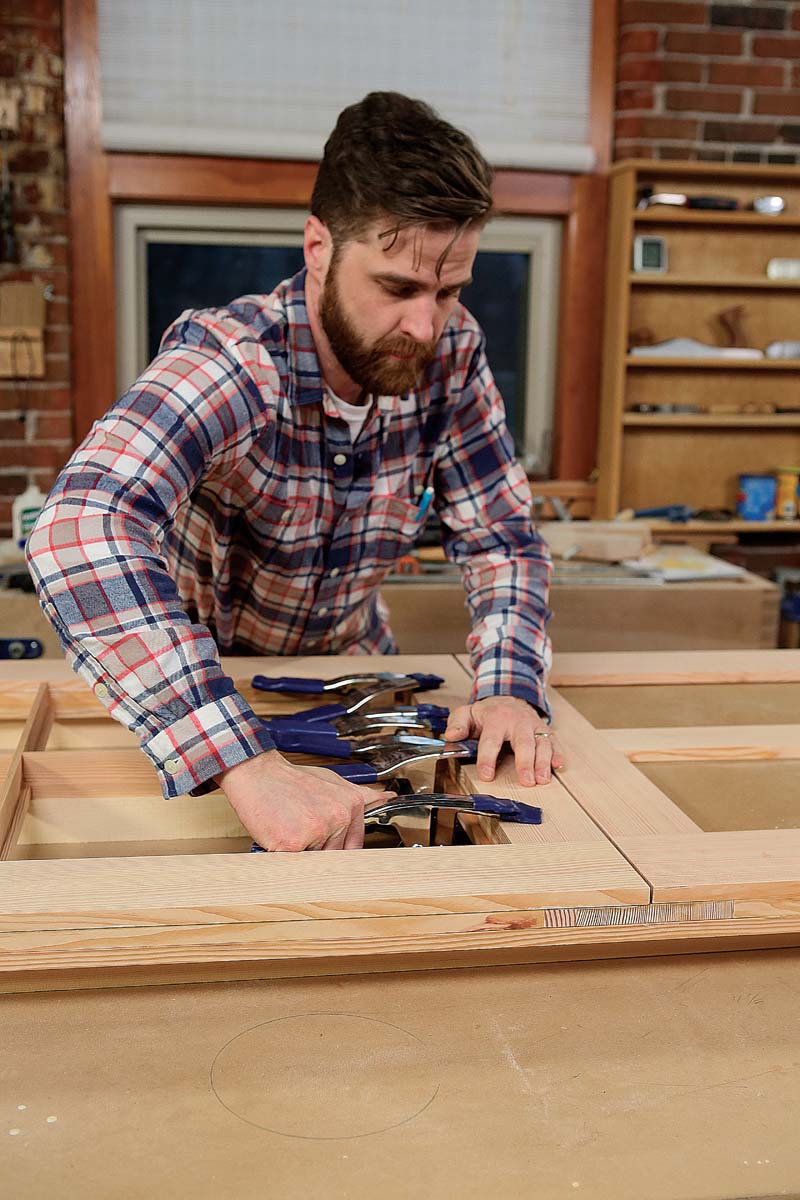
Preassemble the plies. Working one layer at a time, glue and clamp the rails and stiles together. Making one side of each Domino joint oversize leaves some wiggle room to adjust each layer for square if needed. |
|
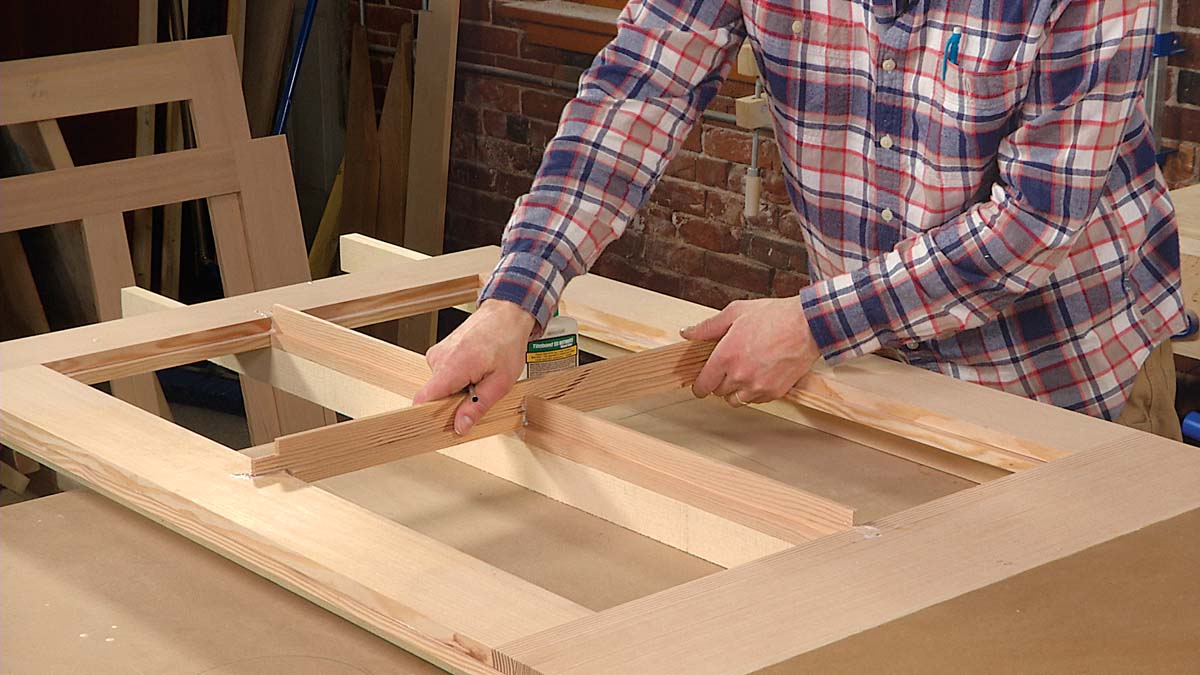
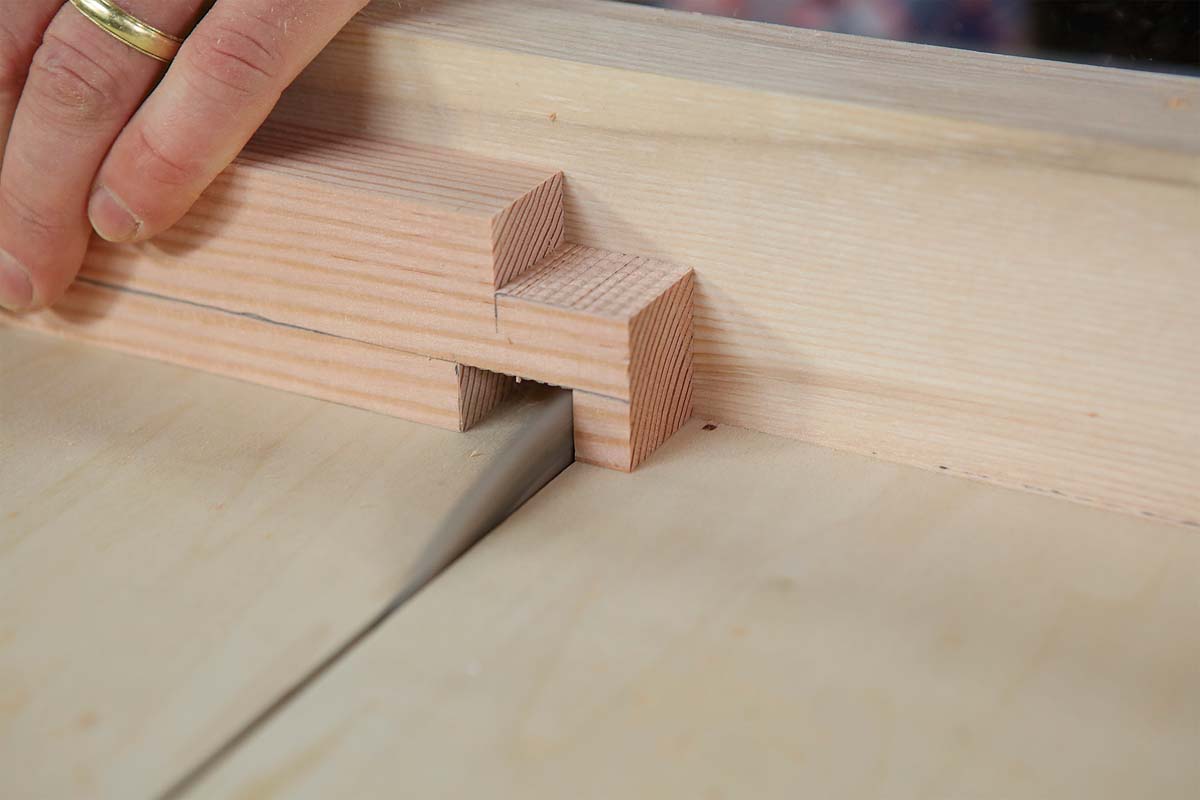
Lap the muntins. A tight-fitting half-lap joint is key, so sneak up on the fit until the pieces slide together snugly without forcing them. |
 |
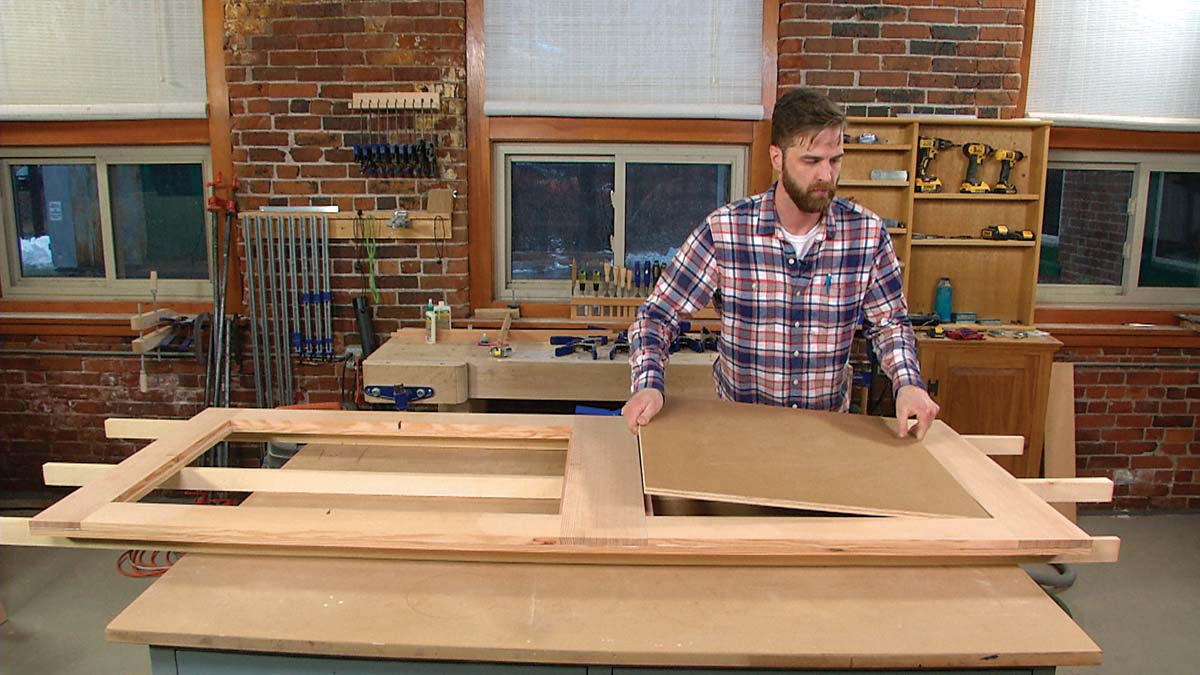 |
Fit the panel. Drop the 5⁄8-in.-thick MDO panel—a type of waterproof plywood—into the middle layer, where it will be captured by the interior and exterior layers. |
 |
 |
|
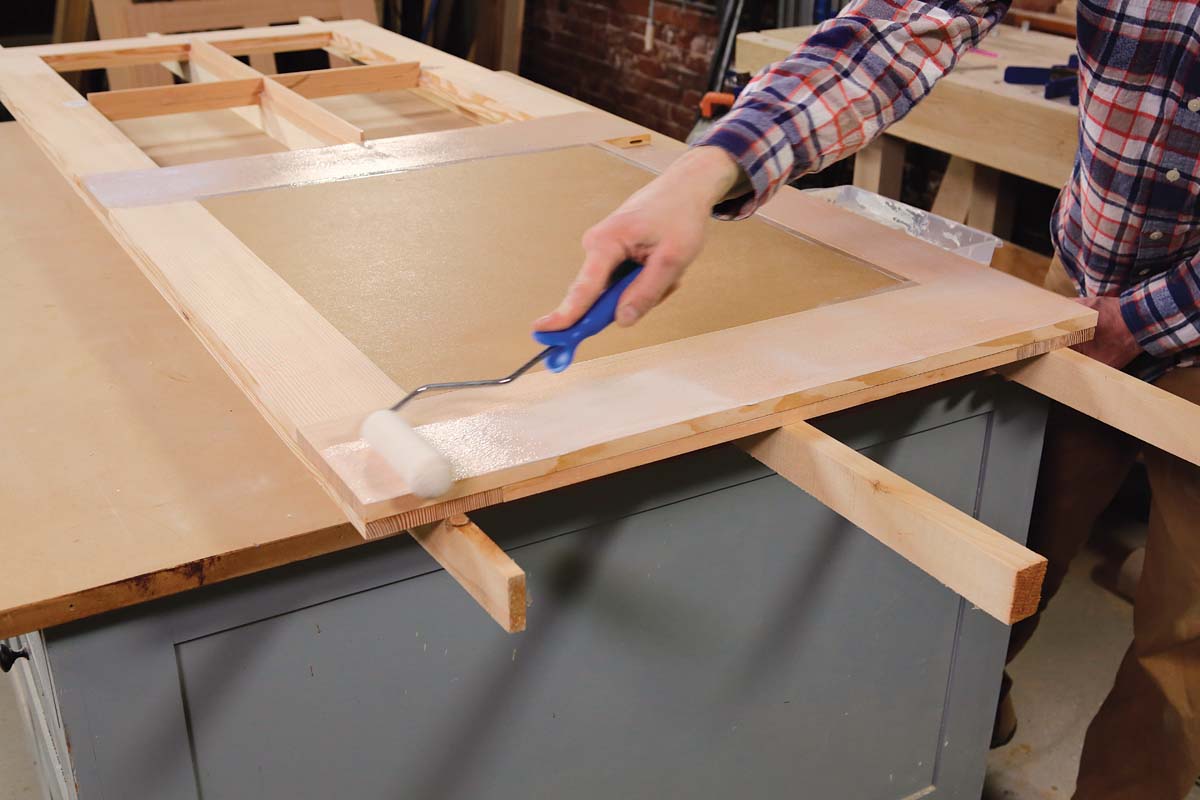
Roll on the glue. I recommend using Titebond III glue, which is waterproof and has a long open time ideal for a complicated glue up. Use a mini paint roller to apply a thin coat onto both mating surfaces, overlapping the edges of the MDO panel. |
 |
 |
|
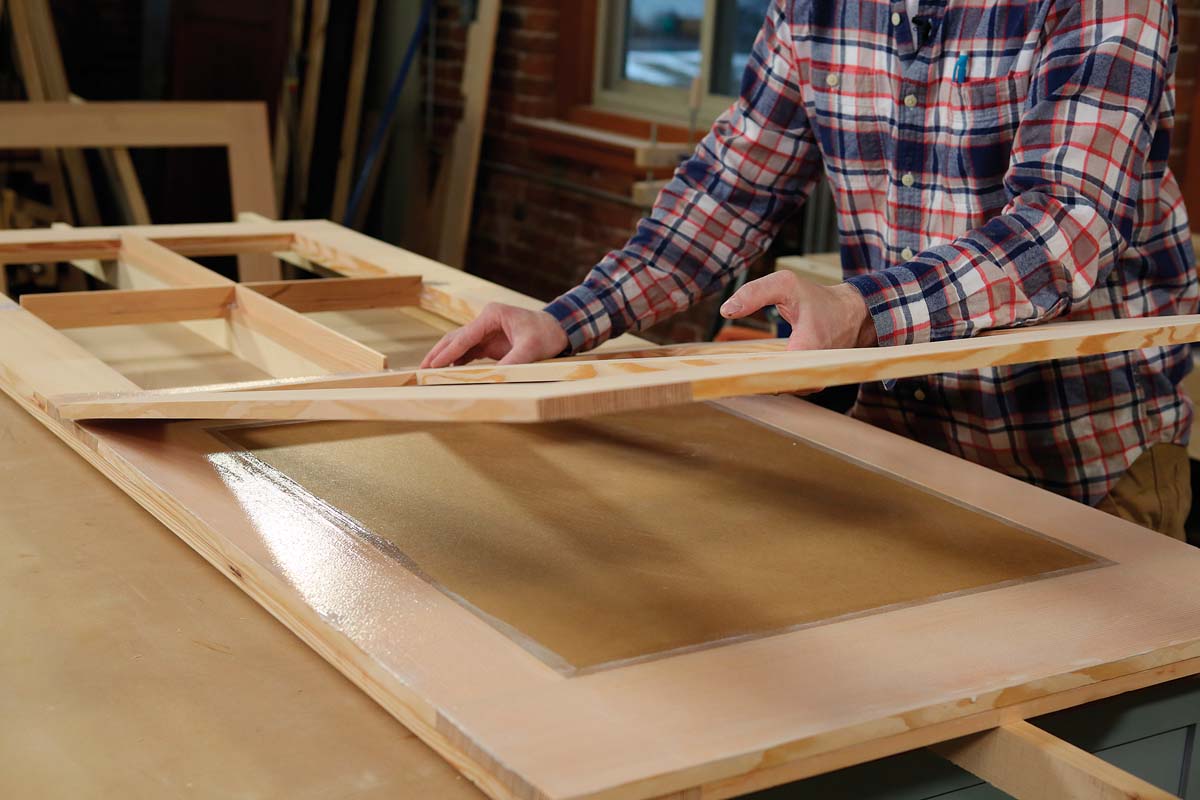
An inner layer in two halves. Although the exterior and middle layers are both full-height, continuous assemblies, the interior layer of the door is done in two halves. This is partly because of the change in stile width from the upper half to the lower half, but it also provides a nice opportunity to leave a purposeful 1⁄8-in. gap, ideal for guiding the placement of the track-saw track that will later be used to cut the door in half after installation. |
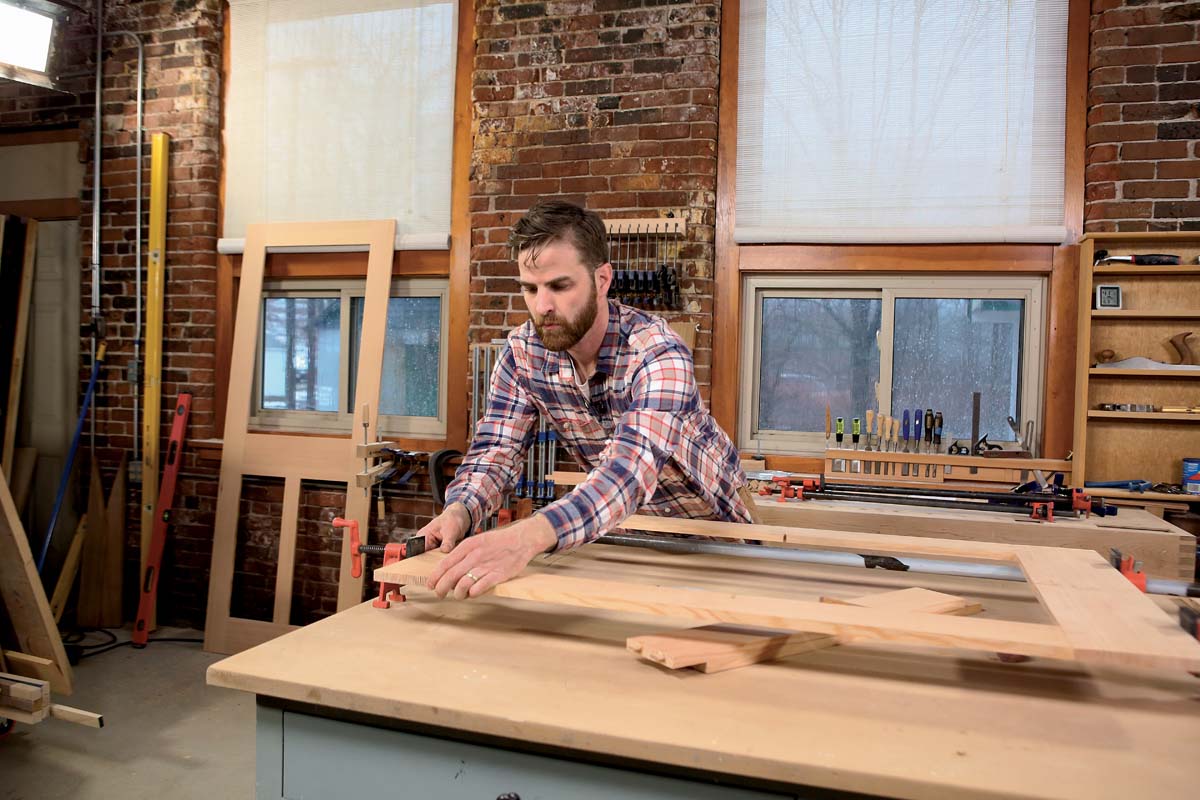
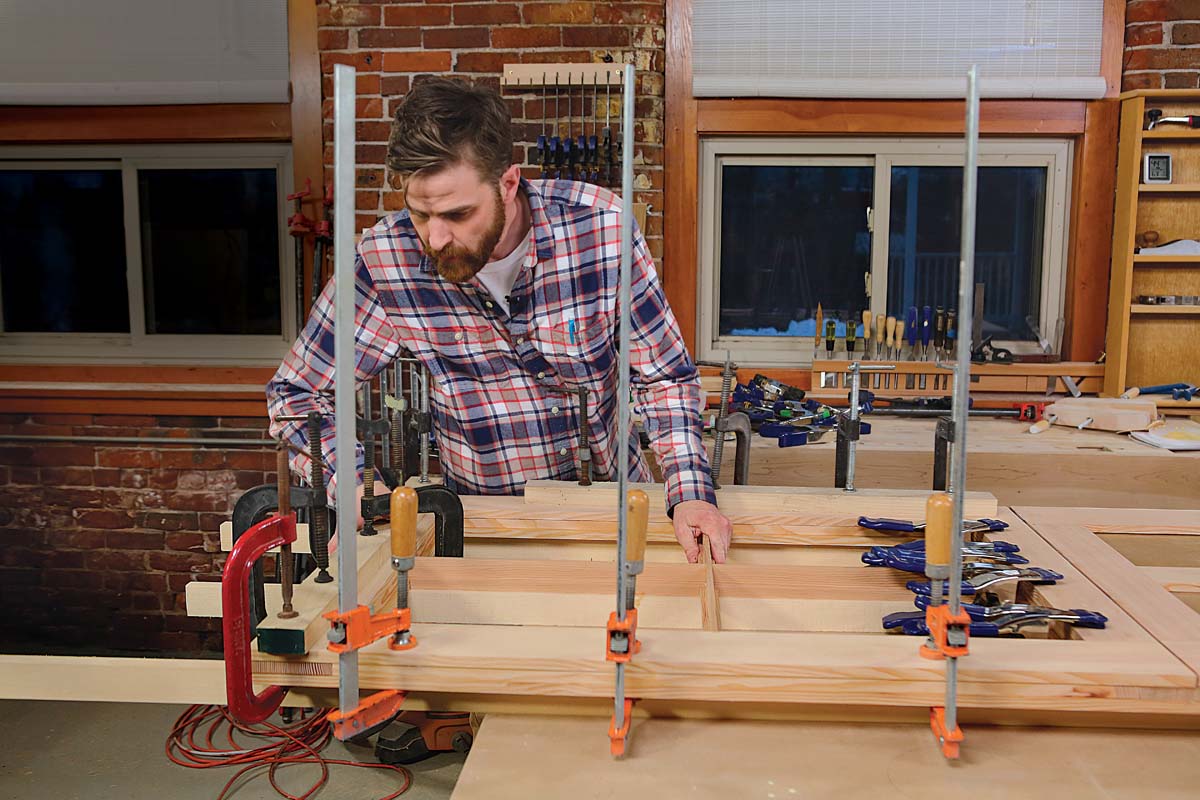
Ample clamps. Bringing the layers together fully is of utmost importance to the strength of the finished door, so don’t be shy about using any and all clamps you can lay your hands on. Wipe away glue squeeze-out as you work, keeping an eye out for seams that need some extra persuading to come together tightly. |
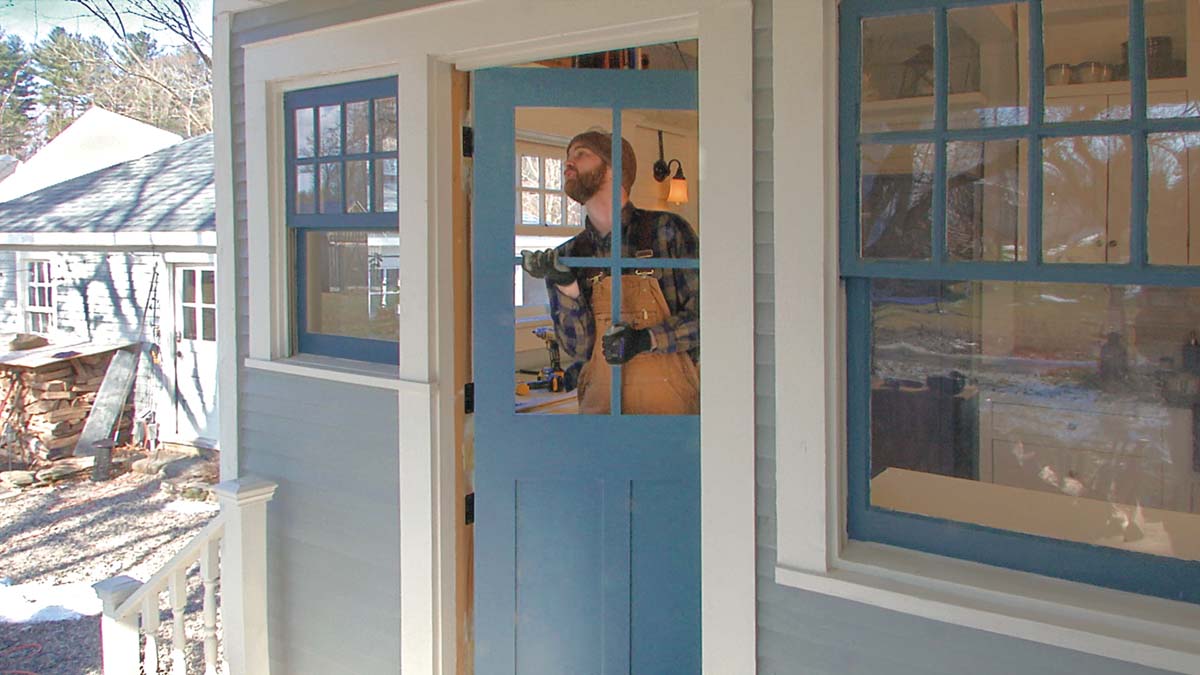
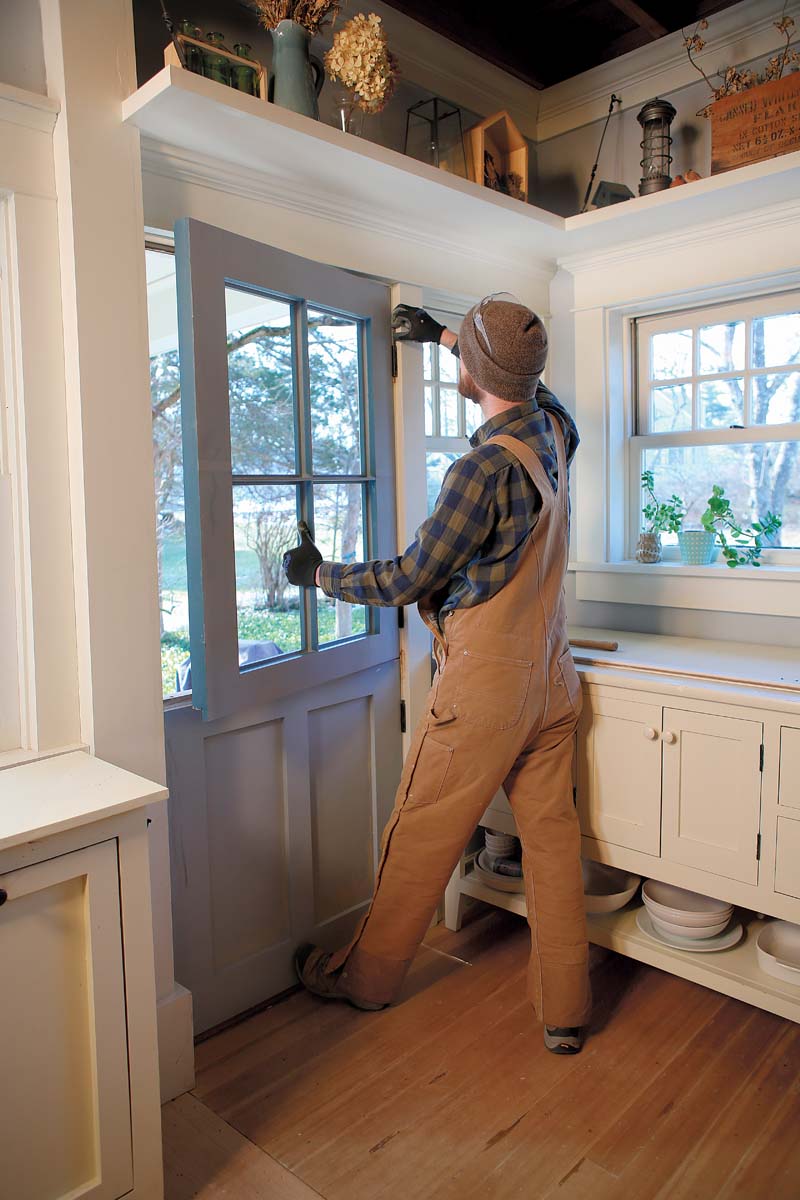
Installing The Door Is Half The Fun
The secret to a perfect fit is to hang the door before cutting it. After fitting the door to the opening, cut the door in two, add the shelf, and rehang. With quality hinges, the two halves should align correctly with an even reveal.
 |
 |
|
Get the fit right first. After changing the doorway from the standard three hinges to four, scribe and trim the door as necessary to fit the opening. |
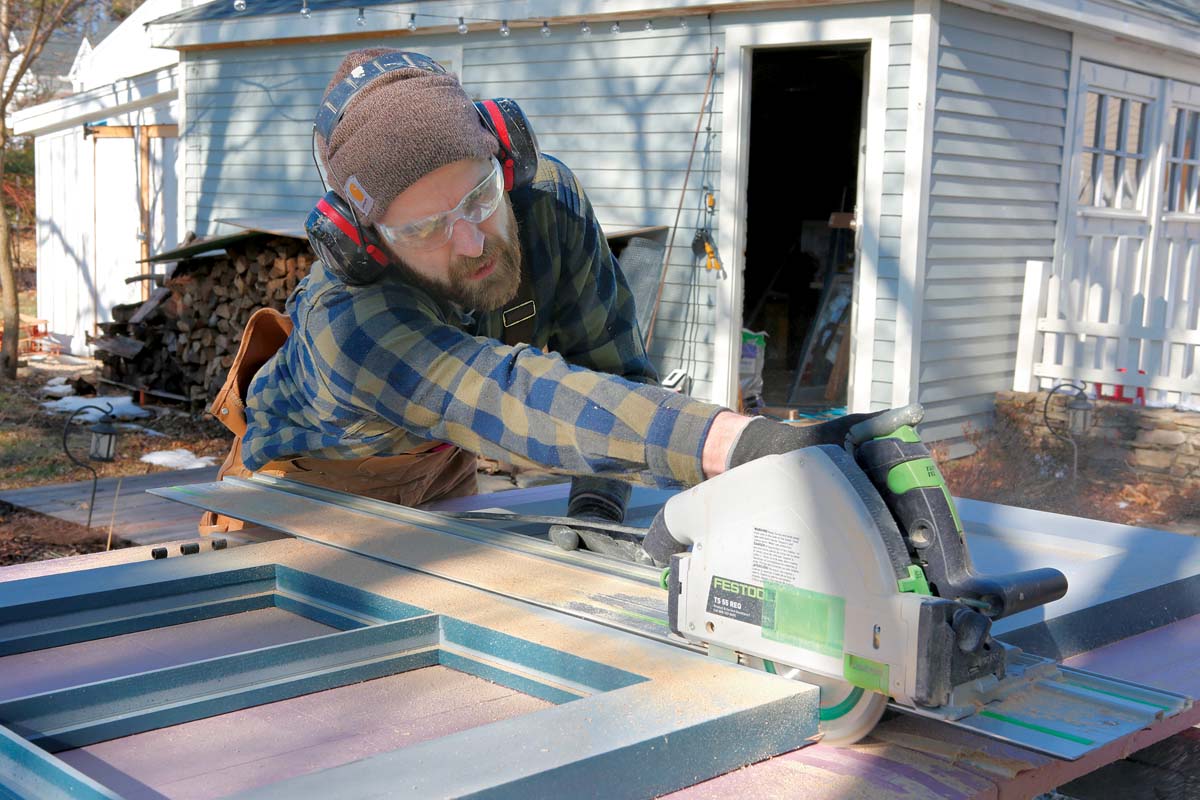
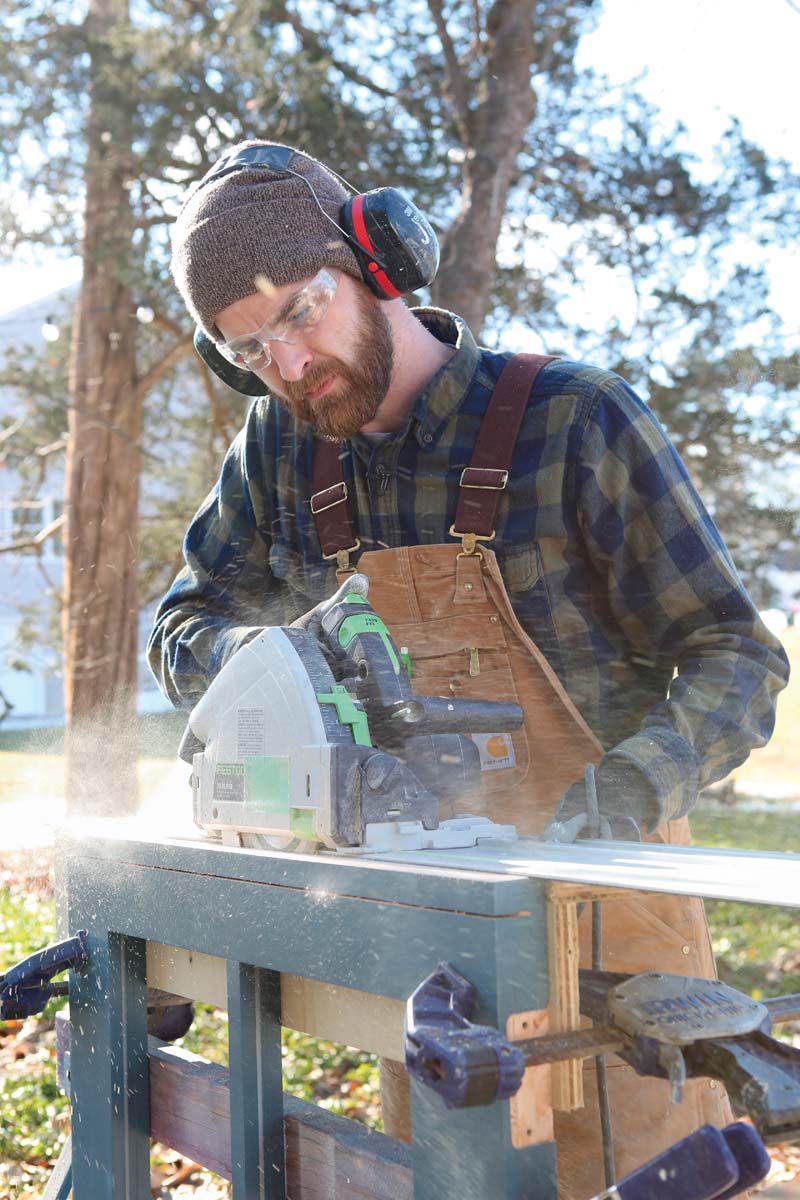
Ride the kerf. Using the 1⁄8-in. kerf intentionally left on the interior layer of the door as your guide, cut the rest of the way through the door, being sure to support both halves fully. |
 |
 |
|
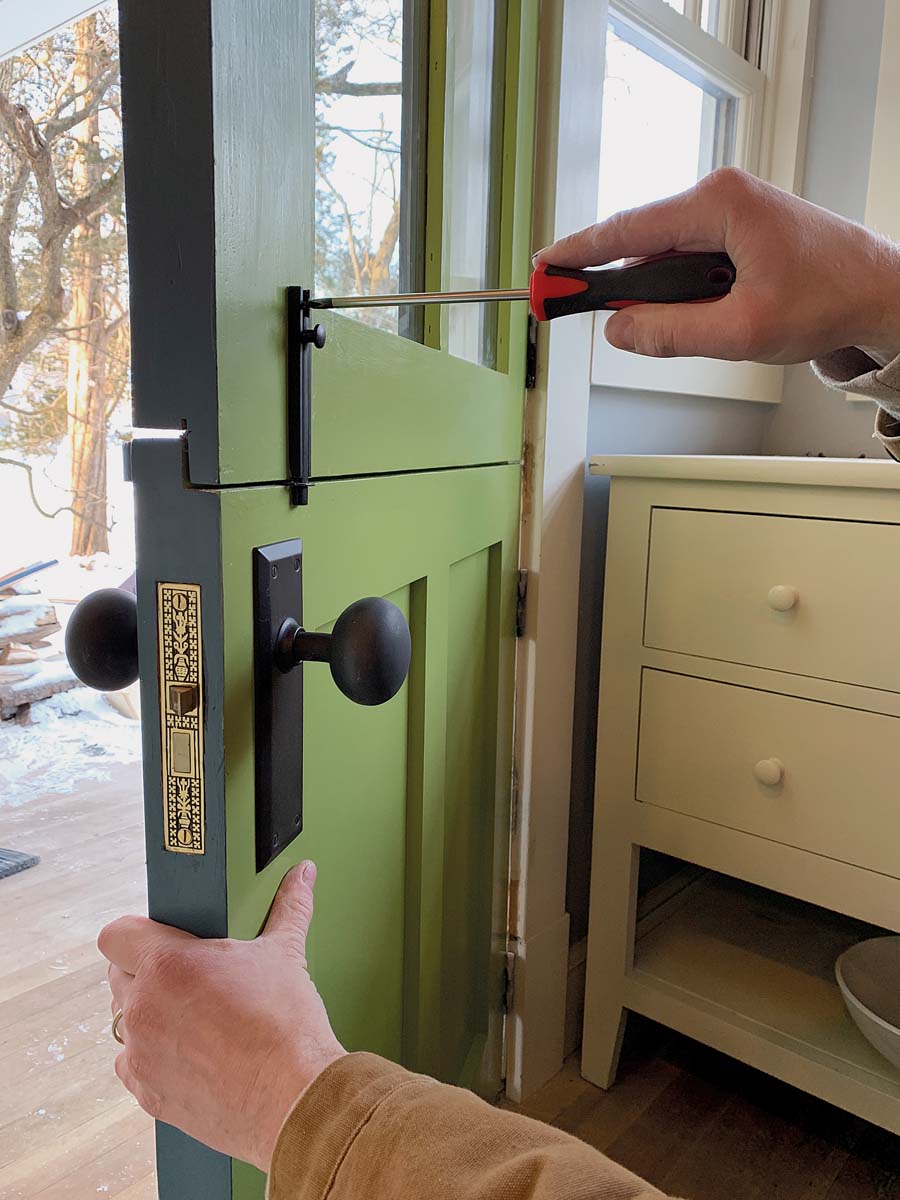
Rehang and adjust if necessary. Reinstall both halves of the door, checking the swing and fit of each, especially where they come together at the middle. |
Add the hardware. After painting the door, slide the mortise lock into place, add a deadbolt if desired, and install a slide bolt to connect the two halves of the door. |
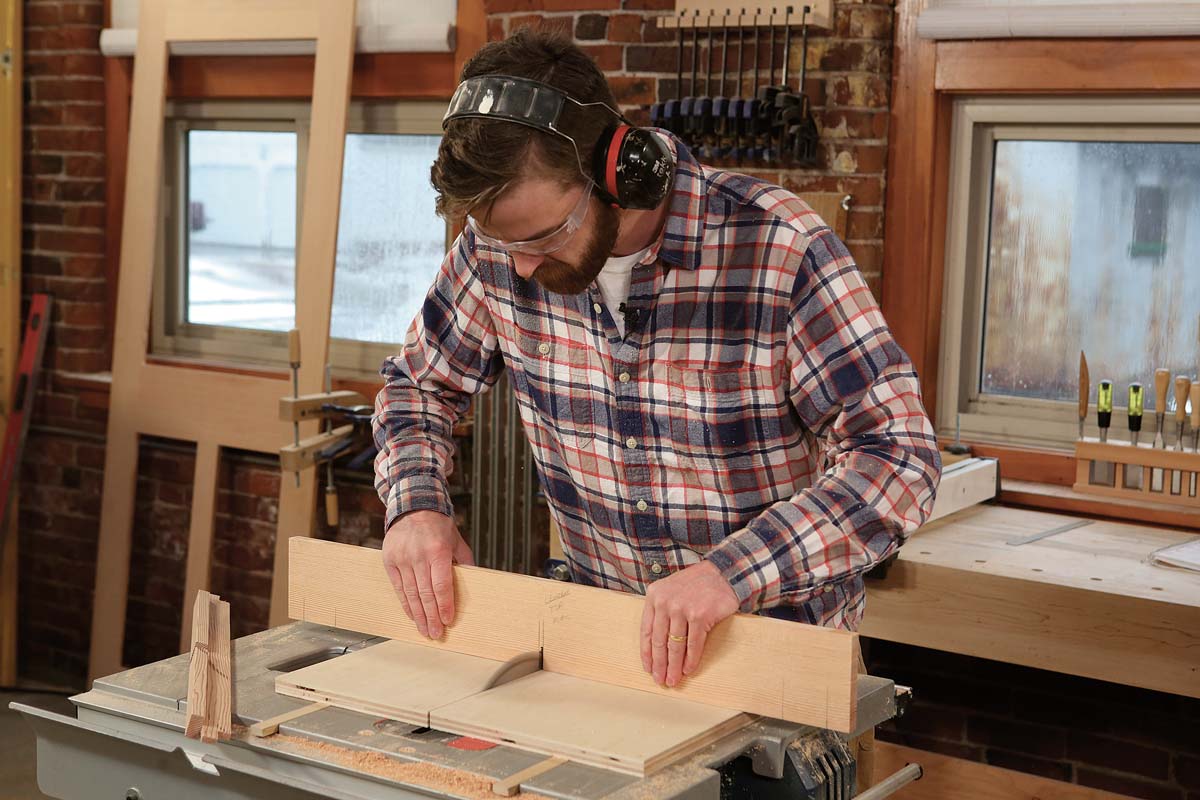
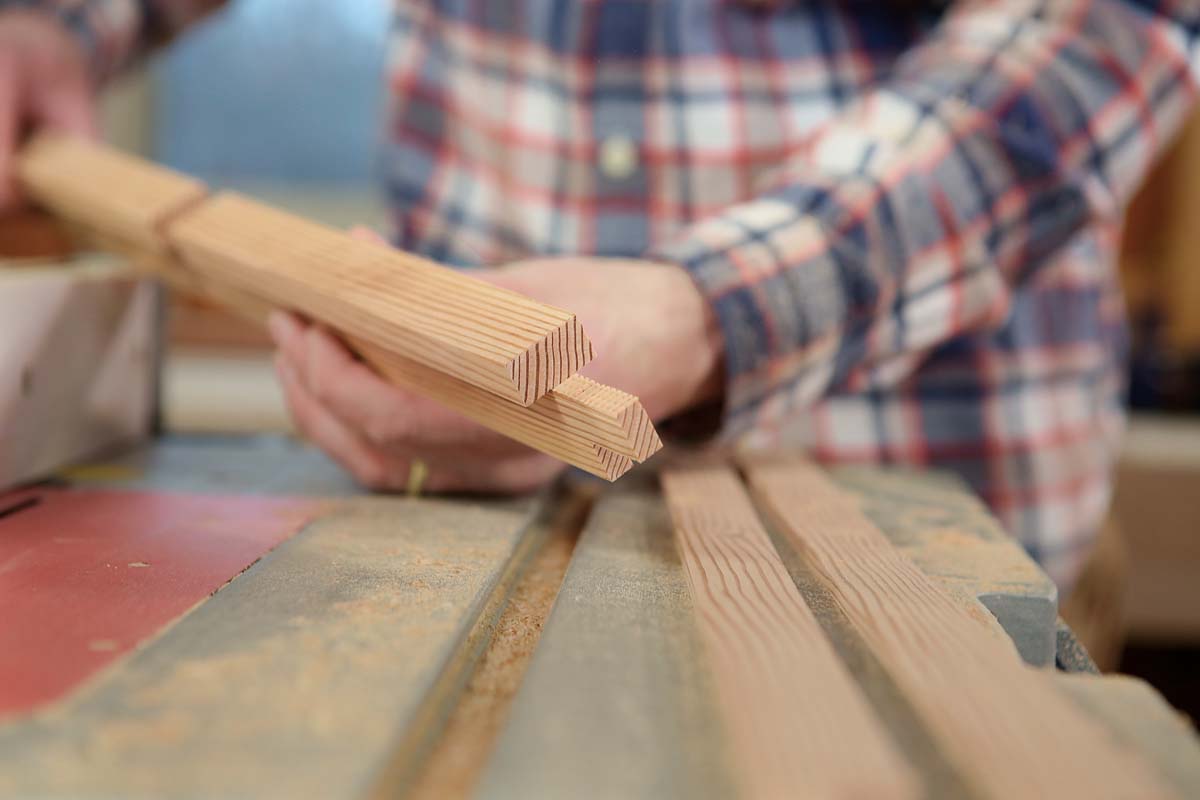
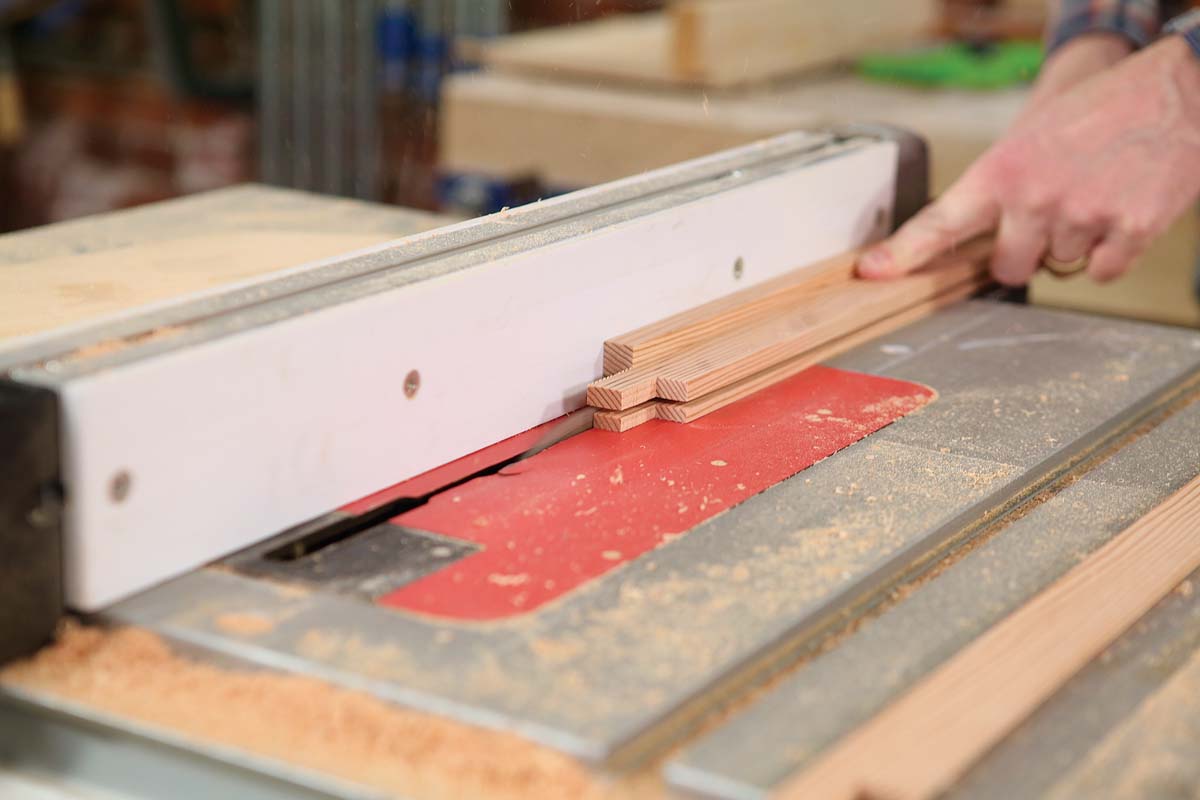
Milling Muntins On The Tablesaw
 |
 |
|
Speed tenons. With a crosscut sled and zero-clearance cutline, take successive passes to remove a little wood at a time. |
Rip the rabbets. After cutting the muntin joinery, make a series of rip cuts to create the rabbet for the glass. |
 |
 |
|
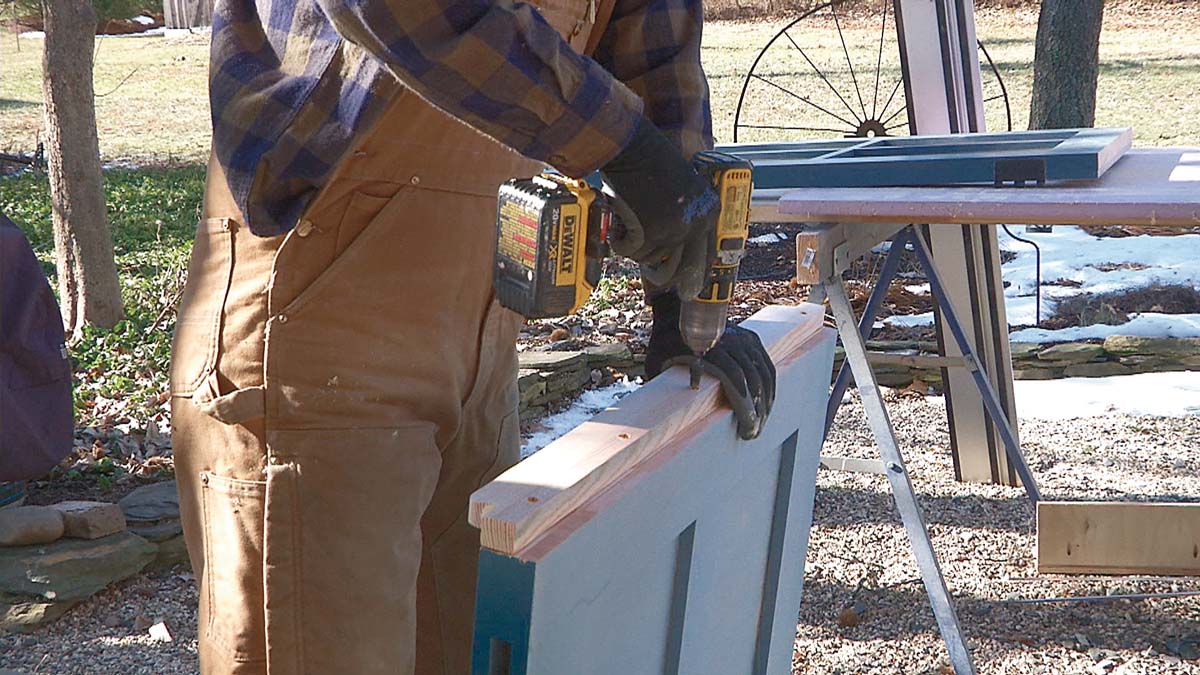
A Notch In Two Cuts In order for the top half of the door to nest against the bottom, you need to cut a notch. Using a track saw, the first cut across the face of the door can be done on a tabletop (photo right). For the second cut, flip the top half of the door upside down, clamp it to a sawhorse, and add a simple L-shaped plywood bracket to one side of the door to support the track saw (photo below right). Set the depth of cut to be about 1⁄8-in. deeper than needed to cut the notch, providing a kerf to accept a length of weatherstripping. |
A Simple Shelf Glue and screw the shelf to the top edge of the bottom half of the door. The shelf must stop short of the interior layer of the door, leaving room for the top half to nest against it. |
 |
Ready For Glass After assembly, insulated glazing units are bedded in silicone and secured with nail-on interior stops. |
ALSO SEE: Video: Build a Dutch Door
From Fine Homebuilding #282
To view the entire article, please click the View PDF button below.
Fine Homebuilding Recommended Products
Fine Homebuilding receives a commission for items purchased through links on this site, including Amazon Associates and other affiliate advertising programs.
Code Check 10th Edition: An Illustrated Guide to Building a Safe House

Homebody: A Guide to Creating Spaces You Never Want to Leave
Get Your House Right: Architectural Elements to Use & Avoid
