
How to Install a Bay Window: Part 1
Build the roof first to make the installation go smoother.
Synopsis: The addition of a bay window can make a room or house seem like an entirely new place. In this first of a two-part article, veteran builder Rick Arnold outlines his process for installing a bay window in an existing house. For Arnold, the key to a smooth process is building the roof first. The roof is then installed in one piece on top of the bay window. The procedure for building the roof proceeds through several steps. First, make a template for the roof base. Then, create a rafter nailer from the template. After the rafter nailer is done, lay out and fasten the common rafter, then lay out and fasten the hip rafters. After the hip rafters are in place, the jack rafters go in. The final construction step before the roof is installed is the laying out and cutting of the sheathing. This article includes sidebars on choosing a bay window and using a construction calculator to figure dimensions. The article also includes a variety of technical drawings that illustrate how to determine the cuts for the template and the sheathing.
Part two of this article is available here.
Magazine extra: Watch this video series for Rick Arnold’s method of building a bay-window roof.
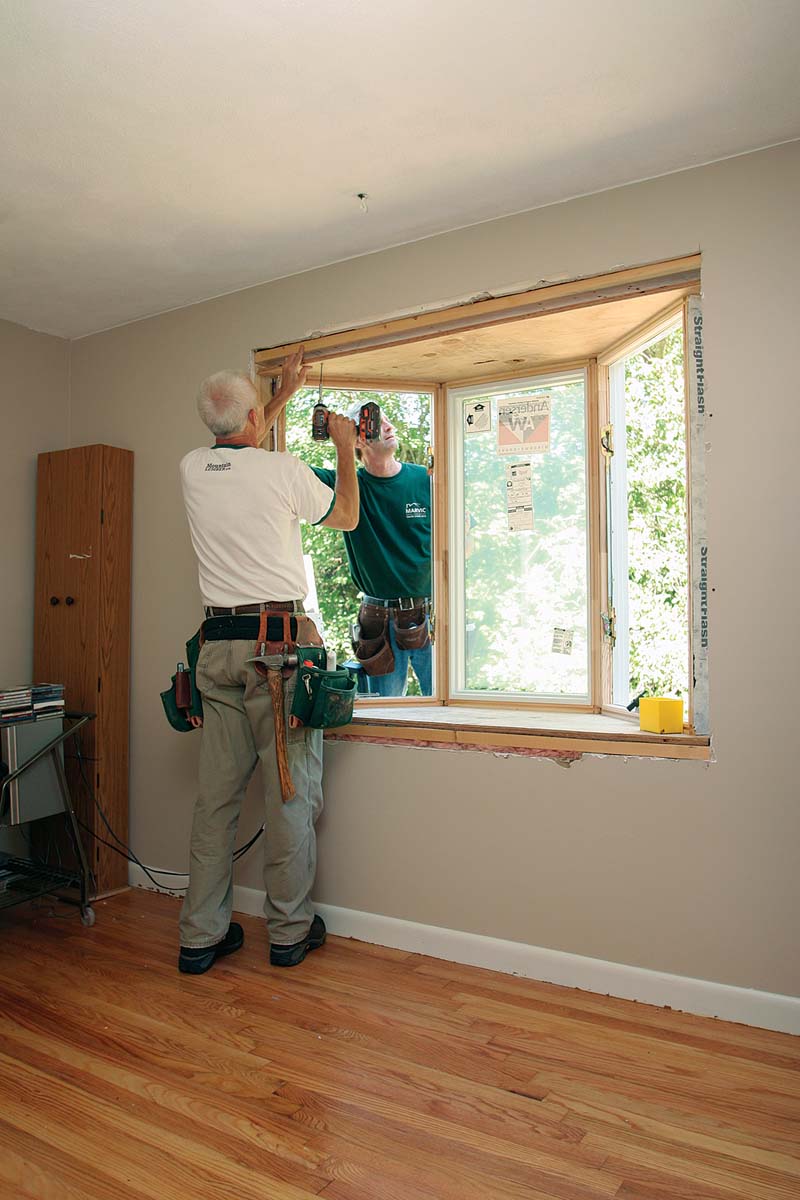
I recently helped my mom and stepdad move into a small ranch house so that they’d be free of stairs and have an easier time getting around. The small house was in decent shape and livable, but the north-facing bedroom’s lack of light made the space grim. With my stepdad’s increasing mobility issues, it seemed likely that he’d be spending more and more time in there, so I decided to make the room more inviting by swapping the existing window for a projecting bay window.
Installing a bay window is one of the easiest ways to transform a room. By reaching beyond a home’s wall, a bay window gathers light from three directions, creating an inviting, sun-collecting space that is perfect for displaying plants, cozying up with a good book, and brightening dark interior spaces.
Not surprisingly, installing a bay window is more involved than putting in a conventional window. This first part of a two-part article deals with choosing a window and framing a good-looking roof to cover it—ahead of time. It may seem odd to frame the roof first, but it makes the whole project easier. The second part covers installing the window, making it weathertight, and trimming the exterior.
Bay-Window Basics
The most common bay windows have outside corners that meet at a 45° angle, but other styles are available. Fortunately, the installation methods for all types and sizes are similar. Bay windows are generally sold with head and seat boards that hold the window together and form its top and bottom. You also can get them without head and seat boards for installation in angled or curved walls. The 45° window that is featured here with head and seat boards is the most common type of window installed. I chose the narrowest window model that was available from this manufacturer so that the window wouldn’t overwhelm the small bedroom.
Why Build The Roof First?
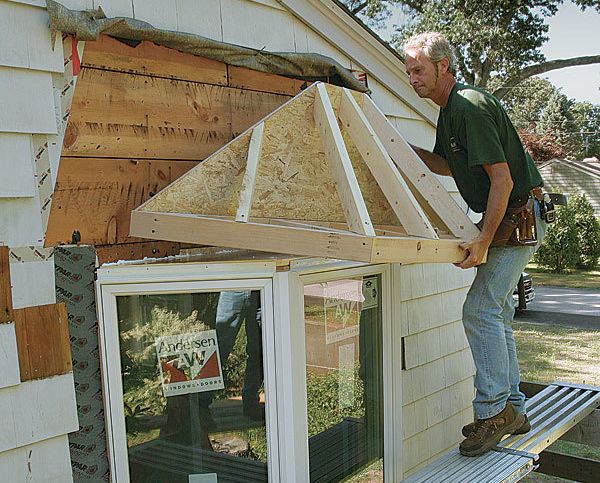
Through the years, I’ve learned that when a projecting window needs a roof, it’s better to build the roof first. For starters, it’s easier and safer to build the roof on the ground. In addition, having the roof framed yet removable makes it easier to cut back brick or siding for flashing and to integrate the window into the house. It also means that the house is vulnerable to bad weather for less time.
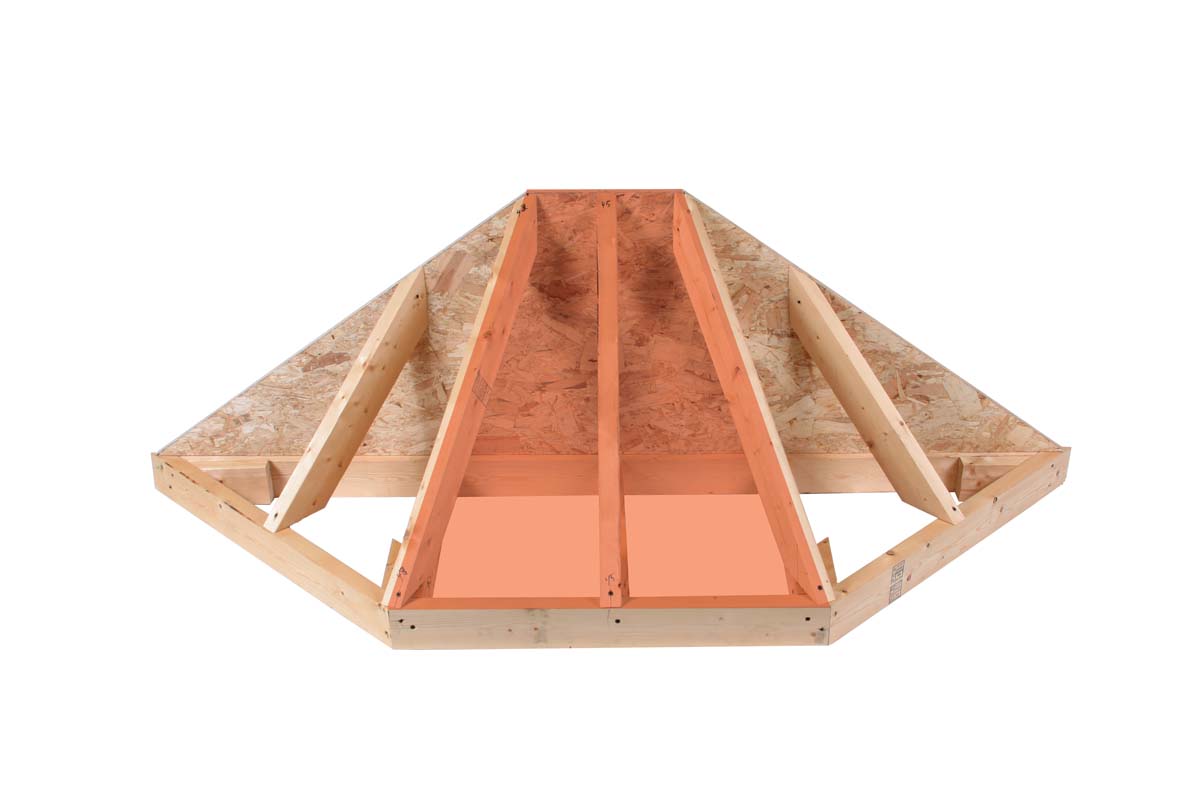
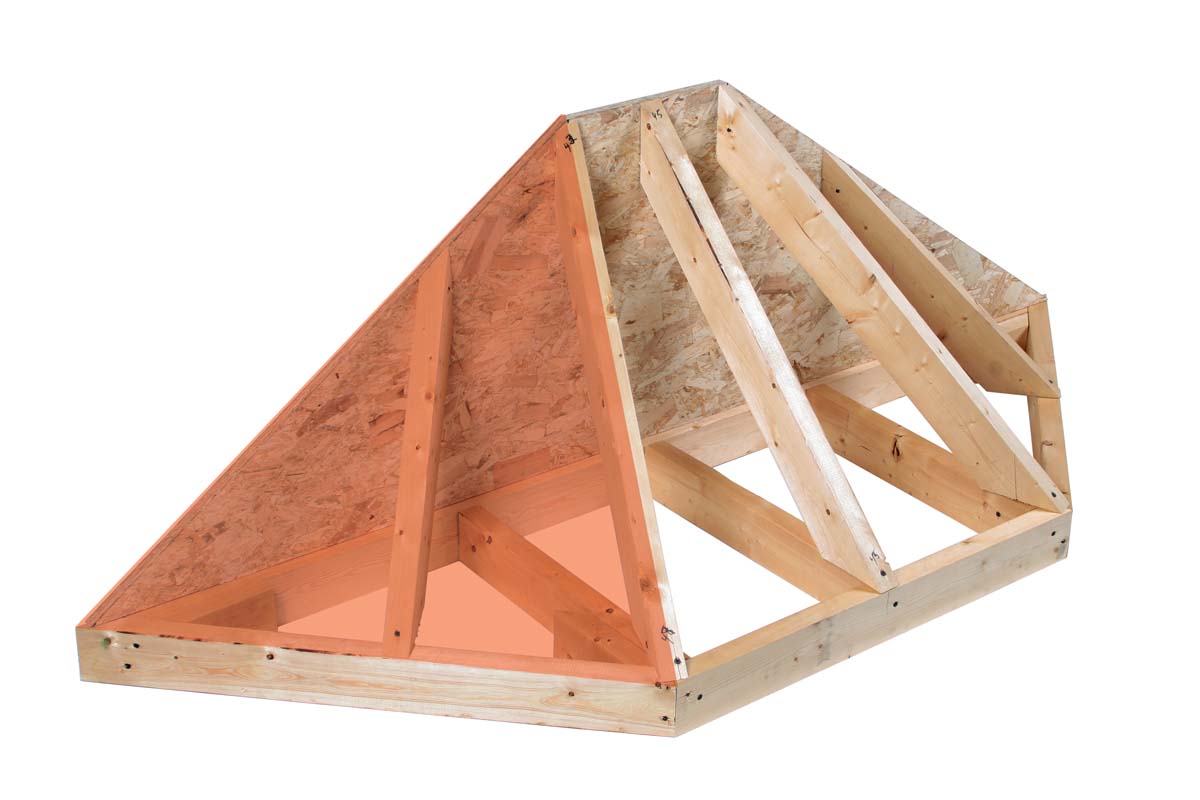
If you’ve ever seen a bay window that just doesn’t look right, it might be because its roof has the wrong shape. The proper shape for a 45° window like the one featured here is based on a section of an octagonal roof with 22.5° hip rafters.
At this angle, the hip rafters bisect the window’s front corners, giving the roof a pleasing shape. The pitch of the roof is also an important factor. When I’m installing the roof in a gable end, I like to use a steep pitch so that the roof has enough mass to balance the surrounding wall. For this window’s overhang, I added 4-1⁄2 in. to the roof framing for a finished soffit made from a 1×5 board. A 5 -in. soffit works with most bay windows, but larger windows (8 ft. wide or more) may need wider soffits to match the overhang on the house’s main roof better.
When deciding on a pitch and overhang for your window, be sure to consider architectural features such as other windows and house-roof overhangs that could interfere with the window’s roof. Once you have a proposed design, make a sketch to see how it will look on the building. This roof’s 12-in-12 pitch also complements the window’s squarish shape.
Make A Template
I’ve seen these little roofs challenge even veteran framers, but my design method makes them easy to build. The first thing that I do is copy the shape of the window (in plan view) onto a piece of 3⁄4-in. OSB. I use this OSB template to lay out and cut the 2x4s that form the roof’s ceiling joists and subfascia. I call this assembly the base. Once I have the base, I rework the template into a nailer for attaching the rafters.
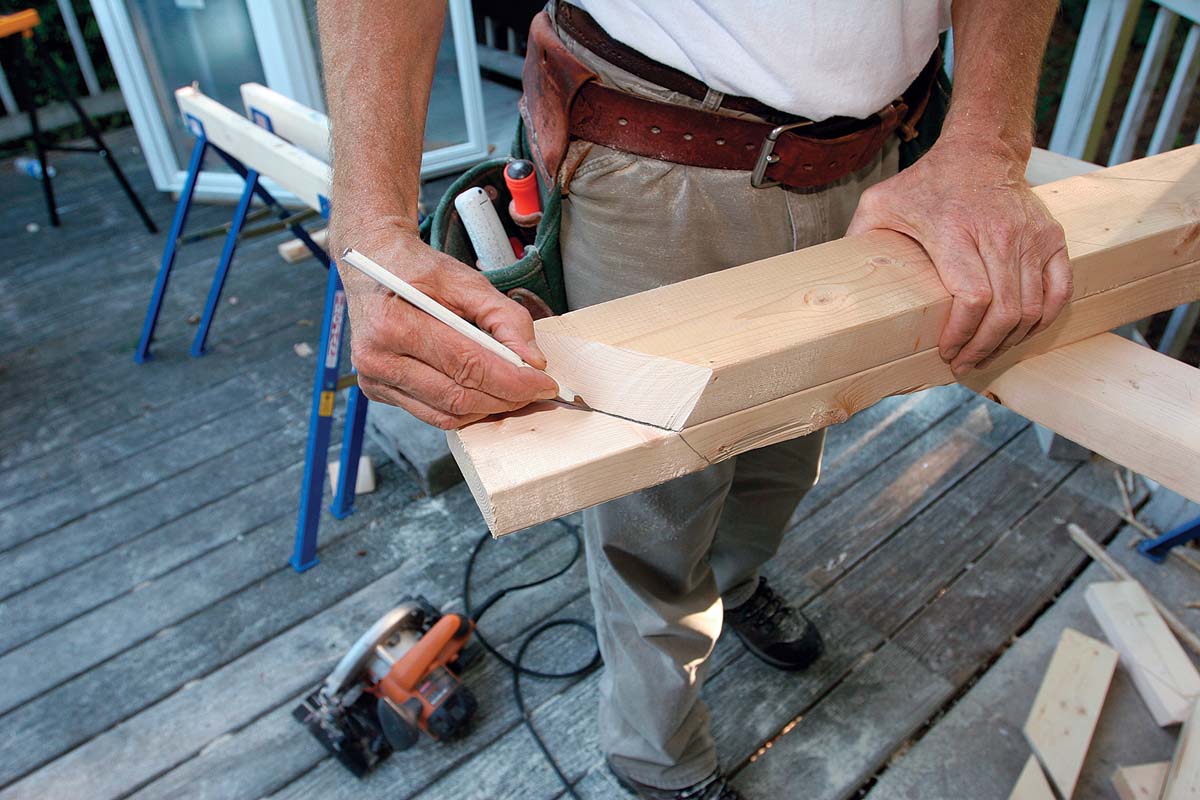
To make the template, I snap a line on the window’s plywood headboard indicating the 4 in. that extends into the rough opening. Then I transfer the window’s shape to the template. Using a scrap of stock, I add the overhang’s width to the template and cut out the trapezoid-shaped OSB with a circular saw. Then I cut and assemble the ceiling joists and subfascia on top of the template.
I fasten the components with 2-1⁄2-in. screws. I use screws because they allow me to hold the components with one hand while I fasten with the other hand. The screws hold better, too. This detail is important because the roof may be lifted onto the window and removed several times before it’s put in place for the last time.
Make A Nailer For The Rafters
After the base is done, I rework the template into a nailer for the rafters. The rafters attach along the nailer’s top edge; the whole assembly then is fastened to the house. If you’re using the manufacturer’s cable-suspension system to help carry the weight of the projecting window, the attachment bracket can be mounted on this OSB nailer, making the entire window installation easier.
You might assume the sides of the nailer are 45° like the sides of the base, but they’re not. They’re slightly less. In simple terms, it’s because the roof is based on a segment of an octagon, not a box.
The right shape for the nailer is critical, and the math is somewhat complicated. I make it easy by using a trick I learned years ago (see “Fashion a rafter nailer from the template,” p. 40).
Cut And Fit The Rafters
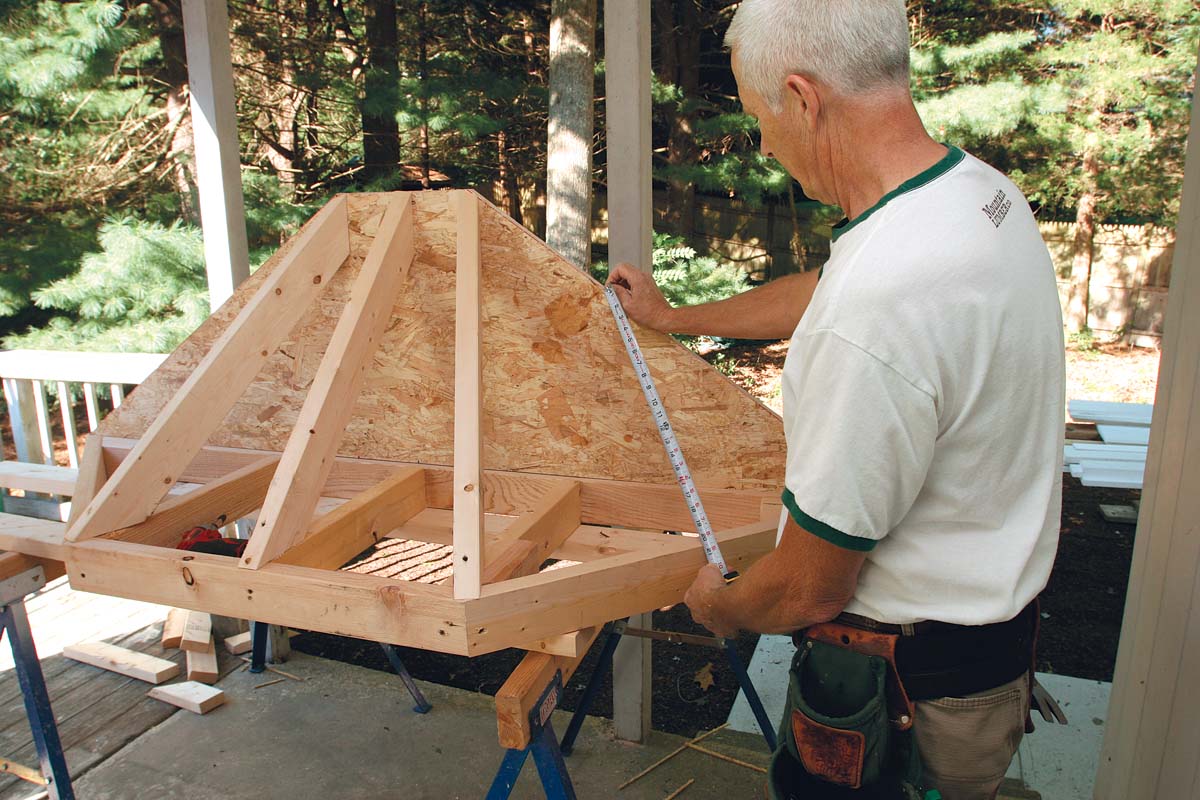
Before I take rafter measurements, I make sure that the rafter nailer is perpendicular to the base. If it isn’t, I push or pull it until it is; then I brace it in the proper position. The first rafter I cut is the common rafter. I measure from the outside edge of the nailer to the outside edge of the subfascia. Because the roof will have a 12-in-12 pitch, the common rafter will have a 45° cut on each end. After I screw the common rafter in place, I measure for the two adjacent hip rafters. They’re longer than the common rafter, so they’ll have slightly different angles. With a 12-in-12 roof, the hips will be 43° on the top and 47° on the bottom.
Getting the hips to fit correctly is important. I suggest being cautious when you cut; you can always trim them if they’re too long. If the hips are too short, the sheathing won’t fit correctly, so it’s better to make a second cut than cut them too short the first time.
The hips bisect the 45° sides of the window, so the tops get a 22.5° bevel. After I check the fit, I use this first rafter as a template for the next rafter. I line it up and mark the bottom, then mark the bevel end. I keep it oriented the same way when I cut the rafter. Now I have a right and a left bevel.
The last pair of rafters go from the center of the angled subfascia to the center of the angled side on the rafter nailer. These are the jack rafters. They will have 45° angles on both ends and a 45° bevel at the top. Because the other side will be the same length, I use the first one as a template to mark the second.
Cut The Sheathing
With the rafters done, I cut the sheathing for the roof. I don’t install it, however, because that would interfere with installing the stainless-steel cables that help to support the window. The second half of this two-part article will show how to install the cables.
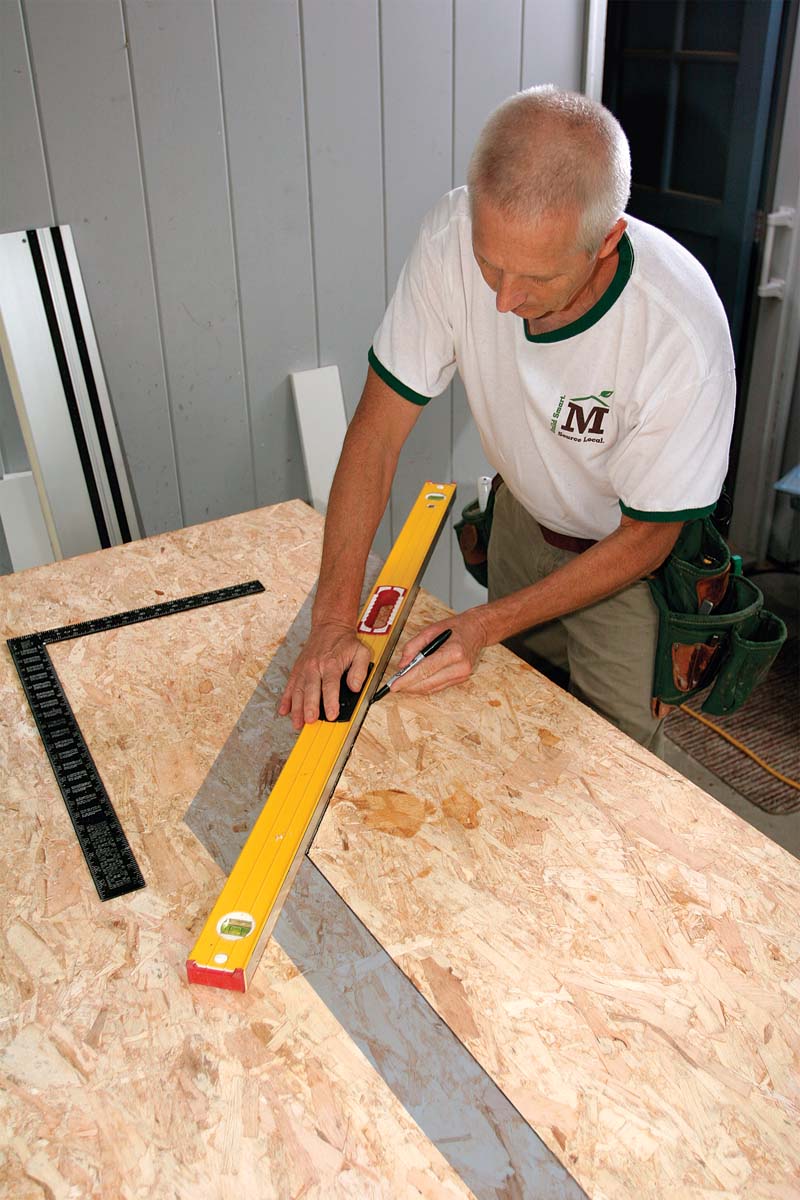
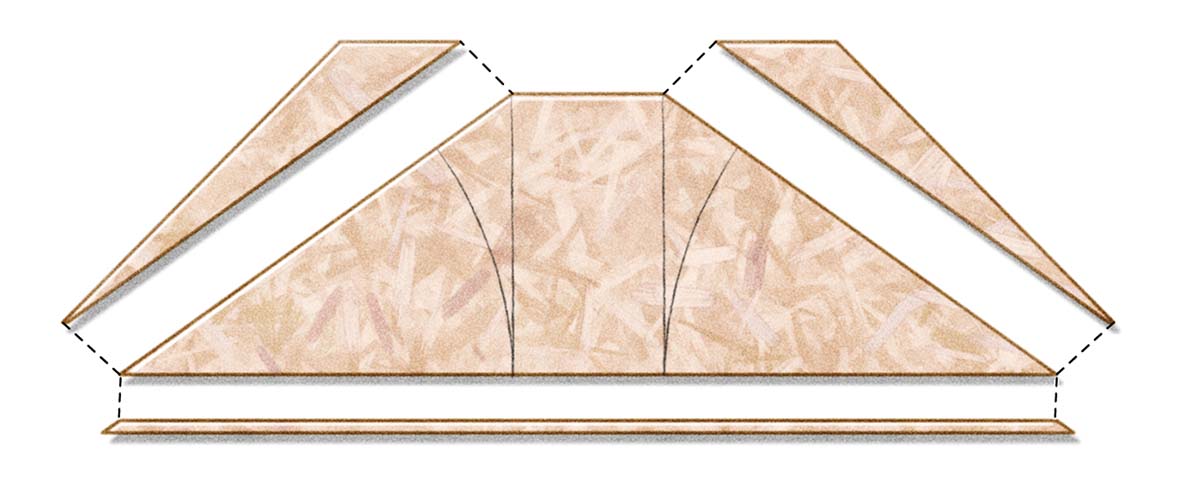
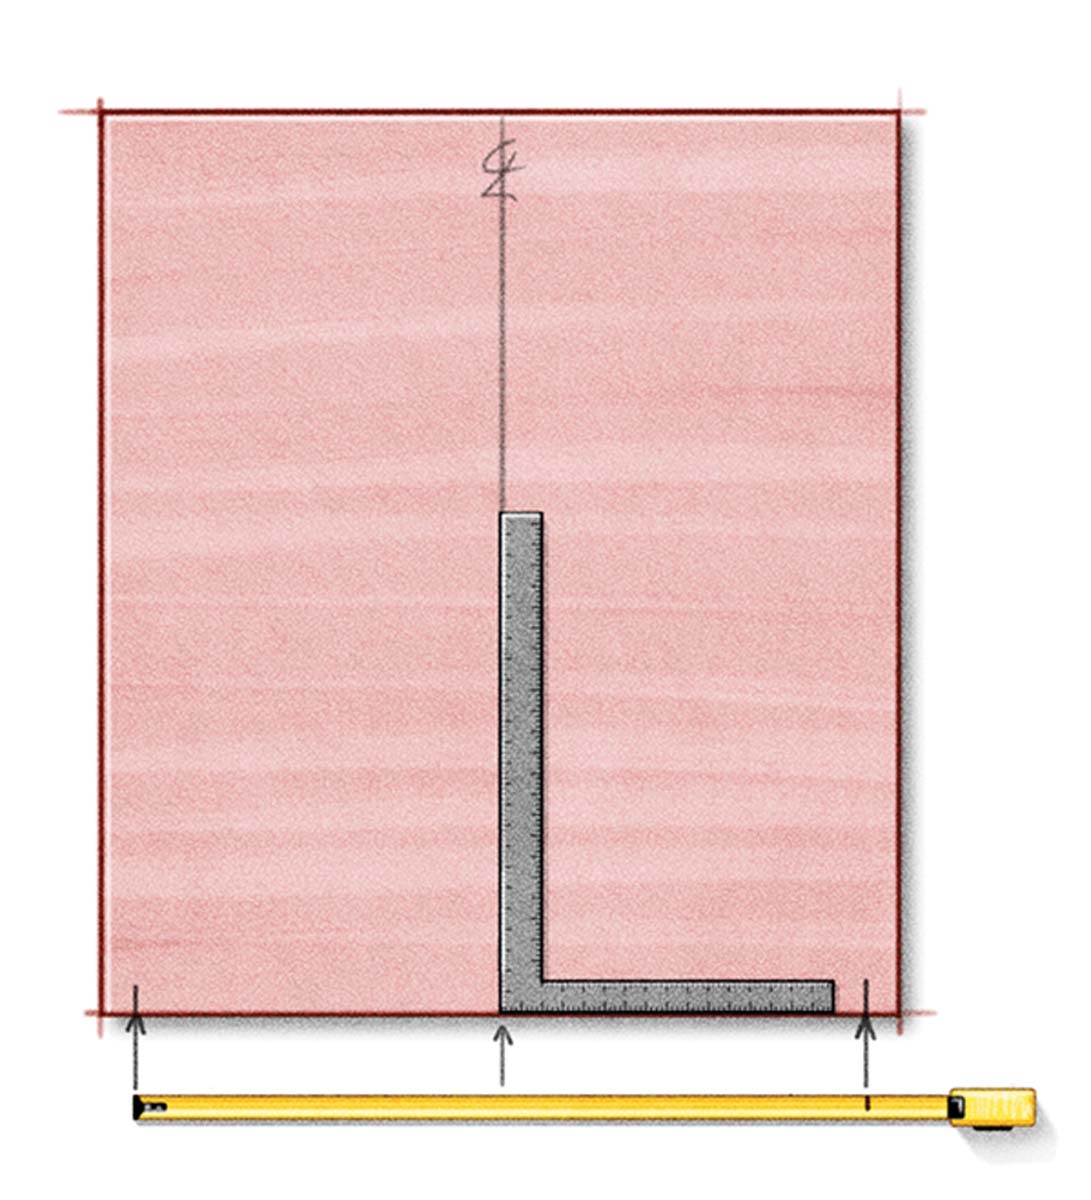
To measure for the center piece, I first measure the fascia length. Then I measure the height. Finally, I measure the width at the top. To cut the center panel, I transfer the fascia measurement to the panel edge and mark its center. I use a framing square to ensure that the height measurement is perpendicular to the edge of the sheathing. Then I transfer the top measurement to the sheathing, centering it on the perpendicular line and using a square to form a right angle at the top.
To cut the side pieces of sheathing, I measure along the subfascia; then I measure the hip rafter and the length along the top of the nailer. I extend the tape to the imaginary point where the sheathing meets the building.
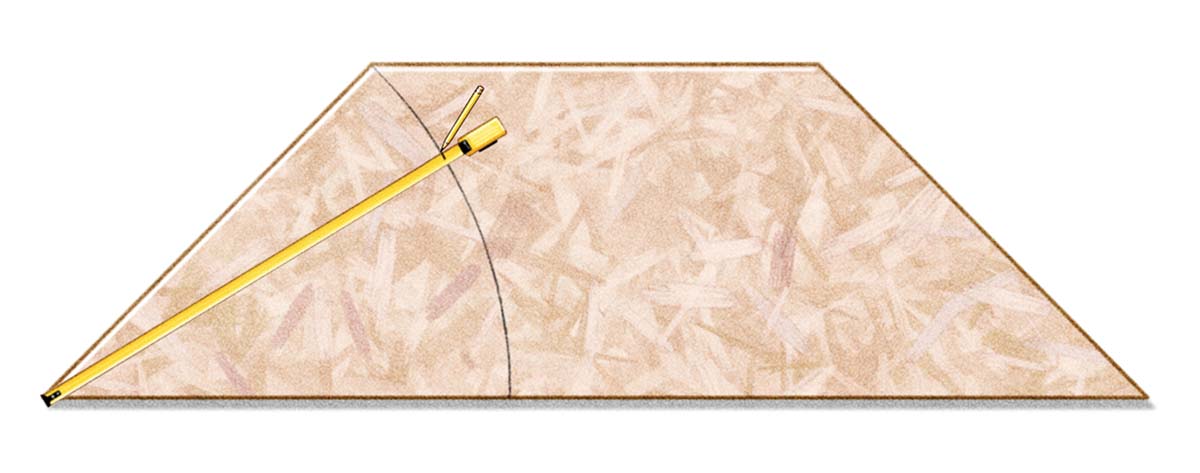
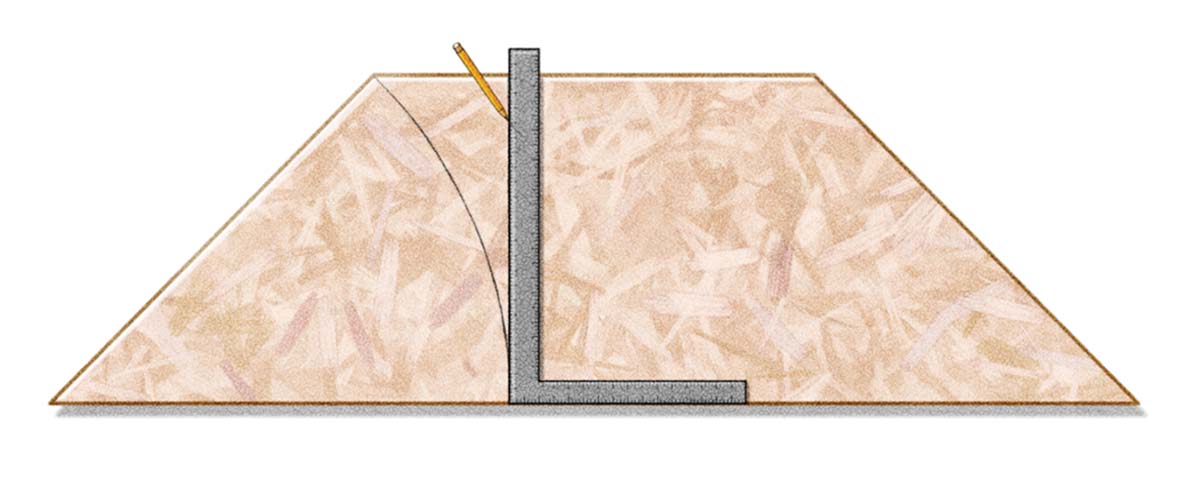
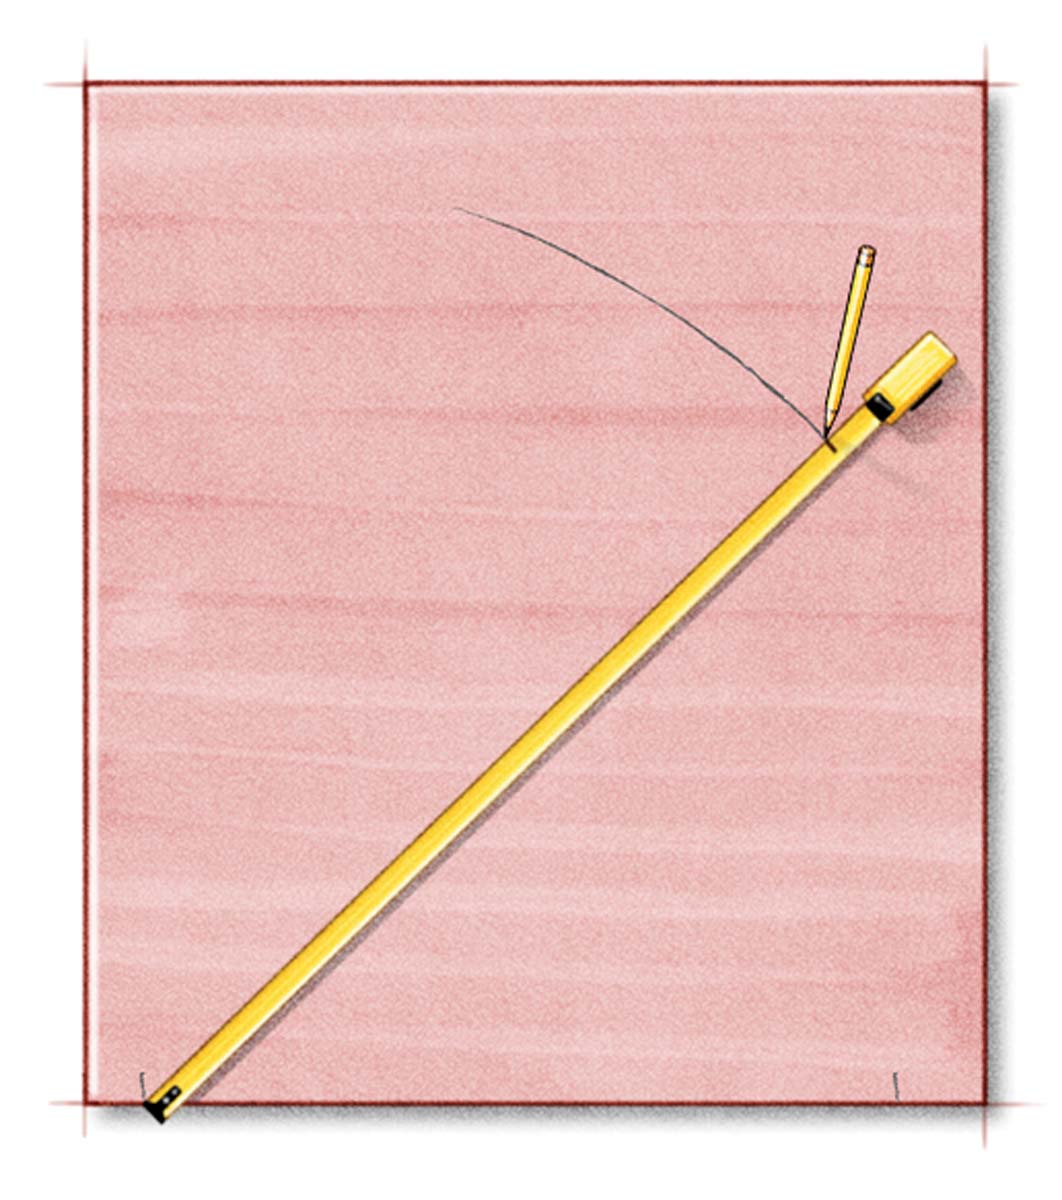
To lay out the triangular-shaped pieces of roof sheathing, I transfer the subfascia measurement to the edge of the panel. At opposite ends of the fascia measurement, I transfer the hip rafter and nailer measurements up. At the end of both measurements, I make a small arc by holding a pencil at the end of the tape. Where the two arcs intersect is the point at the top.
In part 2 of this article, I’ll show you how to install the bay window, put on the roof, and integrate the whole window assembly into the wall.
Make A Template For The Roof Base
 |
 |
|
Measure the width and projection. Begin making a template for laying out the ceiling joist and subfascia by copying the shape of the window onto a sheet of 3⁄4-in. OSB. 1 When making the template, don’t include the 4 in. of plywood that extends into the rough opening. |
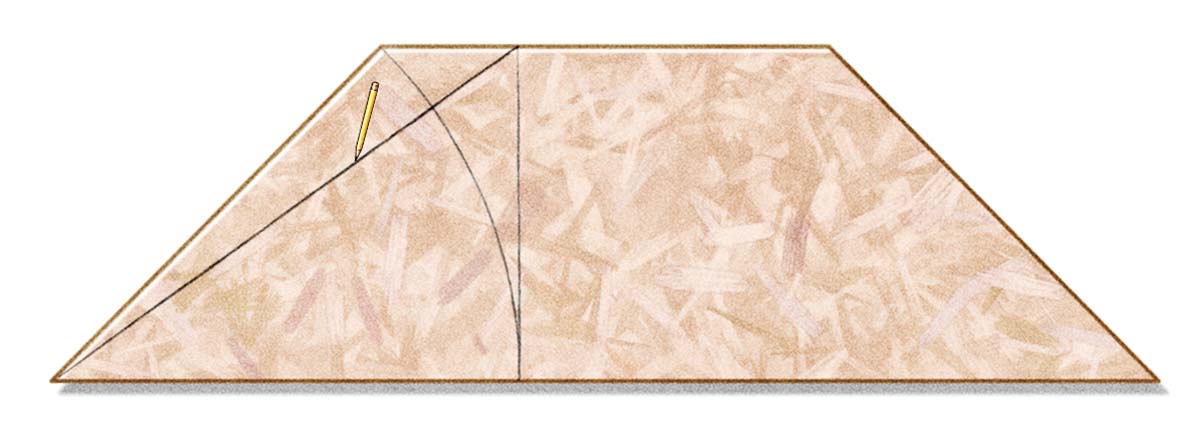
Add the overhang. Draw the window shape onto the OSB template, and add the 4-1⁄2-in. roof overhang to the front and sides of the template. |
Fashion A Rafter Nailer From The Template
 |
 |
|
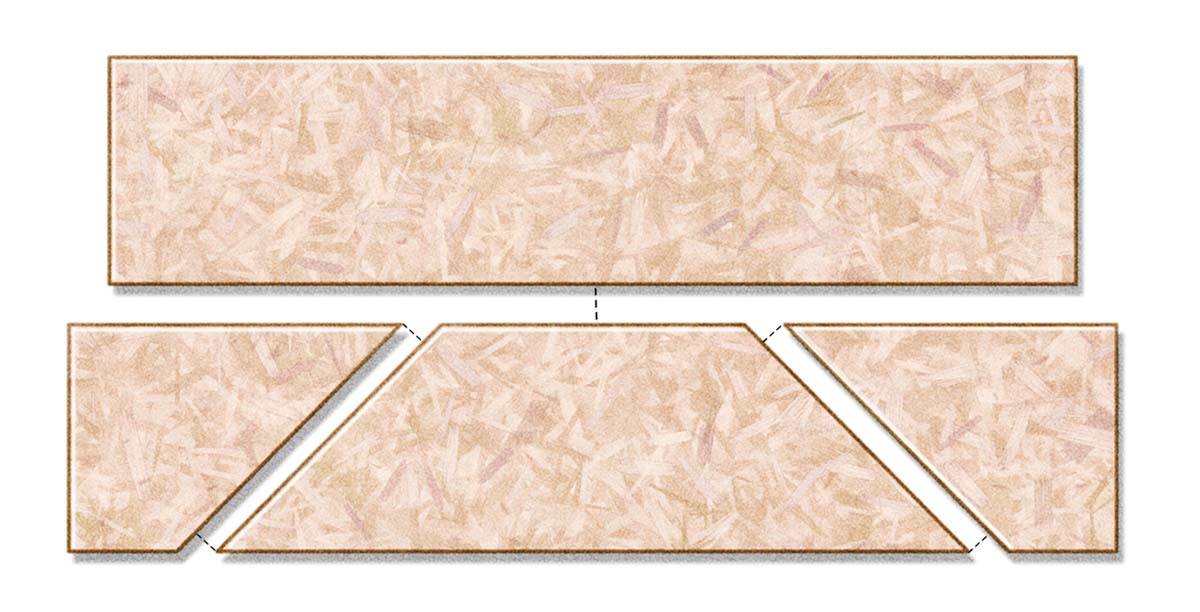
1. After cutting out and using the template to lay out and assemble the roof base, you can convert the template into a nailer for attaching the rafters. |
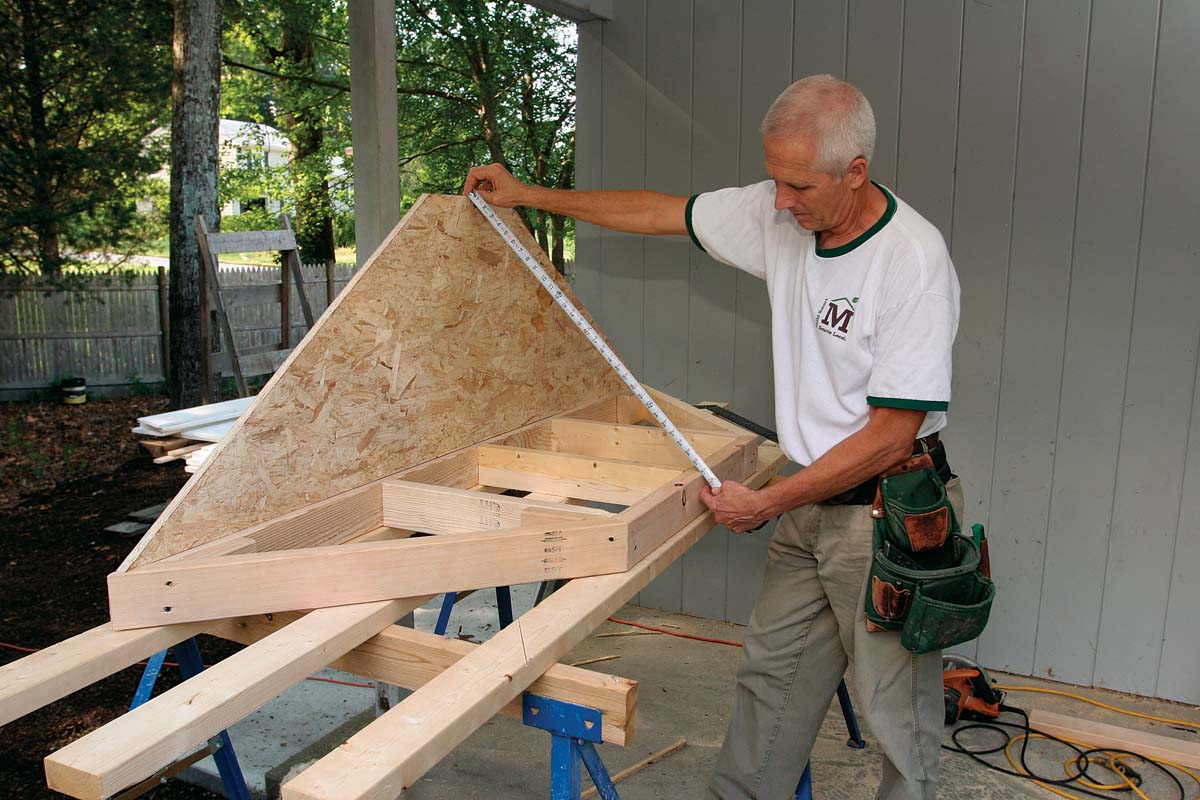
2. Hook a tape on the template corner to measure the angled side. Swing an arc the length of the angled side on the template. |
 |
 |
|
3. Use a square to transfer the mark across the template. |
4. Connect the outside corner to the new mark with a straightedge. |
 |
 |
|
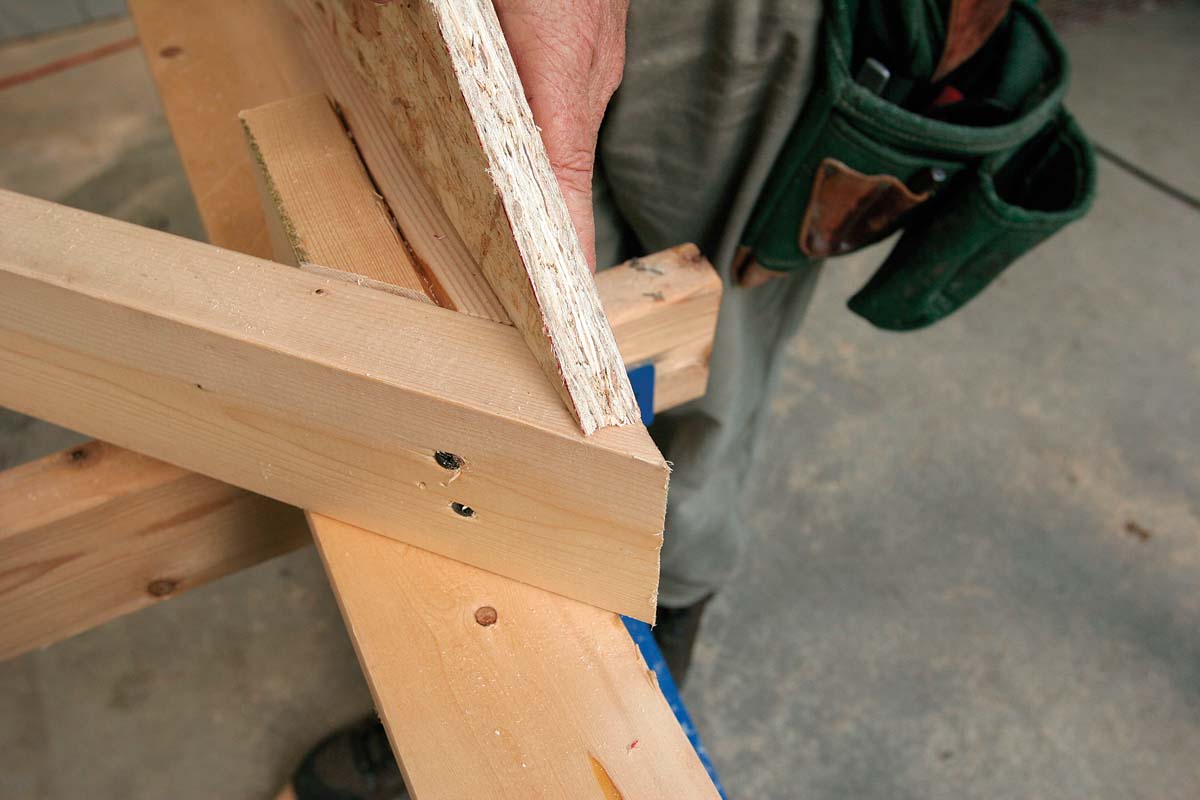
5. Repeat the process on the other side of the template, and cut out the shape. Trim 1⁄2 in. from the bottom edge of the nailer with a circular saw. |
Without trimming, the nailer would project beyond the subfascia, preventing the sheathing and finished fascia from sitting flat. After trimming, the nailer should fit on the base so that the front side is flush with the subfascia (photo above). |
Lay Out And Fasten The Common Rafter
 |
 |
|
Measure the common rafter. After using a framing square to ensure that the rafter nailer is perpendicular to the base (brace if necessary), measure from the top of the nailer (front side) to the outside edge of the subfascia. This will be the long side of the rafter. Cut 45° miters on both ends. |
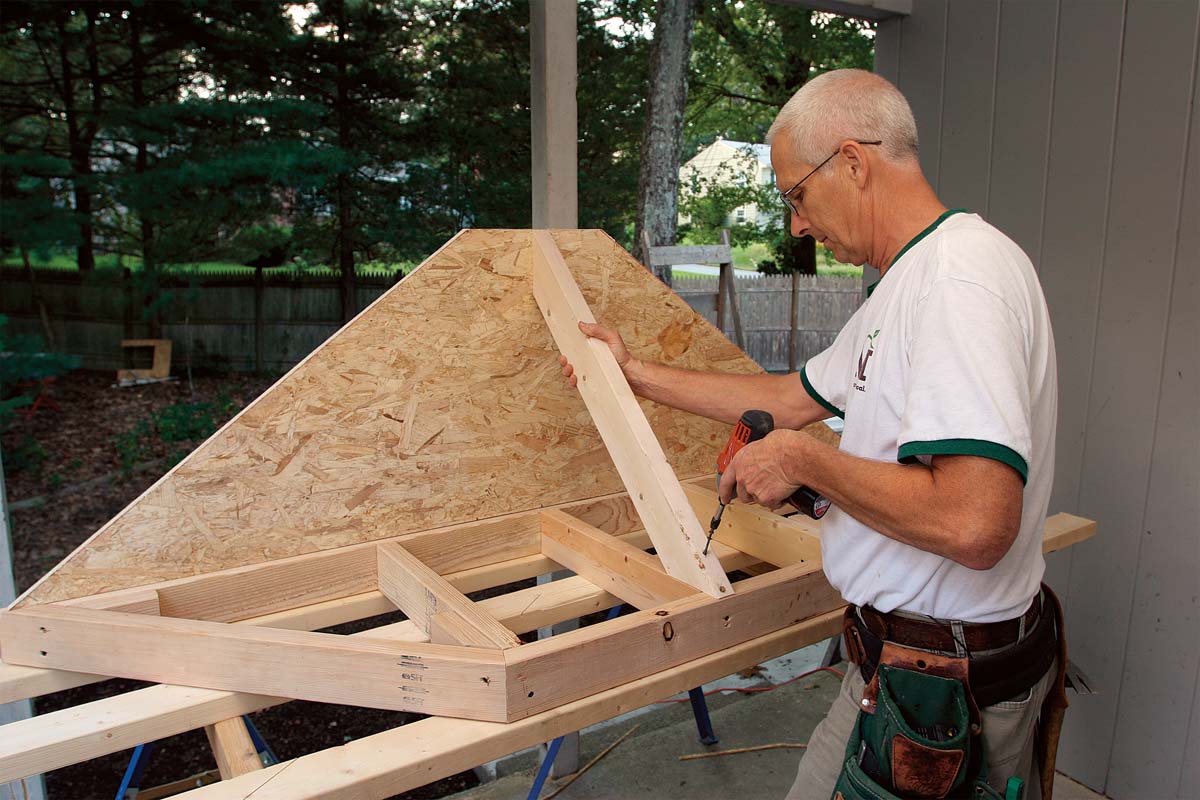
Fasten with screws. Drive 2 1⁄2-in. drywall screws through the rafter end and into the roof base. At the top of the rafter, drive screws from the back side of the nailer into the rafter. Screws hold better than nails; this is important, because the roof will likely be moved several times before final installation on the window. |
Lay Out And Fasten The Hip Rafters
 |
 |
|
Measure the hips. The hip rafters run from the top corners of the rafter nailer to the outside corners of the subfascia. Record the measurement, then subtract 3⁄8 in. to lower the rafter corners so that they are in plane with the subfascia. |
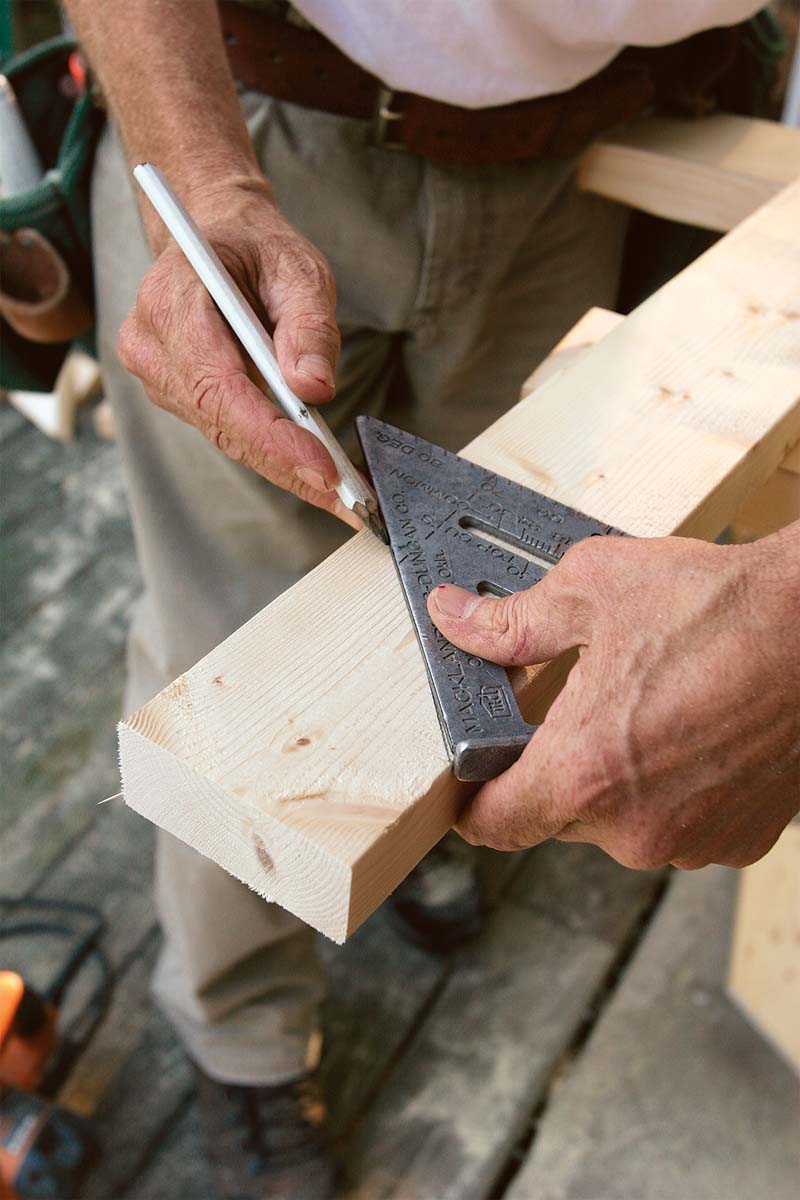
Mark the cuts. Hip rafters on 45° bay-window roofs with a 12-in-12 pitch will have 43° cuts at the top and 47° cuts on the bottom. For pitches other than 12-in-12, use a construction calculator (see sidebar) to figure the angles. |
 |
 |
|
Compound cut on the top; miter cut on the bottom. The bottoms of the hip rafters get a 47° miter without a bevel, but the tops need a 22.5° bevel in addition to a 43° miter. Tilt the saw to 22.5°, and follow the line made earlier. |
Check the fit. Confirm that the first hip rafter fits correctly, then use it as a template to cut the other side. Arranged correctly, the bevels should form a point when the rafters are stacked. If not, the second bevel is sloping the wrong way. |
 |
|
|
The perfect fit. The rafters shouldn’t protrude beyond the top of the rafter nailer or the subfascia. If the rafters are proud, the sheathing, which will be installed later, won’t fit tight to the framing. If the rafters stick up slightly, trim their length from either end, using the same saw settings as the original cut. |
Using A Construction Calculator
First, measure the height of the rafter nailer. Enter the number and press rise. Next, measure the rafter length, enter that number, and press diagonal. Finally, press the pitch button. The result is the top angle. Round that number to the nearest degree, and subtract it from 90 to get the bottom angle.
Lay Out And Fasten The Jack Rafters
 |
 |
|
Cut and fit the jacks. Holding the tape perpendicular to the subfascia, measure to the front of the nailer and the top of the subfascia. The bottom cut has a 45° miter only. The top cut has a 45° miter and a 45° bevel. After checking the fit, use the rafter as a template for the other side by stacking the pair of rafters with one on top of the other as described on the facing page. |
Lay Out And Cut The Sheathing
Center Sheathing
 |
 |
|
1. Transfer the fascia measurement to the panel edge, then find and mark the center of this measurement. 2. Use a square to draw a perpendicular line from this mark. |
3. Measure the height, and transfer this measurement to the perpendicular line in the center. 4. Measure the width at the top. Bisect this measurement on the vertical perpendicular line. |
 |
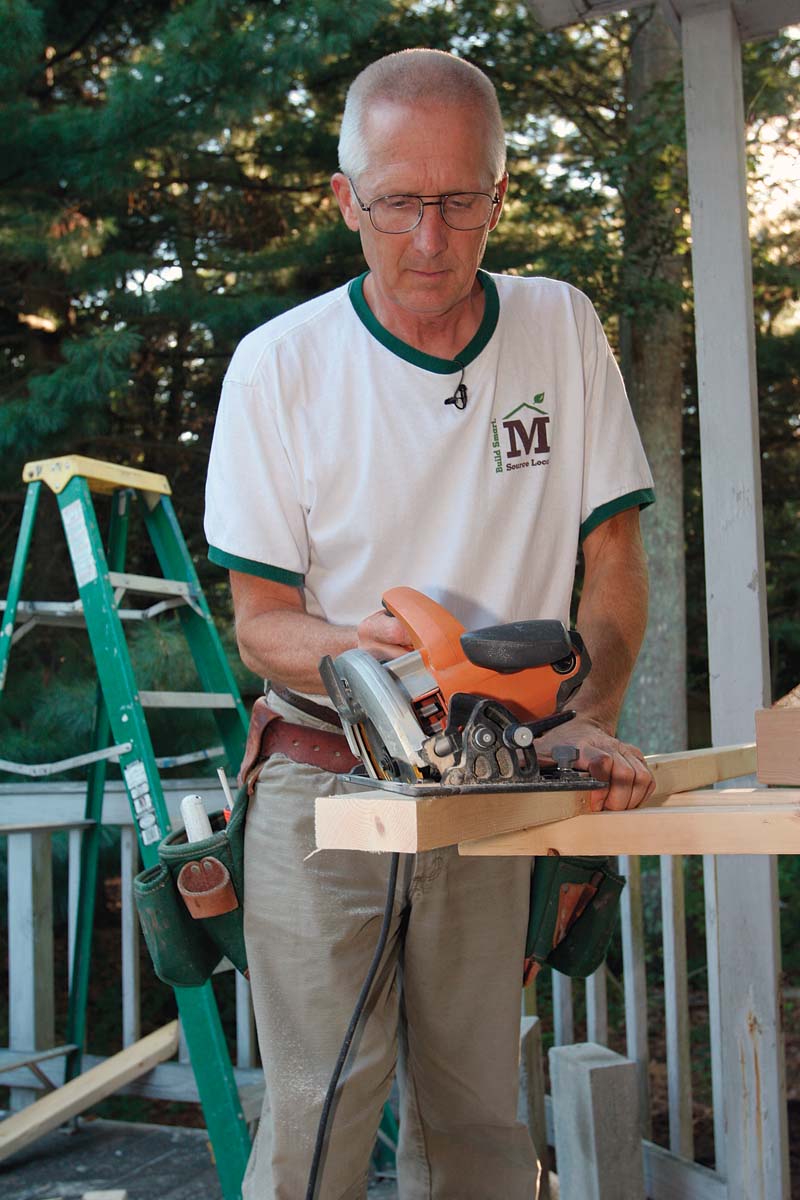
5. Connect the ends of the lines. Cut out the shape with a circular saw, but don’t attach the sheathing. |
Side Sheathing
 |
 |
|
1. Measure the fascia edge, and transfer the measurement to the edge of the sheathing panel. 2. Measure the side on the rafter nailer, and transfer this measurement to the sheathing by forming an arc at the end of the tape. |
3. Do the same for the hip rafter. |
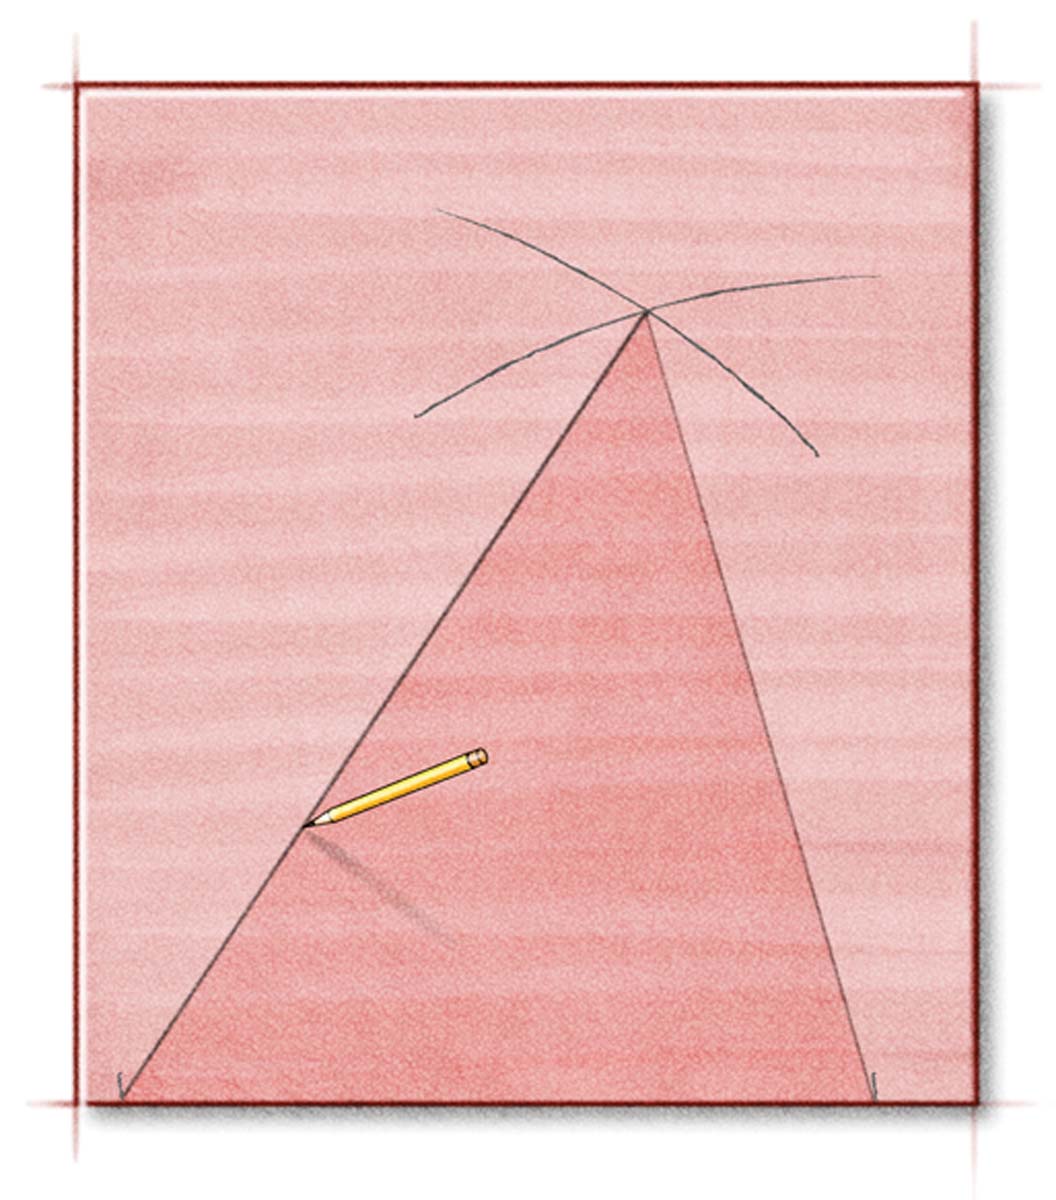 |
4. The intersection of the two arcs is the point at the top. 5. Connect this point to both ends of the fascia measurement, cut out the shape with a circular saw, and use the first piece as a template for the other side. |
Up Next: A Weatherproof Installation
In the second half of this two-part article, we’ll tackle preparing the bay-window opening, installing the window unit with its cable-support system, and integrating the new window and its roof with the surrounding wall.
 |
 |
|
Installing The Window |
Shimming And Fastening |
 |
Fastening Cable Supports |
For more photos and details, click the View PDF button below:
