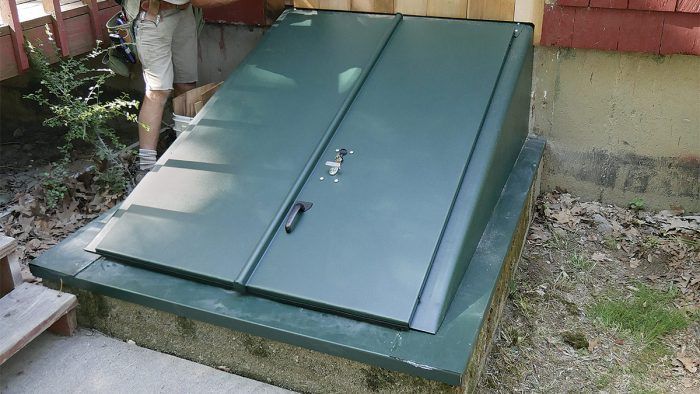
Synopsis: Replacing bulkhead basement doors means disassembling and removing the old doors and installing the new, but the foundation and wall must be prepped properly for a well-functioning assembly. This article walks through the steps, including addressing any deficiencies in the foundation, preparing the wall for the new door-frame header, and flashing and finishing the new-door installation.
On this house, the existing basement bulkhead door was its second. The original was made from wood and became too difficult for the elderly owners to lift, so they had this steel one with torsion springs installed in the 1960s. But after 50-plus years of service—and several poor paint jobs—it had rusted through in a few spots and was peeling constantly.
It’s not a surprising situation. Sloped basement doors receive a lot of punishment. Children play on them, owners walk on them to reach the wall above, and they’re exposed to the elements. They’re also close to the ground and prone to damage from lawn equipment such as grass trimmers. Whether site-built out of wood, or manufactured from steel or plastic, they can deteriorate to the point where replacement makes more sense than a repair.
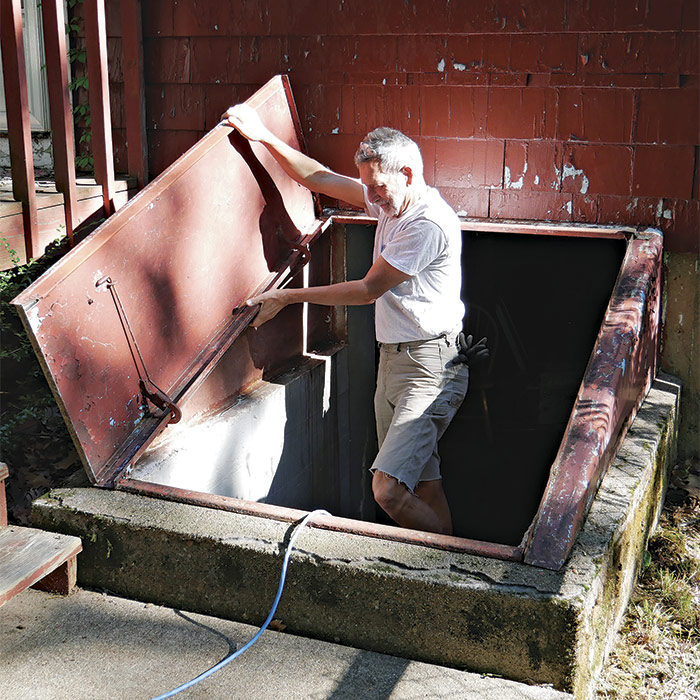
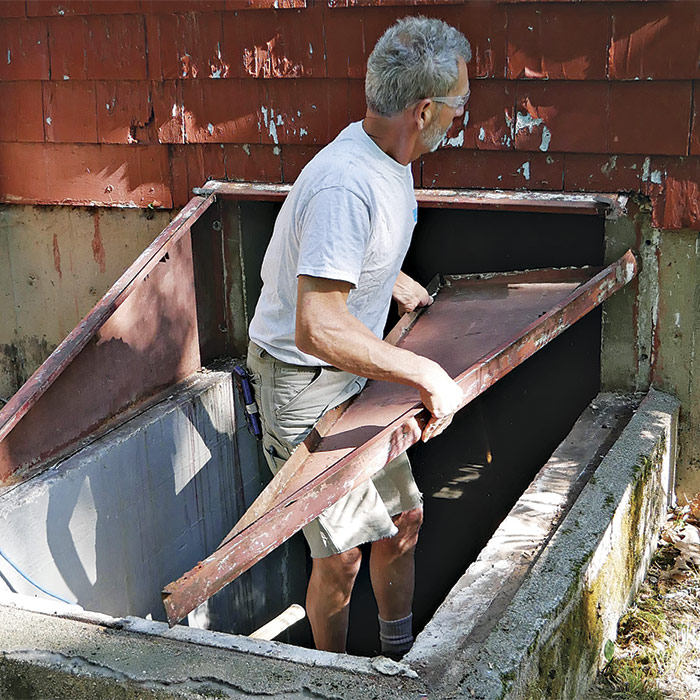
Out with the old
Basement doors are most easily removed piece by piece, just as they’re assembled. The doors and hardware come off first, then the frame is disassembled and removed in parts.
Doors and hardware first. Start by removing the pins or bolts from the hardware to release the doors.
Remove fasteners. A pry bar often makes quick work of removing the anchors or screws fastening the side panels and sill to the foundation. If a pry bar won’t work, a reciprocating saw and metal blade are in order.
Remove the sill.
Unbolt the header sections from the side panels.
Fold the panels in toward the stair opening until they disengage.
Pry the header piece down from under the siding.
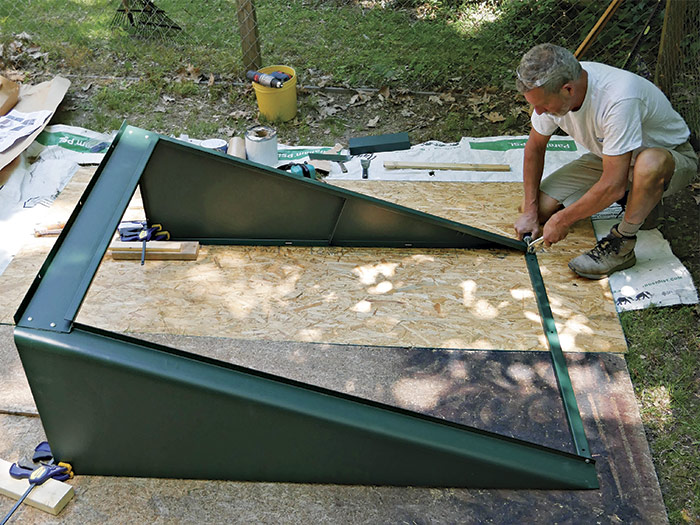
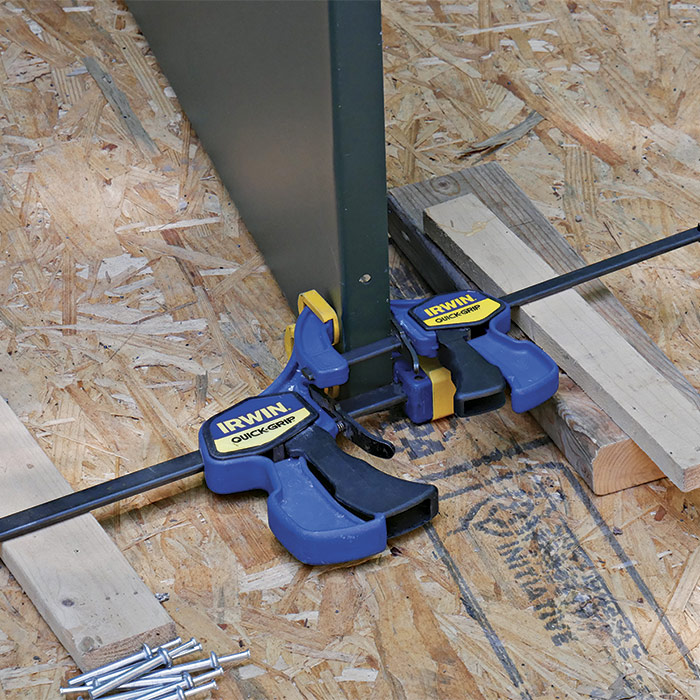
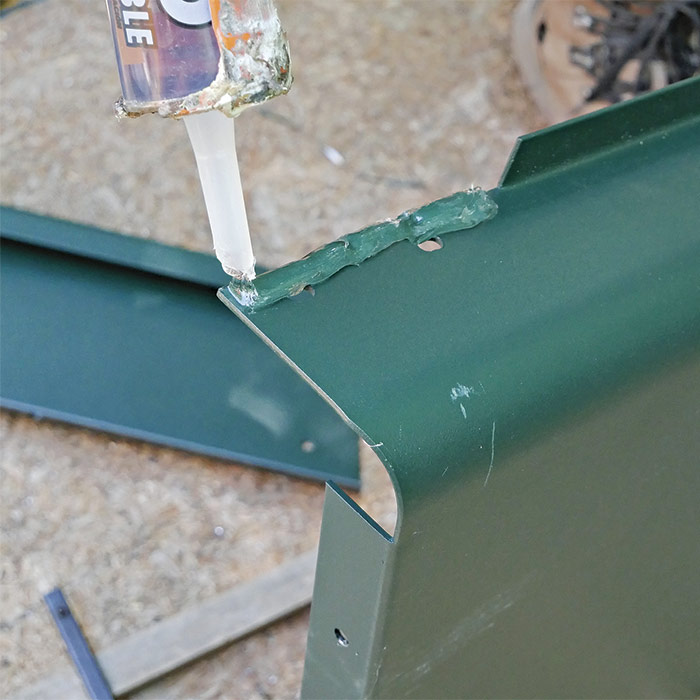
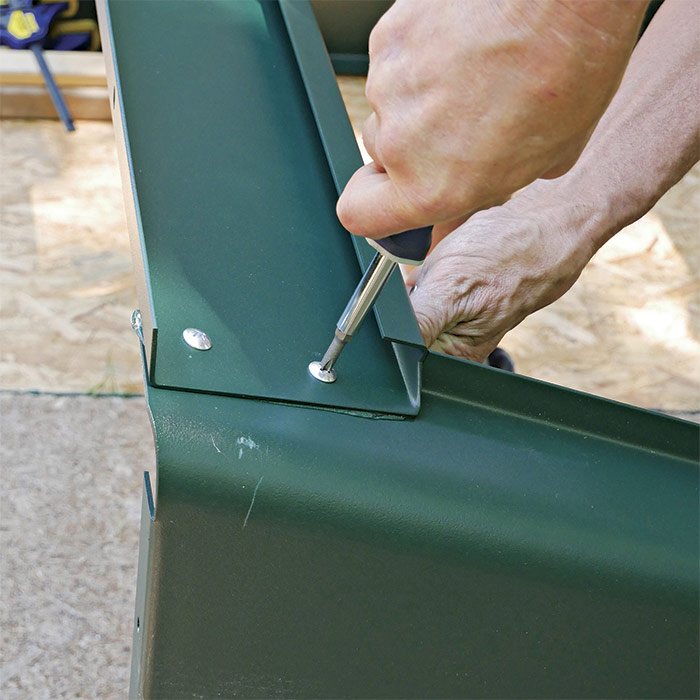
Assemble the new door
To make assembly easier, I unbox the new door components and preassemble them on a flat surface rather than try to do it in place on the foundation.
Set up for success. A couple pieces of sheathing are all you need to make a temporary flat work surface to assemble the new door. I use clamps as a second set of hands to hold the side panels upright.
Seal the connections. At the header, apply high-quality, clear exterior sealant (I used OSI Quad Invisible) to the joints on both sides before bringing the parts together.
Install the header. Position the header piece between the side panels and fasten using the supplied bolts.
Then set the sill piece into place and fasten.
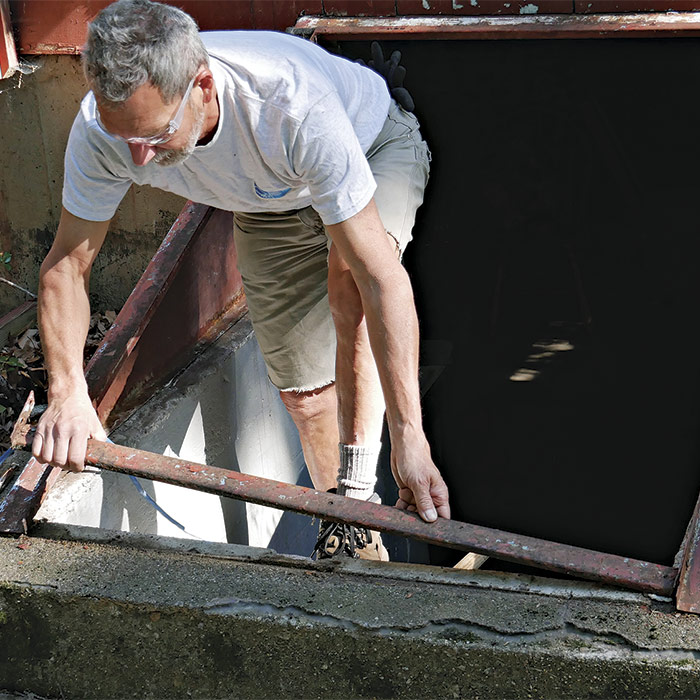
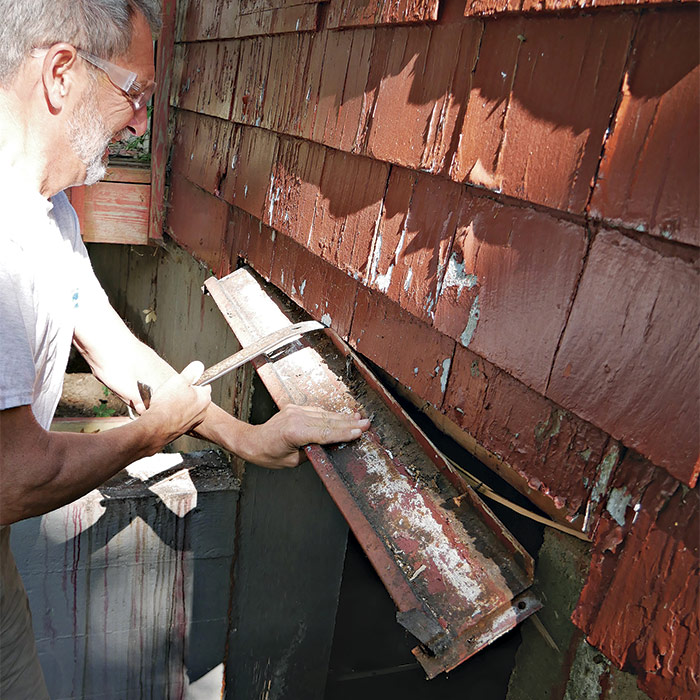
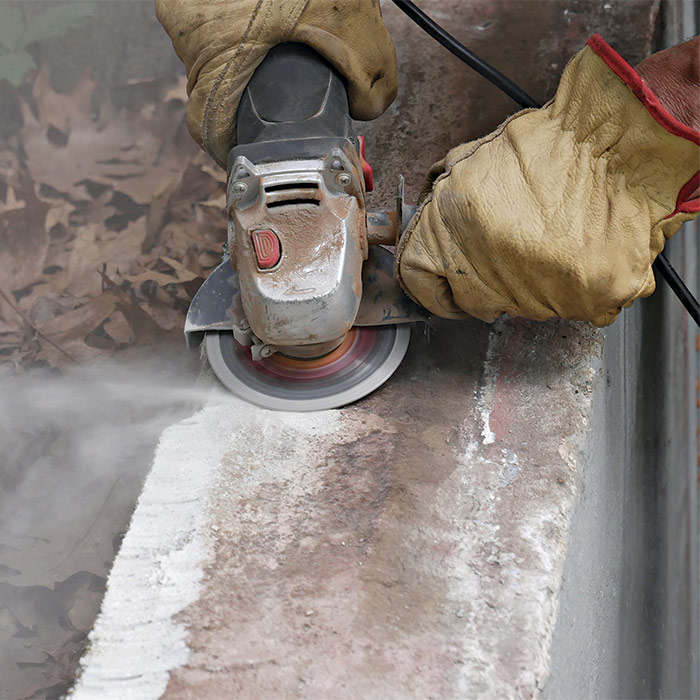
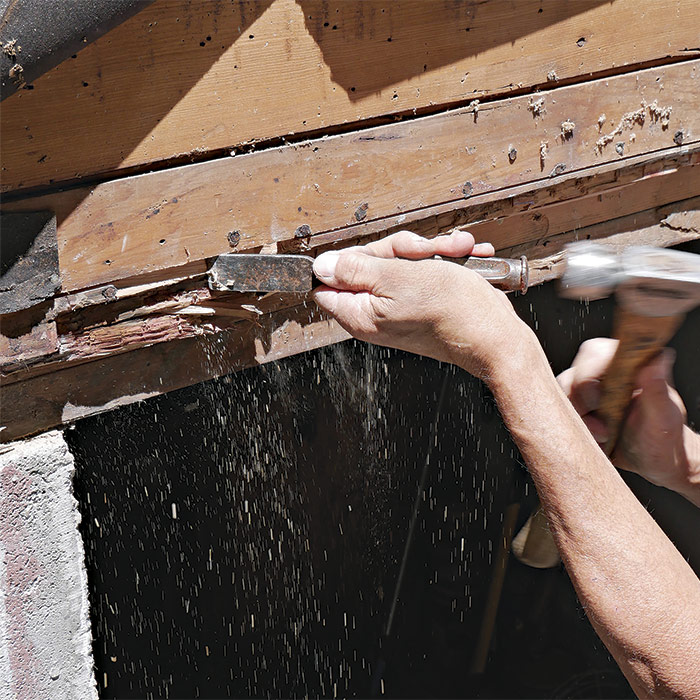
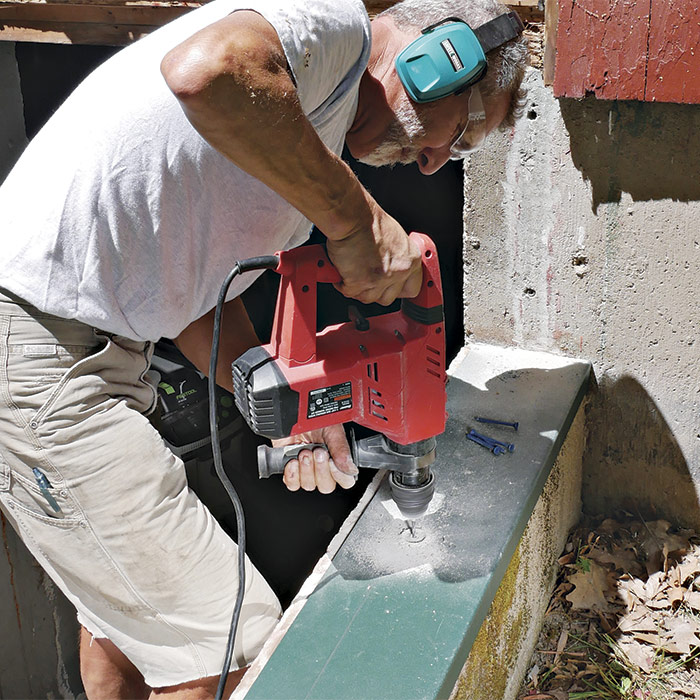
Prepare the Foundation
With the old door removed, this is the chance to address any deficiencies in the concrete foundation. Here, the previous installer had put sloped mortar around the metal door to keep out water, but it actually held water against the steel and led to corrosion, so it needed to be chiseled and ground away.
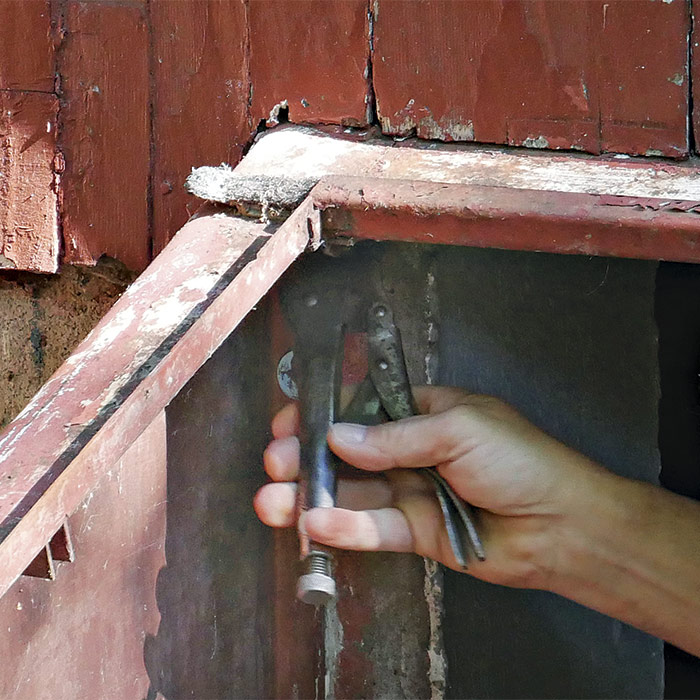
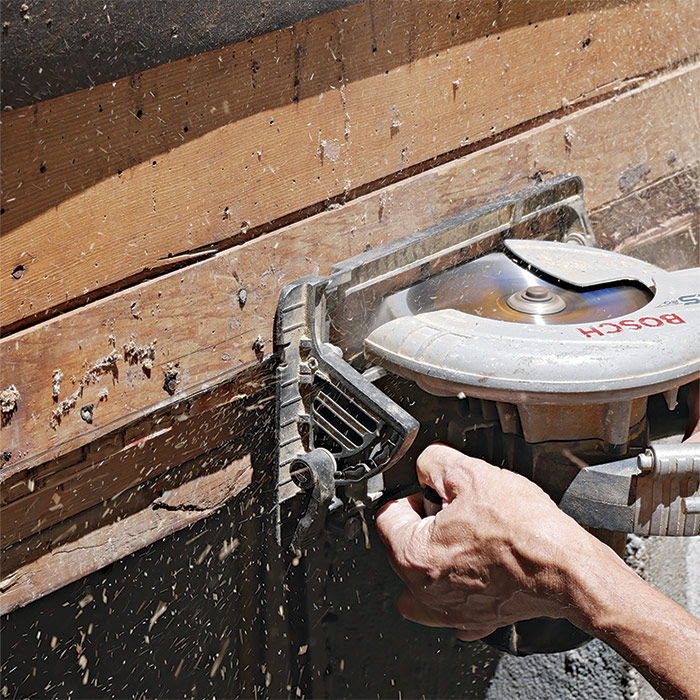
Check for level. Before installing the new door, use a long level to check the foundation for level in all directions. If needed, apply a concrete resurfacer to level out low areas, or use a grinder to level out high spots.
Prepare the wall
The new door-frame header and walls need a flat surface to seal against. This means some adjustments may need to be made when the wall sheathing and underlying framing is on a different plane than the exposed foundation wall below. The wall sheathing can be cut back if it’s proud of the foundation wall, or pressure-treated furring strips can be installed over the foundation wall to pad it flush with the sheathing above.
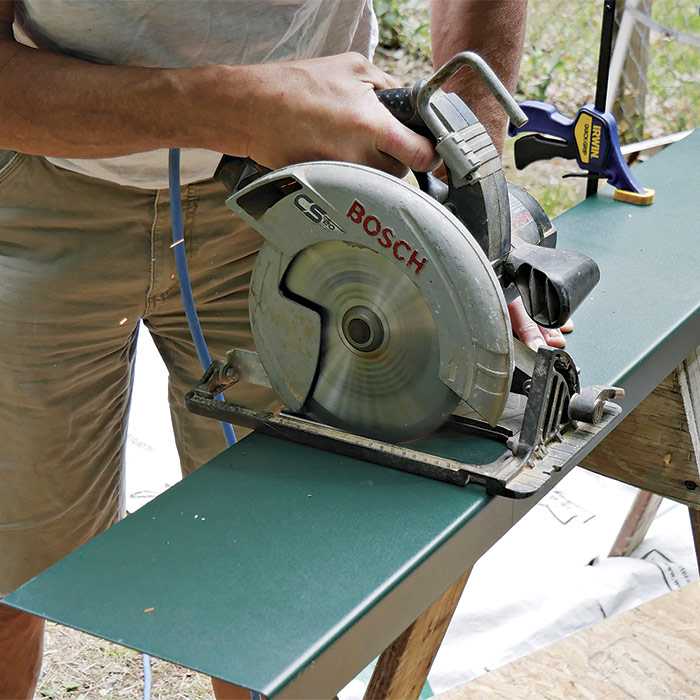
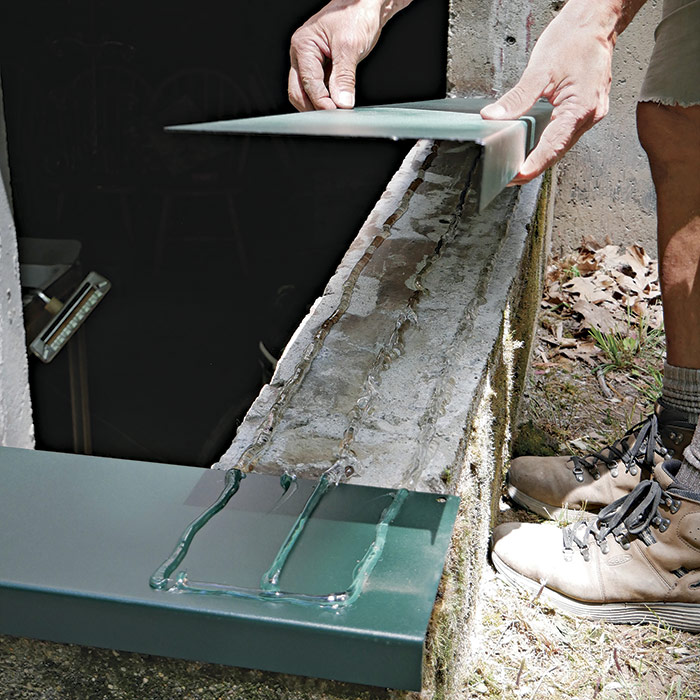
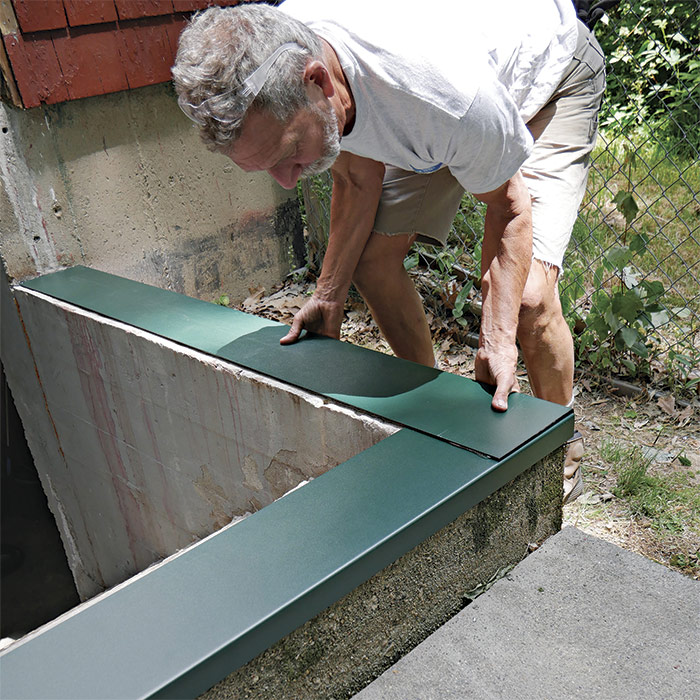
Remove siding. Strip away enough siding from the wall so the door-frame flange can be placed against the sheathing. Here, I removed three courses of cedar shingles to reveal the sheathing and make it easier to slide in replacement shingles after the door is installed.
Dry-fit the frame. Center the frame on the foundation and check the seal against the house. Here the 3⁄4-in. sheathing was about 3⁄8 in. proud of the concrete, so I traced the flange on the wall for a cutline.
Trim the sheathing. Use a circular saw with the blade set at the depth to be removed to cut along the flange mark.
Follow up with a chisel to remove the remaining material to recess the flange.
Cap the foundation
For a clean, finished appearance, cut and install metal accessory plates over the top of the old foundation walls. Like the door unit, these foundation plates are powder-coated on all sides.
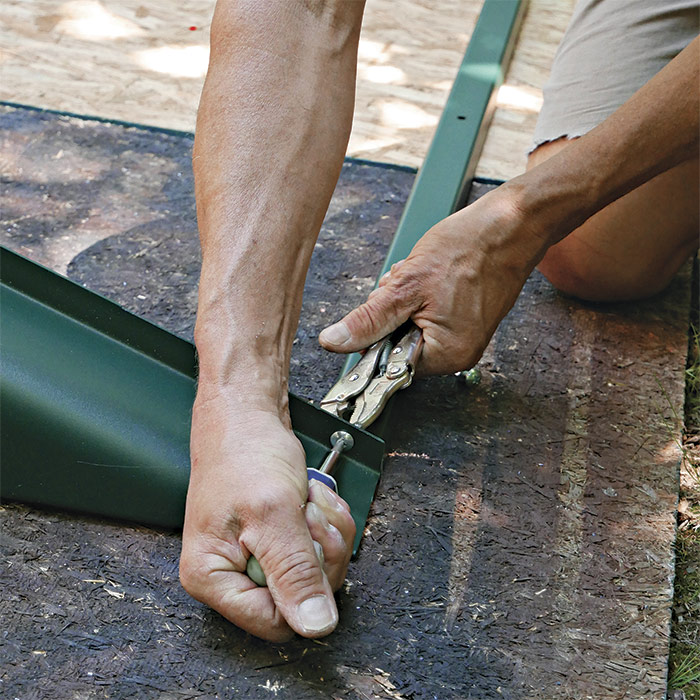
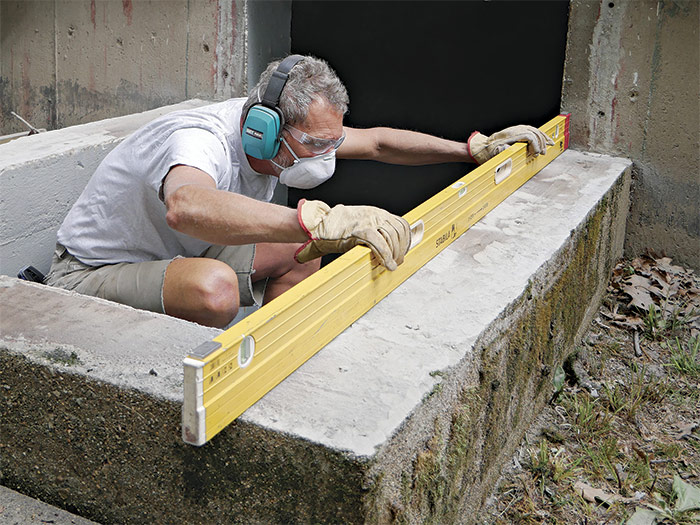
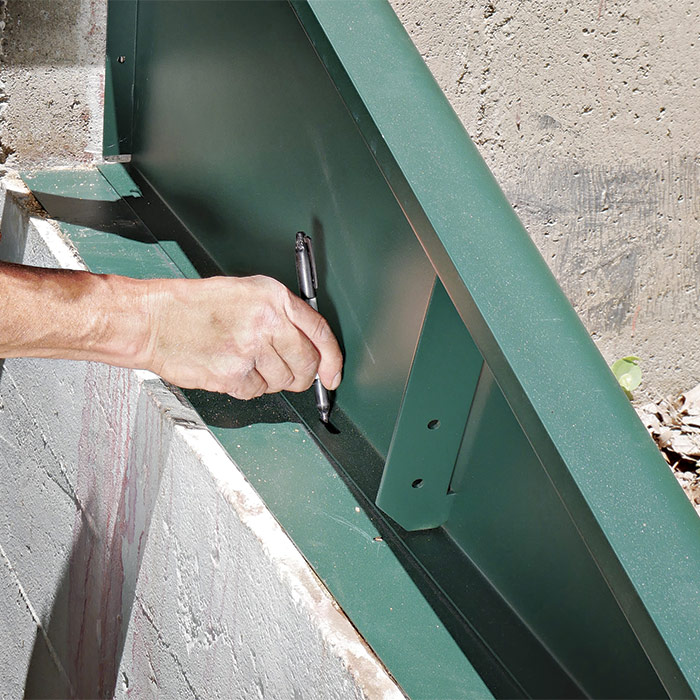
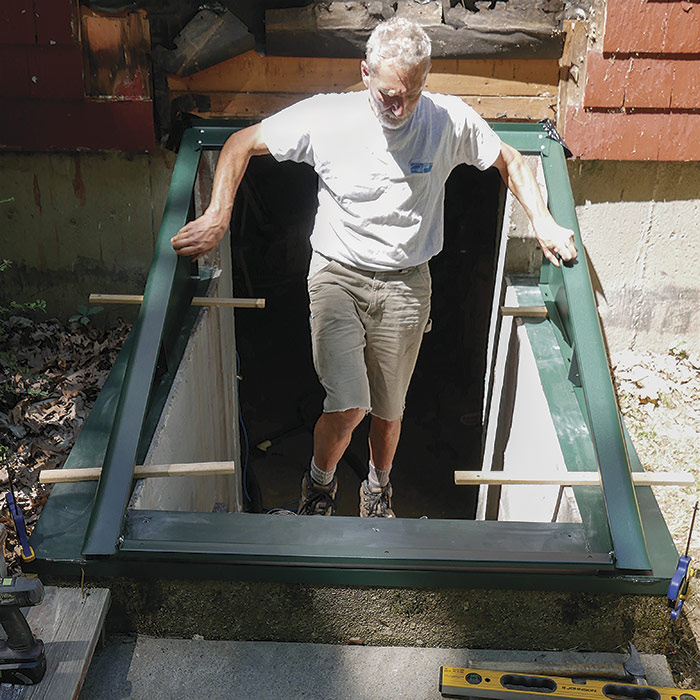
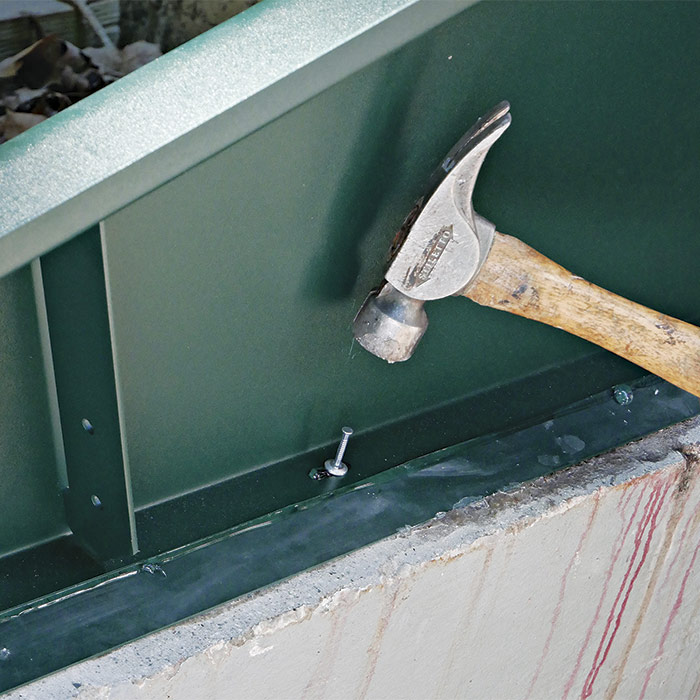
Cut to fit. I cut the plates with a tungsten carbide metal-cutting blade in a circular saw; an angle grinder with a cutoff wheel can also be used.
Prime and paint all cut edges.
Install the Plates. Apply a thick bead of high-quality sealant to the top of the clean foundation before installing the plates.
Install The Frame
The most accurate way to locate the mounting holes for the door is to set the door in place, and get it plumb and square.
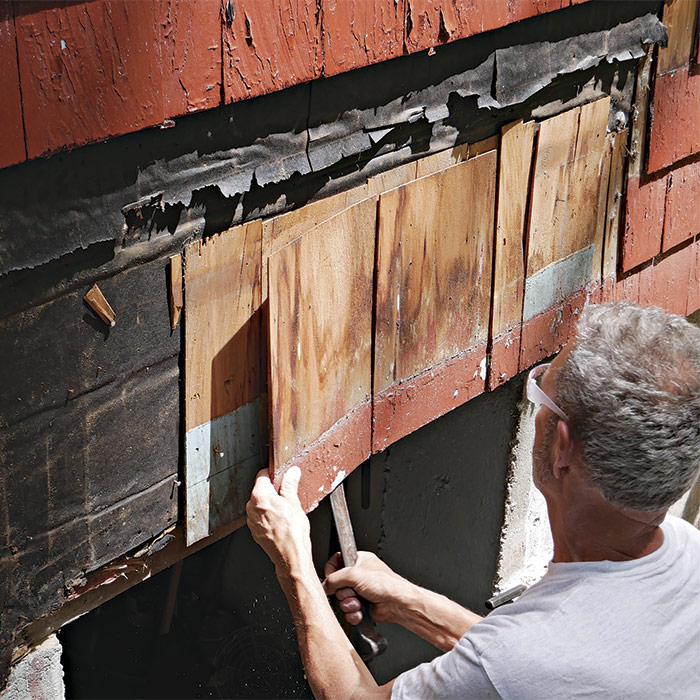
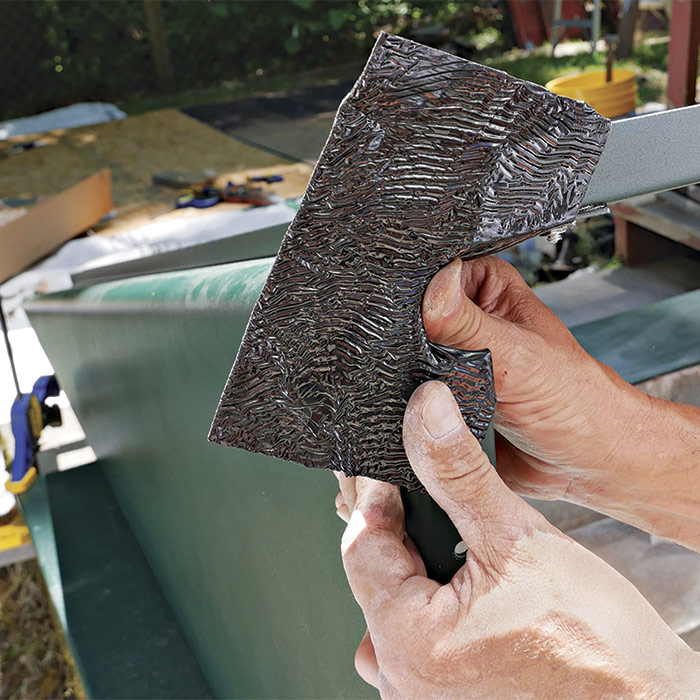
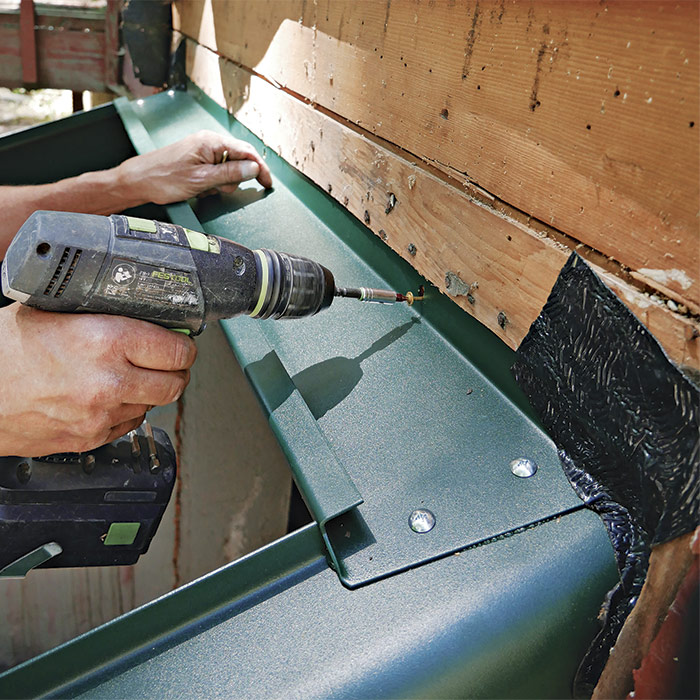
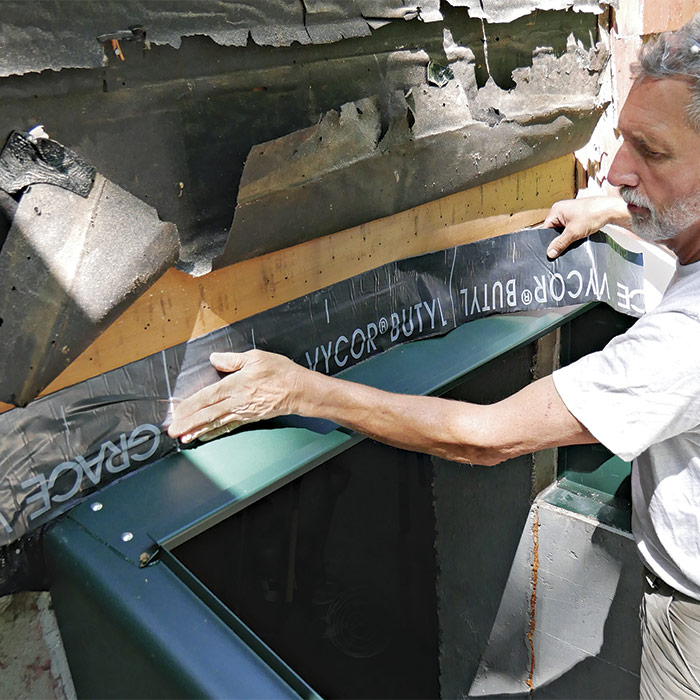
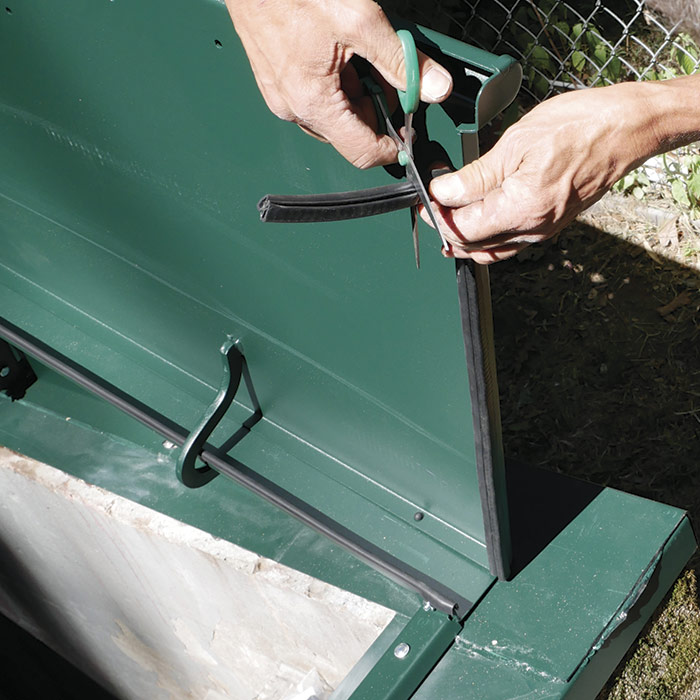
Plumb and square. Dry-fit the door tight against the house and centered on the foundation plates. Measure diagonals to verify that the unit is square, adjusting as necessary.
Prepare for drilling. Locate and mark the mounting holes on the foundation and walls.
Through the metal and into the masonry. Start the holes in the foundation plates with a metal-drilling bit, then switch to a masonry drill and bit to finish boring through the thin remaining metal and into the concrete.
Position and shim. Shim the whole unit about 1 in. above the foundation.
Seal the frame. Apply a bead of sealant along the foundation and walls for the new door frame to bed into.
Bed the frame. After applying sealant, slide out the shims one at a time and lower the frame, backfilling the areas where the shims were located with sealant.
Flash the flange. As added insurance against water, install self-adhering flashing tape at the top corners of the door frame where the side panels meet the header flange to help prevent leaks.
Fasten frame to foundation. To permanently attach the frame to the concrete, install hammer-drive anchors around the entire perimeter.
Flash and Finish
With the door in place, complete the installation by flashing the unit to prevent water entry, and installing or replacing the siding.
Manage water. Apply self-adhered flashing tape over the header flange of the door, tucking it beneath the water-resistive barrier on the wall.
Seal the unit. Install manufacturer-supplied weatherstripping around the new door unit.
Patch the siding. Install new shingles above and around the door frame and flange, leaving a 1⁄4-in. space above the header as a capillary break.
From FineHomebuilding #294
To this article as a PDF, please click the View PDF button below.
Mike Guertin (@mike_guertin) is editorial advisor.
Photos by Colin Russell.
This is a dialog window which overlays the main content of the page. The modal window is a 'site map' of the most critical areas of the site. Pressing the Escape (ESC) button will close the modal and bring you back to where you were on the page.
We use cookies, pixels, script and other tracking technologies to analyze and improve our service, to improve and personalize content, and for advertising to you.
We also share information about your use of our site with third-party social media, advertising and analytics partners.
You can view our Privacy Policy
here and our Terms of Use here.