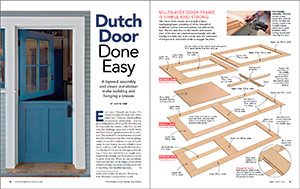
Build a Dutch Door
The trick to making this traditional door easy to build is to use a layered-assembly technique, and to hang the door before cutting it in half.
There are a lot of aesthetic and practical justifications for adding a Dutch door to you house—you can get a cooling breeze off the porch while keeping the dog inside, for instance—but there are also some fun challenges associated with the build, and that’s always a good motivator for a craftsman. The method shown in this video centers around a layered-assembly technique, so you don’t need any plunge routers or mortise machines, or cope-and-stick router-bit sets. Instead, the door is built in three layers, yielding a stiff, strong finished product, without the fuss of traditional joinery. Follow the build layer by layer, including how to join all the rails and stiles, use a crosscut sled on the tablesaw to cut the window muntins, and do the final glue up. After wrapping up the shop portion of the build, join us on site for the actual installation. The trick here is to hang the door as a single piece, and then remove it so that it can be cut in two. When the top and bottom halves are put back on the hinges, it’s much less difficult to bring everything into alignment than if everything were installed separately.
Read the entire article: Dutch Door Done Easy


View Comments
Nice job! I wish I had a panel saw...haha.
Really great! It would be nice to have seen some of the painting and weather stripping
Is there any way to download the video for reference?