
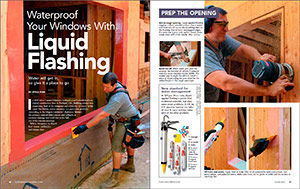
Waterproof Your Windows with Liquid Flashing
Learn how to install liquid-applied flashing to thoroughly seal a rough opening while also leaving a path for water to escape when it does get in.

Synopsis: Carpenter Steve Pink details his company’s method of applying liquid flashing to windows to stop water intrusion using Prosoco’s R-Guard system of Joint & Seam Filler, FastFlash, and AirDam. Through a series of photographs, he explains how to prep the rough openings, apply the liquid flashing, seal the transition, install the windows, and then seal the inside for an air- and watertight flashing system.
In 2010 when I joined Hammer & Hand, a well-established residential construction firm in Portland, Ore., building science was improving, both at the company and across the industry. In the rainy Northwest, water intrusion is a particular problem. According to the Oregon Contractor’s Reference Manual, the primary cause of defect claims and callbacks is moisture damage and mold due to the failure of the exterior envelope. While Hammer & Hand had fewer callbacks and claims than most, our former co-owner—and self-proclaimed building-science geek—Sam Haggerman, went looking for solutions. He heard about a liquid-applied window flashing developed by Building Envelope Innovations (BEI), an Oregon manufacturer, based on their findings that all windows eventually leak, and water will always get in. One of the inventors, Tom Schneider, cited a test conducted by Tatley Grund, a Northwest remodeling company that specializes in water intrusion. Prior to installing any new window, Tatley Grund gives the sill a simple test for watertightness: They tape over the weep holes and fill the sill track with water. If the water level drops at all, the window fails. Twenty percent of windows fail.
BEI brought their liquid-applied system to market, partnering with Prosoco, who dubbed the product FastFlash and made it part of their R-Guard system. Schneider pointed our bosses to independent tests performed after five and ten years on windows installed using the FastFlash system, which showed zero evidence of failed flashing.
I wasn’t convinced, but despite my skepticism, orders came down that it was time to “get into the goop.” And the bosses really could tell who had complied by the globs of pink and red goop on their boots, clothes, and hair.
Change Your Thinking About Water
To understand how to use liquid-applied flashing, and why, you have to change your thinking about water. The old motto, “Think like a raindrop,” becomes, “Water is like a snake. Give it a place to go, and it will leave you alone.” We’re dealing with water management now, accepting that it will eventually get into the flashed opening. So the idea is to create a completely waterproof opening and an aquatic exit strategy. Everything about our approach to liquid-applied flashing follows that philosophy.
Eight years later, the griping and groaning has stopped and we’re better at keeping the goop out of our hair and clothes. Nitrile gloves take care of our hands. More importantly, we’ve installed hundreds of windows using this new flashing system, with zero callbacks for water intrusion.
Best Practices For Liquid Flashing
The following is our company’s approach to liquid-applied flashing. Although there are too many contributors to name, the introduction of liquid flashing to our workflow was a company-wide effort, and we relied on countless product experts and researchers to guide us. It starts with the rough opening, which needs to be flat and stable. After properly nailing the sheathing around the edges, we trim the sheathing flush and get rid of plastic remnants from collated nails. Then we install a piece of bevel siding on the sill, another critical step. If and when water gets in, the pitched sill directs it outside the window opening onto the exterior drainage plane formed by the water-resistive barrier (WRB). Make sure to allow for that piece of siding in your rough opening! I add 5⁄8 in. to the height of all openings on our master list.
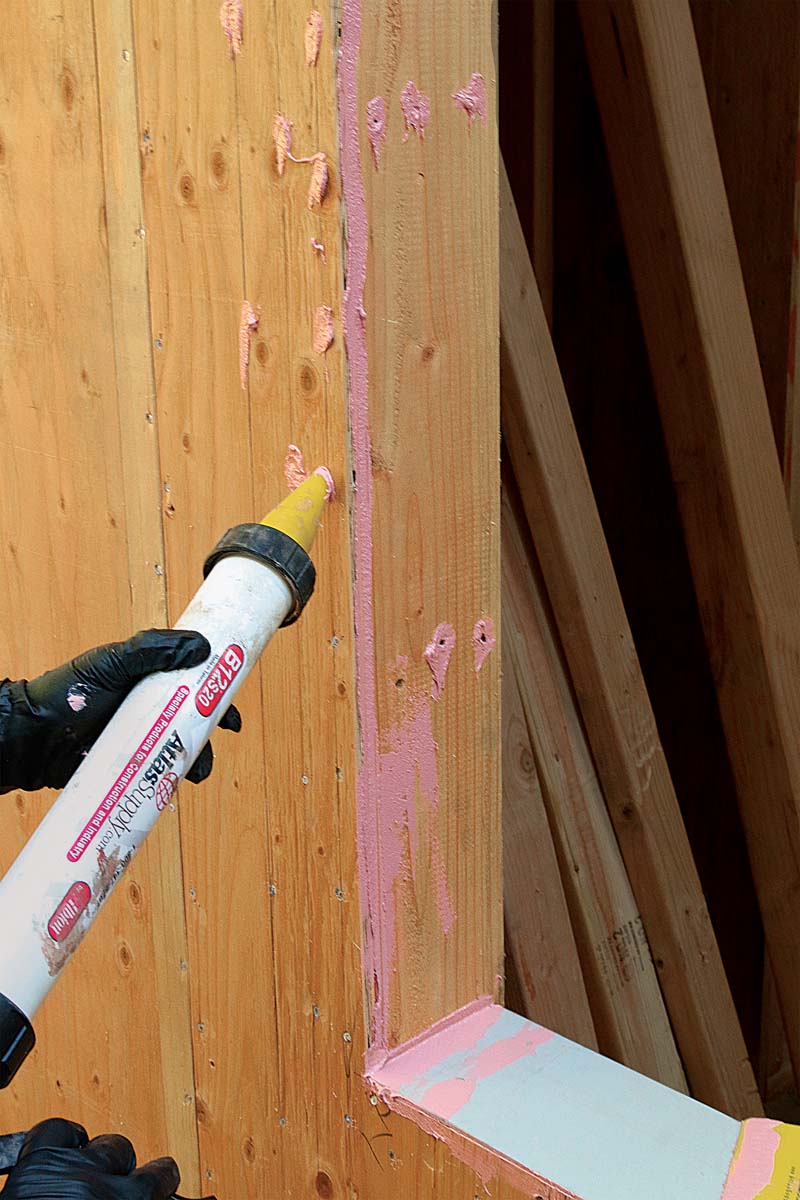
The first liquid-applied product is R-Guard Joint & Seam Filler, which goes over all nail heads, joints, and seams to create a flat, unbroken surface for the FastFlash that follows. For new construction, we often do this step with the walls lying on the ground, which is easier than moving a ladder around. Dry time is anywhere between four and 24 hours, depending on weather and humidity. Chemically, Joint & Seam is similar to FastFlash, just thicker and more fibrous. FastFlash is smoother, with a darker color that let’s you see how thick it’s going on. If you can see plywood peeking through, it’s too thin.
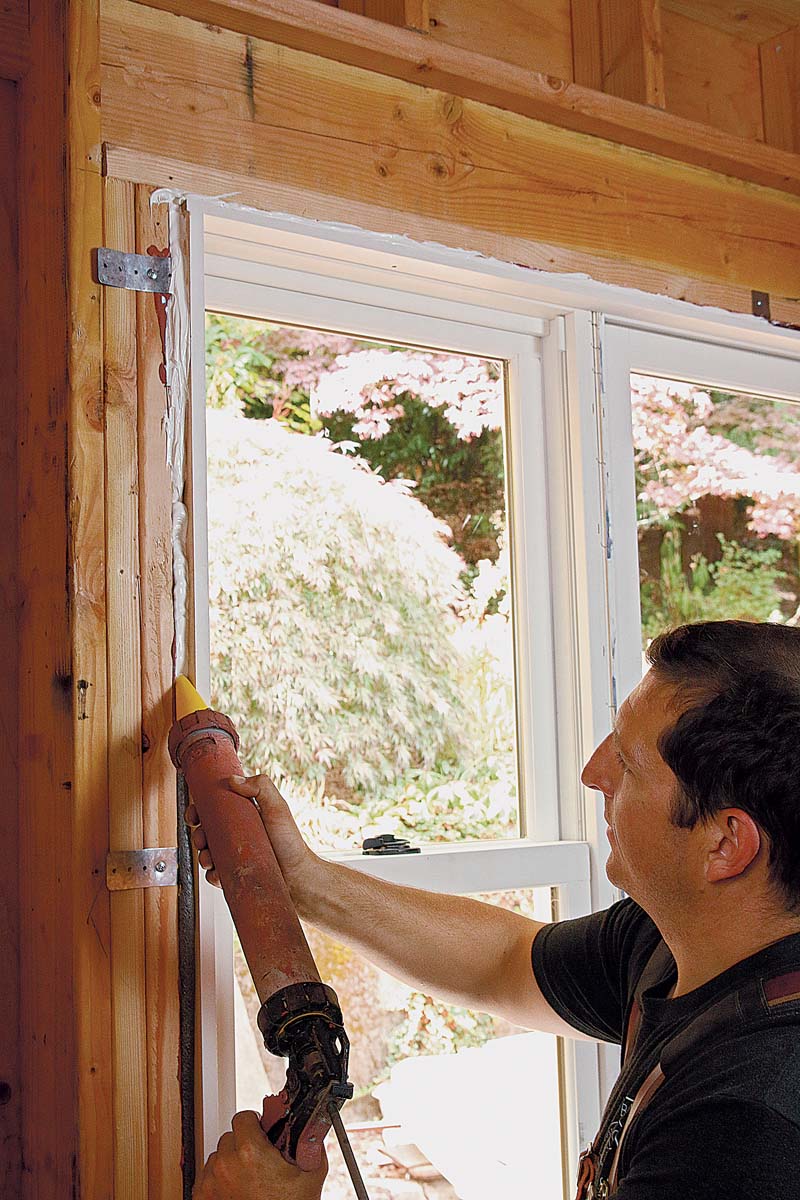
With the rough opening filled and flat, a broad, unbroken layer of FastFlash is applied to create an impermeable barrier wherever water might reach. It extends into the opening past the inside of the window frame, and out onto the sheathing all around. How far it extends onto the plywood is determined by research that shows that wind-driven rain can travel up to 9 in. in any direction before it starts dripping down.
Below the sill we install an extra piece of WRB, troweling on more FastFlash to seal its top edge. I was most skeptical of this detail. The idea of installing a vertical transition without a proper 4-in. lap seems like asking for trouble. But once I saw how the WRB becomes embedded in the liquid flashing, I was convinced.
After the FastFlash dries—also anytime between four and 24 hours depending on weather conditions—we inspect the opening for any voids or gaps, and touch it up as needed to ensure a continuous, impermeable surface. If the goop gets on the window or some other unintended spot, let it fully dry and peel it off.
After that, we install the window per the manufacturer’s specs, but always gap it up off the sill and forward off the sheathing, and never apply sealant or tape at that lower exterior edge. This is the critical escape path for any water that gets in. With a flangeless window like the one we’re using here, tape is ideal to bridge the exterior gap between window and framing (and will later be hidden by casing). Backer rod and a large amount of liquid flashing would also work, but would be needlessly expensive. If a flanged window is being used, apply FastFlash under the flange and then apply tape or more FastFlash over the flange onto the surrounding sheathing. After the window is in, we create a continuous seal along all four inside edges using R-Guard AirDam, which acts as a backstop for anything that makes it past the window and siding.
Finally, we use FastFlash (or Joint & Seam) in one last spot, to seal the top edge of the traditional window flashing above the head casing (or exterior window frame), much the same way we seal the top edge of the WRB below the rough opening.
I’m A Believer
While highly skeptical at first, I’ve come to trust this method of window flashing. Each part of the process is easily inspectable, and gaps or holes are obvious. If we find any, the fix is quick and easy. Now I don’t have to worry that an errant utility-knife blade has cut a hole in the peel-and-stick pan, or that an improperly folded or creased detail will cause damage down the line. And when it comes to a radius or diamond-shaped window, the liquid-applied membrane is a no-brainer, replacing a risky series of folds, cuts, and adhesions.
By the way, Prosoco’s air- and watertight flashing system has also been embraced by the Passive House movement, with its intense emphasis on air-sealing.
Prep The Opening
|
Not-so-rough opening. Liquid-applied flashing requires a clean, smooth surface. Use a router and flush-trim bit to cut the sheathing flush to the framing, free of burrs and jagged edges. If a recip saw is your only option, knock down rough areas with a belt sander after cutting. |
Level the sill. When water gets past the window, the beveled sill directs it outward onto the water-resistive barrier (WRB). The easiest way to angle the sill is to install a piece of bevel siding (be sure allow for the added height in the rough openings). |
 |
 |
|
Fill holes and seams. Apply Joint & Seam Filler to all plywood-to-stud connections, nail penetrations, and plywood seams. Make sure there are no globs or voids and the surface is relatively flat. |
 |
 |
|
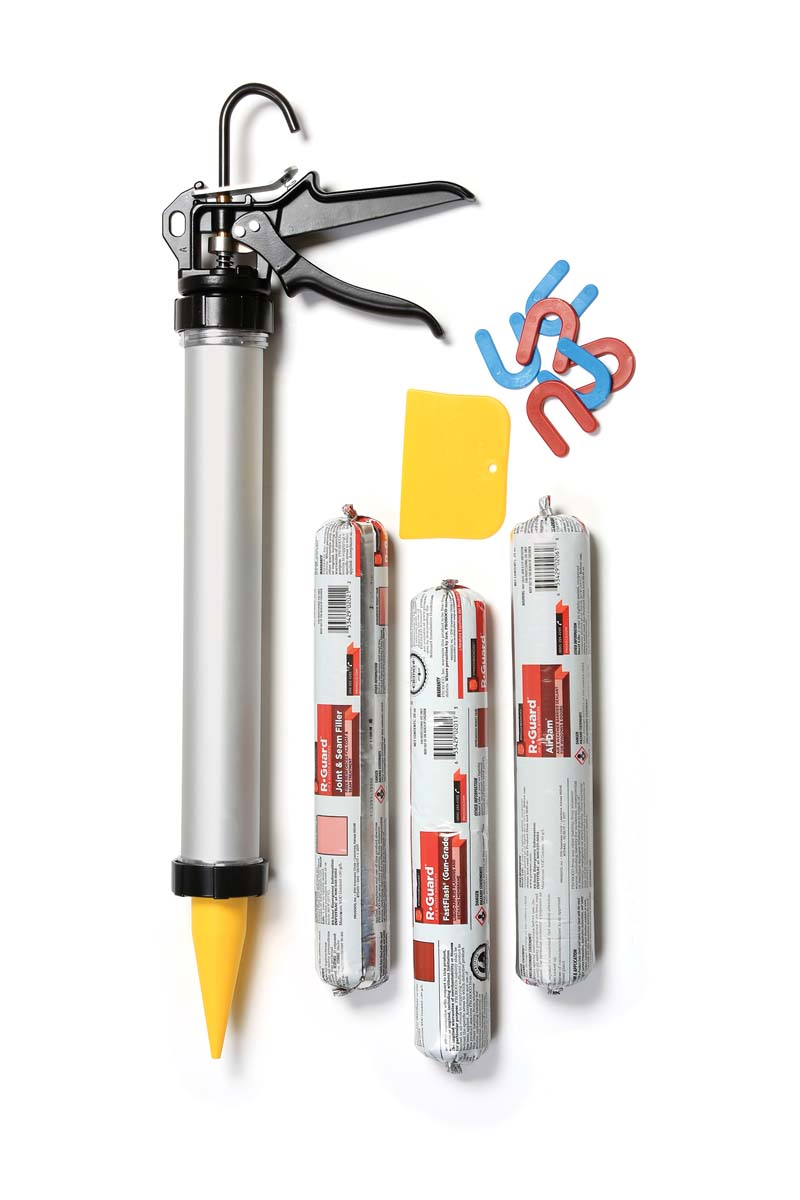
New standard for water management At $25 per 20-oz. tube, liquid-applied flashing is pricier than traditional materials, but eliminates water problems. A 3-ft. by 4-ft. opening requires one tube of Joint & Seam and two tubes each of the other products. |
 |
Apply The Liquid Flashing
|
Coat the inside. FastFlash must extend inside the rough opening at least 1 in. past the window jamb. These windows have extension jambs that cover the full stud, so all of the jack stud is covered. |
 |
Seal The Transition
|
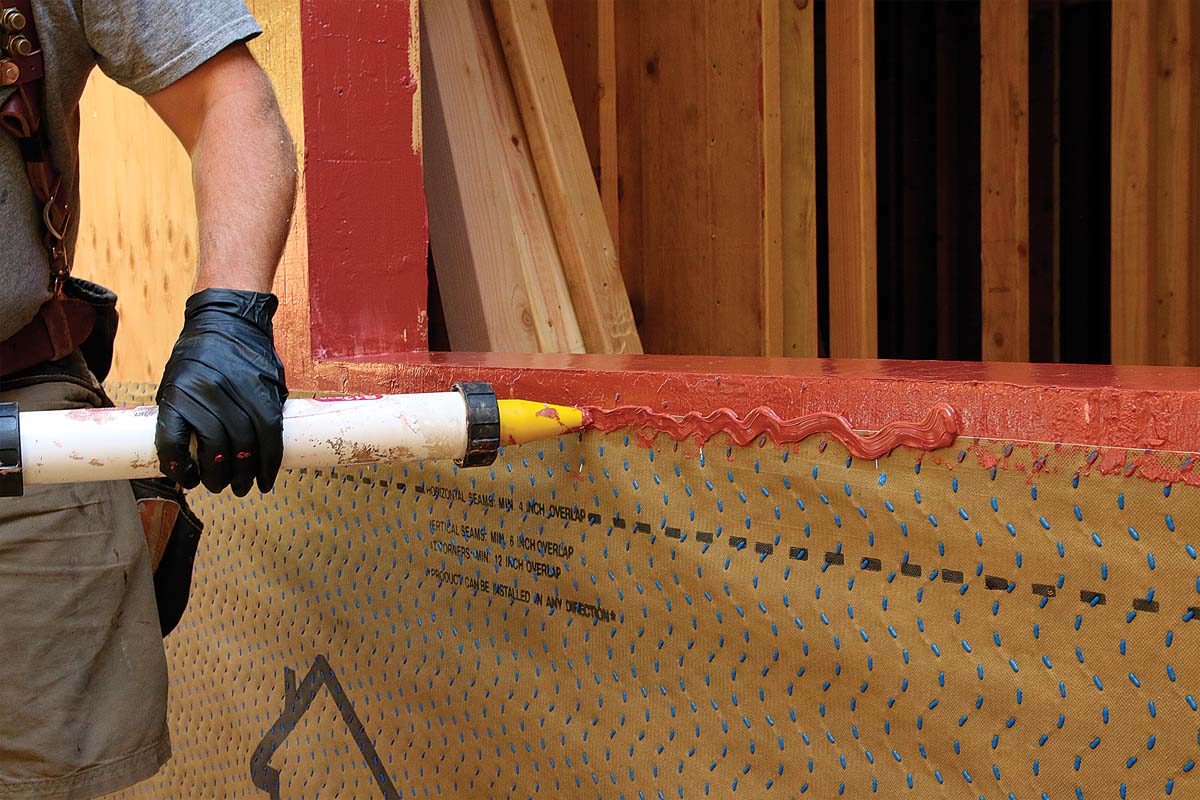
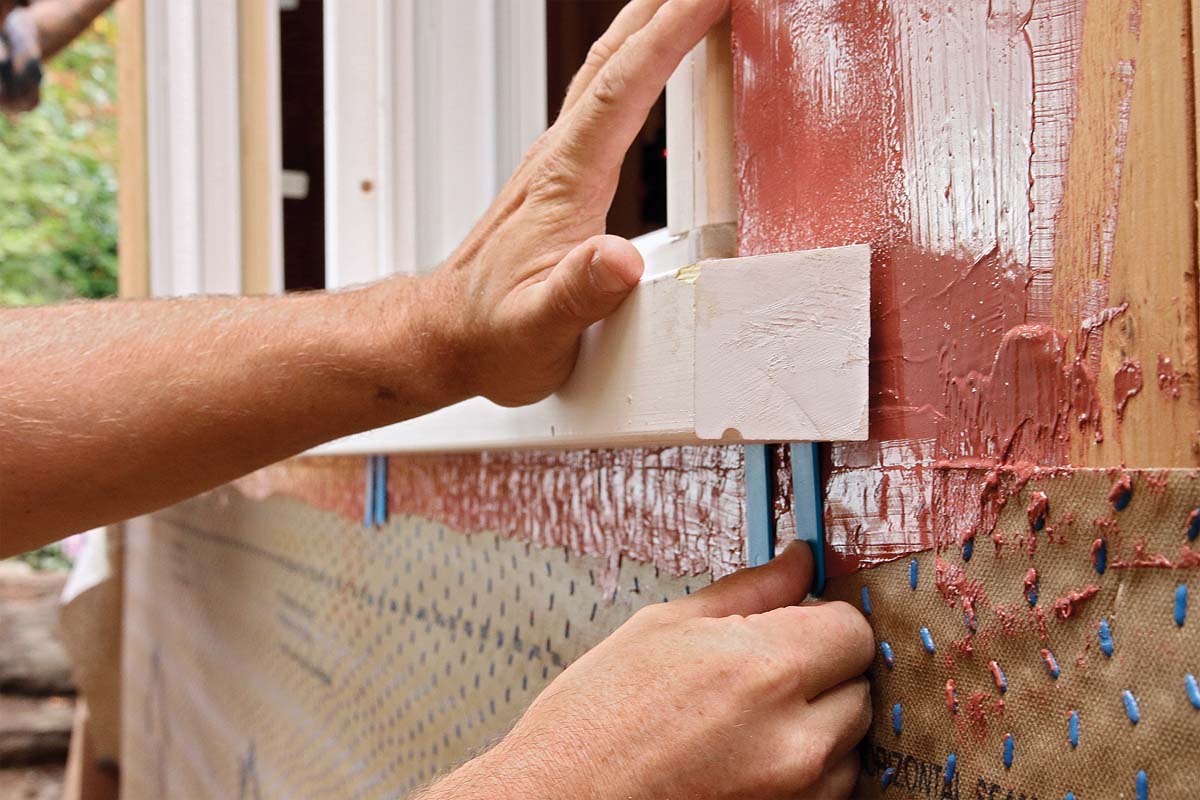
Housewrap is next. If the window is close to the bottom of the sheathing, a single-layer WRB will do. If not, install a 12-in. to 16-in. transition strip that extends 9 in. beyond both sides of the opening. |
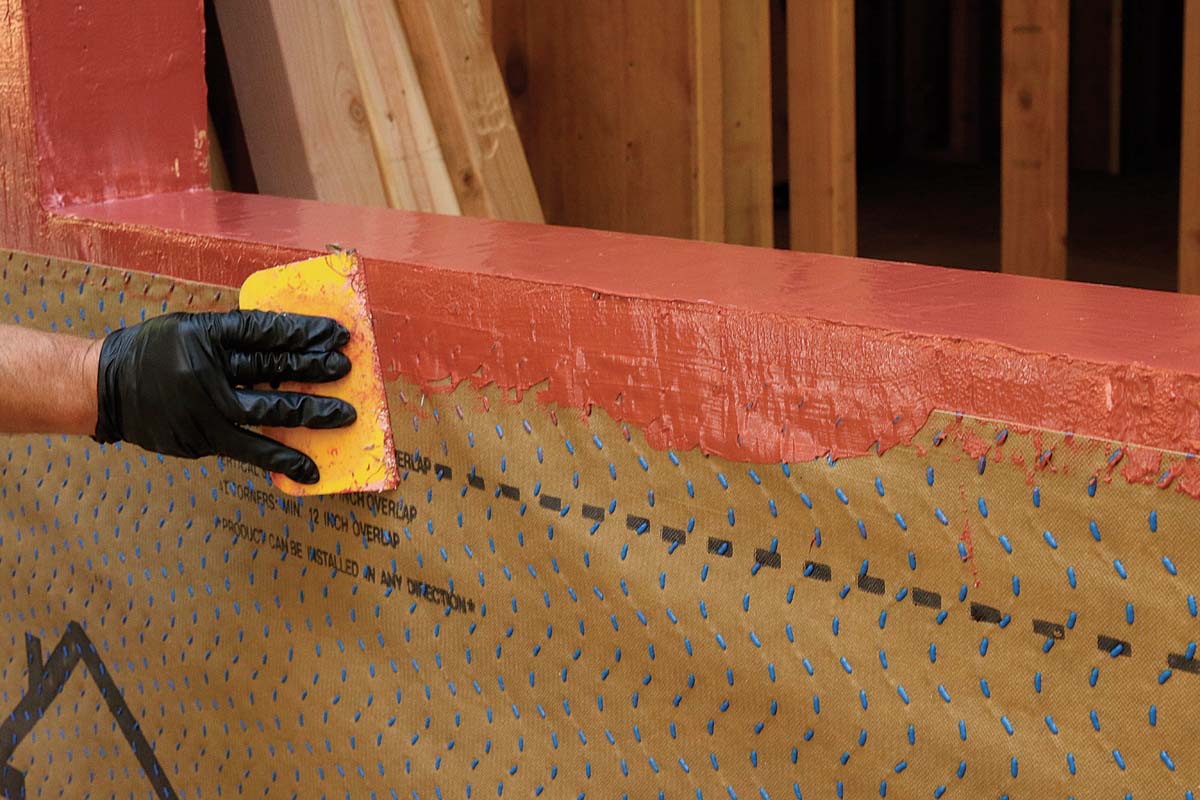
Seal the top edge. Apply FastFlash along the seam to create a waterproof seal, and work the seam with a trowel or spreader to embed the WRB in the liquid product. |
|
|
 |

|
One last pass. Inspect the entire flashed opening and fill any dents, gaps, and holes. Allow 24 hours for them to dry fully. |
 |
Install The Window
 |
 |
|
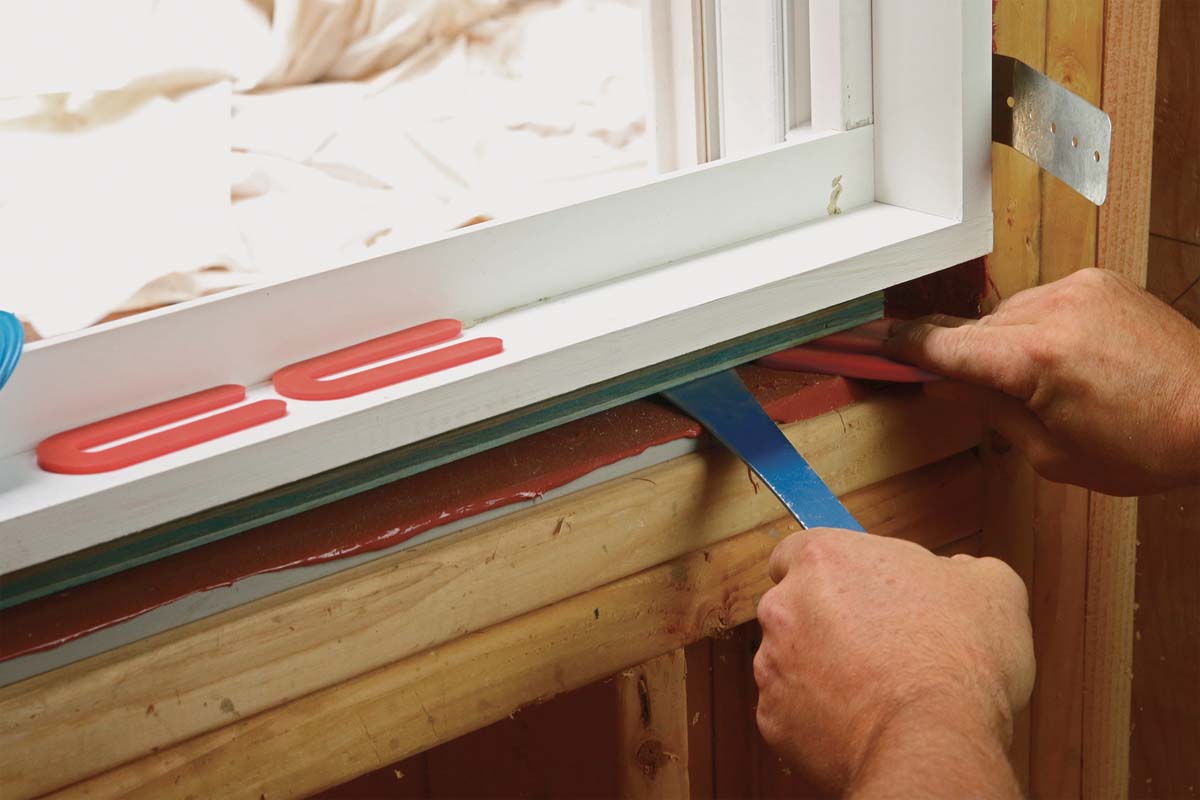
Gap the sill. Install the window per the manufacturer’s specs, but shim it off the sill. It’s critical that water has a path to the exterior. All that’s required is a 1⁄16-in. to 1⁄8-in. gap. |
|
Gap the window off the building, too. A drop of FastFlash holds shims in place. These windows have a factory-installed sill, so shims are slipped behind it prior to fastening. On a nail-fin window, put the shims behind the fins, and don’t tape or seal the bottom fin. |
 |
Flashing a head casing
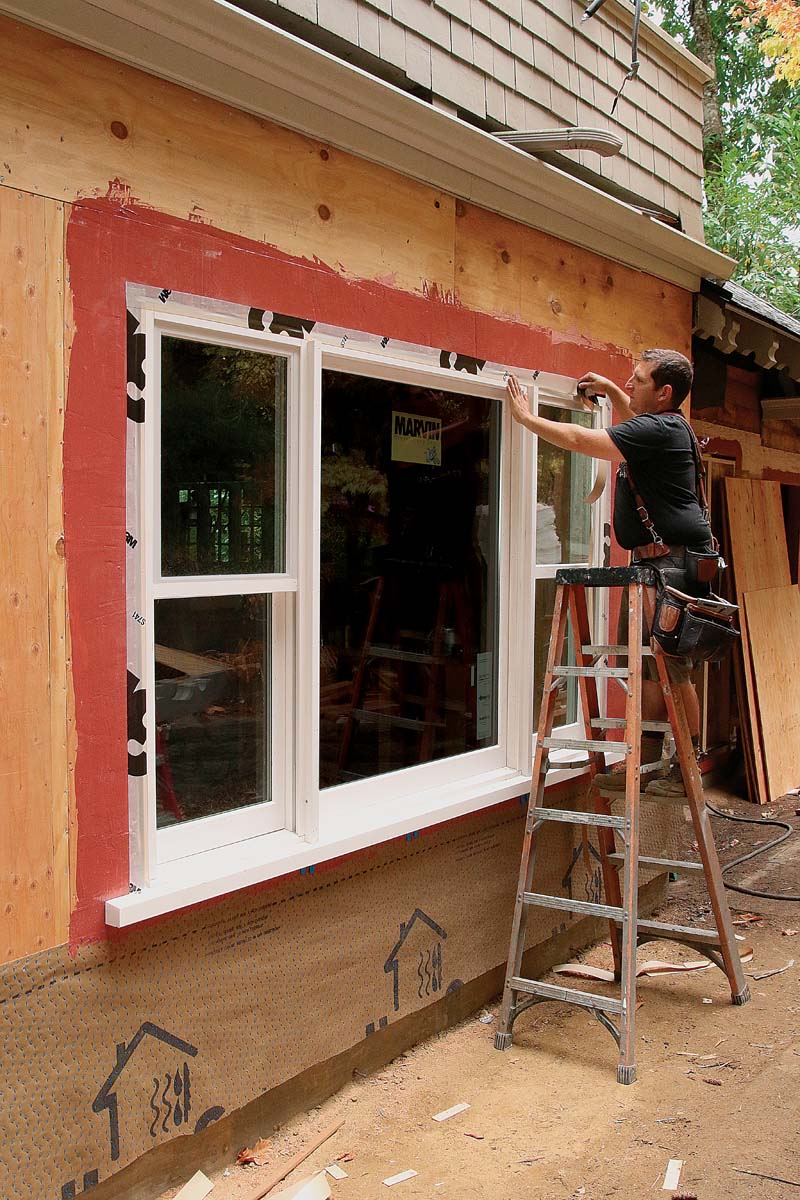
Tape the sides and top only. We use 3M Air and Vapor Barrier 3015 tape to flash the front of the window. This multilayer, elastomeric, self-sealing film sticks incredibly well to just about anything. Later, casing will hide the tape. Do not tape the bottom edge of the window.
Seal The Inside
|
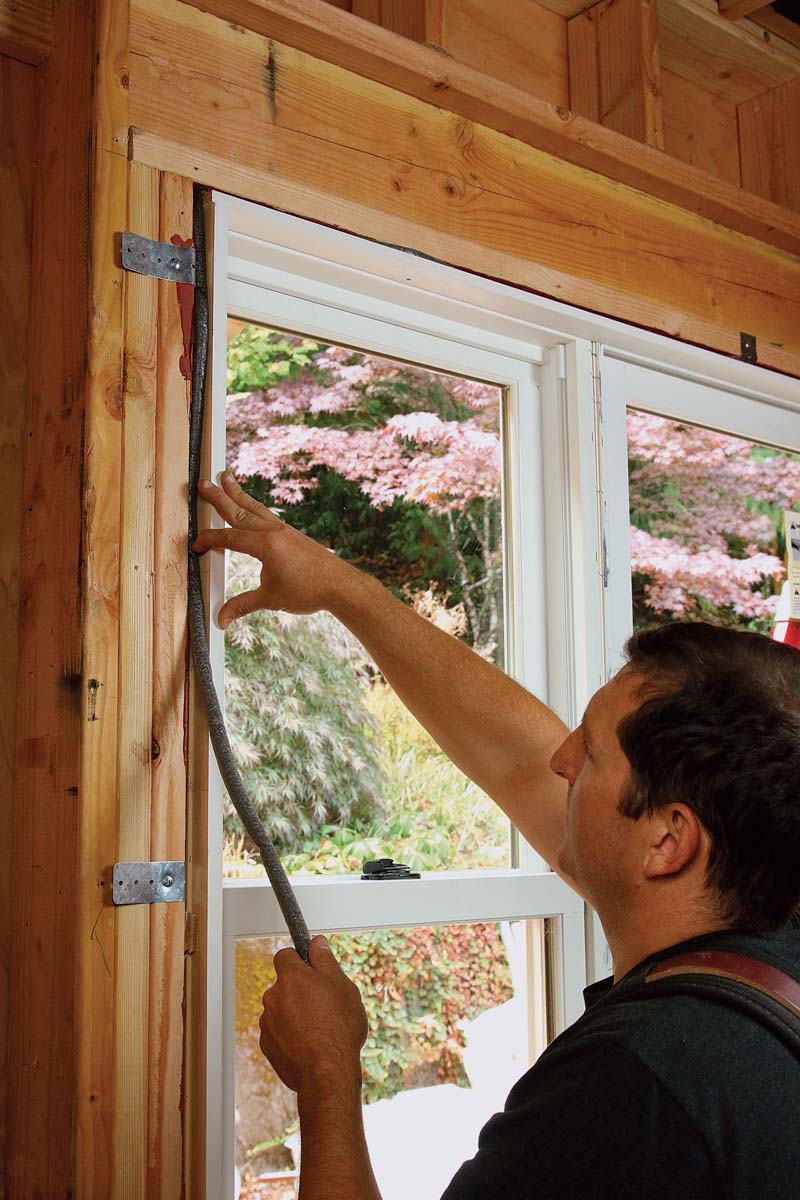
Install backer rod first. Fill the gaps around the window with the appropriate-size backer rod, setting it about 1⁄2 in. deeper than the outside of the framing where possible. You won’t need it for gaps smaller than 1⁄4 in., like the one at the bottom of the window. |
Seal the entire opening. When R-Guard AirDam comes in contact with the back edge of the FastFlash, it creates a chemical bond that is the last line of defense against water intrusion. The seal at the bottom edge forces any water outward and off the beveled sill. |
 |
 |
|
Work the bead. Use a 1⁄2-in. tuck pointer with a rounded tip to work the material. Make sure the AirDam comes in contact with the window frame as well as the FastFlash in the rough opening, creating an unbroken seal. It’s okay if the backer rod and bead bump out around shims or nail plates, as long as the seal is continuous. Wait a day, reinspect for gaps, and then give the AirDam two more days to dry. |
 |
From Fine Homebuilding #283
To view the entire article, please click the View PDF button below.
