Hand and Power Tools for Electrical Work
With this collection of tools, you'll be well equipped for any household wiring project.
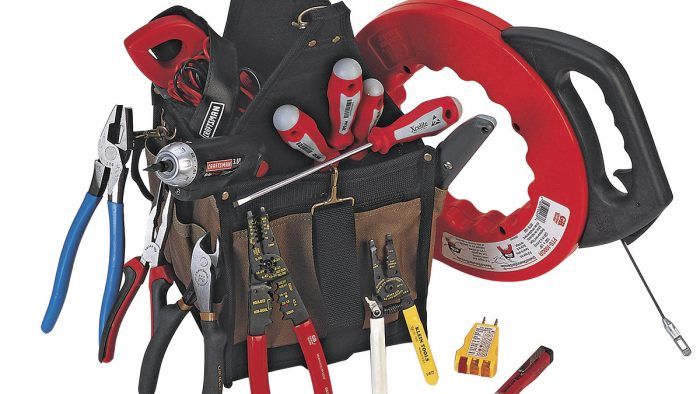
You don’t need a lot of expensive tools to wire a house successfully. And there’s little uniformity among the tools electricians prefer. Some pros carry a dozen different pliers and wire strippers in their tool belts, whereas others streamline their movements and save time by using the fewest tools possible. Here, we’ll outline the basic tools you’ll need for household wiring projects.
The first test of any tool is to fit your hand comfortably; the second, that it feels solid and well made. Better tools tend to be a bit heftier and cost more.
Hand Tools
All hand tools should have cushioned handles and fit your hand comfortably. Manufacturers now make tools in various sizes, so choose the ones that are right for you. Don’t scrimp on quality.
Pliers and strippers
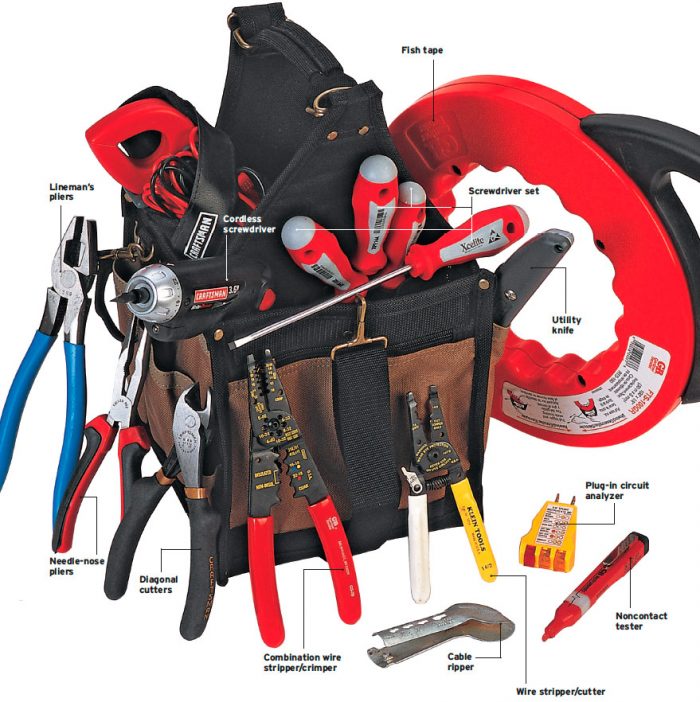
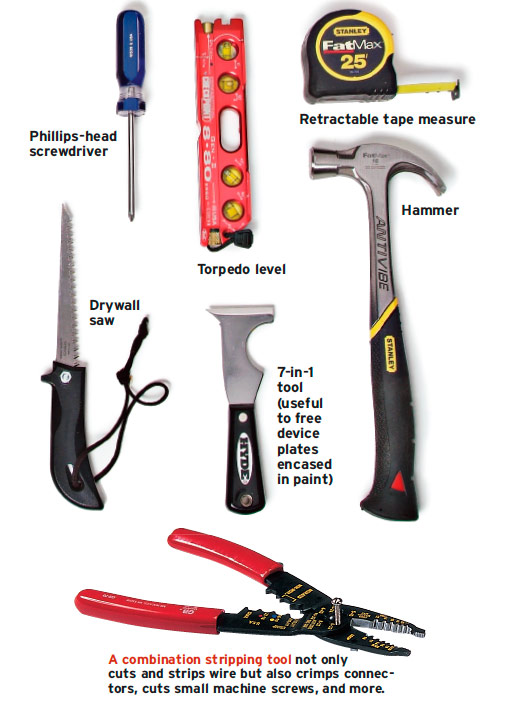
Lineman’s pliers are the workhorse of an electrician’s toolbox. They can cut wire, hold wires fast as you splice them, and twist out box knockouts. Needle-nose (long-nose) pliers can grasp and pull wire in tight spaces. These pliers can loop wire to fit around receptacle and switch screws. A large pair can also loosen and remove knockouts in metal outlet boxes. Diagonal-cutting and end-cutting pliers can cut wires close in tight spaces; end cutters (sometimes called nippers) also pull out staples easily. A multipurpose or combination wire stripper l is used to strip individual wires of insulation, cut wire, crimp connections, and quickly loop wire around screw terminals.
A cable ripper strips the plastic sheathing from Romex® cable without harming the insulation on the individual wires inside. Many pros use a utility knife to strip sheathing, but that takes practice and a light touch to avoid nicking the insulation of individual wires. To strip armored cable, use a Roto-Split® cable stripper; it’s vastly superior to the old method of using a hacksaw and diagonal cutters.
Other useful tools
No two electrician’s tool belts look the same, but most contain a basic kit including tape measure, flashlight, small level, hammer, Speed Square®, and large felt-tipped marker. In the course of a wiring job, you may need several sizes of slot-head and Phillips-head screwdrivers or nut drivers. Jab saws (drywall saws) are also mighty handy in remodel wiring.
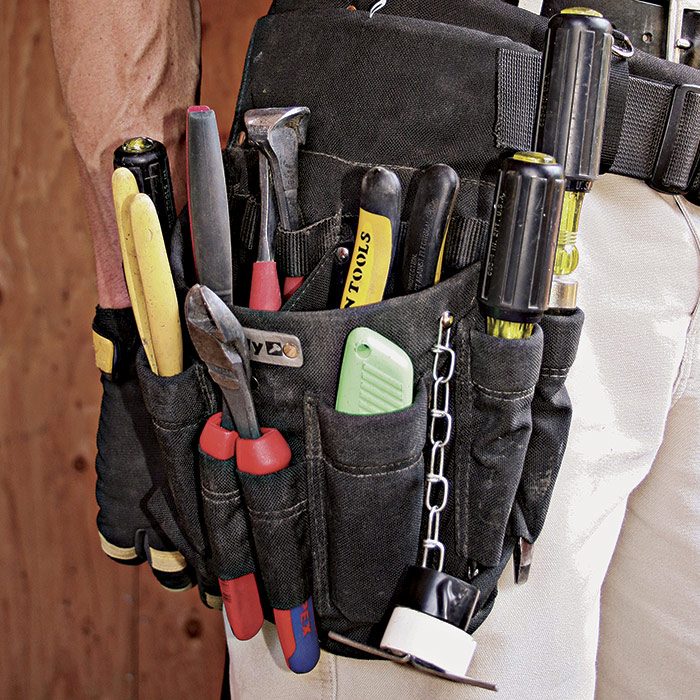
If you’re wiring a whole house, rent a wire reel, a rotating dispenser that enables you to pull cable easily to distant points. Reels hold 250 ft. of cable.
Adequate lighting is essential to both job safety and accuracy. If a site is too dark to see what color wires you’re working with, your chances of making a wrong connection increase. LED headlamps are fantastic tools.
Sturdy stepladders are a must. In the electrical industry, only fiberglass step-ladders are Occupational Safety and Health Administration (OSHA)-compliant because they’re nonconductive. Wood ladders are usually nonconductive when dry, but if they get rained on, wood ladders can conduct electricity.
Power Tools
Buy power tools that are appropriate to your strength and to the task at hand. More powerful tools tend to be heavier and harder to manage; and for wiring, they’re often overkill. If possible, test-drive a friend’s power tool before buying your own.
Drills
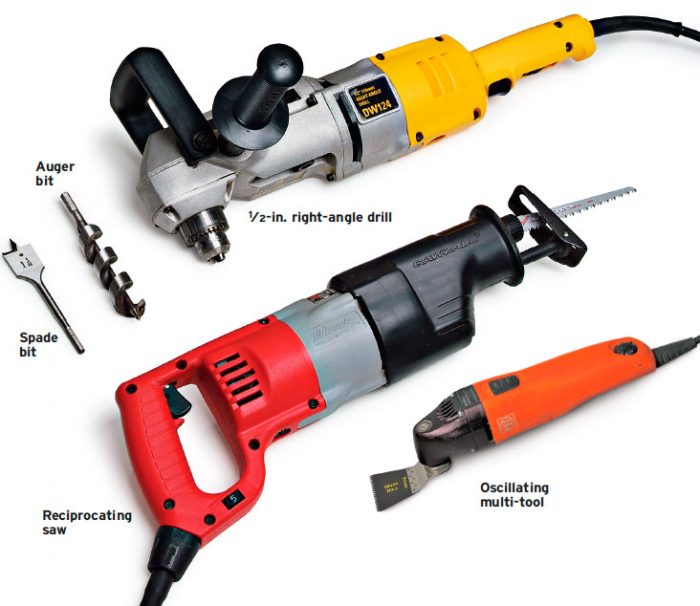
A 1⁄2-in. right-angle drill allows you to fit the drill head between studs or joists and drill perpendicular to the face of the lumber. The pros use drills with 1⁄2-in. chucks, such as the Milwaukee® Hole-Hawg, the DeWalt® stud and joist drill, and so on. They’re very versatile tools. It’s not necessary to get a drill with a clutch; such tools tend to be very heavy and expensive—overkill even for wiring a house. A right-angle, D-handle drill and a sharp bit are more than adequate.
Drill bits
Spade bits cut quickly but tend to snap in harder wood. For this reason, most pros prefer auger bits. Self-feeding chipper bits drill doggedly through hard, old wood but won’t last long if they hit nails. A 7⁄8-in. Greenlee® Nail Eater® bit is a wise buy if your old lumber is nail infested; many companies offer similar nail-eater bits.
Reciprocating saw
A reciprocating saw with a demolition sawblade is indispensable for most remodeling jobs because it can handle the occasional nail without destroying the blade. You can use a recip saw to cut openings in plaster, but an oscillating tool with a Universal E-Cut® blade will cut plaster in a more controlled manner.
Oscillating multi-tools
Oscillating multi-tools, cordless or corded, are unequalled for cutting materials in place. Often called Fein® tools because that company has dominated the niche for decades, multi-tools have blades that vibrate rather than spin. Thanks to precise (3.2 degrees) oscillations per minute (OPM), they can make fine-kerf, controlled cuts where it would be hard or impossible for most cutting tools to fit.
Multi-tools are so good for creating box openings in finish surfaces that they have largely supplanted rotary cutters, long a favorite of drywaller installers. Typically, drywall installers hung sheets of drywall over installed outlet boxes, then used a rotary cutter to trim around the outside of a box. But it takes a seasoned hand, because rotary cutter bits tend to jump around and so can nick wire insulation. Oscillating multi-tools, in comparison, are easier to control.
Gone fishin’
Spring-steel fish tapes or fiberglass fish rods are used to run cable behind finish surfaces. A fish tape is invoked in almost every old wiring how-to book on the market. Today’s pros, however, swear by a pulling grip, also called a swivel kellum grip.
In many cases, however, it’s simplest to use a flex bit (flexible bit) to drill through the framing. When the bit emerges, a helper can attach the new cable to a small “fish hole” near the bit’s point. Then, using a swivel kellum to keep the new cable from getting twisted, put the drill in reverse and pull the bit (and cable) back through the holes it drilled. No fish tape required.
A 48-in. drill extension will increase the effective drilling length of a flex bit. Use an insulated steering guide to keep the flex bit from bowing excessively.
Cordless Tools
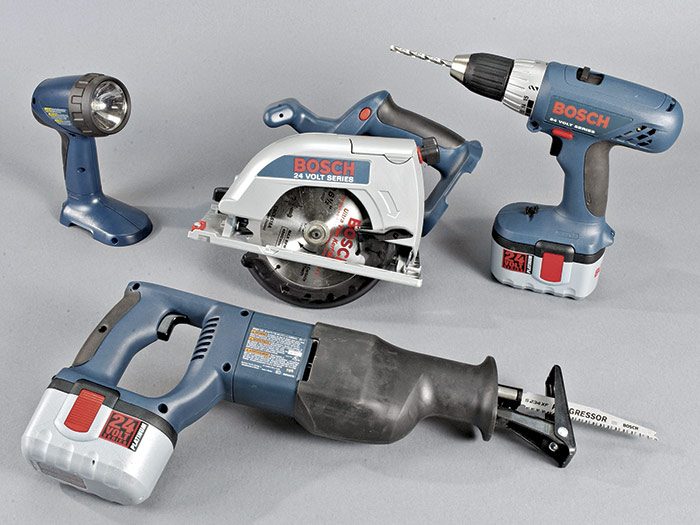
Cordless tools are particularly well suited to electrical work, which often takes place in confined spaces where tool cords can get hung up. If there’s no cord to accidentally cut through or extension cords to come apart, there’s also less risk of shock. Many times cordless tools are the only practical choice when you need to turn off the power or you’re working where outlets are scarce—or not yet energized. Today’s cordless tools are brawny enough to handle almost any situation an electrician might encounter, so the pros just grab ’em and go.
Things to consider
Buy a tool that fits your project’s scope, your skill level, and your budget. Research tools thoroughly online before you buy: You’ll spend wisely and, more to the point, you’ll learn about features you may not know existed. Pro tool reviews are especially helpful in this respect. Then hit the home centers and heft the tools. How long can you hold the tool aloft? Is the grip comfortable? Are there LED lights to help you see what you’re drilling or cutting? Is it easy to change bits or blades? Does the tool feel well balanced or lopsided?
Voltage is a rough measure of how much power a tool can deliver; most professional-grade cordless tools are 18v to 20v systems, through a 12v or 14.4v drill/driver would be fine for incidental tasks such as screwing outlet boxes to framing, mounting receptacles to boxes, or screwing on face plates. However, if you’re roughing in wiring and boring through studs, drilling into concrete, or doing an extensive rehab, go with 18v to 20v tools.
Amp-hours (Ah) indicate how much battery run-time the tool has: 2.0 Ah means that the battery can deliver 2 amps of current for 1 hour. If a tool draws 1 Ah from its 2.0 Ah battery pack, it can run for 2 hours before you need to switch batteries. Battery packs up to 4.0 Ah are widely available, but, again, more is not necessarily better. Cordless tools use lithium-ion (Li-ion) batteries, but battery platforms are not interchangeable—you can’t swap, say, a DeWalt battery into a Makita® drill. For this reason, most people stay with one brand as they add tools.
Brushless motors. Until recently most tool motors had an armature, a commutator, and carbon brushes. Brushed motors were cheap to assemble and didn’t need electronics. As the brushes ride against the commutator, however, they wear down and eventually need to be replaced. These days, better-quality cordless tools have brushless motors that are more efficient (less friction), have longer run times, are generally maintenance-free, and are typically more compact. They are definitely worth the money.
Combo kits. All cordless tool makers offer kits with some combination of a drill/driver, circular saw or reciprocating saw, two batteries, and a charger. Good-quality kits tend to offer considerable savings above buying tools individually, and you can swap batteries between the tools in the kit. Research tool kits carefully, however, because the quality of individual tools within a kit can vary greatly.
Excerpted from Wiring Complete, 3rd Edition (The Taunton Press, 2017) by Michael Litchfield and Michael McAlister
Available in the Taunton Store and at Amazon.com.

