FHB Logo Facebook LinkedIn Email Pinterest Twitter X Instagram Tiktok YouTube Plus Icon Close Icon Navigation Search Icon Navigation Search Icon Arrow Down Icon Video Guide Icon Article Guide Icon Modal Close Icon Guide Search Icon Skip to content
Subscribe
Log In
  • How-To
  • Design
  • Tools & Materials
  • Restoration
  • Videos
  • Blogs
  • Forum
  • Magazine
  • Members
  • FHB House
  • Podcast
Log In

Fine Homebuilding Project Guides

Wiring

Guide Home
  • Working with Electricity
  • Tools and Materials
  • Receptacles and Switches
  • Lights and Fans
  • Rough-In
  • Outdoor Wiring
  • Panels and Subpanels
How-To

Installing a Range Hood

Learn how to mount, vent, and wire the hood over a cooktop.

By Mike Litchfield, Michael McAlister
  • X
  • facebook
  • linkedin
  • pinterest
  • email
  • add to favorites Log in or Sign up to save your favorite articles
Safety Alert: Most hoods aren’t heavy but they’re unwieldy, so get help installing one.

Range hoods are typically screwed to the underside of a cabinet or mounted directly to a wall. A typical hood is mounted between 24 and 30 inches above the range, though it’s best to check the installation manual and your local building codes for specific requirements. The ducting that vents a hood should exit the house as directly as possible. As you plan your duct route, use a stud finder to locate studs in the wall behind the stove or through ceiling joists above. The duct run should exit through the siding or the roofing. To locate the hole for the ductwork, level the hood and center it over the range.

Mounting and Ducting a Range Hood

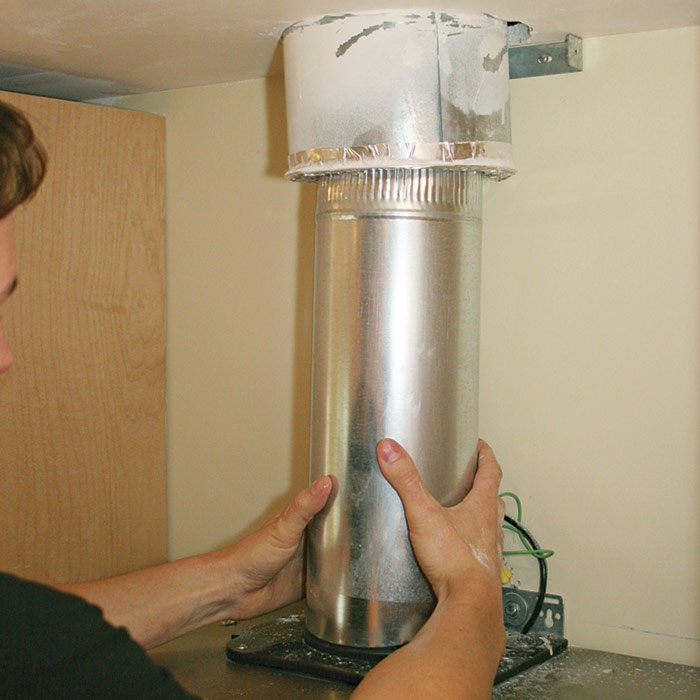
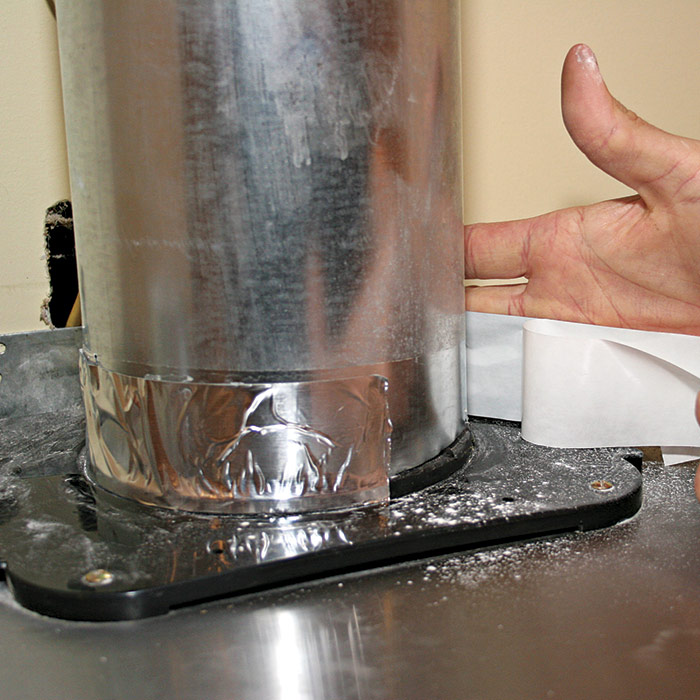
Cut a hole in the wall or ceiling and insert a thimble—a specialized fitting that creates an opening through a wall or ceiling into which the duct fits. If there already is a thimble in place, insert the duct from the range hood up into the thimble 3 in. to 4 in. above its final position 1. Friction should hold the duct in place.

PRO TIP: A well-sized hood should extend about 3 in. beyond the range on both ends.

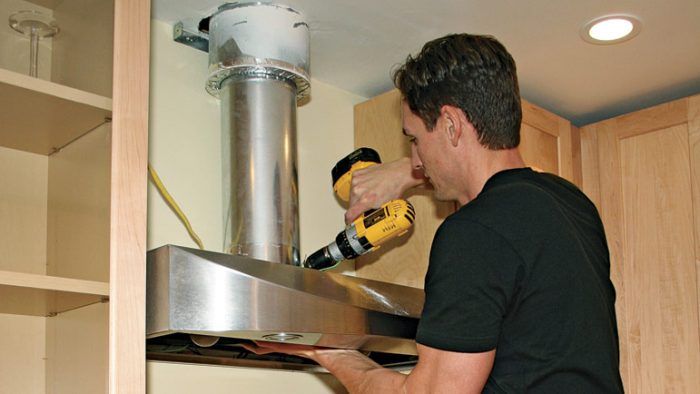
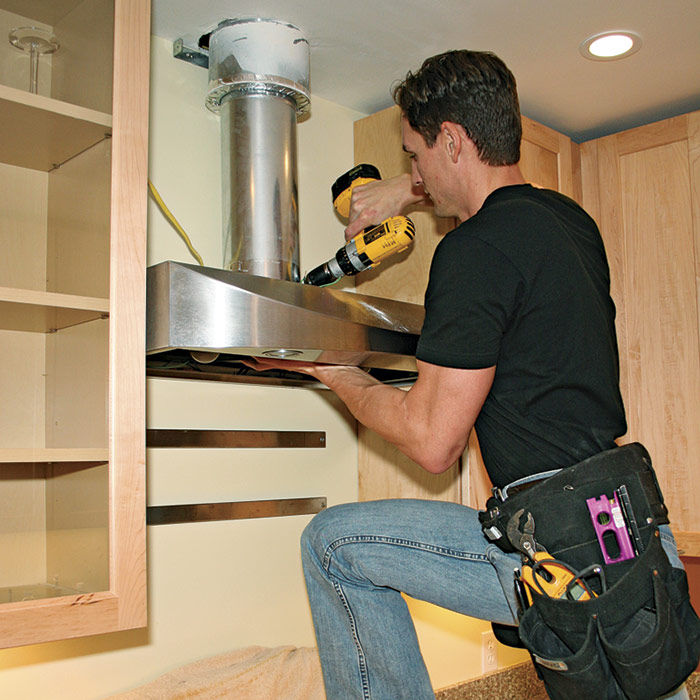
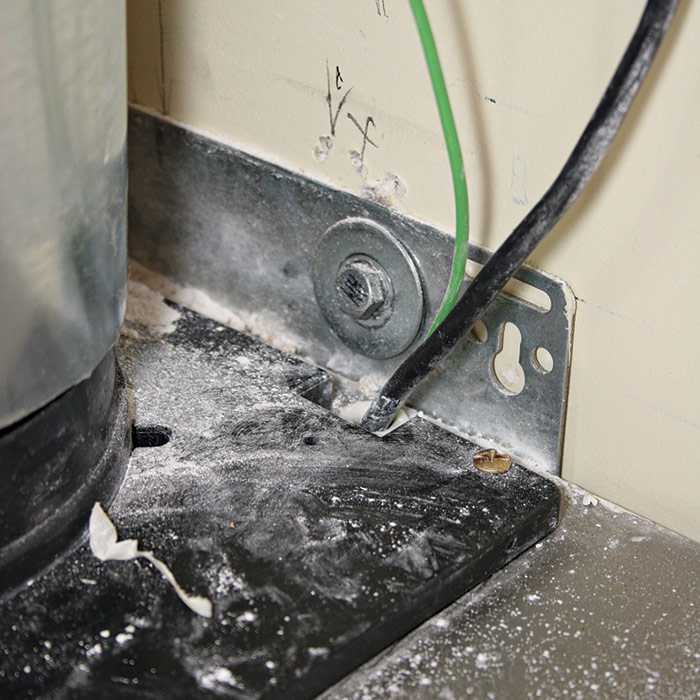
Level the hood, center it over the range, and bolt it to the wall 2. Mount the hood in at least two points: If the studs behind the hood are 16 in. o.c., you may have to bolt one side of the hood to a stud 3 and secure the other side of the hood with a toggle bolt. After the hood is mounted, slide the duct down over the takeoff atop the hood 4. Tape all of the joints with self-adhering metal tape.

1  Slide the duct into the thimble.
1) Slide the duct into the thimble.

2  Level, center, and mount the hood.
2) Level, center, and mount the hood.

3  Bolt at least one side of the hood to a stud.
3) Bolt at least one side of the hood to a stud.

4  Lower the duct over the hood takeoff and seal the joint with metal tape.
4) Lower the duct over the hood takeoff and seal the joint with metal tape.


Wiring a Range Hood

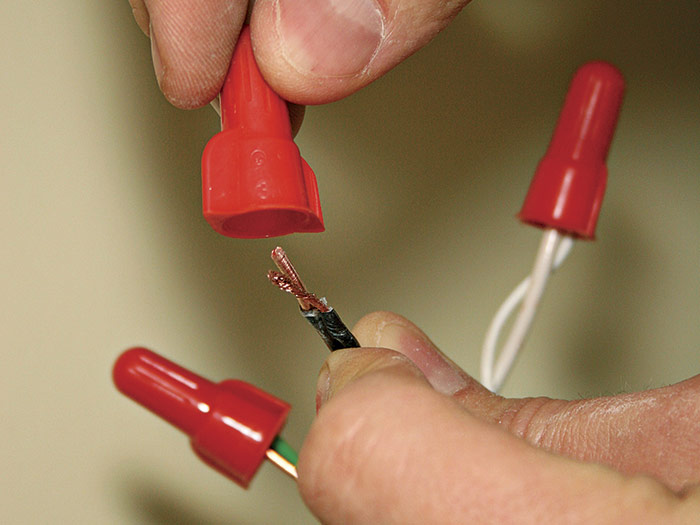
Many range hoods have discrete electrical junction boxes with knockouts into which you insert cable clamps and cables. In the example shown here, the shroud that encloses the duct doubles as a junction box. The lead wires from the fan and light emerge through a bushing on the top of the hood and attach to wires in a Romex supply cable, which emerges from the wall cavity.

Strip and splice like wire pairs using wire connectors. Splice the ground wires first—be sure there’s a grounding pigtail to the hood itself—then neutral wires, and then hot wires 1.

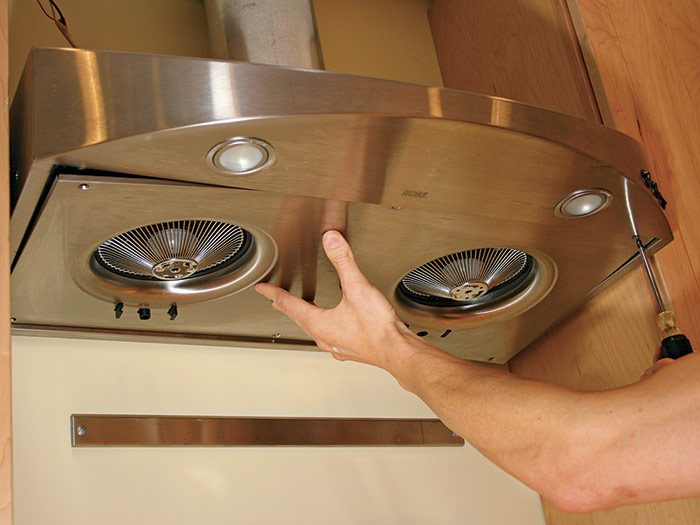
To minimize weight and avoid marring shiny trim pieces, many pros install the fan filters, trim, and other trappings after the hood shell is mounted. Most of the parts simply snap into place—just follow the instructions provided 2. Then, if your hood has a bottom casing, screw it into place 3. Finally, fit the shroud over the ducting and the wire connection—they’re usually held in place with one pair of screws at the top and another pair at the bottom 4.

1  Splice the grounds, then neutrals, and then hot wires.
1) Splice the grounds, then neutrals, and then hot wires.

2  Snap on the fans, filters, and trim pieces.
2) Snap on the fans, filters, and trim pieces.

3  Attach the bottom casing onto the hood.
3) Attach the bottom casing onto the hood.

4  Use screws to secure the shroud in place.
4) Use screws to secure the shroud in place.


Wiring Complete, 3rd Edition

Excerpted from Wiring Complete, 3rd Edition (The Taunton Press, 2017) by Michael Litchfield and Michael McAlister

Available in the Taunton Store and at Amazon.com.

Previous: Installing a Bathroom Fan

Guide

Wiring

Chapter

Lights and Fans

Sign up for eletters today and get the latest how-to from Fine Homebuilding, plus special offers.

Signing you up...

This site is protected by reCAPTCHA and the Google Privacy Policy and Terms of Service apply.
See all newsletters
See all newsletters

Log in or create an account to post a comment.

Sign up Log in

Become a member and get full access to FineHomebuilding.com

Wiring

Wiring

Trusted, code-compliant guidance from the pros for working safely on any wiring project

View Project Guide

View All Project Guides »

Become a member and get unlimited site access, including the Wiring Project Guide.

Start Free Trial

Working with Electricity
  • Basics
  • Safety
  • Troubleshooting and Upgrades
Tools and Materials
  • Electrical Tools
  • Electrical Boxes
  • Cables and Wires
Receptacles and Switches
  • Materials
  • Wiring Receptacles
  • Wiring Switches
Lights and Fans
  • Lighting Design
  • Installing Lights
  • Fans
Rough-In
  • Planning
  • Installing Electrical Boxes
  • Running Cable
  • Retrofit Work
  • Making Connections in Boxes
  • Electrical Conduit
Outdoor Wiring
  • Basics
  • Outlets
  • Installing Lighting
Panels and Subpanels
  • Understanding Panels
  • Circuits
  • Installing a Subpanel

Fine Home Building

Newsletter Sign-up

  • Fine Homebuilding

    Home building tips, offers, and expert advice in your inbox.

  • Green Building Advisor

    Building science and energy efficiency advice, plus special offers, in your inbox.

  • Old House Journal

    Repair, renovation, and restoration tips, plus special offers, in your inbox.

Signing you up...

This site is protected by reCAPTCHA and the Google Privacy Policy and Terms of Service apply.
See all newsletters

Follow

  • Fine Homebuilding

    Dig into cutting-edge approaches and decades of proven solutions with total access to our experts and tradespeople.

    Start Free Trial Now
    • Facebook
    • Instagram
    • X
    • LinkedIn
  • GBA Prime

    Get instant access to the latest developments in green building, research, and reports from the field.

    Start Free Trial Now
    • Facebook
    • YouTube
  • Old House Journal

    Learn how to restore, repair, update, and decorate your home.

    Subscribe Now
    • Facebook
    • Instagram
    • X

Membership & Magazine

  • Online Archive
  • Start Free Trial
  • Magazine Subscription
  • Magazine Renewal
  • Gift a Subscription
  • Customer Support
  • Privacy Preferences
  • About
  • Contact
  • Advertise
  • Careers
  • Terms of Use
  • Site Map
  • Do not sell or share my information
  • Privacy Policy
  • Accessibility
  • California Privacy Rights

© 2025 Active Interest Media. All rights reserved.

Fine Homebuilding receives a commission for items purchased through links on this site, including Amazon Associates and other affiliate advertising programs.

  • Home Group
  • Antique Trader
  • Arts & Crafts Homes
  • Bank Note Reporter
  • Cabin Life
  • Cuisine at Home
  • Fine Gardening
  • Fine Woodworking
  • Green Building Advisor
  • Garden Gate
  • Horticulture
  • Keep Craft Alive
  • Log Home Living
  • Military Trader/Vehicles
  • Numismatic News
  • Numismaster
  • Old Cars Weekly
  • Old House Journal
  • Period Homes
  • Popular Woodworking
  • Script
  • ShopNotes
  • Sports Collectors Digest
  • Threads
  • Timber Home Living
  • Traditional Building
  • Woodsmith
  • World Coin News
  • Writer's Digest
Active Interest Media logo
X
X
This is a dialog window which overlays the main content of the page. The modal window is a 'site map' of the most critical areas of the site. Pressing the Escape (ESC) button will close the modal and bring you back to where you were on the page.

Main Menu

  • How-To
  • Design
  • Tools & Materials
  • Video
  • Blogs
  • Forum
  • Project Guides
  • Reader Projects
  • Magazine
  • Members
  • FHB House

Podcasts

  • FHB Podcast
  • ProTalk

Webinars

  • Upcoming and On-Demand

Podcasts

  • FHB Podcast
  • ProTalk

Webinars

  • Upcoming and On-Demand

Popular Topics

  • Kitchens
  • Business
  • Bedrooms
  • Roofs
  • Architecture and Design
  • Green Building
  • Decks
  • Framing
  • Safety
  • Remodeling
  • Bathrooms
  • Windows
  • Tilework
  • Ceilings
  • HVAC

Magazine

  • Current Issue
  • Past Issues
  • Magazine Index
  • Subscribe
  • Online Archive
  • Author Guidelines

All Access

  • Member Home
  • Start Free Trial
  • Gift Membership

Online Learning

  • Courses
  • Project Guides
  • Reader Projects
  • Podcast

More

  • FHB Ambassadors
  • FHB House
  • Customer Support

Account

  • Log In
  • Join

Newsletter

Get home building tips, offers, and expert advice in your inbox

Signing you up...

This site is protected by reCAPTCHA and the Google Privacy Policy and Terms of Service apply.
See all newsletters
See all newsletters

Follow

  • X
  • YouTube
  • instagram
  • facebook
  • pinterest
  • Tiktok

Join All Access

Become a member and get instant access to thousands of videos, how-tos, tool reviews, and design features.

Start Your Free Trial

Subscribe

FHB Magazine

Start your subscription today and save up to 81%

Subscribe

We hope you’ve enjoyed your free articles. To keep reading, become a member today.

Get complete site access to expert advice, how-to videos, Code Check, and more, plus the print magazine.

Start your FREE trial

Already a member? Log in

Privacy Policy Update

We use cookies, pixels, script and other tracking technologies to analyze and improve our service, to improve and personalize content, and for advertising to you. We also share information about your use of our site with third-party social media, advertising and analytics partners. You can view our Privacy Policy here and our Terms of Use here.

Cookies

Analytics

These cookies help us track site metrics to improve our sites and provide a better user experience.

Advertising/Social Media

These cookies are used to serve advertisements aligned with your interests.

Essential

These cookies are required to provide basic functions like page navigation and access to secure areas of the website.

Delete My Data

Delete all cookies and associated data