FHB Logo Facebook LinkedIn Email Pinterest Twitter X Instagram Tiktok YouTube Plus Icon Close Icon Navigation Search Icon Navigation Search Icon Arrow Down Icon Video Guide Icon Article Guide Icon Modal Close Icon Guide Search Icon Skip to content
Subscribe
Log In
  • How-To
  • Design
  • Tools & Materials
  • Restoration
  • Videos
  • Blogs
  • Forum
  • Magazine
  • Members
  • FHB House
  • Podcast
Log In

Fine Homebuilding Project Guides

Wiring

Guide Home
  • Working with Electricity
  • Tools and Materials
  • Receptacles and Switches
  • Lights and Fans
  • Rough-In
  • Outdoor Wiring
  • Panels and Subpanels
How-To

Installing Recessed Lighting

Locate and cut the hole, wire the recessed fixture, and then secure the can.

By Mike Litchfield, Michael McAlister
  • X
  • facebook
  • linkedin
  • pinterest
  • email
  • add to favorites Log in or Sign up to save your favorite articles

As the name implies, recessed lighting fixtures fit into the space above the ceiling. Recessed fixtures produce a strong downward cone of light and are frequently used to provide general illumination, to illuminate work areas such as in kitchens, or to accent art, tables, or other features.

In new construction, recessed fixtures come with steel frames and bars that fasten directly to the ceiling framing. In remodel installations, as shown in the drawing below, recessed fixtures are secured to the drywall or other wallboard via mounting clips. With the advent of LED light sources, recessed fixtures come in a wider variety of sizes and outputs and can fit in even the tightest of spaces.

Recessed Light Fixture

Recessed Light Fixture

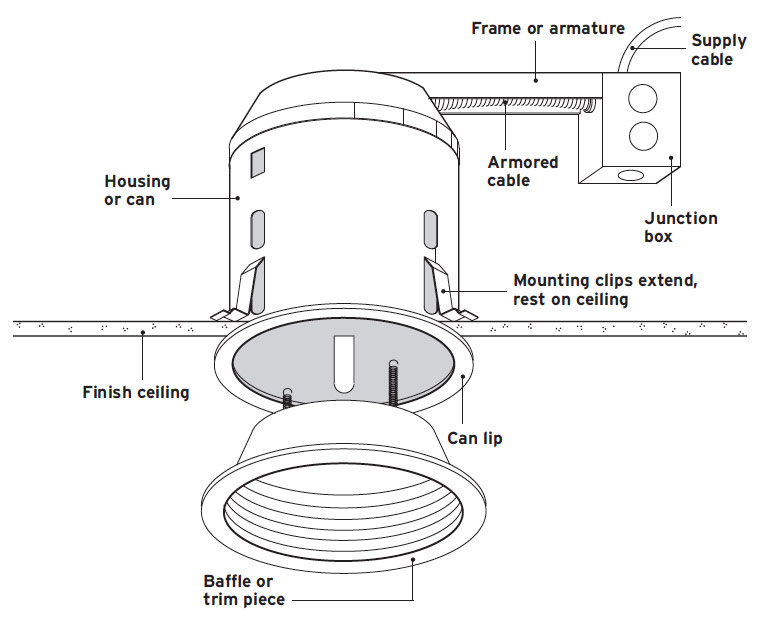
Recessed light fixtures vary. The low-voltage model shown in the photo sequence below has a transformer at the end of its assembly to reduce line voltage. This drawing shows a model that runs on line voltage (120v), so it has no transformer. If the unit is watertight, it will have additional trim or lens elements. Closely follow the installation instructions provided with your fixture.


Retrofitting recessed lighting

In retrofit installations, the supply cable to the recessed lighting unit typically comes from an existing ceiling box or nearby switch box. The supply cable feeds to an integral junction box on the fixture. Finding the nearest power source and fishing the wires often means thinking spatially: The nearest power source may be in another room or on another floor. If the recessed fixture is a low-voltage unit, it will come with a transformer, which reduces the 120v current of the supply cable.


Cutting a Ceiling Hole for Recessed Lighting

There’s no absolute rule on where to place a recessed light, but in a small space, such as a shower alcove, a fixture centered in one direction or another will look best 1. In addition, you may want to use a stud finder to avoid hitting ceiling joists above.

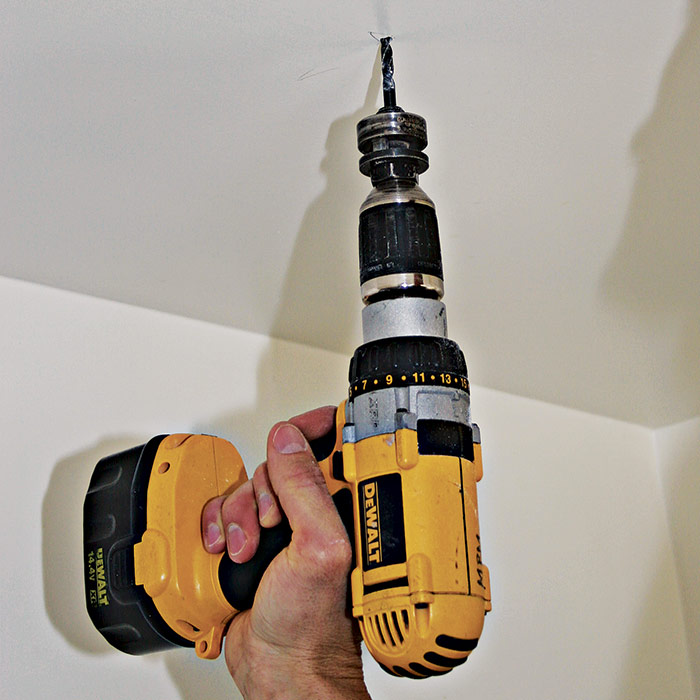
Drill a pilot hole to see what’s above 2 and to make sure there’s room for the can. Make the hole small because if there’s an obstruction above it, you’ll need to patch it. After drilling the hole, you can insert a 4-in. piece of bent wire and rotate it to see if it hits a ceiling joist.

1 Measure to center the light fixture. A single recessed fixture centered in one direction or another usually looks good.
1) Measure to center the light fixture. A single recessed fixture centered in one direction or another usually looks good.

2 Drill a pilot hole.
2) Drill a pilot hole.

3  Keep the drill bit aligned vertically.
3) Keep the drill bit aligned vertically.


Safety Alert

To avoid hitting pipes or cables when drilling into a ceiling, use a bit that’s 1 in. long—just long enough to drill through the plaster or drywall. Use a cordless drill to further reduce the chances of shocks.


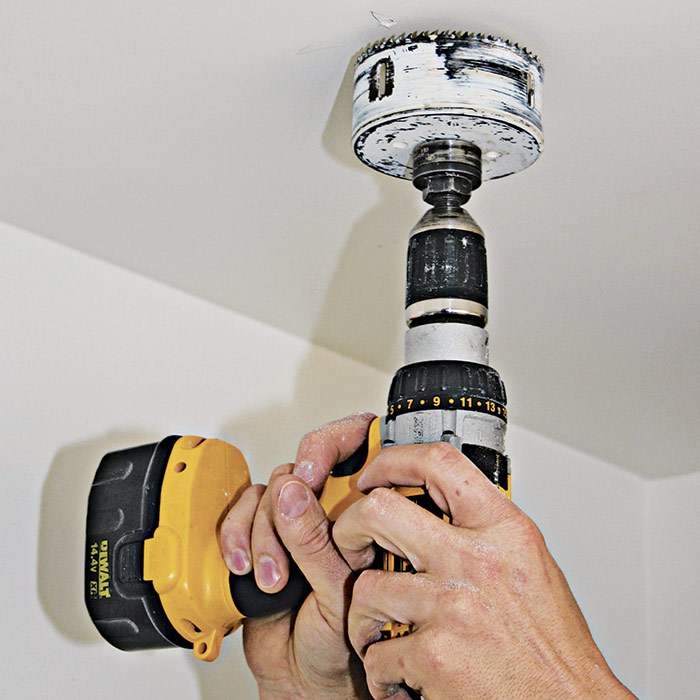
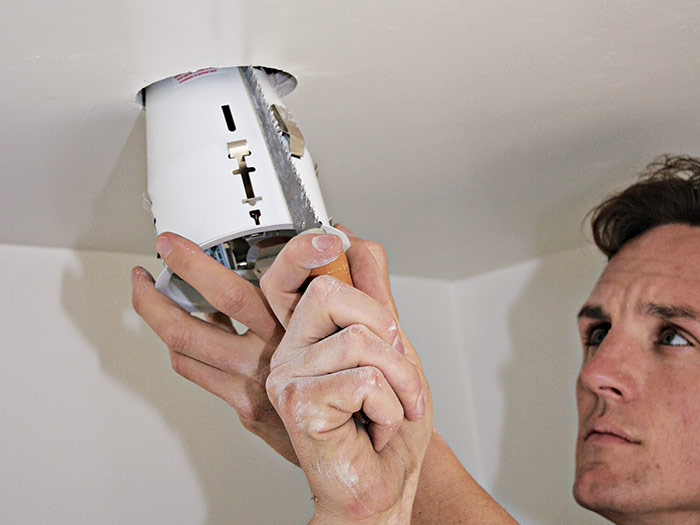
Also, use the small pilot hole to keep the centering bit of a hole saw from drifting. Keep the drill vertical, and the circle of the sawblade parallel to the ceiling 3. There are special carbide hole saws for drilling through plaster. A bimetal hole saw will also cut through drywall, but plaster will quickly dull the blade. Wear goggles.

If the hole saw is the right size for the can, you won’t need to enlarge it. But for the light shown here, the saw was a shade too small, so the installer used a jab saw to enlarge the hole slightly 4. In a pinch, you can also use just a jab saw to cut the hole.

enlarge the hole as needed
4) If the can is too snug—or doesn’t fit at all—enlarge the hole as needed.

5  Test-fit the fixture. Wires are housed in the (gray) junction box.
5) Test-fit the fixture. Wires are housed in the (gray) junction box.

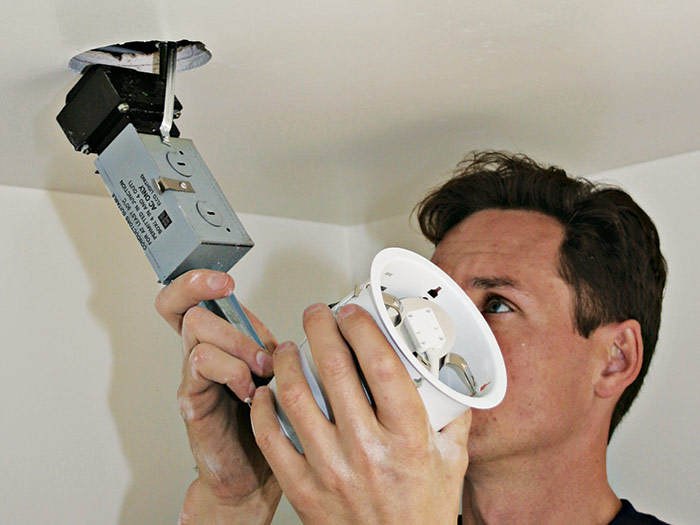
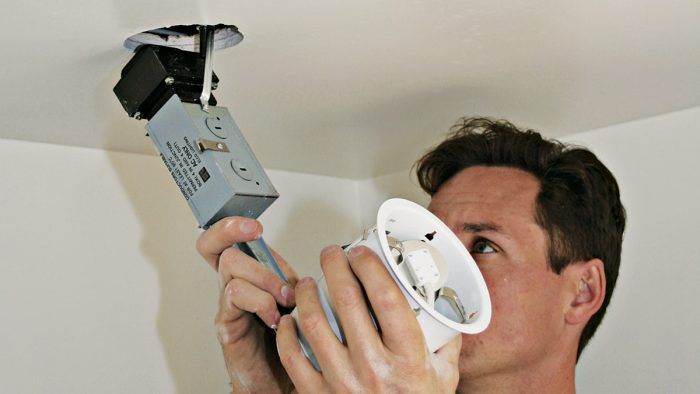
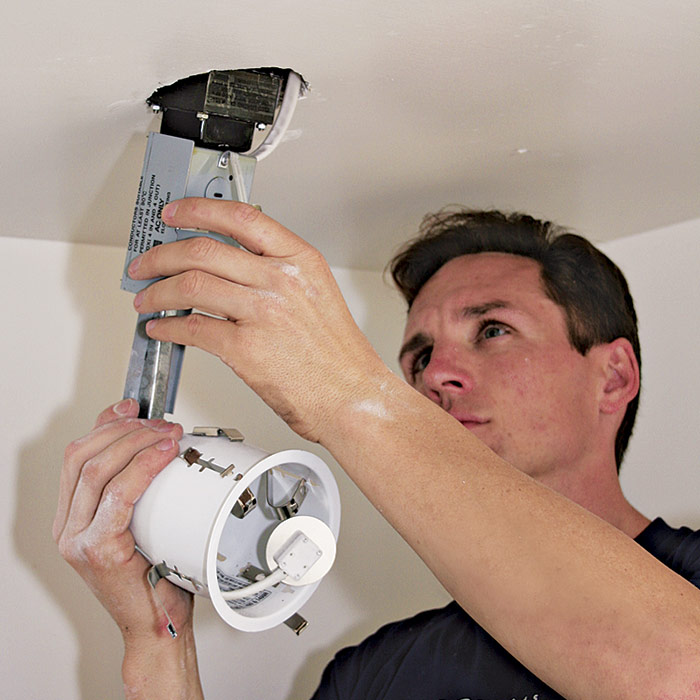
Test-fit the unit 5. Although you want the can to fit snugly, the unit’s junction box and transformer also need to fit through. The black box about to enter the hole is the transformer.

Wiring a Recessed Fixture

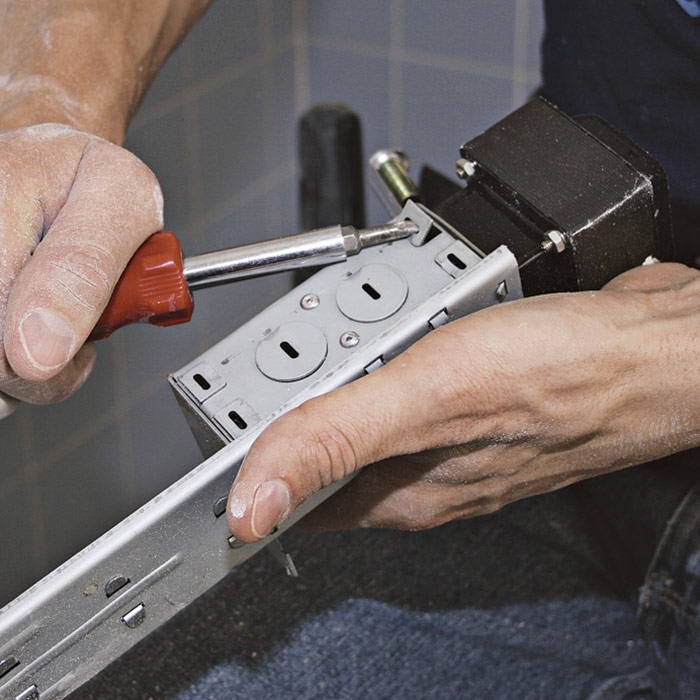
To wire a recessed fixture, remove a Romex knockout from the unit’s integral junction box 1. Inside the knockout, there is a spring-loaded strain-relief clamp that will grip the incoming cable, so you don’t need to insert a Romex connector. Run a length of (unconnected) Romex cable from the nearest power source and feed it into the knockout just removed. Of course, the cable must not be energized when you are working on it. (To wire the box with AC or MC cable, remove one of the circular 1⁄2-in. knockouts and insert an appropriate connector.)

1 Remove a knockout from the junction box.
1) Remove a knockout from the junction box.

2 Remove the cable sheathing, then splice fixture leads to supply wires.
2) Remove the cable sheathing, then splice fixture leads to supply wires.


PRO TIP: If you have access to the space above a ceiling fixture, staple the Romex to a joist, leaving at least 12 in. of free cable so you can push the fixture components into the hole. A cable that’s too short may prevent this.


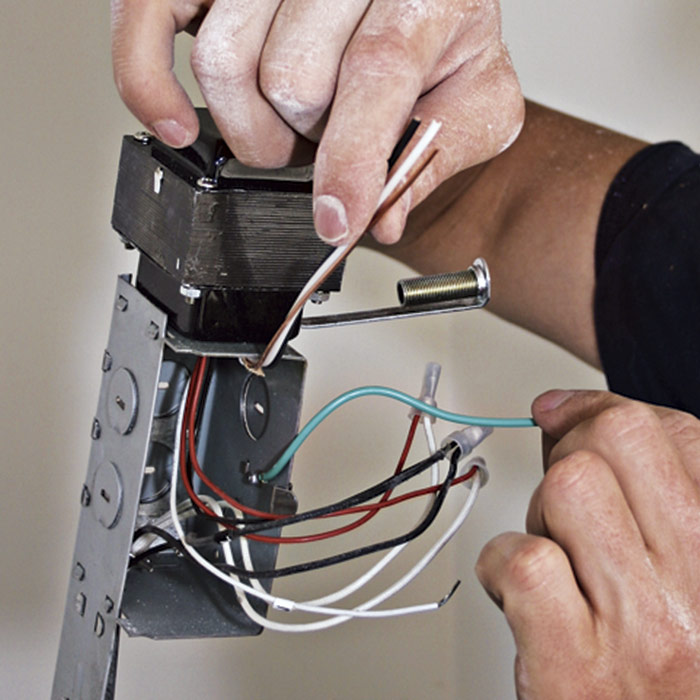
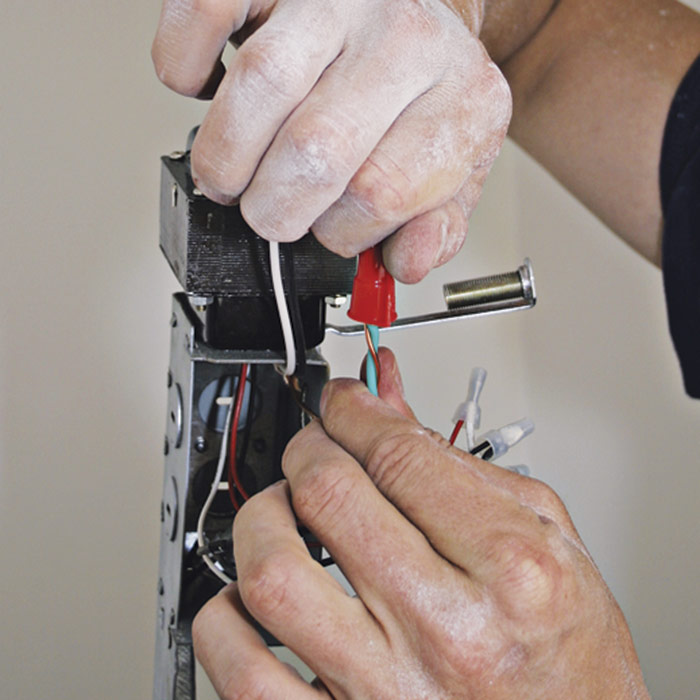
Inside the fixture’s junction box will be two sets of wires that were spliced at the factory. They connect the secondary wires that run from the transformer to the socket. (At the transformer, the current is reduced from 120v to 12v, so polarity is no longer an issue.) There are also three unconnected fixture leads in the box, to which you’ll splice the supply wires 2.

Using wire connectors, connect the incoming ground wire to the green fixture lead, the incoming neutral to the white lead, and the hot wire to the black fixture lead 3.

3  Always connect the ground wires first.
3) Always connect the ground wires first.

4  Tuck the spliced wires into the box.
4) Tuck the spliced wires into the box.

5  Close the junction box cover, being careful not to pinch wires.
5) Close the junction box cover, being careful not to pinch wires.

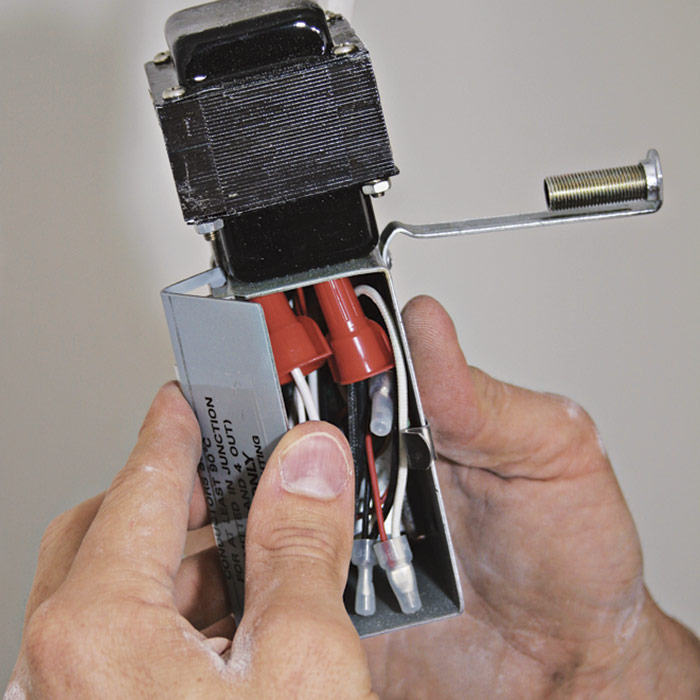
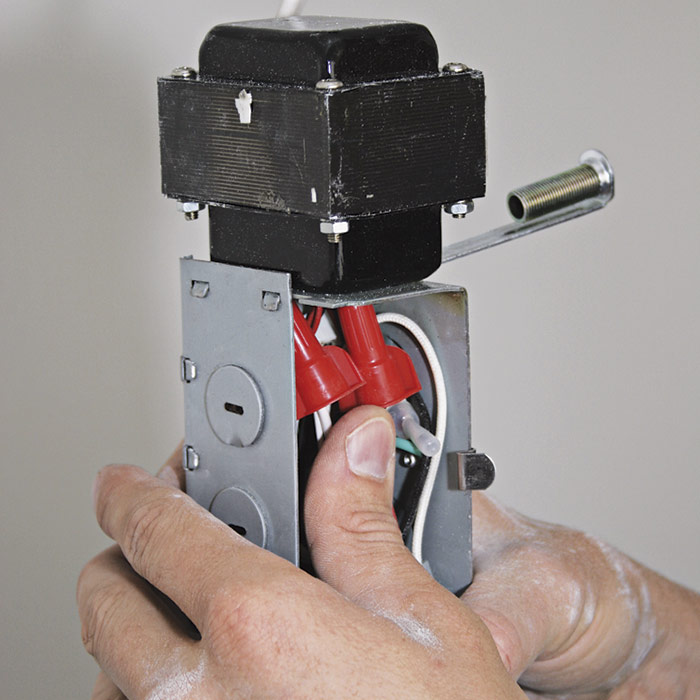
Tuck the spliced wire groups into the fixture junction box 4. At the right of the junction box is a piece of threaded rod that can be adjusted to support the transformer at the correct height. Snap the junction box cover 5 closed. As with other outlet boxes, code determines the number of wires you can splice in a fixture junction box, based on the cubic inches in the box.

Securing the Can

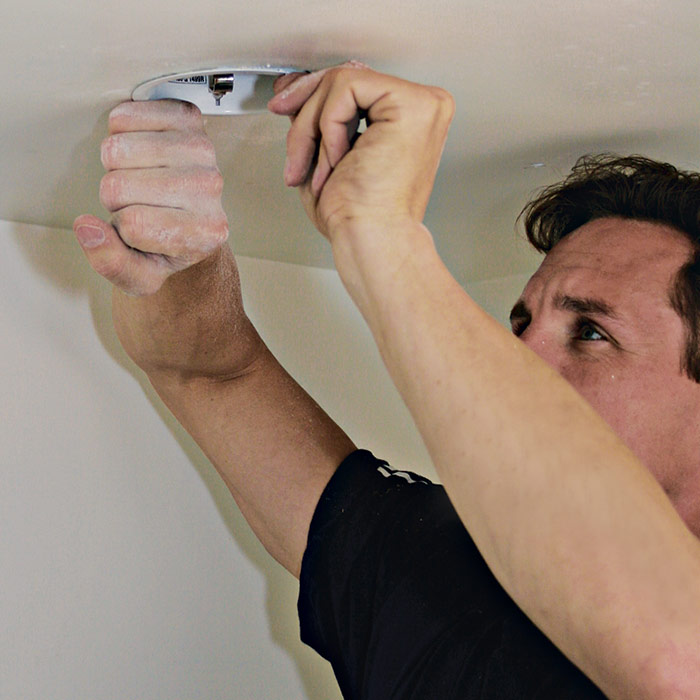
Once the recessed lighting fixture has been wired, push the fixture into the hole, being careful not to bind the Romex cable as you do so 1. If the fit is snug, use the side of your fist to seat the lip of the fixture flush to the ceiling 2.

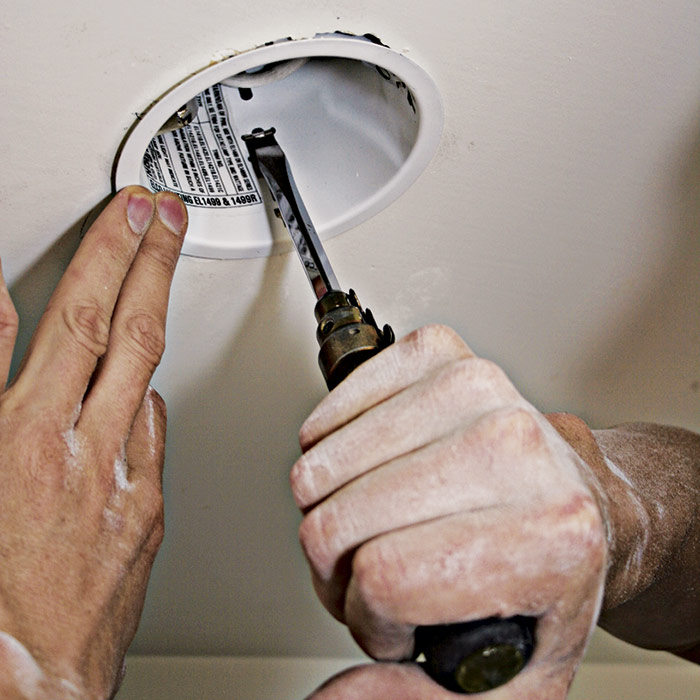
Use a screwdriver to push up the spring-loaded clips that pivot and press against the back face of the drywall to hold the fixture snugly in place 3. To remove the fixture later, pop out the clips.

1 Feed the cable and the now-wired fixture into the hole.
1) Feed the cable and the now-wired fixture into the hole.

2 If the fit is tight, use your fist to seat the lip of the fixture flush to the ceiling.
2) If the fit is tight, use your fist to seat the lip of the fixture flush to the ceiling.

3 Use a screwdriver to engage the spring-loaded clips that secure the fixture.
3) Use a screwdriver to engage the spring-loaded clips that secure the fixture.

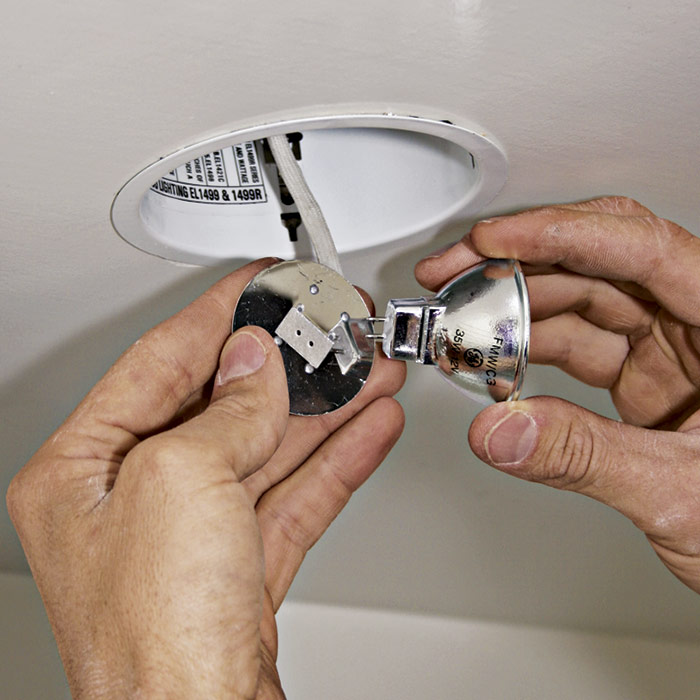
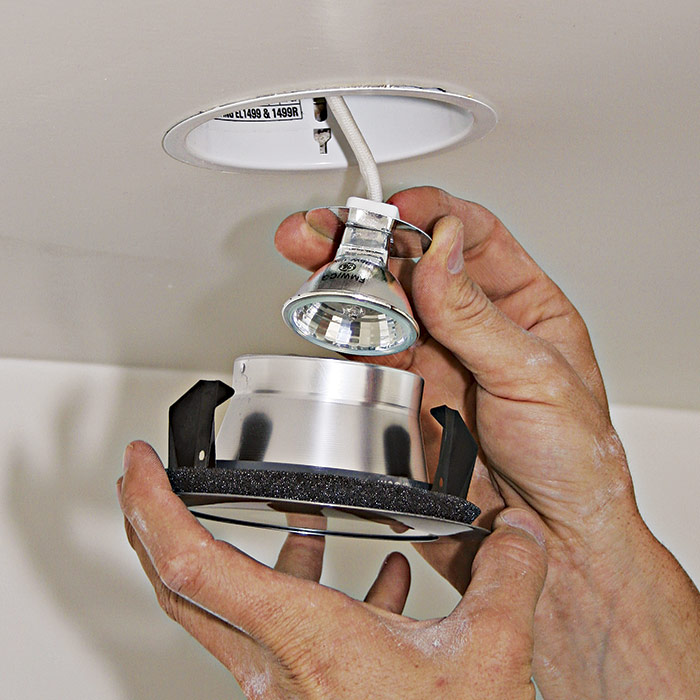
Insert the bulb (the fixture here uses an MR-16 bi-pin halogen bulb) into the fixture socket 4. Here, the installer is gripping the lamp’s rim, to keep the sides of the lamp clean. Skin oils can cause hot spots on the very hot-running lamps, shortening the life of the bulb. The lamp pins should seat securely. Install the trim piece—this one has a gasket. Snap in the lamp and socket, and push the assembly up into the can. The three arms on the side of the assembly will grip the inside of the can 5.

4 Insert the bulb with steady pressure till all pins seat.
4) Insert the bulb with steady pressure till all pins seat.

5  Install the trim assembly. The black ring is a moisture-proof gasket.
5) Install the trim assembly. The black ring is a moisture-proof gasket.


PRO TIP: The pros apply a tiny dab of anti-oxidant paste to the lamp pins before seating them in a fixture socket to prevent oxidation. A good practice, but not imperative.


Wiring Complete, 3rd Edition

Excerpted from Wiring Complete, 3rd Edition (The Taunton Press, 2017) by Michael Litchfield and Michael McAlister

Available in the Taunton Store and at Amazon.com.

Previous: Installing a Sconce Light Next: Recessed Can Lights Can Leak Air

Guide

Wiring

Chapter

Lights and Fans

Sign up for eletters today and get the latest how-to from Fine Homebuilding, plus special offers.

Signing you up...

This site is protected by reCAPTCHA and the Google Privacy Policy and Terms of Service apply.
See all newsletters
See all newsletters

Log in or create an account to post a comment.

Sign up Log in

Become a member and get full access to FineHomebuilding.com

Wiring

Wiring

Trusted, code-compliant guidance from the pros for working safely on any wiring project

View Project Guide

View All Project Guides »

Become a member and get unlimited site access, including the Wiring Project Guide.

Start Free Trial

Working with Electricity
  • Basics
  • Safety
  • Troubleshooting and Upgrades
Tools and Materials
  • Electrical Tools
  • Electrical Boxes
  • Cables and Wires
Receptacles and Switches
  • Materials
  • Wiring Receptacles
  • Wiring Switches
Lights and Fans
  • Lighting Design
  • Installing Lights
  • Fans
Rough-In
  • Planning
  • Installing Electrical Boxes
  • Running Cable
  • Retrofit Work
  • Making Connections in Boxes
  • Electrical Conduit
Outdoor Wiring
  • Basics
  • Outlets
  • Installing Lighting
Panels and Subpanels
  • Understanding Panels
  • Circuits
  • Installing a Subpanel

Fine Home Building

Newsletter Sign-up

  • Fine Homebuilding

    Home building tips, offers, and expert advice in your inbox.

  • Green Building Advisor

    Building science and energy efficiency advice, plus special offers, in your inbox.

  • Old House Journal

    Repair, renovation, and restoration tips, plus special offers, in your inbox.

Signing you up...

This site is protected by reCAPTCHA and the Google Privacy Policy and Terms of Service apply.
See all newsletters

Follow

  • Fine Homebuilding

    Dig into cutting-edge approaches and decades of proven solutions with total access to our experts and tradespeople.

    Start Free Trial Now
    • Facebook
    • Instagram
    • X
    • LinkedIn
  • GBA Prime

    Get instant access to the latest developments in green building, research, and reports from the field.

    Start Free Trial Now
    • Facebook
    • YouTube
  • Old House Journal

    Learn how to restore, repair, update, and decorate your home.

    Subscribe Now
    • Facebook
    • Instagram
    • X

Membership & Magazine

  • Online Archive
  • Start Free Trial
  • Magazine Subscription
  • Magazine Renewal
  • Gift a Subscription
  • Customer Support
  • Privacy Preferences
  • About
  • Contact
  • Advertise
  • Careers
  • Terms of Use
  • Site Map
  • Do not sell or share my information
  • Privacy Policy
  • Accessibility
  • California Privacy Rights

© 2025 Active Interest Media. All rights reserved.

Fine Homebuilding receives a commission for items purchased through links on this site, including Amazon Associates and other affiliate advertising programs.

  • Home Group
  • Antique Trader
  • Arts & Crafts Homes
  • Bank Note Reporter
  • Cabin Life
  • Cuisine at Home
  • Fine Gardening
  • Fine Woodworking
  • Green Building Advisor
  • Garden Gate
  • Horticulture
  • Keep Craft Alive
  • Log Home Living
  • Military Trader/Vehicles
  • Numismatic News
  • Numismaster
  • Old Cars Weekly
  • Old House Journal
  • Period Homes
  • Popular Woodworking
  • Script
  • ShopNotes
  • Sports Collectors Digest
  • Threads
  • Timber Home Living
  • Traditional Building
  • Woodsmith
  • World Coin News
  • Writer's Digest
Active Interest Media logo
X
X
This is a dialog window which overlays the main content of the page. The modal window is a 'site map' of the most critical areas of the site. Pressing the Escape (ESC) button will close the modal and bring you back to where you were on the page.

Main Menu

  • How-To
  • Design
  • Tools & Materials
  • Video
  • Blogs
  • Forum
  • Project Guides
  • Reader Projects
  • Magazine
  • Members
  • FHB House

Podcasts

  • FHB Podcast
  • ProTalk

Webinars

  • Upcoming and On-Demand

Podcasts

  • FHB Podcast
  • ProTalk

Webinars

  • Upcoming and On-Demand

Popular Topics

  • Kitchens
  • Business
  • Bedrooms
  • Roofs
  • Architecture and Design
  • Green Building
  • Decks
  • Framing
  • Safety
  • Remodeling
  • Bathrooms
  • Windows
  • Tilework
  • Ceilings
  • HVAC

Magazine

  • Current Issue
  • Past Issues
  • Magazine Index
  • Subscribe
  • Online Archive
  • Author Guidelines

All Access

  • Member Home
  • Start Free Trial
  • Gift Membership

Online Learning

  • Courses
  • Project Guides
  • Reader Projects
  • Podcast

More

  • FHB Ambassadors
  • FHB House
  • Customer Support

Account

  • Log In
  • Join

Newsletter

Get home building tips, offers, and expert advice in your inbox

Signing you up...

This site is protected by reCAPTCHA and the Google Privacy Policy and Terms of Service apply.
See all newsletters
See all newsletters

Follow

  • X
  • YouTube
  • instagram
  • facebook
  • pinterest
  • Tiktok

Join All Access

Become a member and get instant access to thousands of videos, how-tos, tool reviews, and design features.

Start Your Free Trial

Subscribe

FHB Magazine

Start your subscription today and save up to 70%

Subscribe

We hope you’ve enjoyed your free articles. To keep reading, become a member today.

Get complete site access to expert advice, how-to videos, Code Check, and more, plus the print magazine.

Start your FREE trial

Already a member? Log in

Privacy Policy Update

We use cookies, pixels, script and other tracking technologies to analyze and improve our service, to improve and personalize content, and for advertising to you. We also share information about your use of our site with third-party social media, advertising and analytics partners. You can view our Privacy Policy here and our Terms of Use here.

Cookies

Analytics

These cookies help us track site metrics to improve our sites and provide a better user experience.

Advertising/Social Media

These cookies are used to serve advertisements aligned with your interests.

Essential

These cookies are required to provide basic functions like page navigation and access to secure areas of the website.

Delete My Data

Delete all cookies and associated data