FHB Logo Facebook LinkedIn Email Pinterest Twitter X Instagram Tiktok YouTube Plus Icon Close Icon Navigation Search Icon Navigation Search Icon Arrow Down Icon Video Guide Icon Article Guide Icon Modal Close Icon Guide Search Icon Skip to content
Subscribe
Log In
  • How-To
  • Design
  • Tools & Materials
  • Restoration
  • Videos
  • Blogs
  • Forum
  • Magazine
  • Members
  • FHB House
  • Podcast
Log In

Fine Homebuilding Project Guides

Wiring

Guide Home
  • Working with Electricity
  • Tools and Materials
  • Receptacles and Switches
  • Lights and Fans
  • Rough-In
  • Outdoor Wiring
  • Panels and Subpanels
How-To

Laying Out the Job

Follow this logical sequence to mark box locations for receptacles, switches, and light fixtures.

By Mike Litchfield, Michael McAlister
  • X
  • facebook
  • linkedin
  • pinterest
  • email
  • add to favorites Log in or Sign up to save your favorite articles

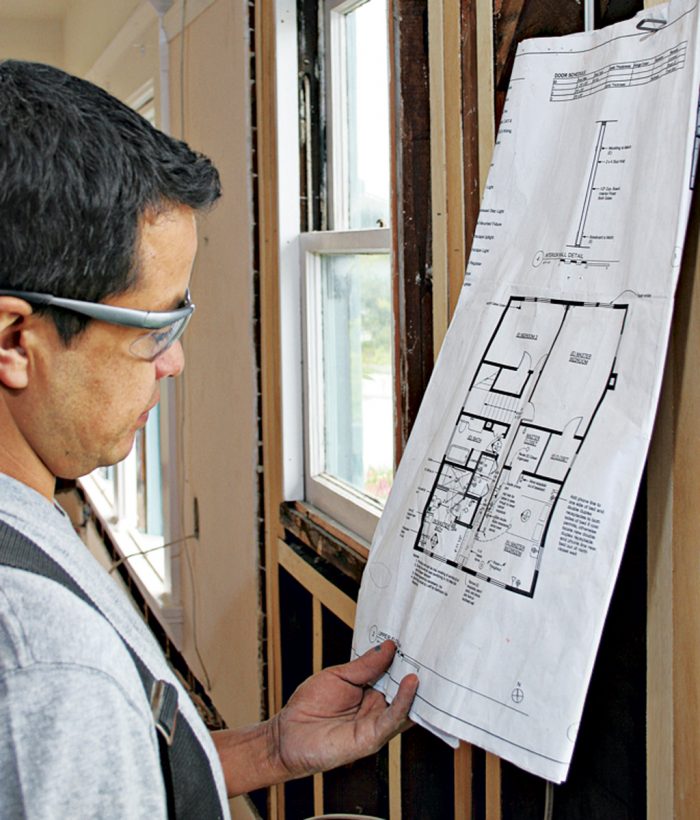
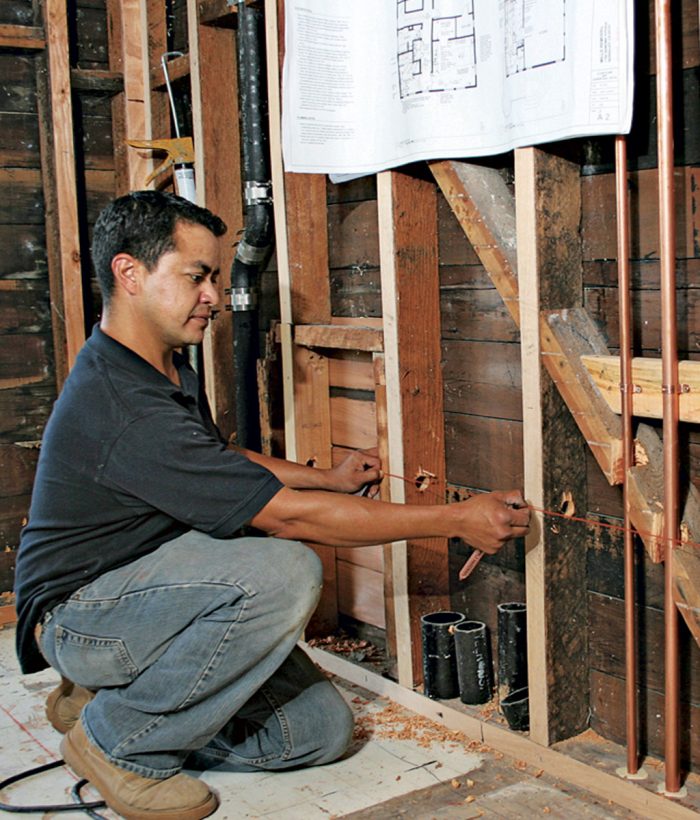
With electrical plans in hand, walk each room and mark box locations for receptacles, switches, and light fixtures. Each device must be mounted to a box that houses its wiring connections. The only exceptions are devices that come with an integral box, such as bath fans, recessed light cans, and undercabinet light fixtures 1.

Pro Tip: When marking box locations on finish surfaces, use a pencil—never a crayon, grease pencil, or felt-tipped marker. Pencil marks won’t show through new paint. Also, grease pencils and crayons can prevent paint from sticking.


Mark receptacles and switches on the walls first. Then mark ceiling fixtures. If studs and joists are exposed, use a vividly colored crayon that will show up on the wood. If there are finish surfaces, use a pencil to mark walls at a height where you can see the notations easily—these marks will be painted over later. Near each switch box, draw a letter or number to indicate which fixture the switch controls.

Rough-in recap: Box locations

  • Whatever heights you choose to set outlets and switches, be consistent.
  • Code requires that no point along a wall be more than 6 ft. from an outlet. Set the bottom of wall outlets 12 in. to 15 in. above the finished floor surface, or 18 in. above the finished floor surface to satisfy Americans with Disabilities Act (ADA) requirements.
  • Place the top of switch boxes at 48 in. and they will line up with drywall seams (if sheets run horizontally), thus reducing the drywall cuts you must make.
  • In kitchens and bathrooms, place the bottom of countertop receptacles 42 in. above the finished floor surface. This height ensures that each receptacle will clear the combined height of a standard countertop (36 in.) and the height of a backsplash (4 in.), with 2 in. extra to accommodate cover plates.


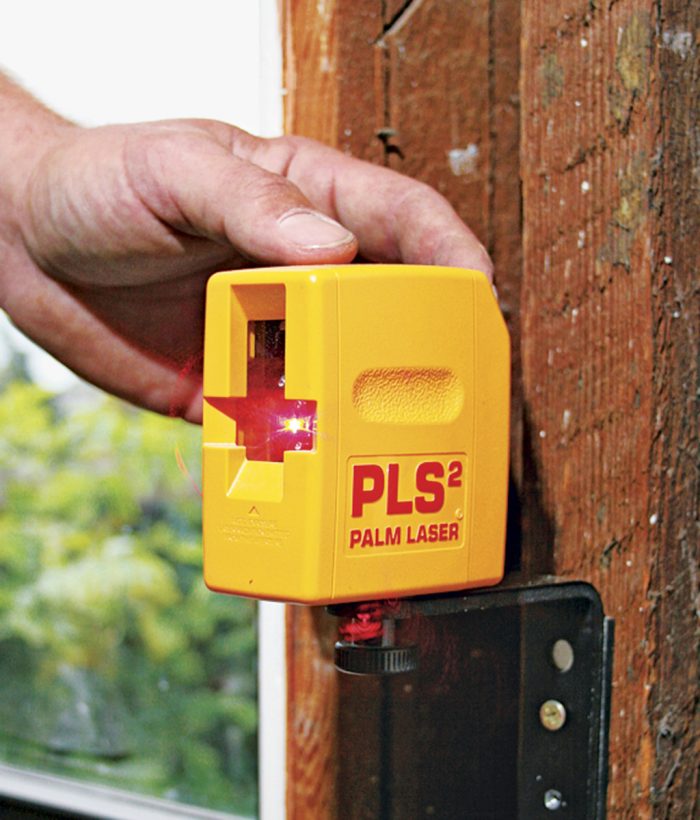
Once you’ve roughly located boxes on the walls, use a laser level 2 to set exact box heights for each type of box.

For more on box heights, see “Rough-in recap: Box locations” above.

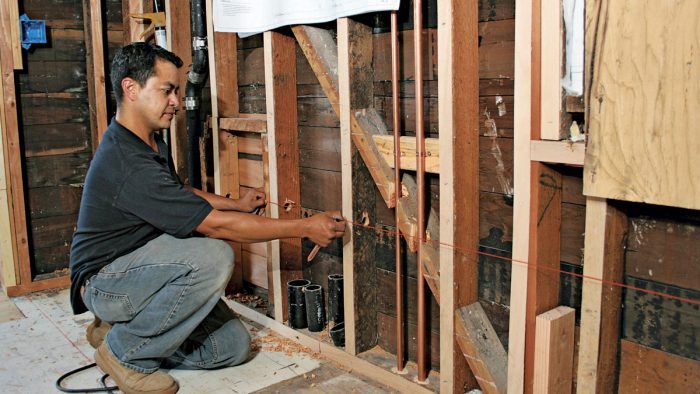
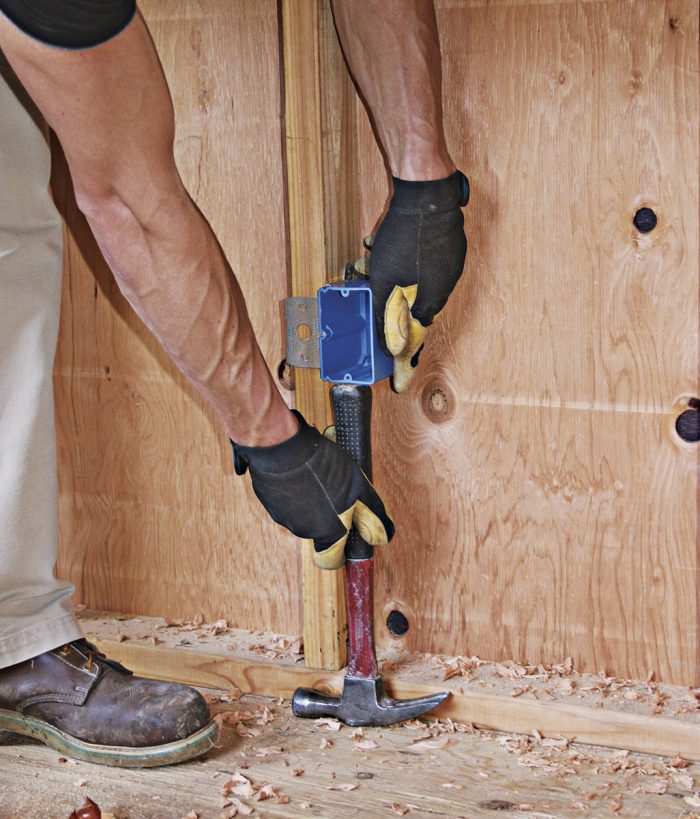
You can also use a hammer to establish the bottom lines of the boxes 3. Many electricians prefer to determine level with the laser, then snap a permanent chalkline at that height so they can move the laser to other rooms 4.

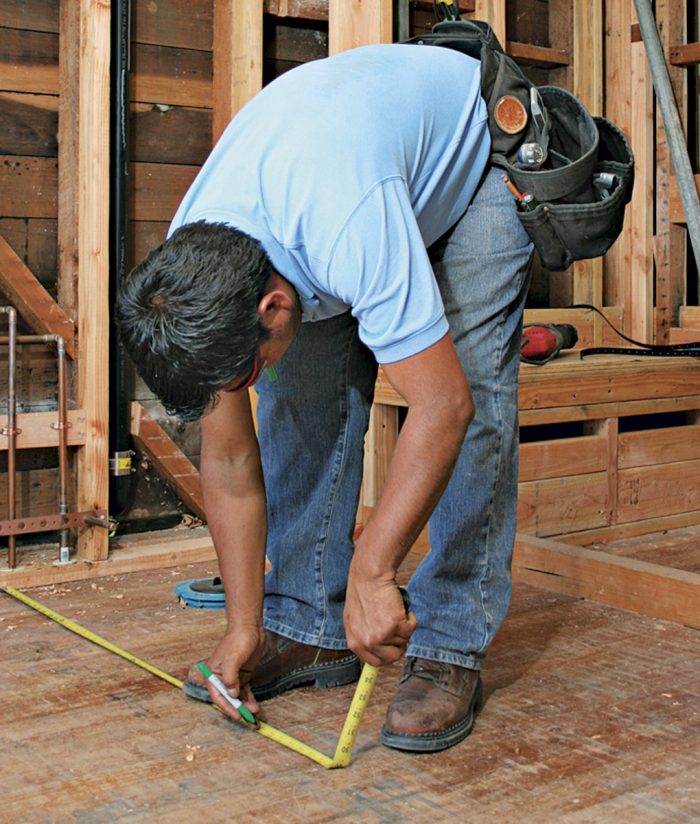
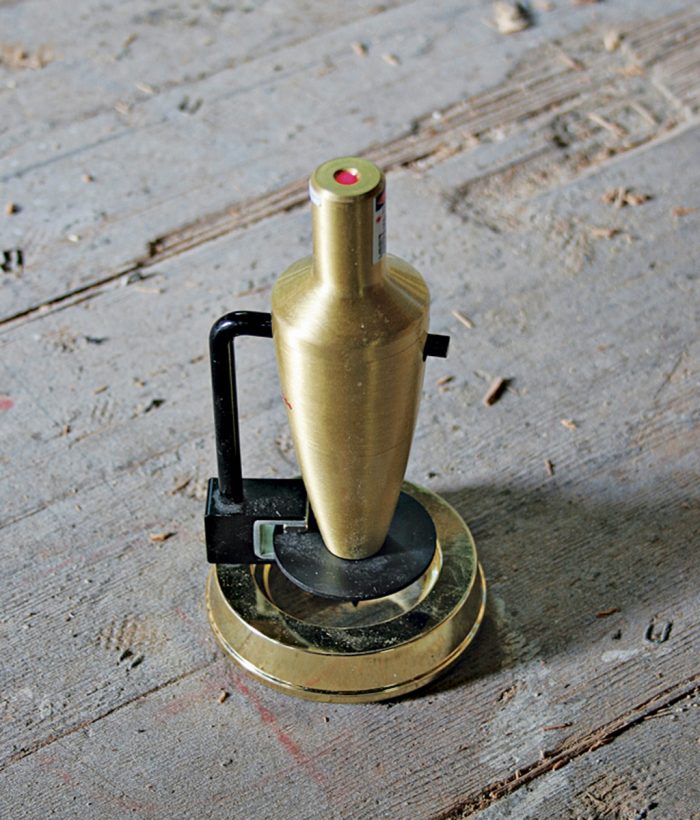
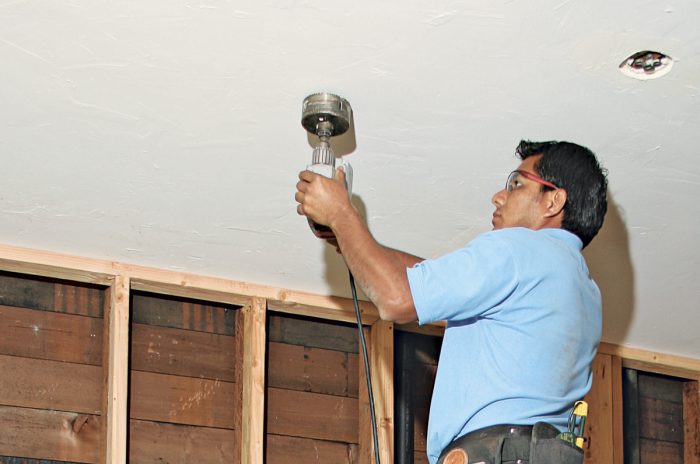
To locate ceiling fixtures, mark them on the floor 5 and use a plumb laser 6 to transfer that mark up to the ceiling 7. This may seem counterintuitive, but it will save you a lot of time. Floors are flat, almost always the same size and shape as the ceilings above, and—perhaps most important—accessible and easy to mark. In complex rooms, such as kitchens, draw cabinet and island outlines onto the floor as well. Those outlines will help you fine-tune ceiling light positions to optimally illuminate work areas.

1 Begin the layout by walking the room and marking box locations.

2 Use a laser level to set box heights above counters.

The length of a hammer is a good guide for box height.
3  A hammer handle quickly establishes box heights at roughly 12 in.

4 You can snap a level chalkline to indicate box tops or bottoms.

Mark the ceiling fixture center locations on the floor.
5  Many electricians prefer to mark ceiling fixture centers on the floor.

6 They then use a plumb laser to transfer marks to the ceiling.
use a hole saw on each ceiling mark
7  Center your hole saw on each ceiling mark.
Avoiding hot wires

In remodels, there may be live wires behind finish surfaces. Use a noncontact tester to initially test receptacles, switches, fixtures, and any visible wires. Then follow up with a probe tester, if possible. The cables feeding those devices will be nearby. Wall receptacles are usually fed by cables running 1 ft. to 3 ft. above. Switches often have cable runs up to a top plate; each ceiling fixture has cable running to the switch(es) controlling it. Avoid drilling or cutting into those areas, and you’ll minimize the risk of shock.


Wiring Complete, 3rd Edition

Excerpted from Wiring Complete, 3rd Edition (The Taunton Press, 2017) by Michael Litchfield and Michael McAlister

Available in the Taunton Store and at Amazon.com.

Previous: Developing a Floor Plan Next: Electrical Outlets by the Numbers

Guide

Wiring

Chapter

Rough-In

Sign up for eletters today and get the latest how-to from Fine Homebuilding, plus special offers.

Signing you up...

This site is protected by reCAPTCHA and the Google Privacy Policy and Terms of Service apply.
See all newsletters
See all newsletters

Log in or create an account to post a comment.

Sign up Log in

Become a member and get full access to FineHomebuilding.com

Wiring

Wiring

Trusted, code-compliant guidance from the pros for working safely on any wiring project

View Project Guide

View All Project Guides »

Become a member and get unlimited site access, including the Wiring Project Guide.

Start Free Trial

Working with Electricity
  • Basics
  • Safety
  • Troubleshooting and Upgrades
Tools and Materials
  • Electrical Tools
  • Electrical Boxes
  • Cables and Wires
Receptacles and Switches
  • Materials
  • Wiring Receptacles
  • Wiring Switches
Lights and Fans
  • Lighting Design
  • Installing Lights
  • Fans
Rough-In
  • Planning
  • Installing Electrical Boxes
  • Running Cable
  • Retrofit Work
  • Making Connections in Boxes
  • Electrical Conduit
Outdoor Wiring
  • Basics
  • Outlets
  • Installing Lighting
Panels and Subpanels
  • Understanding Panels
  • Circuits
  • Installing a Subpanel

Fine Home Building

Newsletter Sign-up

  • Fine Homebuilding

    Home building tips, offers, and expert advice in your inbox.

  • Green Building Advisor

    Building science and energy efficiency advice, plus special offers, in your inbox.

  • Old House Journal

    Repair, renovation, and restoration tips, plus special offers, in your inbox.

Signing you up...

This site is protected by reCAPTCHA and the Google Privacy Policy and Terms of Service apply.
See all newsletters

Follow

  • Fine Homebuilding

    Dig into cutting-edge approaches and decades of proven solutions with total access to our experts and tradespeople.

    Start Free Trial Now
    • Facebook
    • Instagram
    • X
    • LinkedIn
  • GBA Prime

    Get instant access to the latest developments in green building, research, and reports from the field.

    Start Free Trial Now
    • Facebook
    • YouTube
  • Old House Journal

    Learn how to restore, repair, update, and decorate your home.

    Subscribe Now
    • Facebook
    • Instagram
    • X

Membership & Magazine

  • Online Archive
  • Start Free Trial
  • Magazine Subscription
  • Magazine Renewal
  • Gift a Subscription
  • Customer Support
  • Privacy Preferences
  • About
  • Contact
  • Advertise
  • Careers
  • Terms of Use
  • Site Map
  • Do not sell or share my information
  • Privacy Policy
  • Accessibility
  • California Privacy Rights

© 2025 Active Interest Media. All rights reserved.

Fine Homebuilding receives a commission for items purchased through links on this site, including Amazon Associates and other affiliate advertising programs.

  • Home Group
  • Antique Trader
  • Arts & Crafts Homes
  • Bank Note Reporter
  • Cabin Life
  • Cuisine at Home
  • Fine Gardening
  • Fine Woodworking
  • Green Building Advisor
  • Garden Gate
  • Horticulture
  • Keep Craft Alive
  • Log Home Living
  • Military Trader/Vehicles
  • Numismatic News
  • Numismaster
  • Old Cars Weekly
  • Old House Journal
  • Period Homes
  • Popular Woodworking
  • Script
  • ShopNotes
  • Sports Collectors Digest
  • Threads
  • Timber Home Living
  • Traditional Building
  • Woodsmith
  • World Coin News
  • Writer's Digest
Active Interest Media logo
X
X
This is a dialog window which overlays the main content of the page. The modal window is a 'site map' of the most critical areas of the site. Pressing the Escape (ESC) button will close the modal and bring you back to where you were on the page.

Main Menu

  • How-To
  • Design
  • Tools & Materials
  • Video
  • Blogs
  • Forum
  • Project Guides
  • Reader Projects
  • Magazine
  • Members
  • FHB House

Podcasts

  • FHB Podcast
  • ProTalk

Webinars

  • Upcoming and On-Demand

Podcasts

  • FHB Podcast
  • ProTalk

Webinars

  • Upcoming and On-Demand

Popular Topics

  • Kitchens
  • Business
  • Bedrooms
  • Roofs
  • Architecture and Design
  • Green Building
  • Decks
  • Framing
  • Safety
  • Remodeling
  • Bathrooms
  • Windows
  • Tilework
  • Ceilings
  • HVAC

Magazine

  • Current Issue
  • Past Issues
  • Magazine Index
  • Subscribe
  • Online Archive
  • Author Guidelines

All Access

  • Member Home
  • Start Free Trial
  • Gift Membership

Online Learning

  • Courses
  • Project Guides
  • Reader Projects
  • Podcast

More

  • FHB Ambassadors
  • FHB House
  • Customer Support

Account

  • Log In
  • Join

Newsletter

Get home building tips, offers, and expert advice in your inbox

Signing you up...

This site is protected by reCAPTCHA and the Google Privacy Policy and Terms of Service apply.
See all newsletters
See all newsletters

Follow

  • X
  • YouTube
  • instagram
  • facebook
  • pinterest
  • Tiktok

Join All Access

Become a member and get instant access to thousands of videos, how-tos, tool reviews, and design features.

Start Your Free Trial

Subscribe

FHB Magazine

Start your subscription today and save up to 70%

Subscribe

You have 1 free article remaining.

Get complete site access, including thousands of videos, how-to tips, tool reviews, and design features.

Start your FREE trial

Already a member? Log in

We hope you’ve enjoyed your free articles. To keep reading, become a member today.

Get complete site access to expert advice, how-to videos, Code Check, and more, plus the print magazine.

Start your FREE trial

Already a member? Log in

Privacy Policy Update

We use cookies, pixels, script and other tracking technologies to analyze and improve our service, to improve and personalize content, and for advertising to you. We also share information about your use of our site with third-party social media, advertising and analytics partners. You can view our Privacy Policy here and our Terms of Use here.

Cookies

Analytics

These cookies help us track site metrics to improve our sites and provide a better user experience.

Advertising/Social Media

These cookies are used to serve advertisements aligned with your interests.

Essential

These cookies are required to provide basic functions like page navigation and access to secure areas of the website.

Delete My Data

Delete all cookies and associated data