Materials for Rough-In
Get tips on how to make sure you buy enough of the correct hardware and cable to run all of your circuits without having too much left over when you're done.
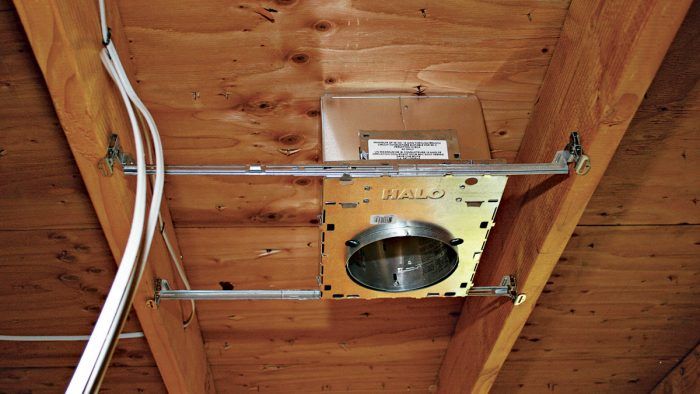
Most of the materials installed during the rough-in phase can be installed either in new construction or remodel wiring. All materials must be UL- or NRTL-listed, which indicates that they meet the safety standards of the electrical industry. There are, however, a number of specialized boxes, hanger bars, and other elements intended for remodel wiring that can be installed with minimal disruptions to existing finish surfaces.
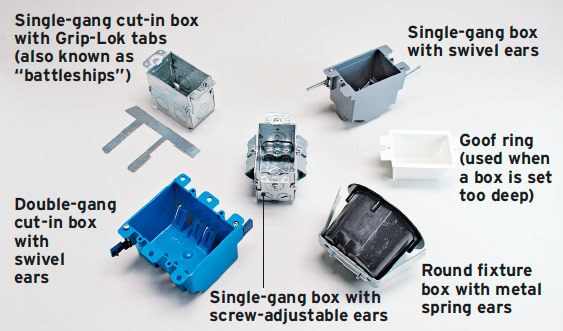
Remodel (cut-in) boxes mount to existing finish surfaces—unlike new-work boxes, which attach to framing. Most cut-in boxes have lips (flanges) that rest on the plaster or drywall surface to keep boxes from falling into the wall or ceiling cavity. Spring clamps, folding tabs, or screw-adjustable wings on the box are then expanded to hold the box snug to the backside of the wall or ceiling. The devices that anchor boxes vary greatly A.
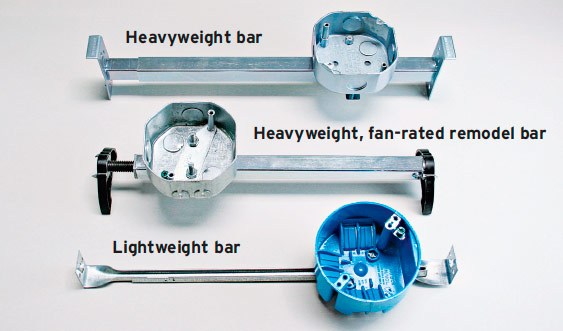
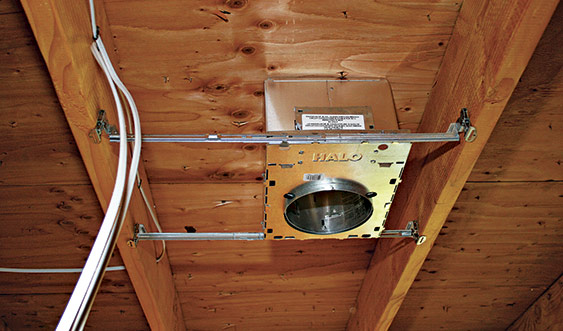
Code requires that ceiling boxes be mounted to framing. Expandable remodel bar hangers accommodate this requirement B. Adjustable hangers also allow you to locate recessed light fixtures exactly C.
Cable connectors (also called clamps) solidly connect cable to the box to prevent strain on electrical connections inside the box D. Cable clamps also prevent sheathing from being scraped or punctured by sharp box edges. Plastic boxes come with integral plastic spring clamps inside. If you use metal boxes, insert plastic push-in connectors into the box knockouts; no other cable connector is as quick or easy to install in tight spaces.
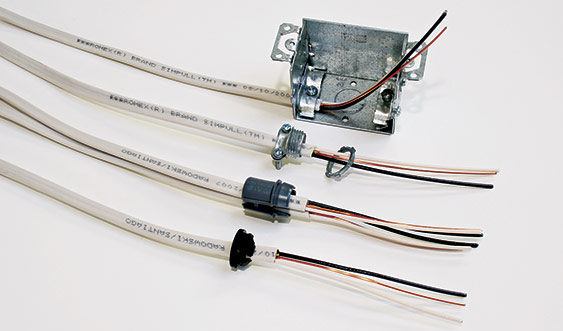
| PRO TIP: Don’t forget to leave 8 in. to 10 in. of cable sticking out of each box for connecting devices later. |
Ordering materials
In general, order 10 percent extra of all boxes and cover plates (they crack easily) and the exact number of switches, receptacles, light fixtures, and other devices specified on the plans. It’s okay to order one or two extra switches and receptacles, but there’s usually no need if you do your homework.
Cable is another matter altogether. Calculating the amount of cable can be tricky because there are infinite ways to route cable between two points. Electricians typically measure the running distances between several pairs of boxes to come up with an average length. They then use that average to calculate a total for each room. In new work, for example, boxes spaced 12 ft. apart (per code) take 15 ft. to 20 ft. of cable to run about 2 ft. above the boxes and drop it down to each box. After you’ve calculated cable for the whole job, add 10 percent.
Cable for remodel jobs is tougher to calculate because it’s impossible to know what obstructions hide behind finish surfaces. You may have to fish cable up to the top of wall plates, across an attic, and then down to each box. Do some exploring, measure that imaginary route, and again create an average cable length to multiply. If it takes, say, 25 ft. for each pair of wall boxes and you have eight outlets to wire, then 8 outlets 3 25 ft. = 200 ft. Add 10 percent, and your total is 220 ft. Because the average roll of wire sold at home centers contains 250 ft., one roll should do it.
Rough-in Recap: Electrical Code
|
Excerpted from Wiring Complete, 3rd Edition (The Taunton Press, 2017) by Michael Litchfield and Michael McAlister
Available in the Taunton Store and at Amazon.com.


