Mounting Light Fixtures
The most important thing is to attach the box to a surface sturdy enough to support the weight of the fixture, and there's often more than one way to do that.
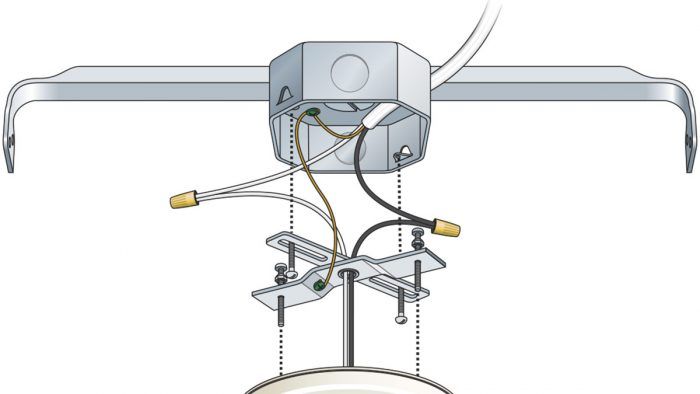
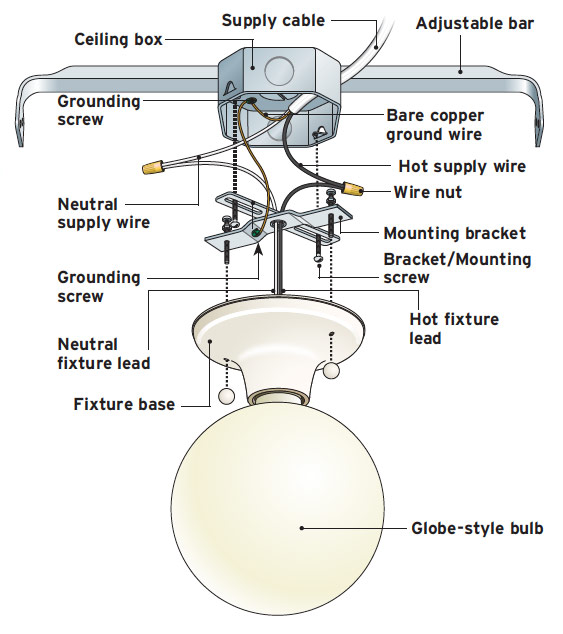
There are many mounting options for light fixture boxes. The main choice is whether you nail or screw the box directly to a stud or ceiling joist or use an extendable mounting bar to which the box is attached. Either method works fine, but a box that slides along a mounting bar means you can more easily position the light fixture just where you want it. If you have access to the framing from above, or if there is no drywall on the ceiling yet, you could also add some solid wood blocking between the joists to fasten a basic light box too.
|
Mounting fixtures to boxes
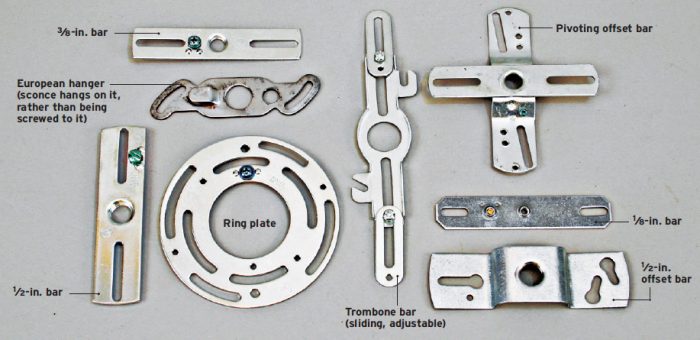
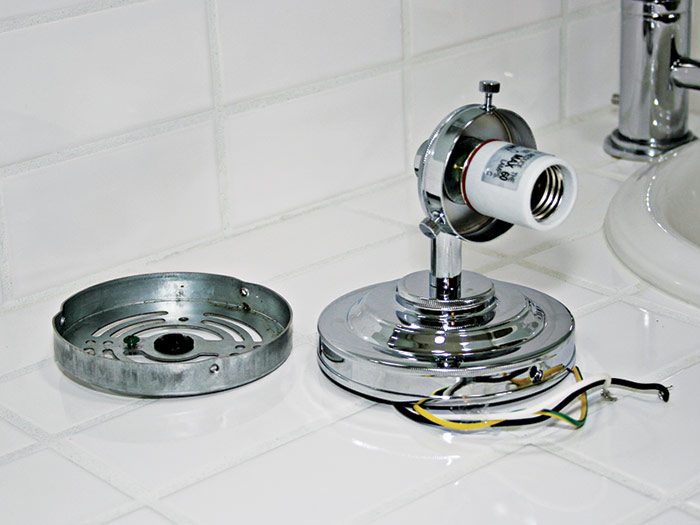
If mounting screws on all light fixtures were exactly the same diameter and spacing as the screw holes on all boxes, life would be simple and you’d screw the fixture directly to the box. But there are many different box sizes and configurations, and light fixtures vary considerably. Consequently, there are many mounting brackets to reconcile these differences.
Always examine existing outlet boxes before buying new fixtures and make sure that fixture hardware can be mounted. Otherwise, a routine installation could turn into a long, drawn-out affair with a lot of trips to the hardware store.
| Safety Alert: Most bar and box assemblies are rated for 50 lb.; if your light fixture weighs more than that, install a fan box instead. |
Here’s an overview of how various fixtures mount to outlet boxes. All metal brackets, boxes, and lamp fixtures must be grounded to be safe. There are special grounding screws (10-32 machine screws, colored green) that ensure a positive connection to metal boxes or plates when installed in a threaded hole. Do not use a wood screw or the like to attach the ground wire to the box; it doesn’t provide a good enough connection.
 |
 |
Play it safe!Electrical codes require that all fixtures and devices—everything that gets installed—must be “listed” and must be recognized by the authority having jurisdiction (AHJ), usually the local inspector checking your installation. Typically, light fixtures will have an Underwriters Laboratories (UL) listing or an NRTL listing. If an inspector doesn’t see a UL or NRTL sticker, he or she could ask you to remove the fixture. Pay attention to a fixture’s wattage rating, usually specified on a sticker on the fixture’s base. Substituting a bulb with a higher wattage can overheat and damage the fixture and, in some cases, ignite nearby combustible surfaces. |
Flat-mounting brackets
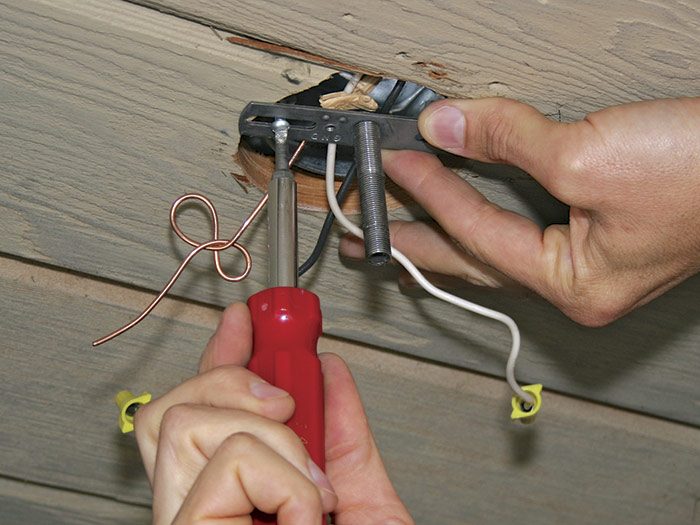
Typically, a mounting bracket is screwed to a fixture box, and the fixture is attached to the bracket, either by machine screws or, as is more common for chandeliers, by a threaded post that screws into a threaded hole in the center of the mounting bracket. Brackets can be as simple as a flat bar with screw slots, but some adjust by sliding, whereas others are offset slightly to provide a little more room for electrical connections—and fingers. Ring brackets can be rotated so the slots line up perfectly with outlet-box and fixture screw holes.
No brackets
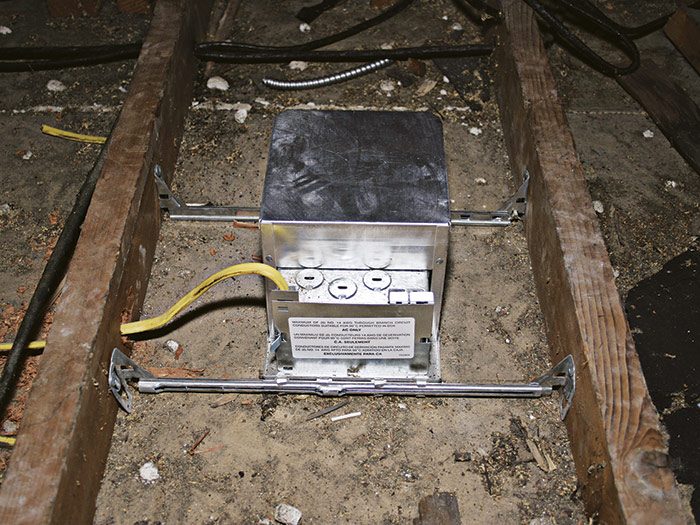
Some fixtures don’t require a mounting bracket. The fixture has its own junction box; once inserted into a hole cut in the ceiling, the fixture is supported by the ceiling. Integral clips and trim pieces pull the fixture tightly to the plaster or drywall ceiling. Recessed cans can be IC-rated (they may be covered with insulation) or may be non-IC-rated (cannot be covered with insulation).
Excerpted from Wiring Complete, 3rd Edition (The Taunton Press, 2017) by Michael Litchfield and Michael McAlister
Available in the Taunton Store and at Amazon.com.

