FHB Logo Facebook LinkedIn Email Pinterest Twitter X Instagram Tiktok YouTube Plus Icon Close Icon Navigation Search Icon Navigation Search Icon Arrow Down Icon Video Guide Icon Article Guide Icon Modal Close Icon Guide Search Icon Skip to content
Subscribe
Log In
  • How-To
  • Design
  • Tools & Materials
  • Restoration
  • Videos
  • Blogs
  • Forum
  • Magazine
  • Members
  • FHB House
  • Podcast
Log In

Fine Homebuilding Project Guides

Wiring

Guide Home
  • Working with Electricity
  • Tools and Materials
  • Receptacles and Switches
  • Lights and Fans
  • Rough-In
  • Outdoor Wiring
  • Panels and Subpanels
How-To

Tapping Into an Existing Outlet

Follow these guidelines to tap into an interior outlet when adding an outdoor receptacle.

By Mike Litchfield, Michael McAlister
  • X
  • facebook
  • linkedin
  • pinterest
  • email
  • add to favorites Log in or Sign up to save your favorite articles

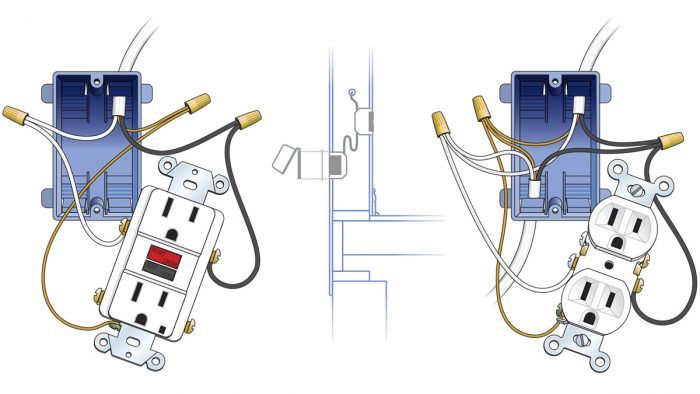
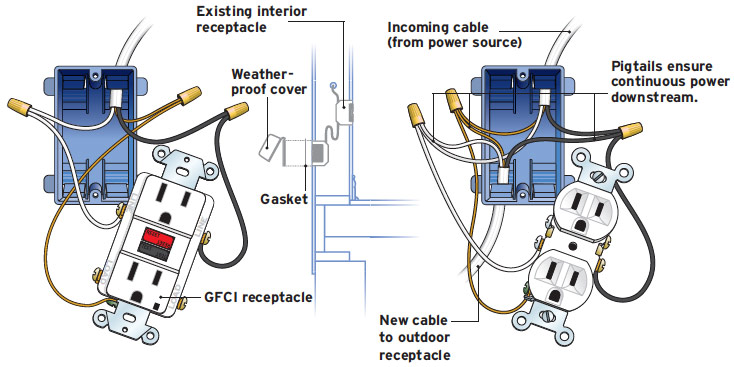
When adding a single outdoor receptacle, it’s usually easiest to tap into an interior outlet within the same stud bay. In the installation shown here, the electrician solved the box-capacity problem by replacing the old receptacle with a commercial-grade duplex receptacle. Instead of splicing new and old wires and using pigtails—which would have required twist-on wire connectors and thus a larger box—he joined incoming and outgoing wires by inserting them into terminal holes in the back of the receptacle and then tightened down the terminal screws. Note: Wiring a commercial-grade receptacle in this manner is not the same as back-wiring a standard receptacle because standard receptacles have inferior spring clamps that are unreliable.

Adding an Outdoor Receptacle

Adding an Outdoor Receptacle
If you tap into an existing receptacle at the end of a circuit, there should be enough room inside the box to bring a cable to feed the new outdoor receptacle. However, if there are already two cables in the box—incoming and outgoing—you may need to replace the existing box with a larger one.


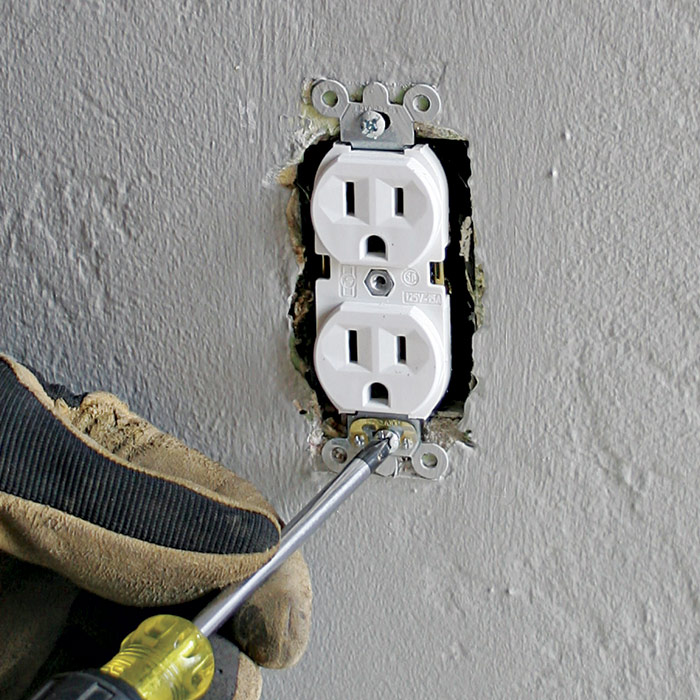
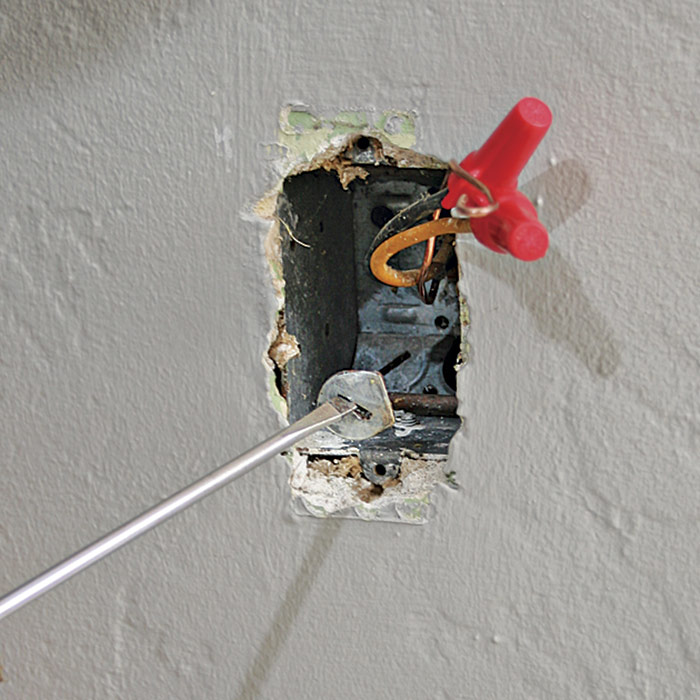
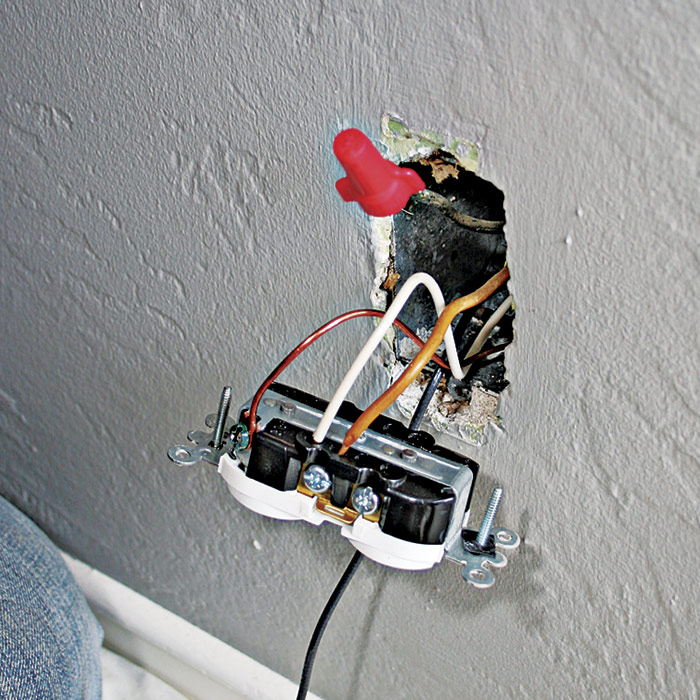
Start by turning off the power to the receptacle at the panel or fuse box; then use a voltage tester to make sure the power is off. Remove the cover plate and unscrew the mounting screws securing the receptacle to the outlet box 1.

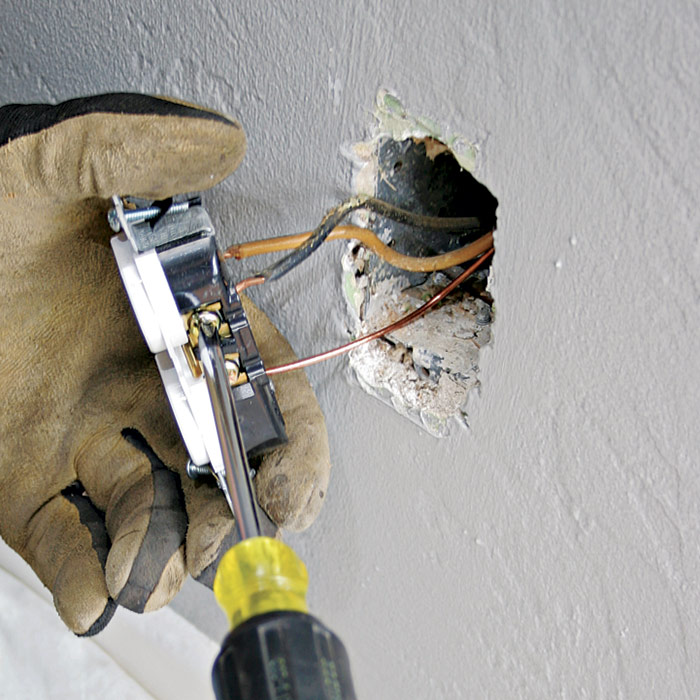
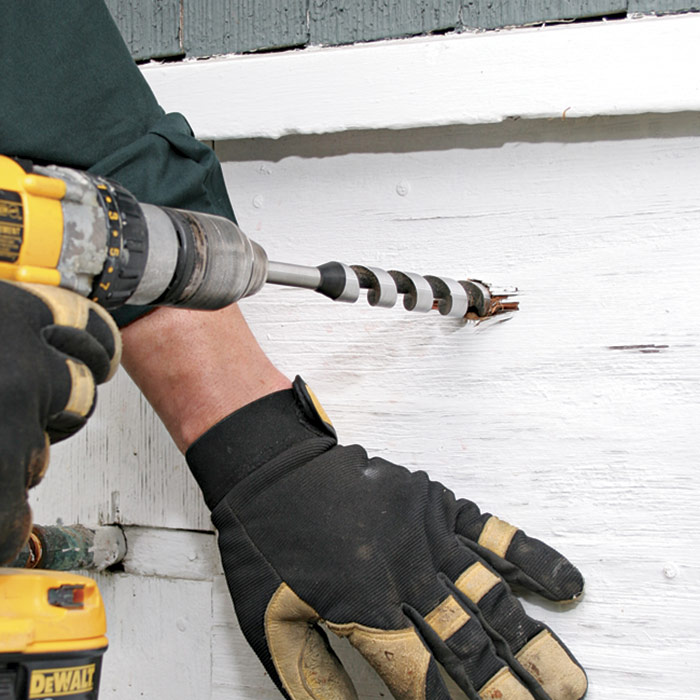
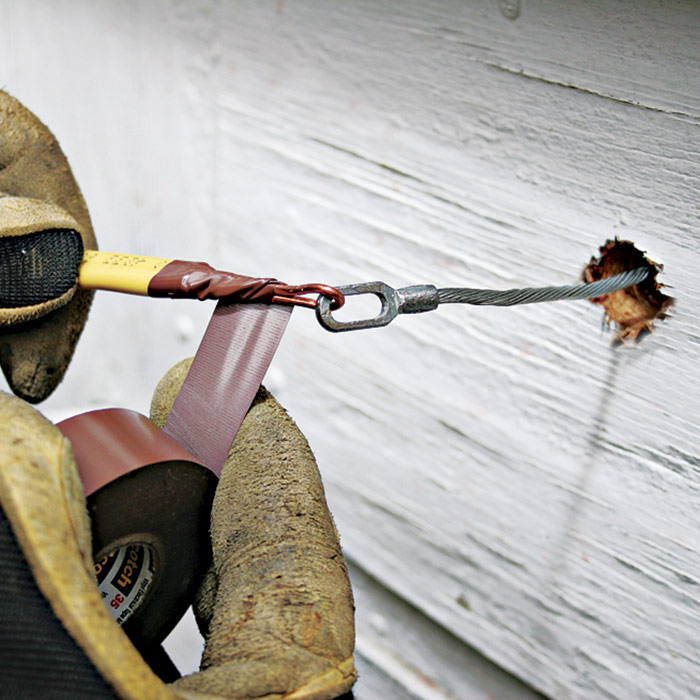
Pull the receptacle out of the box, being careful not to touch the screw terminals; then test them again with a probe tester to make sure they’re not energized 2. Detach the wires from the terminals, fold them out of the way, and look for a knockout in the box to remove. Typically, a pair of knockouts will be hidden beneath an integral cable connector—unscrew it. Then remove a knockout from the outlet box 3. Drill through the exterior wall and into the same stud bay as the interior receptacle 4. Then, inside the house, push fish tape through the knockout hole and into the stud bay 5. Outside, a helper can catch the tape, pull it out of the hole you just drilled, and attach the new cable to it 6.

1  Turn off the power, remove the cover plate, and unscrew the receptacle.
1) Turn off the power, remove the cover plate, and unscrew the receptacle.

2  Pull the receptacle out of the box and remove the wires attached to its terminals.
2) Pull the receptacle out of the box and remove the wires attached to its terminals.

3  Use a screwdriver to pry out a knockout.
3) Use a screwdriver to pry out a knockout.

4  Outside, have a helper drill through the siding.
4) Outside, have a helper drill through the siding.

5  Push the fish tape through the knockout hole, into the stud bay.
5) Push the fish tape through the knockout hole, into the stud bay.

6  Outside, retrieve the fish tape and attach the new cable.
6) Outside, retrieve the fish tape and attach the new cable.

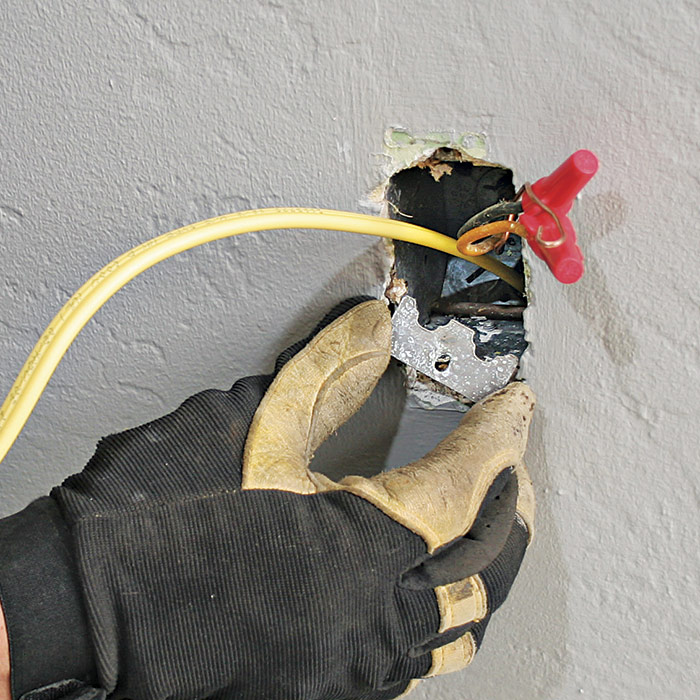
Inside, pull the fish tape and the attached cable into the box. Pull about 1 ft. of new cable out of the box and then replace the integral cable clamp 7 to secure the cable. Strip the cable sheathing and splice like wires together, starting with the ground wires. Use a special green grounding nut to splice the grounds 8. Use wire strippers to remove 1⁄2 in. of the insulation from the ends of the hot and neutral wires 9.

7  Pull the new cable through and attach a cable clamp.
7) Pull the new cable through and attach a cable clamp.

8  Leaving one ground wire long, use a green grounding nut to splice.
8) Leaving one ground wire long, use a green grounding nut to splice.

9  Use wire strippers to remove 1⁄2 in. of insulation off the wire ends.
9) Use wire strippers to remove 1⁄2 in. of insulation off the wire ends.

10  Connect all wires; gently push the receptacle into the box.
10) Connect all wires; gently push the receptacle into the box.

To save space in the old box, insert the stripped wire ends into terminal holes in the back of the spec-grade (commercial-grade) receptacle 10. Because spec-grade receptacles solidly clamp wire ends, this connection is as solid as any splice. Fold the wires into the box as you push the receptacle into place until it is fully seated in the box—do not use mounting screws to pull the receptacle into the box because this could strip the screw threads. Then replace the cover and screw it into place.

PRO TIP: To power holiday lights safely, plug them into a GFCI receptacle housed in a waterproof while-in-use box cover. But before installing the lights, calculate the total wattage of all the bulbs so you don’t overload the circuit.


Mounting & Wiring an Exterior Outlet

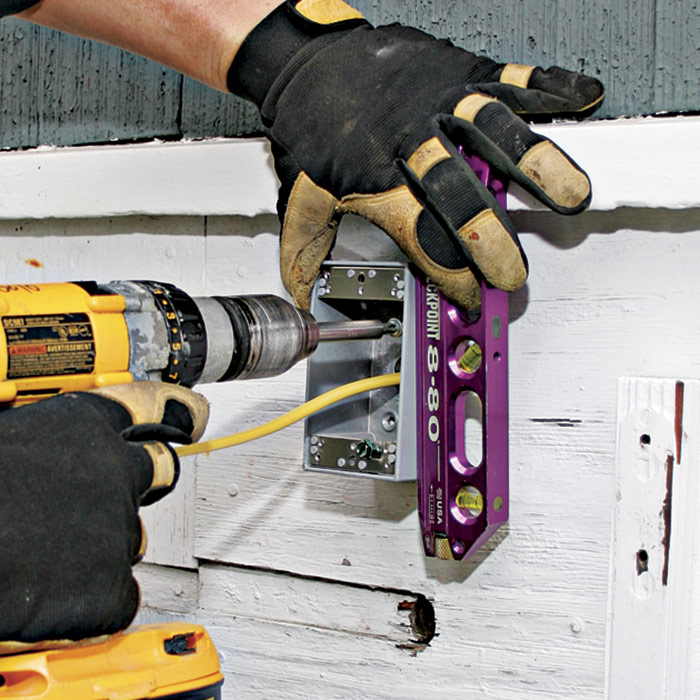
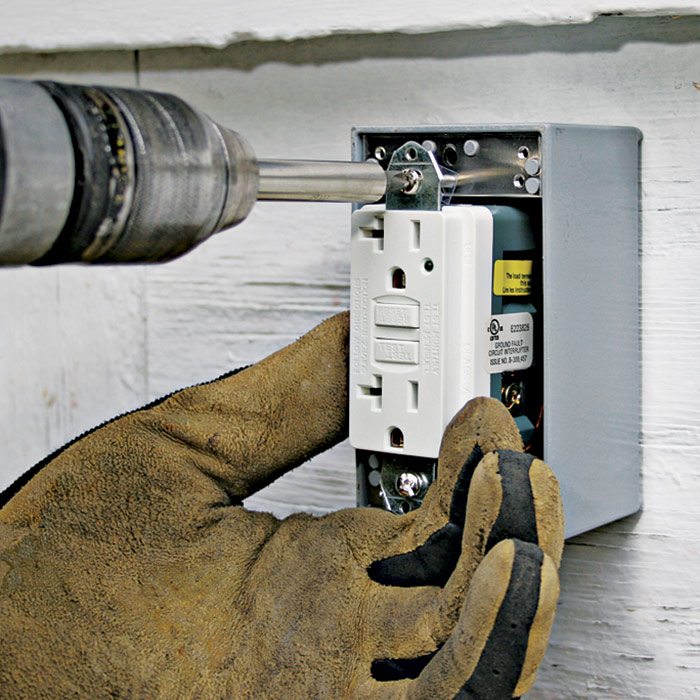
Once the new cable is spliced to the cable in an existing receptacle, feed the cable through the cable connector in the back of the exterior box and mount the box. (The hole drilled in the exterior wall must be wide enough for the cable connector or the box won’t sit flat to the wall.) To mount the box, use mounting ears or the small holes in the back. Apply siliconized caulking to the hole before attaching the box. Plumb the box and screw it to the outside of the building 1.

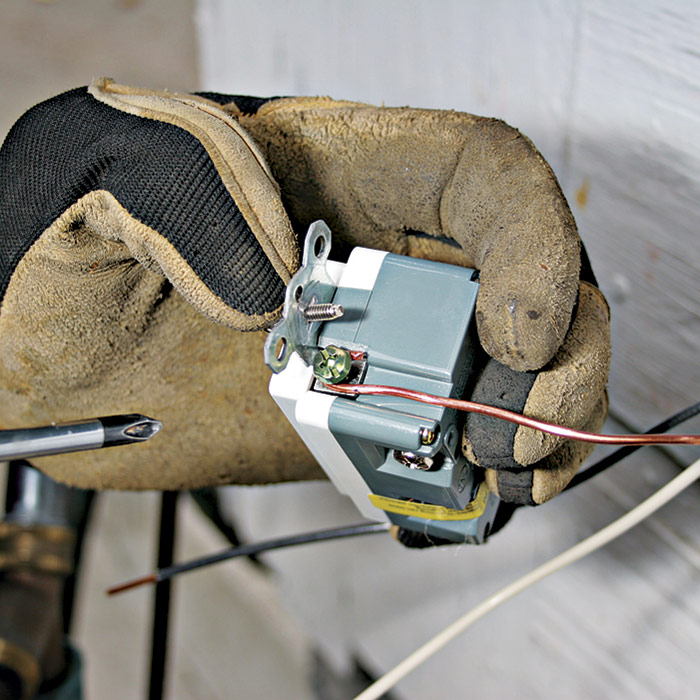
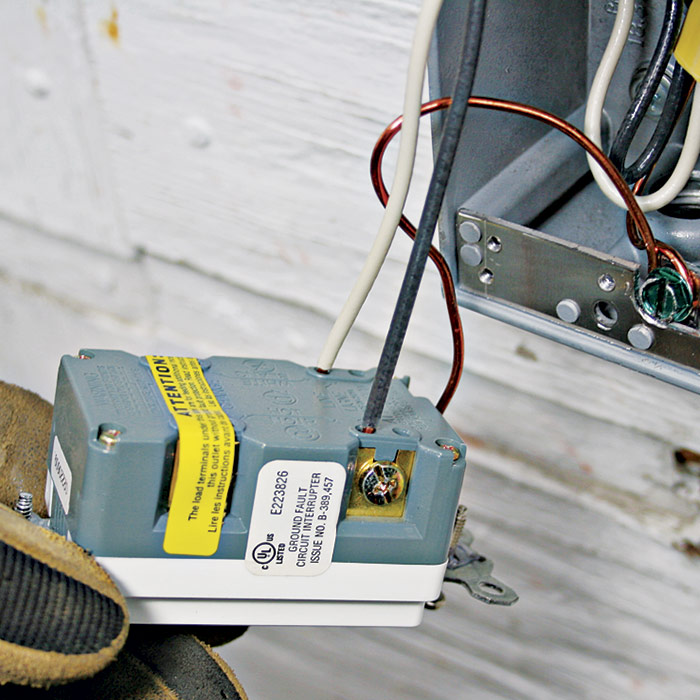
Strip sheathing from the cable and ground the box by looping the bare ground wire around the green grounding screw. Leave this ground wire long 2. Use a wire stripper to remove 1⁄2 in. of the insulation from the ends of the neutral and hot wires. Next, loop and attach the long ground wire to the green ground screw on the GFCI receptacle 3. Then connect the hot and neutral wires in their respective screw-terminal holes 4.

1  Feed the cable through the connector in the box and secure it to the building.
1) Feed the cable through the connector in the box and secure it to the building.

3 Attach the long ground wire to the green ground screw on the receptacle.
2) Loop the bare ground wire around the green grounding screw.

3  Attach the long ground wire to the green ground screw on the receptacle.
3) Attach the long ground wire to the green ground screw on the receptacle.

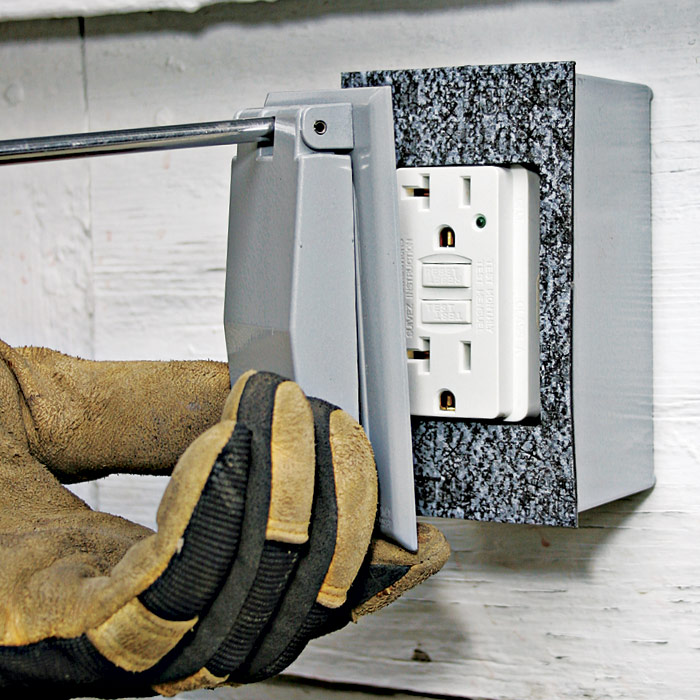
If the GFCI receptacle has plaster ears, use diagonal cutters to remove them;
otherwise, the receptacle may not fit into the box. Fold the wires and push the receptacle into the box; then screw down the mounting screws that secure the receptacle to the box 5. A weatherproof gasket is used to keep water away from the wires—set it in place around the receptacle before you attach the cover 6.

4  Insert wires into terminals: brass screw for hot wire; silver screw for neutral wire.
4) Insert wires into terminals: brass screw for hot wire; silver screw for neutral wire.

5  Fold and tuck the wires into the box. Then secure the receptacle to the box.
5) Fold and tuck the wires into the box. Then secure the receptacle to the box.

6  Fit the gasket around the receptacle and screw on the weatherproof cover.
6) Fit the gasket around the receptacle and screw on the weatherproof cover.


PRO TIP: GFCI receptacles are larger than standard duplex receptacles, so there will not be enough room in a single-gang box if you also need to splice an outgoing cable to feed another outdoor outlet downstream. In that case, install a deep box or install an extension to the single-gang box.


Wiring Complete, 3rd Edition

Excerpted from Wiring Complete, 3rd Edition (The Taunton Press, 2017) by Michael Litchfield and Michael McAlister

Available in the Taunton Store and at Amazon.com.

Previous: Protect Your Outdoor Electrical Outlets Next: Adding an Outside Outlet

Guide

Wiring

Chapter

Outdoor Wiring

Sign up for eletters today and get the latest how-to from Fine Homebuilding, plus special offers.

Signing you up...

This site is protected by reCAPTCHA and the Google Privacy Policy and Terms of Service apply.
See all newsletters
See all newsletters

Log in or create an account to post a comment.

Sign up Log in

Become a member and get full access to FineHomebuilding.com

Wiring

Wiring

Trusted, code-compliant guidance from the pros for working safely on any wiring project

View Project Guide

View All Project Guides »

Become a member and get unlimited site access, including the Wiring Project Guide.

Start Free Trial

Working with Electricity
  • Basics
  • Safety
  • Troubleshooting and Upgrades
Tools and Materials
  • Electrical Tools
  • Electrical Boxes
  • Cables and Wires
Receptacles and Switches
  • Materials
  • Wiring Receptacles
  • Wiring Switches
Lights and Fans
  • Lighting Design
  • Installing Lights
  • Fans
Rough-In
  • Planning
  • Installing Electrical Boxes
  • Running Cable
  • Retrofit Work
  • Making Connections in Boxes
  • Electrical Conduit
Outdoor Wiring
  • Basics
  • Outlets
  • Installing Lighting
Panels and Subpanels
  • Understanding Panels
  • Circuits
  • Installing a Subpanel

Fine Home Building

Newsletter Sign-up

  • Fine Homebuilding

    Home building tips, offers, and expert advice in your inbox.

  • Green Building Advisor

    Building science and energy efficiency advice, plus special offers, in your inbox.

  • Old House Journal

    Repair, renovation, and restoration tips, plus special offers, in your inbox.

Signing you up...

This site is protected by reCAPTCHA and the Google Privacy Policy and Terms of Service apply.
See all newsletters

Follow

  • Fine Homebuilding

    Dig into cutting-edge approaches and decades of proven solutions with total access to our experts and tradespeople.

    Start Free Trial Now
    • Facebook
    • Instagram
    • X
    • LinkedIn
  • GBA Prime

    Get instant access to the latest developments in green building, research, and reports from the field.

    Start Free Trial Now
    • Facebook
    • YouTube
  • Old House Journal

    Learn how to restore, repair, update, and decorate your home.

    Subscribe Now
    • Facebook
    • Instagram
    • X

Membership & Magazine

  • Online Archive
  • Start Free Trial
  • Magazine Subscription
  • Magazine Renewal
  • Gift a Subscription
  • Customer Support
  • Privacy Preferences
  • About
  • Contact
  • Advertise
  • Careers
  • Terms of Use
  • Site Map
  • Do not sell or share my information
  • Privacy Policy
  • Accessibility
  • California Privacy Rights

© 2025 Active Interest Media. All rights reserved.

Fine Homebuilding receives a commission for items purchased through links on this site, including Amazon Associates and other affiliate advertising programs.

  • Home Group
  • Antique Trader
  • Arts & Crafts Homes
  • Bank Note Reporter
  • Cabin Life
  • Cuisine at Home
  • Fine Gardening
  • Fine Woodworking
  • Green Building Advisor
  • Garden Gate
  • Horticulture
  • Keep Craft Alive
  • Log Home Living
  • Military Trader/Vehicles
  • Numismatic News
  • Numismaster
  • Old Cars Weekly
  • Old House Journal
  • Period Homes
  • Popular Woodworking
  • Script
  • ShopNotes
  • Sports Collectors Digest
  • Threads
  • Timber Home Living
  • Traditional Building
  • Woodsmith
  • World Coin News
  • Writer's Digest
Active Interest Media logo
X
X
This is a dialog window which overlays the main content of the page. The modal window is a 'site map' of the most critical areas of the site. Pressing the Escape (ESC) button will close the modal and bring you back to where you were on the page.

Main Menu

  • How-To
  • Design
  • Tools & Materials
  • Video
  • Blogs
  • Forum
  • Project Guides
  • Reader Projects
  • Magazine
  • Members
  • FHB House

Podcasts

  • FHB Podcast
  • ProTalk

Webinars

  • Upcoming and On-Demand

Podcasts

  • FHB Podcast
  • ProTalk

Webinars

  • Upcoming and On-Demand

Popular Topics

  • Kitchens
  • Business
  • Bedrooms
  • Roofs
  • Architecture and Design
  • Green Building
  • Decks
  • Framing
  • Safety
  • Remodeling
  • Bathrooms
  • Windows
  • Tilework
  • Ceilings
  • HVAC

Magazine

  • Current Issue
  • Past Issues
  • Magazine Index
  • Subscribe
  • Online Archive
  • Author Guidelines

All Access

  • Member Home
  • Start Free Trial
  • Gift Membership

Online Learning

  • Courses
  • Project Guides
  • Reader Projects
  • Podcast

More

  • FHB Ambassadors
  • FHB House
  • Customer Support

Account

  • Log In
  • Join

Newsletter

Get home building tips, offers, and expert advice in your inbox

Signing you up...

This site is protected by reCAPTCHA and the Google Privacy Policy and Terms of Service apply.
See all newsletters
See all newsletters

Follow

  • X
  • YouTube
  • instagram
  • facebook
  • pinterest
  • Tiktok

Join All Access

Become a member and get instant access to thousands of videos, how-tos, tool reviews, and design features.

Start Your Free Trial

Subscribe

FHB Magazine

Start your subscription today and save up to 81%

Subscribe

You have 1 free article remaining.

Get complete site access, including thousands of videos, how-to tips, tool reviews, and design features.

Start your FREE trial

Already a member? Log in

We hope you’ve enjoyed your free articles. To keep reading, become a member today.

Get complete site access to expert advice, how-to videos, Code Check, and more, plus the print magazine.

Start your FREE trial

Already a member? Log in

Privacy Policy Update

We use cookies, pixels, script and other tracking technologies to analyze and improve our service, to improve and personalize content, and for advertising to you. We also share information about your use of our site with third-party social media, advertising and analytics partners. You can view our Privacy Policy here and our Terms of Use here.

Cookies

Analytics

These cookies help us track site metrics to improve our sites and provide a better user experience.

Advertising/Social Media

These cookies are used to serve advertisements aligned with your interests.

Essential

These cookies are required to provide basic functions like page navigation and access to secure areas of the website.

Delete My Data

Delete all cookies and associated data