Wiring a Single-Pole Switch
You don't need to be an electrician to wire a light switch–you just need to have a few basic tools and follow these simple steps.
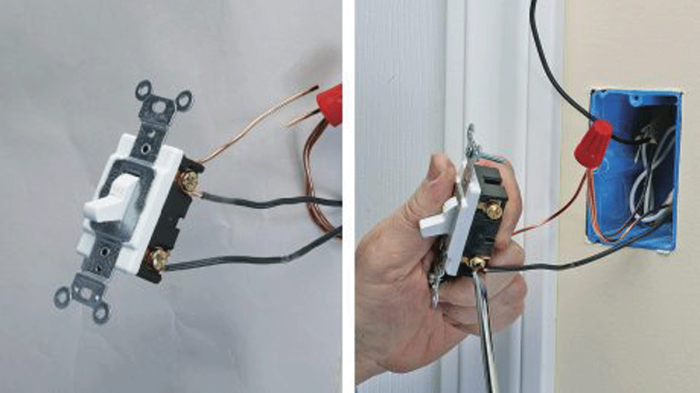
Installing a single-pole switch is just one in a series of tasks that make up an electrician’s work, but along with running rough wiring and installing boxes, it’s a task that anyone can do and save some money in the process. When wiring a switch, there are two scenarios: You’re connecting two feeds (one power, one to the fixture) or one feed (from the fixture to the switch). The tools you need are basic: Phillips-head and slotted-head screwdrivers, a pair of wire strippers, electrician’s tape, yellow wire nuts (for two conductors), red wire nuts (for three conductors), lineman’s pliers, and a utility knife. If you’d like more information on residential wiring, please consult Rex Cauldwell’s book Wiring a House.
Safety is the first priority when wiring a homeNo matter how simple the job or how confident you are with your wiring skills, you should always turn off the circuit breaker before touching any wiring in your house. To make sure the circuit you’re about to touch is truly powered down, check the wires with an electrical tester. If you’re concerned about the condition of your existing wiring, or if you’re not sure that the circuit you’re about to work on is up to code, take a look at the following two articles first: 9 Common Wiring Mistakes and Code Violations – These can be illegal or dangerous—or both—but all are simple to avoid. Is Your Old Wiring Safe? – Inspect the electrical panel and exposed wiring to identify safety risks and upgrade options. |
7 simple steps to get the job done
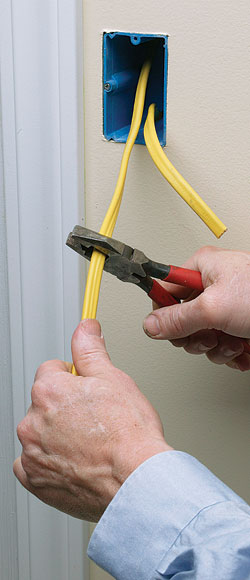
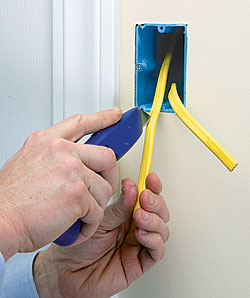
Step 1: Leave yourself enough slack. Pull 8 in. to 10 in. of non-metallic sheathed cable through the box, then trim it back to a 6-in. length, measured from the outside face of the box. The cutters on lineman’s pliers cut cleanly and easily through the cable.
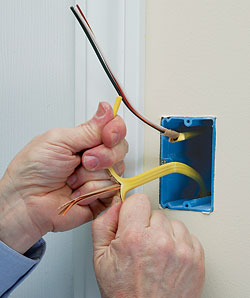
Step 2: There are two ways to skin a piece of non-metallic sheathed cable, but here’s the most foolproof. Make a shallow cut about 2 in. long at the end of the cable. Now grab both black and white conductors, and pull them apart in opposite directions so that the jacket rips, continuing until the tear reaches the inside of the box. Now cut the jacket away, leaving about 1/2 in. inside the box.
Step 3: Stripping the jacket with a knife is trickier. Starting where the non-metallic sheathed cable comes into the box, carefully insert the tip of a sharp utility-knife blade into the jacket’s center, and slice the jacket all the way to the end of the cable. Trim the jacket away close to where the cable enters the box and carefully inspect both black and white insulations for cuts. Any nicks should be covered completely with two wrappings of electrical tape.
Switch to a dimmer?
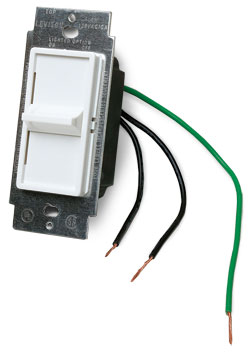
Used instead of a standard switch, a dimmer gives you more flexibility in lighting control. Installation is often easier than a single-pole switch because many dimmers require wire nuts to connect to the power source rather than the screw terminals found on conventional switches. Dimmers range in cost from $10 to $30. |
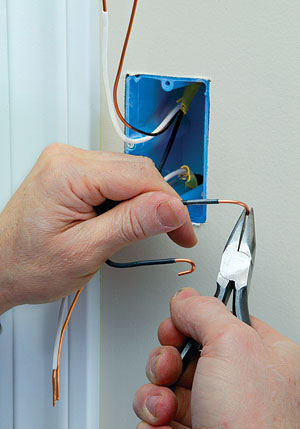
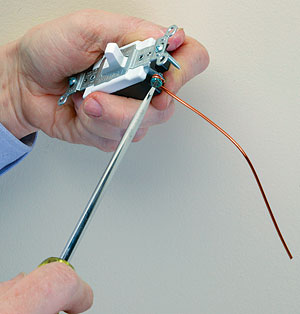
Step 4: Strip and bend the hooks. Strip each wire’s insulation back about 3/4 in. Make an open-ended loop on the black wires with needle-nose pliers or wire strippers. Next, make a loop in a 6-in. length of bare ground wire, fasten it around the green screw terminal, and tighten the screw snugly.
 |
 |
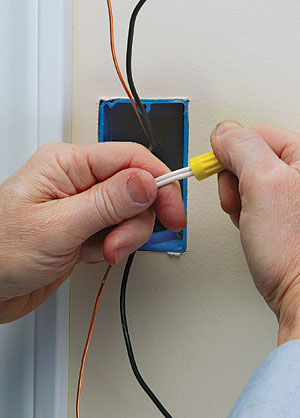
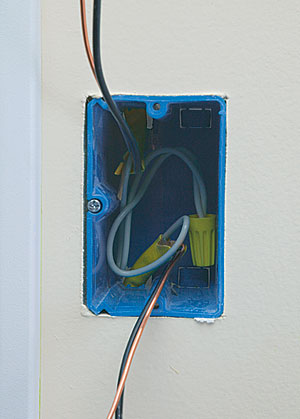
Step 5: Connect the pairs. Wires in a box get connected together with wire nuts—small caps with metal inserts that grab the wire tight when twisted. To make these connections, firmly press the tips of all wires that are being connected together into the nut and twist the nut clockwise until the wires are wrapped tightly together and there is a good amount of resistance to further twisting.
Make sure the size of the wire nuts are matched to the number and gauge of wires you are connecting (acceptable numbers and sizes will be listed on the packaging). In this case, with a yellow wire nut, join the white wires, then use a red wire nut to join the two grounds and a short length of ground that’s connected to the switch. Gently push these sets into the back of the box.
 |
 |
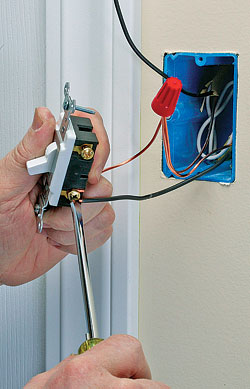
Step 6: Attach the black wire loops to the switch terminals. Always remember to wrap the wire clockwise around the screw so that when the screw tightens, it carries the loop with it.
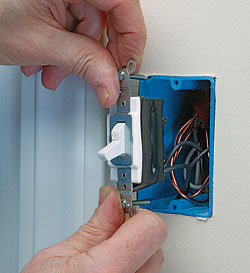
Step 7: Fold the wires behind the switch, not on the sides. After wrapping the switch body with a layer of tape, fold the black wires back into the box neatly, then push in the switch on top of the wires. Finish by securing the switch’s screws to the box.
A wire stripper is an indispensable tool
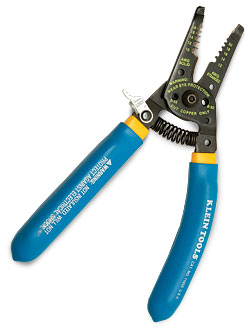
If you watch late-night television, you may have seen advertisements that feature a guy yelling about some appliance that performs a host of tasks, all for an unbelievable price. You probably won’t see this wire stripper from Klein Tools (www.kleintools.com), but it’s worthy of a good yell: It’s the tool you want when you’re doing electrical work. Its jaws are gauged to strip five different wire sizes. They also can cut wire and bend hooks, and they have a serrated nose for gripping. The plastic-padded handles are curved for a comfortable grip. The tool really is a bargain, about $15 in most stores.
Photos by: Charles Bickford

