1970’s Bathroom Renovation (Product from Lowes / Work done by Me)
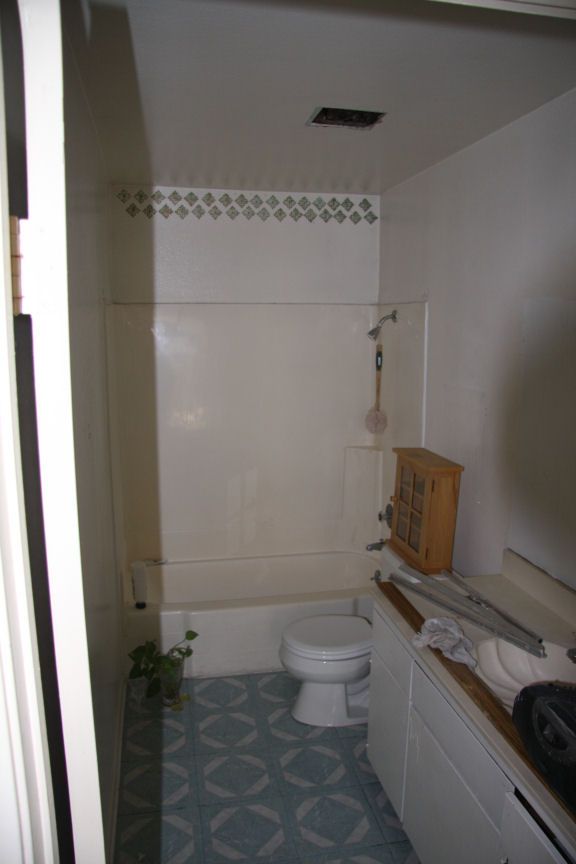
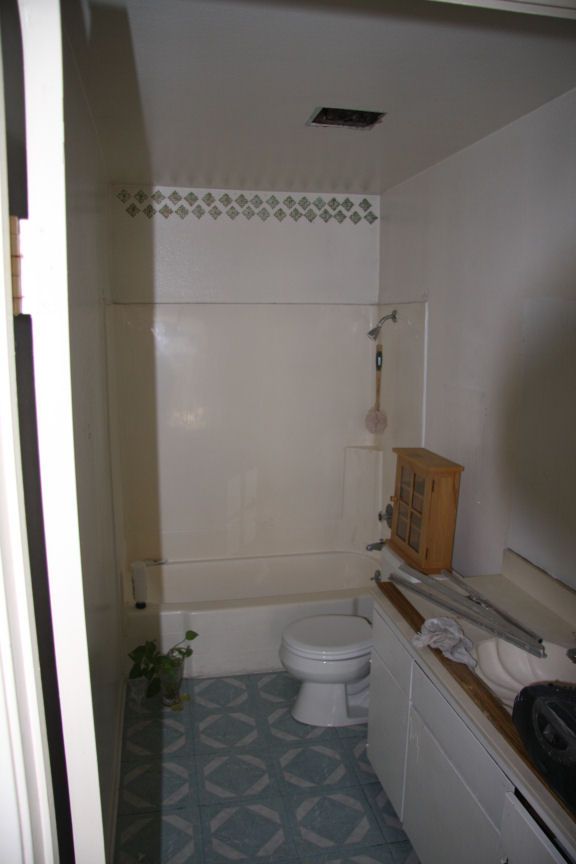
This bathroom was straight from the 1970’s! Not only was it ugly, but it was in desperate need of repair. The original tub / shower was cracked, flaking apart and leaking. The multi-layered linoleum floor was warped and damaged from the water that leaked from cracks in the tub. The lower twelve inches of drywall / green board was crumbled to the point of being completely disintegrated between the tub and the toilet. We also had to deal with mold, which could be a serious health issue. The toilet was leaking and so was the faucet and gate valve under the sink which was frozen open. The subfloor itself was also damaged from the water which had obviously been leaking for quite some time. The leak was so bad that it completely warped the entire drywall ceiling to the garage which sat directly below this bath and adjacent bedroom.
Hiring the work would have been very expensive. After considering our options, we chose to buy all our products and materials from Lowes through their QSP program which saved us a bundle of money. We’re just simple home owners that were highly motivated to do what had to be done on a limited budget. We were very happy with the end results of our hard work and want to thank the people at Lowes store in Tustin California for their knowledge and experience when we needed help.
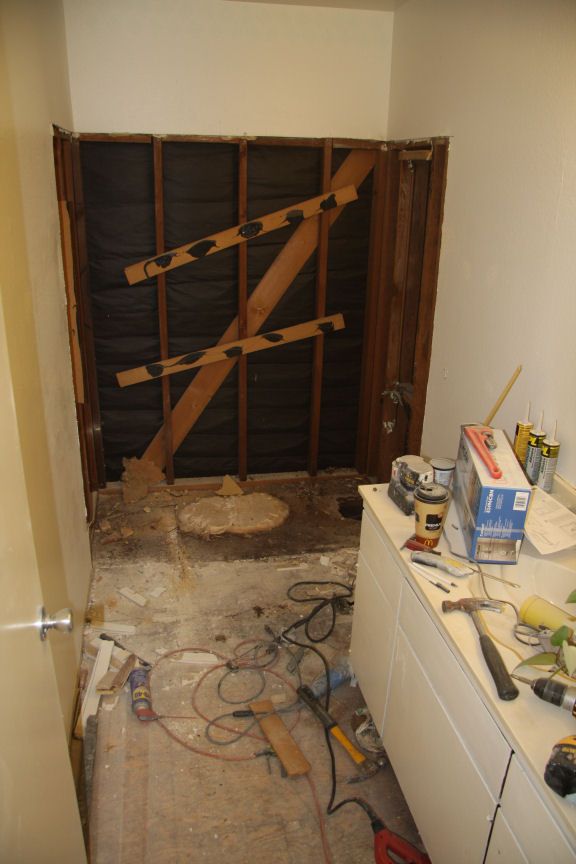
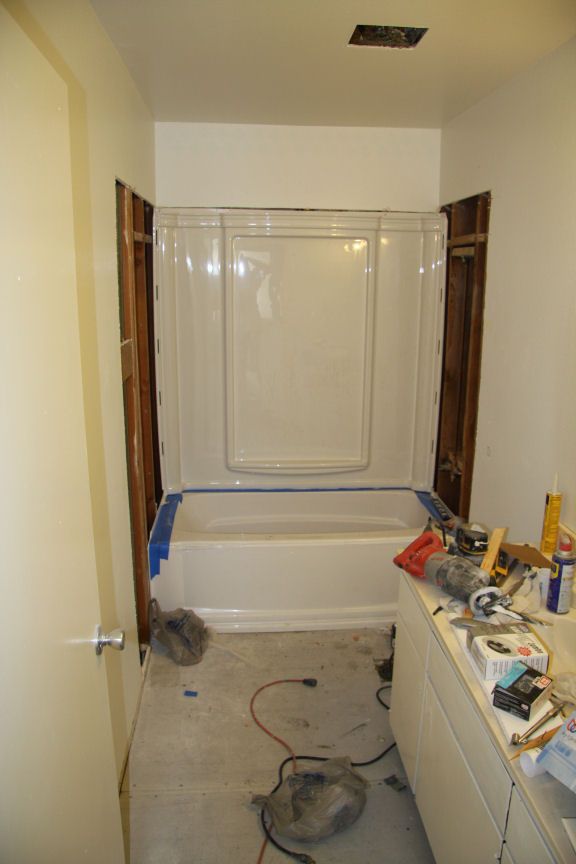
We started this project by removing the frozen gate valves that supplied water to the toilet and sink and installed new quarter turn ball valves. No more leaks! We’d deal with the rest of the plumbing issue later on after doing the demo work. I knew the tub / shower was probably secured to the studs with a nail fin, so we drew a line around the outer edges of the tub / shower about 3 inches from the outer edges. We cut out the drywall along these lines to expose the nail fin. From there, we used hammers, nail pullers, pry bars and a reciprocating saw to remove the old tub / shower. We used a long handle scraper blade to remove the linoleum floor and were surprised by three separate layers of linoleum. We removed any part of the sub floor that was damaged and replaced it. We wore protective clothing including respirators when treating the mold problem that took a few days to resolve.
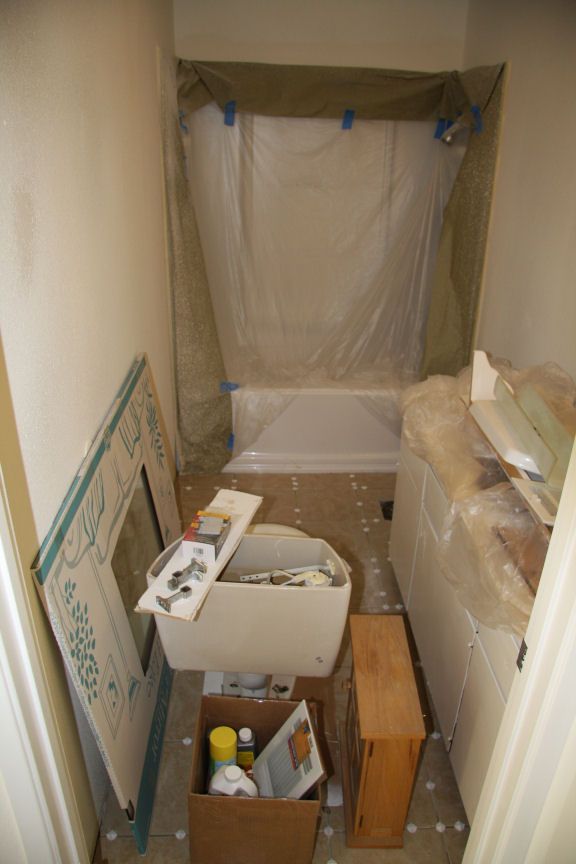
In order to bring more structure to the floor, we decided to screw down cement board on top of the plywood. We then laid down ceramic tile and these two things really firmed up the floor. The toilet was removed and completely rebuilt with new hardware and reinstalled with a new heavy duty wax ring. The cabinets were chemically stripped and power sanded before we filled any imperfections, primed and then painted them the color ‘Cool Gray’ with Valspar paint.
We had to replace a significant amount of green board in the bathroom. After the tape and mud work, I used a Wagner BigTex turbine powered spray texture gun to shoot texture on the walls and ceiling. The key to making this tool work correctly is making sure the mixture of mud & water is perfect and then this tool works like a champ. I also used the Wagner Paint Crew to paint the entire home and it too worked great.
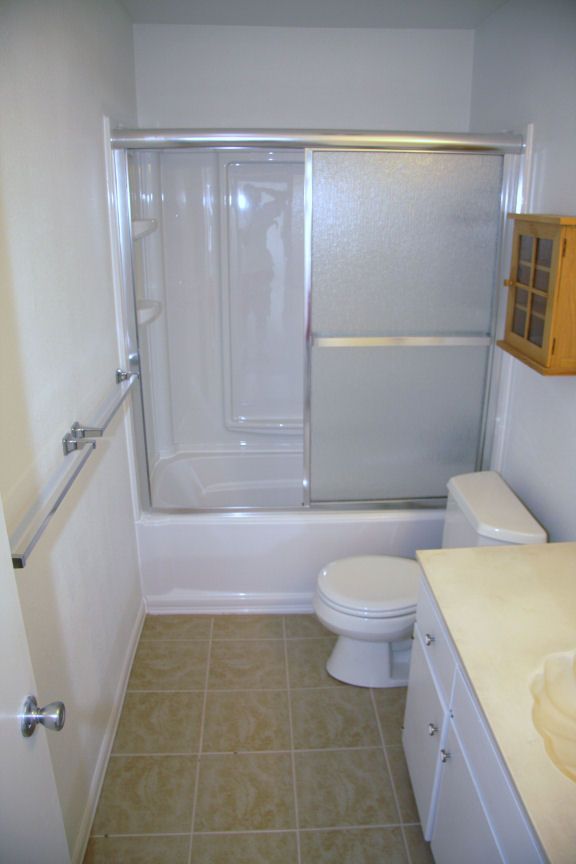
We chose to buy a plastic DTS (Direct To Stud) tub / shower made by Eleganza. The tub / shower offered several nice features including lots of shelves, a deeper than normal tub, an easy to clean surface and easy installation. The DTS install looked pretty straight forward, but it was not as easy as we thought. And the manufacturer’s instructions were poorly written and incomplete. I also wanted to point out that we ended up going through a couple of these tub / shower units at the store before we found one that was not broken, so make sure you check them out carefully at the store before you bring them home. The tub / shower walls had plastic interlocking tabs that locked into the adjacent pieces, but they didn’t always fit so perfect and we ended up having to break off a tab or two make it fit.
The most important aspects about installing a tub is to make sure its level and square so the water drains correctly and the shower doors operate smoothly and align with the rails when they open and close. We encountered a few bumps along the way during this install.
The fixture kit we were directed to buy did not work with our plumbing. We had to buy a ‘Deep Tub Kit’ from a plumbing wholesaler that was four times the price of the original kit we bought from Lowes. We also had to change the location of our mixing valve and water spout. Both my wife and I have experience sweating copper pipe, so this wasn’t too big of deal for us.
Even though the bottom of the tub had a honeycomb shape for strength, Aaron in the plumbing department at Lowes suggested we also lay down a base of sand and work the tub’s honeycomb base into the sand for added strength. It made sense to me, so we did this. Once the tub was installed, we moved forward with installing the walls, which are locked together with interlocking tabs, glued in place to the studs, and then nailed at the edges. The sides of the plastic walls where the shower doors make contact were actually hollow, so we filled this area with precision cut wood for added strength. This wood also gave me a strong place for securing the shower door rails. The shower doors went in nice and square and operated as smooth as silk. The water drained as planned…whew!
Even though the panels were supposed to be leak proof because of the way they were designed, we decided to fill all the seams with caulk just to be safe. We also caulked all the edges and used clear silicon along the rails for a water proof seal.
Both my wife and I were very happy with this transformation and we think the pictures speak for themselves.
