1970’s Kitchen Remodel (Product from Lowes / Work done by Me)
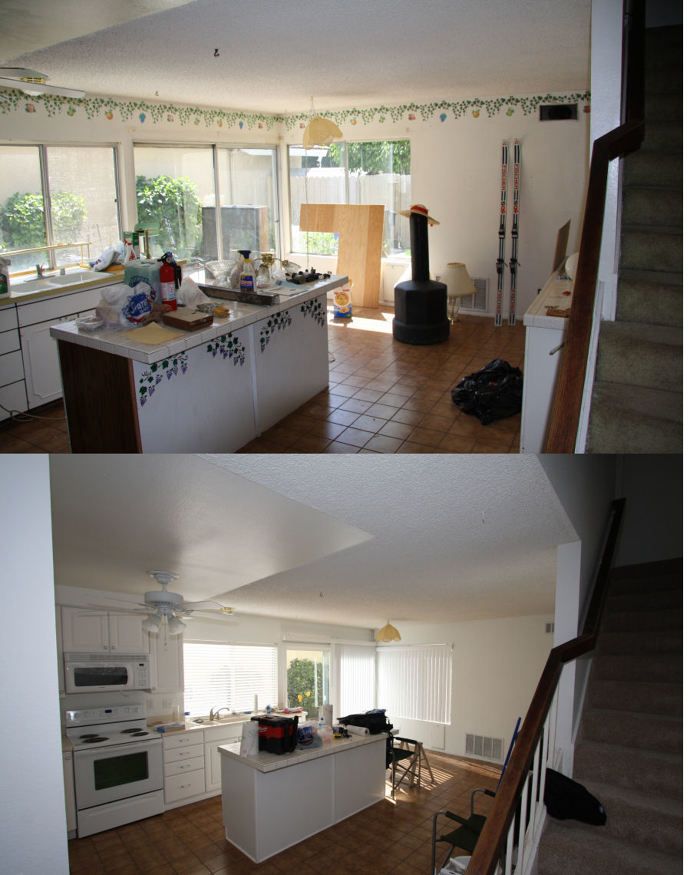
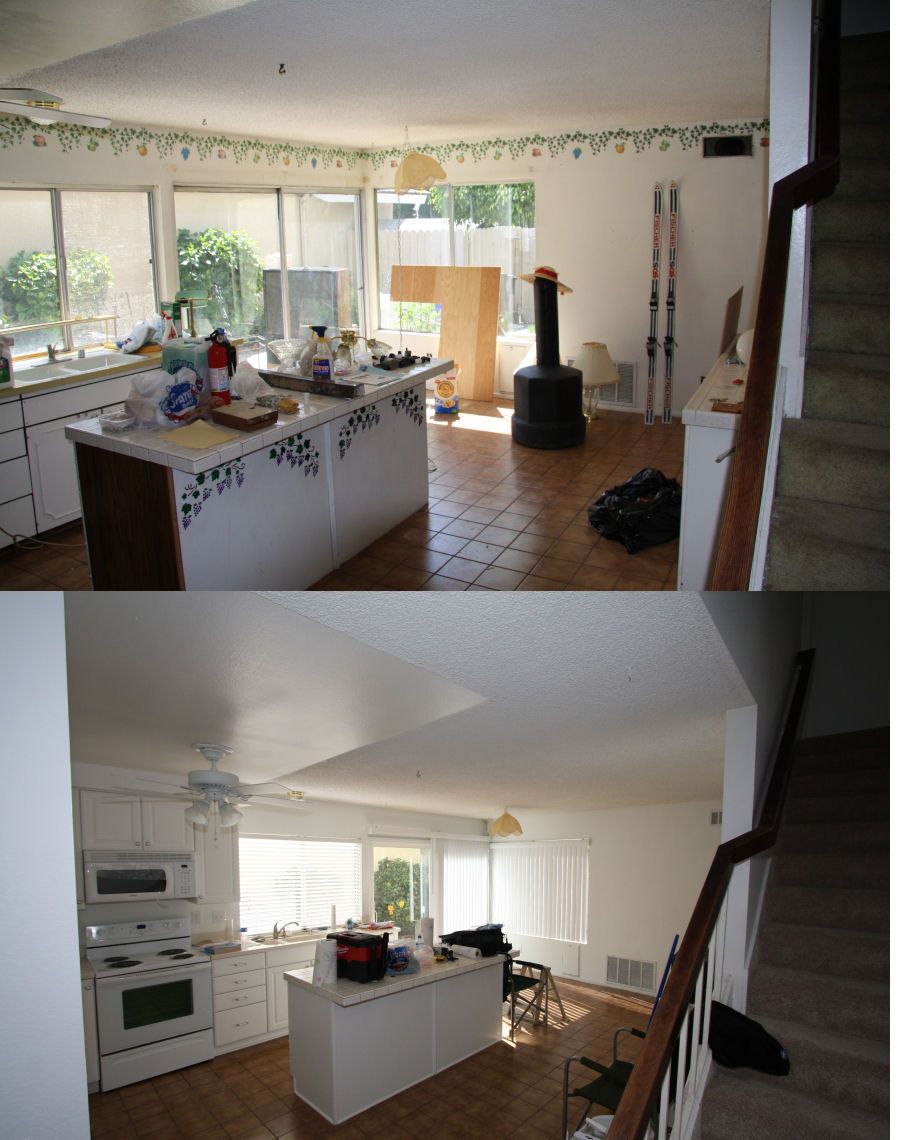
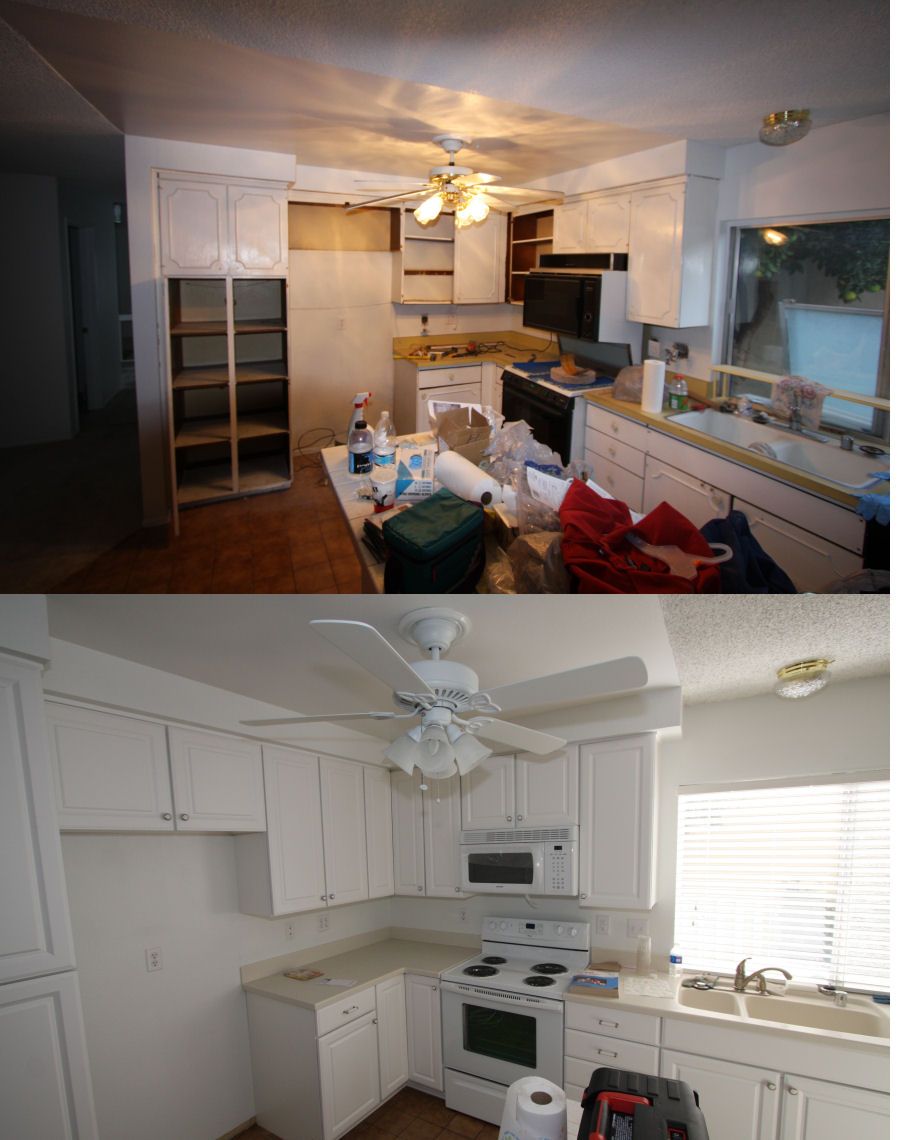
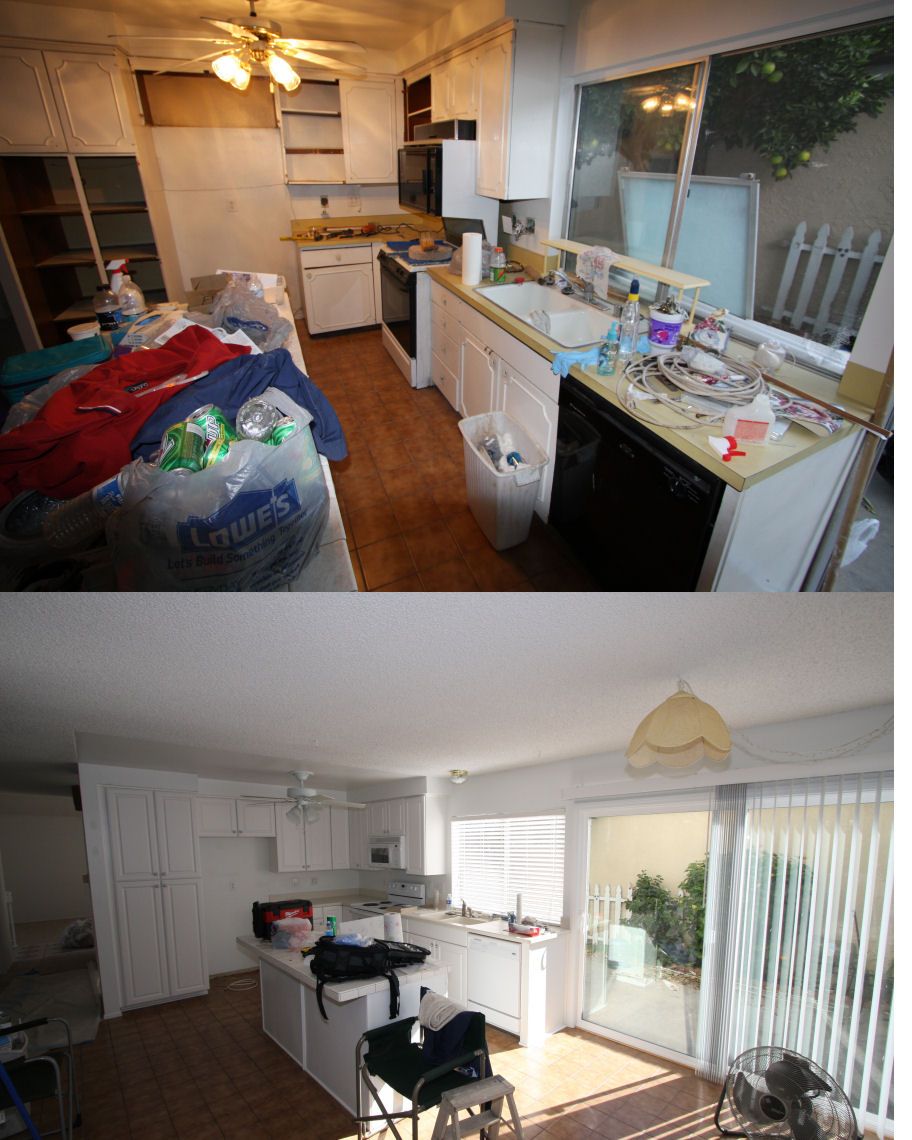
Here’s our 1970’s kitchen with what’s left of the ugly wall paper, mustard yellow countertops, crooked kitchen cabinets, leaking plumbing fixtures, broken appliances, a wobbly ceiling fan, etc. We bought this rental home as a fixer and it needed lots of work. After receiving numerous bids and considering various options, my wife and I decided to take on the task of remodeling and do all the work ourselves. We chose to buy our products from Lowes, who offered us a large savings on many items through their QSP discount program. These discounts allowed us to buy higher quality products and complete our remodel within the constraints of our limited budget.
We decided to replace the following items:
· Kitchen cabinets with new countertops (Shenandoah Arctic Grove topped with Corian Bisque color)
· All plumbing fixtures above and below the sink (Moen)
· All electrical outlets, switches and wall plates
· All HVAC vent covers
· Ceiling fan (Hunter Breeze)
· Sliding glass door (Pella Thermastar)
· New blinds (Levalour cut to fit)
· New appliances (Whirlpool dish washer, stove, microwave, Insinkerator disposal)
The original cabinets once had a beautiful stained wood finish, but the tenants painted them with what looked to be a BBQ brush. In fact, they painted numerous heavy dripping coats over all surfaces including screws, hinges, all metal and plastic pieces throughout the house, etc. Much of the wood was severely damaged and crumbling apart, so we decided to buy new cabinets. We only had enough money to replace the main kitchen cabinets and had to make do with the island and cabinets against the stairs, both of which were still in decent shape. We chose the semi-custom Shenandoah cabinets in the Arctic Grove white color scheme which featured some real wood components, dovetailed joints, ball bearing sliders, and a durable baked white finish that was resistant to all household chemicals, crayons, etc. To start this process, we simply took measurements and pictures of our exiting kitchen and submitted them to the kitchen designer at Lowes. She “June” modeled different makes and configurations of cabinets in her computer for us, which greatly helped our decision making process. Once everything was ordered, the fun was just around the corner.
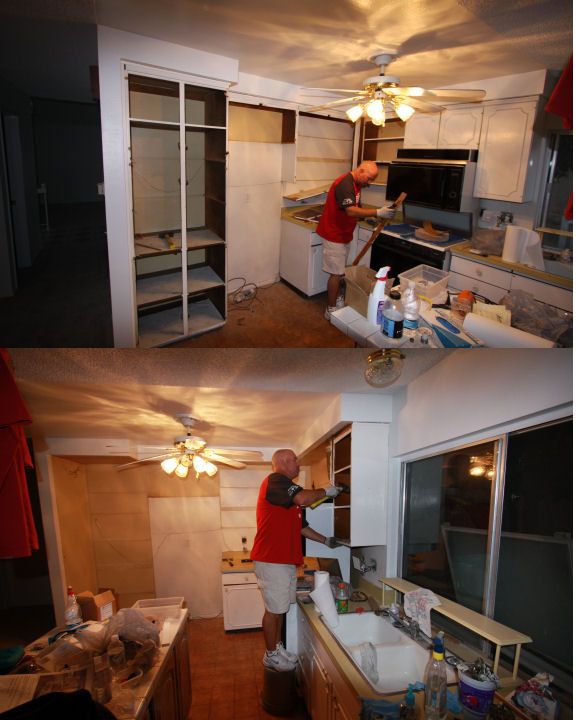
The original cabinets from the early 1970’s were still in place. I invited a good friend of mine over to help me demo the cabinets. We did all the work in an evening with hammers, saws and pry bars. The demo work was fun and it saved us roughly $800 by doing the work ourselves.
After I completed all the prep work from fixing cracks, holes, etc, we chose to prime any of the darker areas just to make sure nothing would show through the paint. We chose Lowe’s Valspar primer and paint products in the color “Cool Gray” and couldn’t have been happier. I actually left some paint out to dry on a piece of wax paper so I could check it out a bit further and was extremely impressed with the elasticity and strength of this paint compared to other paints I’ve used in the past. As much as we wanted to scrape the ceilings throughout the house, our time and money did not permit this. But we did buy ceiling paint tinted to our color and painted all ceilings throughout the house.
After the cabinet demo and paint was complete, I replaced all electrical outlets, switches and wall plates. While waiting for our new cabinets to arrive, my wife and I stripped the cabinets from the island and against the stairs using a 10 minute paint stripper from the paint department. The wooden cabinet doors looked incredible after stripping and sanding them, but we chose to prime and paint them white to match our new cabinets.
All the old gate valves for the water supply were removed and replaced with quarter turn ball valves along with new pipes, fittings, etc. No more leaks!
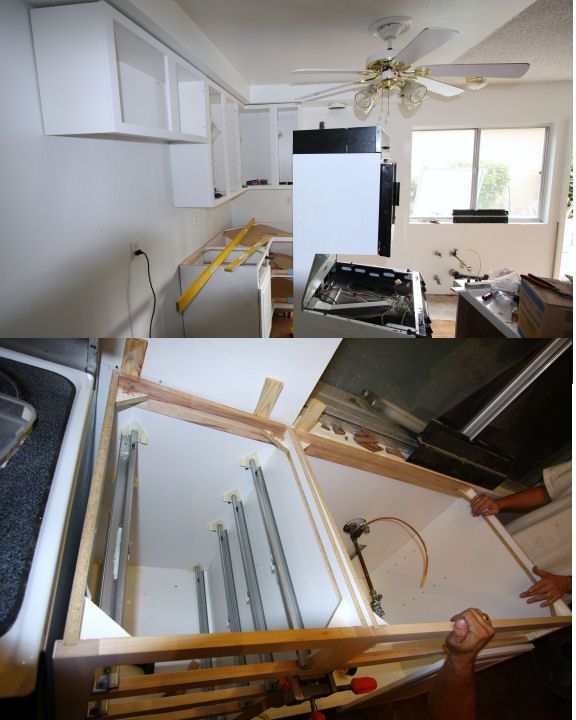
Installing the new Shenandoah kitchen cabinets went smooth thanks to June at Lowe’s who modeled everything for us on her computer. I simply used an adjustable cargo bar meant for a truck bed to prop up and hold the cabinets in place before securing them. After the first cabinet was installed, I clamped on the next cabinet so its face was dead even with the other cabinet, all the while making sure they were level. I used hard wood shims on the backs or sides of the cabinets take up any space so the cabinets would stay put when I screwed them in place. I continued using this method throughout the entire install and was very happy with the results. You can see my levels, clamps and shims in action in the 4th picture. The soffit however on the side of the kitchen window was not level and I had to make a compromise on being level because of this. Installing a top piece of trim covered up this difference so it was no longer noticeable.
We chose Corian for our countertop because of its smooth surface without joints, its price, durability, free built in sink promotion and we found a color that closely matched the existing tile on our island. If we had the money, we would have used Corian on all the counter tops, but we were on a limited budget and didn’t have the money to do so. We had no choice but to have our Corian countertops measured and installed. The install company came out to our home and pasted a number of pre-printed post-it sized squares across our cabinets and took digital pictures of them. The pictures were digitally interpreted for a CNC machine which cut out our countertops to an accuracy of 1/32 of an inch. I was amazed at the accuracy of this process because the countertops truly did fit like a glove. The installers simply ran beads of glue (Liquid Nails) on the bottom of the Corian and set it into place. They did the same thing for the back splash, and then ran a bead of clear silicone across the top for water proofing. They were in and out within an hour!
I installed a new Hunter Breeze ceiling fan to match the white décor of the kitchen. The fan was perfectly smooth and quiet out of the box and did not need any balancing. I also installed Levalour blinds that were cut to length by Lowes.
The kitchen sliding glass door was a serious problem. It took an average man or two small women to open it. The bottom rail was severely damaged and so was the door, so we decided to replace it with a more energy efficient Pella Thermastar Vinyl sliding door. The install was fairly straight forward for me. The only real critical part was making sure the door was square and not pulled too tight with any of the screws. Once installed, the door opened and closed smoothly with just one finger.
The appliance installs went pretty smooth. However, I did drop a small screw into the dishwasher. This required a special trip to Lowes to buy a small telescoping magnet so I could fish it out. The Whirlpool Microwave oven was interesting to me because it was designed to work in various configurations, such as venting to the back, venting to the side or venting through the top. It came from the factory setup to vent through the back, so I had to reconfigure it to vent through the top. Reconfiguring it was easy enough. I removed the top access panel, removed and re-installed the squirrel cage blower in a different direction, slid on a new top panel with a rectangular lip and was done. I thought it was a smart and versatile design.
Choosing to buy from Lowes through their QSP program and doing the work ourselves saved us a lot of money. We remodeled the entire home, but not everything went as smooth as the kitchen remodel. I do have to give props to our Lowes store in Tustin California because they were there for us through thick and thin. They offered knowledge, experience and help when they could. They even visited our home to see how things were going. They truly made the entire process easier for us. If you plan to spend more than $4K in a given department or more than $10K throughout the store, then I’d highly recommend connecting with your store manager and asking them about the Lowes QSP program that can save you lots of money.
