1970’s Master Bathroom Renovation (Product from Lowes / Work done by Me)
This small master bathroom still had the original shower doors from the 1970’s! Not only was this room ugly, but it was in desperate need of repair. The original shower was cracked, chalking, flaking apart and leaking. The multi-layered linoleum floor was filthy and plain ugly. The ceiling was in very poor shape and crumbling in places.
This entire home was in serious need of work and the costs really started to add up based on the estimated we received. After some serious thought, we decided to tackle the remolding ourselves, including this bathroom. We had just finished installing a similar tub / shower upstairs and thought installing this shower would be easier, but we ran into a problem which almost cost us the entire install.
We chose to buy our products, materials and tools through the Lowes QSP program which saved us a bundle of money.
We chose the Eleganza plastic shower sold at Lowes because of its price, ease of installation, ease of cleaning and features which included lots of shelves and a foot rest. We removed the old linoleum flooring with a long handled scraper blade which made easy work of the floor. I presumed the shower was secured with a nail fin, so I marked off a line about three inches away from the edge all the way around the shower. I cut the dry wall with a razor blade and knocked it out with a hammer. The rest of the shower was quickly removed with hammers, nail removers, pliers, a pry bar and a reciprocating saw.
Much of the ceiling was removed and replaced with new green board. I used a Wagner BigTex texture gun to shoot texture on the walls and ceiling, then knocked it down with a blade. Getting the mud to water ratio thin enough and correct is the key to making the BigTex work well and it worked like a champ throughout the entire home.
The most important part of installing the shower is to make sure everything is level and square so the water drains and the shower doors open and close smoothly and are square to the rails. Another very important part of the install is to make sure the drain is lower than the rest of the pan so the water drains, and this is the gotcha that almost cost us our install.
Another gotcha was that our measurements were dead on for the length, width and height, but I forgot to take into account measuring the distance from the drain to the wall. When the shower base was installed, its base was a good inch and a half away from the back wall. I decided to frame out the wall to make up this distance, but that created other problems at the top of the shower which I solved with some plastic crown molding around the top. As it turned out, the side walls were completely out of square and I had to reframe them, which is something I did not anticipate originally.
I had to modify our copper plumbing to install the new shower valve. We tested our work for a few days under pressure to make sure there were no leaks.
The base of the shower was made from Styrofoam which had hollow squares on the underside. Aaron in the Lowes plumbing department recommend to us that we lay down a base of sand and work the Styrofoam base into the sand so the load would be more evenly displaced, so that’s what we did. The original shower drain had a short jagged stub and wasn’t long enough to reach the drain. I had to break out the mortar surrounding the drain and couple a new pipe for the extra length. After working the tub in place and verifying that everything was level and square, I installed the walls. Before installing the walls, I should have made sure water was draining into the drain!
Once I reframed the walls so they were square, the shower walls were glued in place to the studs with a plastic compatible adhesive and then nailed in place. New green board was installed to cover the edges, which were then taped, mudded, sanded, textured, and painted.
I installed ceramic tile on the floor using an inexpensive hand held tile cutter to make any and all cuts. This particular toil had a slow drain problem. I used an inexpensive Milwaukee camera scope to find a round piece of plastic wedged in the line. I was able to some flexible to0ol and finally a grabber to remove this thin Frisbee looking object that obviously didn’t below there. The frozen gate water supply valve was replaced with a quarter turn ball valve. All water lines, pipes, joints, seals, etc, were replaced without question and a new heavy duty wax ring was used when installing the toilet.
Everything looked great and I thought I was done until shortly my wife turned on the water.
OMG! The water was pooling up around the drain and not draining. OMG!
I was truly panicked and thought we might have to scrap the entire install. Once I was able to think more clear, I came up with a couple potential solutions, but I first had to better understand what was pushing the drain up so I could fix this. I was unable to remove the drain by hand, so now I had a new problem to deal with before I could do anything else.
I bought an expanding pipe plug, which is simply two plastic cones surrounded by a large thick rubber band and held together using threaded rod and nuts. As the wing nut is tightened, the cones come together and push the thick rubber band outward. I swapped out the short threaded rod with a longer threaded rod and chucked this assembly into my drill after expanding the plug inside the drain. Then I ran the drill in reverse, which finally loosened the drain assembly. Whew!
Once drain was removed, I could see lots of sand inside…ugh! I taped some small clear tubing into the crevice tool of my shop-vac and sucked out all the sand that I could by working the hose assembly back and forth into the crevice between the drain and hole in the shower base. It took many hours to vacuum all the sand because the hose kept plugging up from larger rocks, but I was limited in the size of the hose I could use. After stomping on the sho0wer base to redistribute any sand, I was pleased to see that the base had dropped significantly. But I was not off the hook yet!
This ended up being a multi-part problem because the coupling I installed was now contacting the base of the drain and preventing it from lowering any further. I installed a spiral cut bit into my trusty Dremel tool and was able to carefully mill down the coupling a bit. I also cut down the base of the drain by nearly a quarter inch. It was the combination of removing the excess sand, redistributing it, modifying the coupling and the drain which resolved the problem. Whew! What a relief.
Please realize that we had a very limited budget to work with. This entire home was in serious need of work, so we had to spread the money wisely and make hard choices. We would have loved to have done more here, but we’re very pleased to have a working shower that’s clean and beautiful compared to what was there.
-
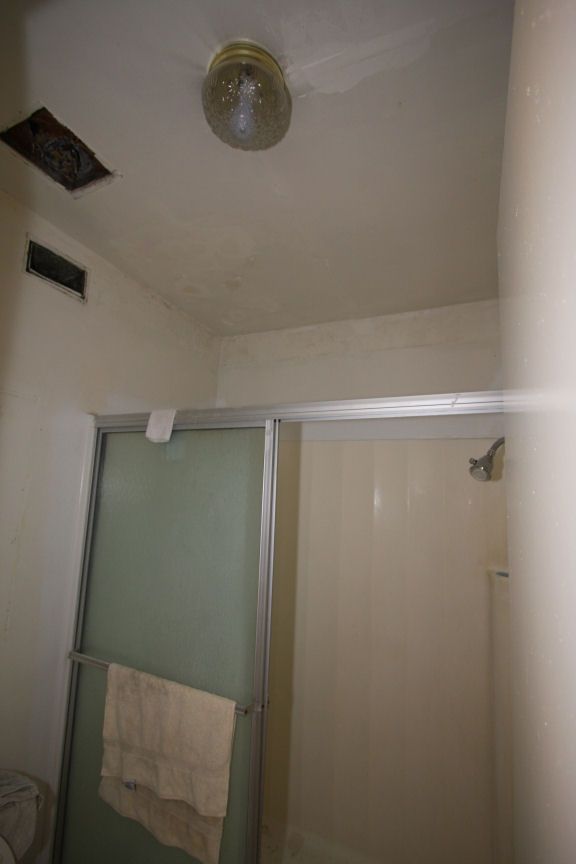
For a master bedroom, this shower was ugly and scummy. Unfortunately, I had already removed the wall paper by the time I took pictures, but it was wild and straight from the 70’s. This is the original shower from the early 1970’s which was cracked, chalky, and leaking. The shower doors took lots of force to move and were damaged. The ceiling was actually crumbling apart in areas and needed serious attention. The linoleum floor turned out to have multiple layers of linoleum glued on top of each other and was peeling at one of the edges. Everything was filthy dirty and required lots of work before it was sanitary enough to work with.
-
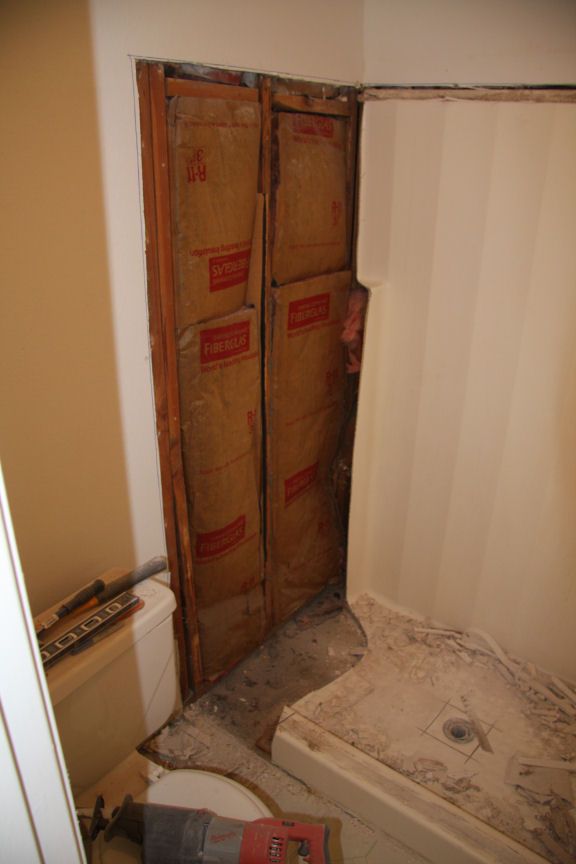
The demo work has begun! We used a utility knife, a hammer, nail puller, pry bar and a sawzall to do all the demo work. The linoleum floor was easily removed with a long handle scraper blade.
-
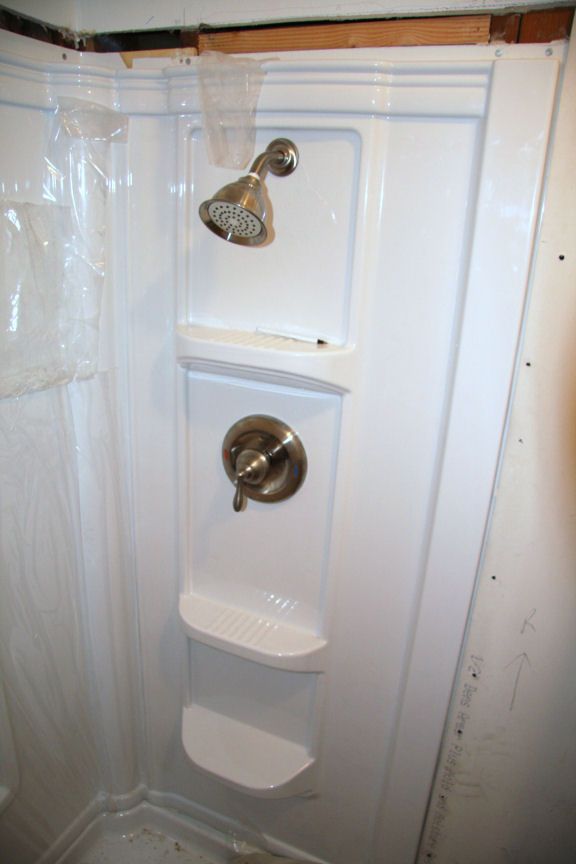
I just finished installing the shower and screwed in the drywall / green board to cover the nail fins. Next comes the mud, tape and more mud to make the joints seamless. Then comes the texture followed by paint. We chose Valspar semi gloss paint in the color ‘Cool Gray’ for this bathroom and the rest of the home.
-
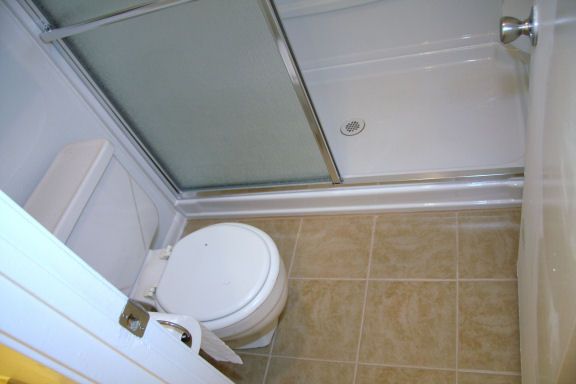
Finally done! I installed ceramic tile on the floors which you can see in this picture. Everything is now functional, clean and sanitary.
-
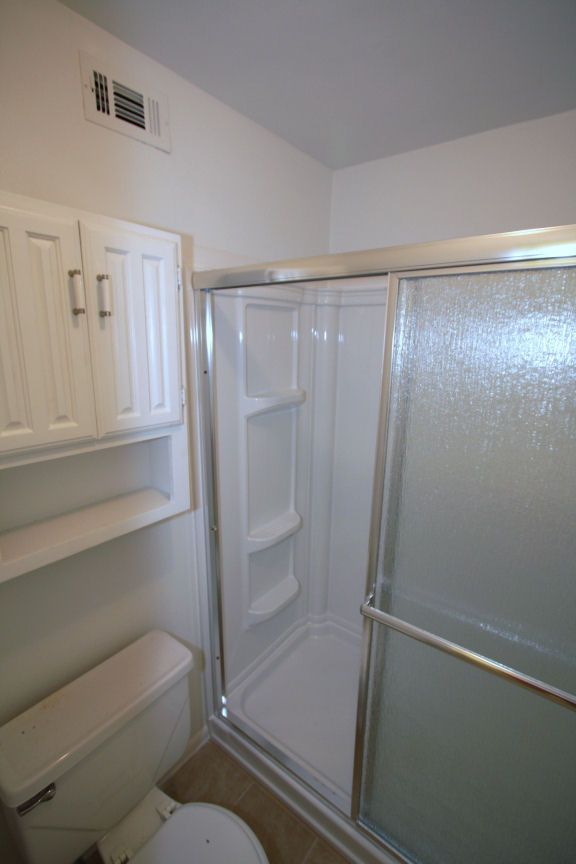
Finally done! The plastic Eleganza shower has plenty of shelves and a foot rest on both sidewalls. It’s easy to clean and now the water drains as it should J. Everything is now functional, clean and sanitary.