Dewalt DW708 Compound Miter Saw Upgrade Modification
DeWalt 708 Sliding Compound miter Saw modification
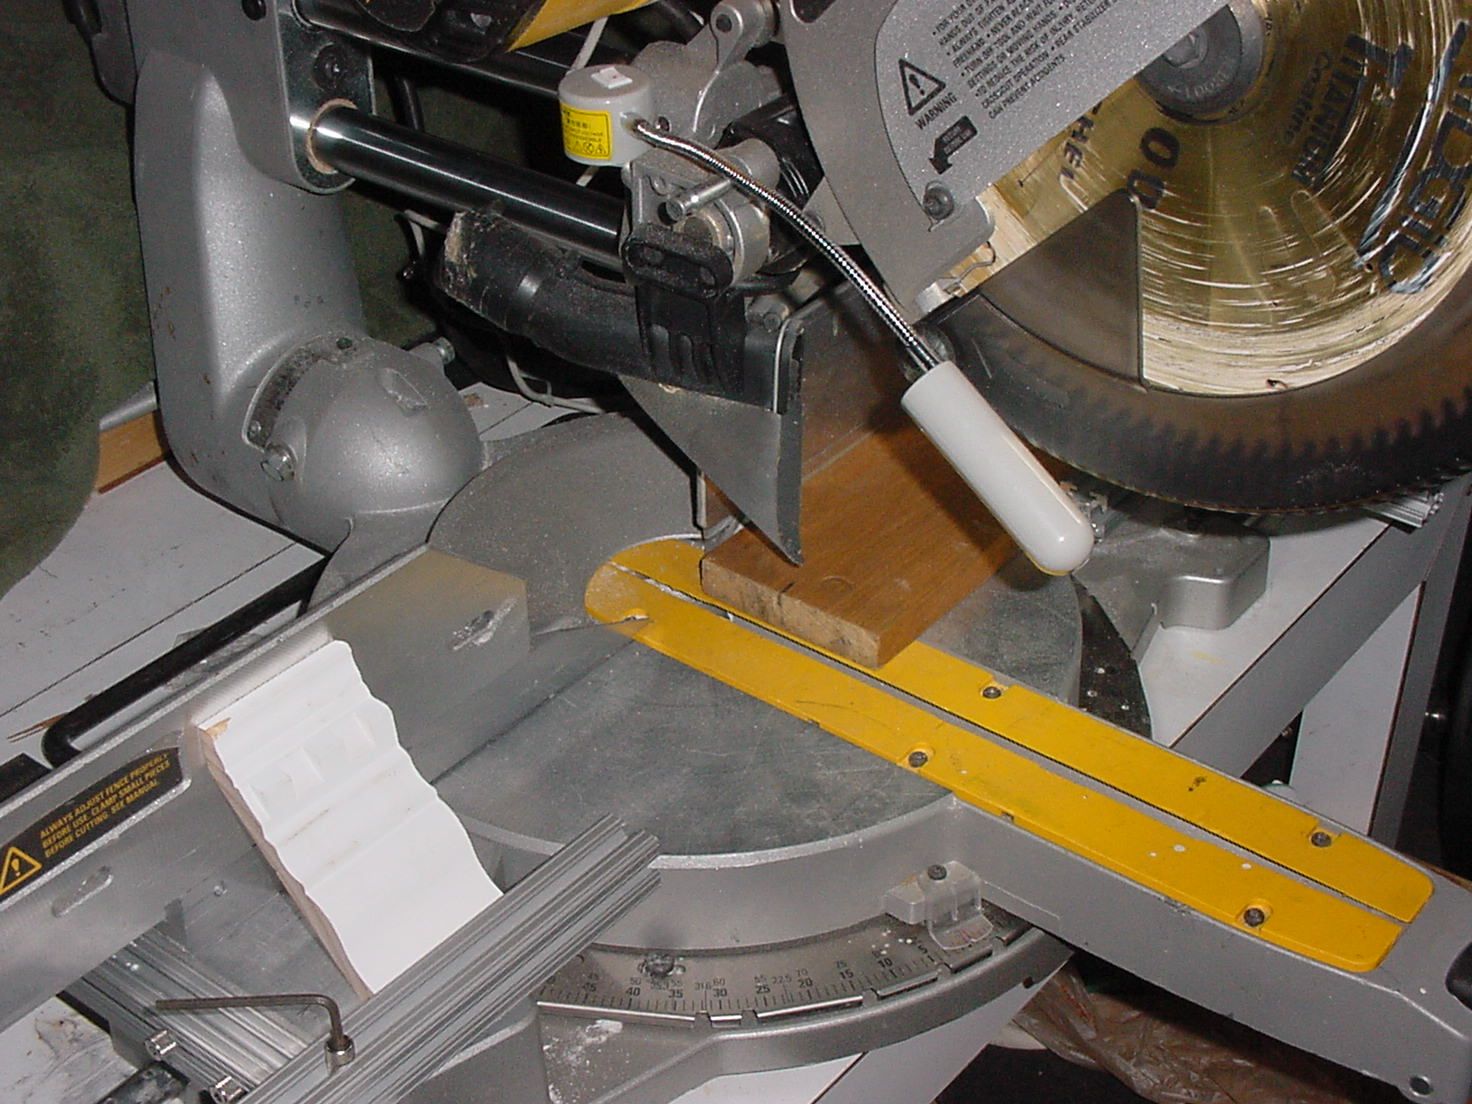
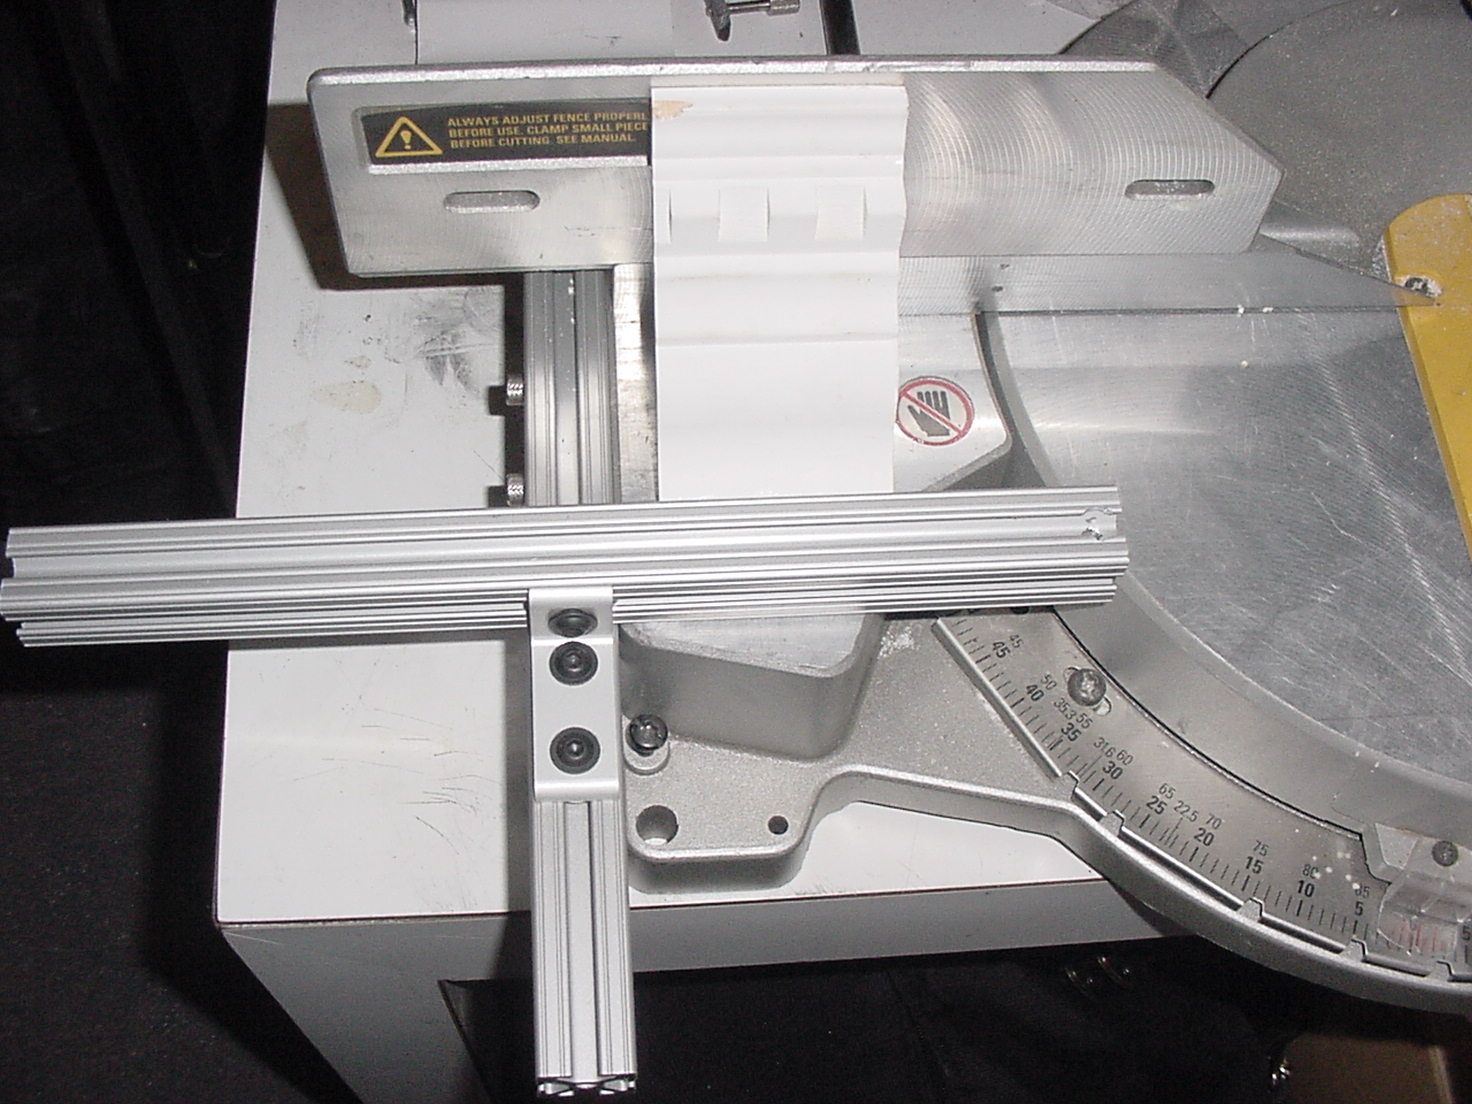
Many of you jobbers have seen the newer versions of this saw and liked the added touches of the light and laser line, and have also viewed the Festool saw for 1300 bucks and noticed the incorporated Crown molding table fence stop built in to the base. I have noted with interest, several vids on how to add a crown stop, consisting of a wooden shop made jig, assembled to affix semi permanently to the table of your particular saw, with a fair amount of labor involved. I came up with a simple solution for TWO of the three add- ons. An inexpensive adjustable LED Light, and a permanent Adjustable Crown molding table fence that extends out to accomodate 6″ or wider crown, can be left on the saw permanently, so they won’t get lost or misplaced, and also can be used as a zero gap fence for the occasional really short piece of stock, that can’t be supported at the blade. They also add extra wide support for flat stock. I personally don’t care to use a laser line, so I didn’t concern myself with the 3d option. The whole operation takes about 2 hours on a rainy afternoon, and about 40 bucks in materials. ( pic 1)
Now to be honest, I had the 1×1 extruded aluminum bar stock laying around from another jig I never made. 8020 10 SERIES 1010 1 X 1 T-SLOTTED EXTRUSION x 48″ $12.99
You could also use ( This profile give you 2 slots instead of one) .8020 10 SERIES 1020 1 X 2 T-SLOTTED EXTRUSION x 24 $11.31
Also, all of these things are readily available from Amazon.com and comes with free shipping over 35 bucks. It will come to 40.00INCRA Build-It Knobs, 1/4-20 by 1-1/2-Inch Bolts, Washers, Set of 8 $11.50 & FREE Shipping on orders over $35.
You will also need ( 2) 1/4 -20 Tee Nuts8020 Inc 10 Series 3204 Standard ¼ 20 tee nuts (2)79 cents apiece.
You will need a drill press to accurately drill the holes in the extruded aluminum and reference those holes to the sides of the saw, after you drill your holes thru the center of the bar. (¼ 20 leaves very little room for error but it can be done accurately on your drill press) I used 10-32 because I had these stainless thumb screws laying around in my parts draw, and I wanted to leave more meat thru the bar center. You cannot easily get the T nuts for 10-32 so I had to make some out of3/16 Alum stock on the table saw. Which can take some time. (Pic 2 shows the home made Tee Nut off to the side.)
¼ -20 is commonly available for this extrude, and so are the knobs etc, so I would go with the ¼ – 20 If I had to do this over again.
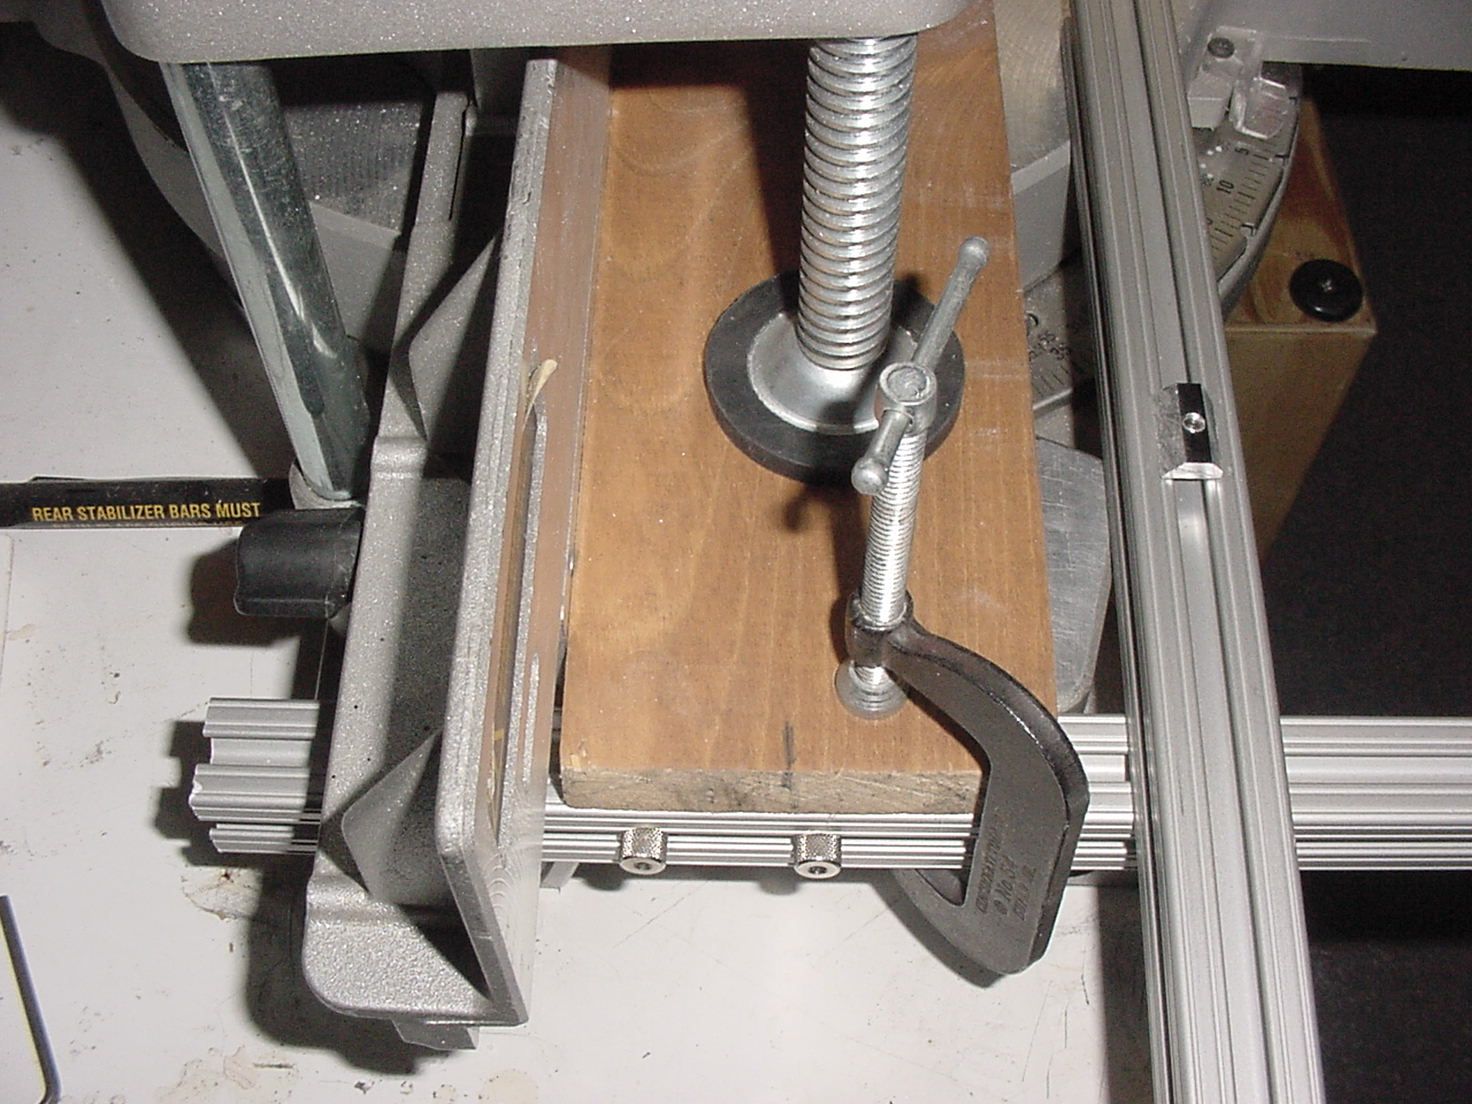
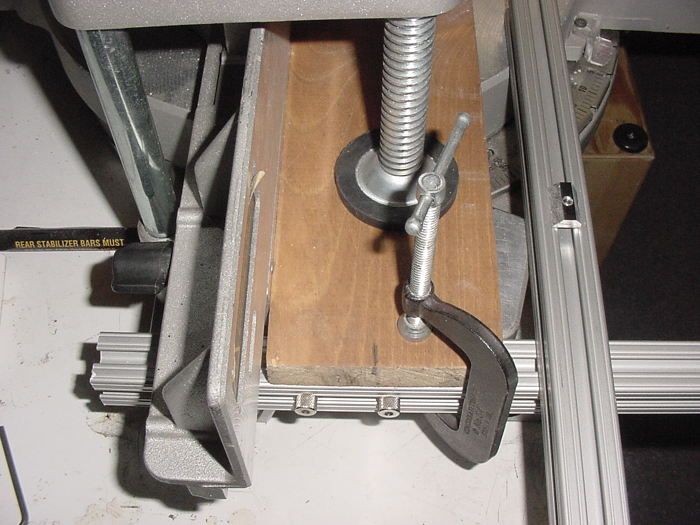
This is how to register the bar to the saw body ( pic 2)
Use the Dewalt hold down on a piece of flat stock to register the bars dead nuts to the table top, then C clamp the bar to the wood. Use a transfer punch to register the centers, with the rail in place on the saw.( or a drill bit of similar size) and drill your pilot holes (freehand, with the rail in place) for tapping.(Tapping also free hand)with the rail off.That’s it. Now for the light. (Magnetic Mounting Base Working Gooseneck Lamp 110v + 10 LED Light for Home or Sewing Machine $11.78)
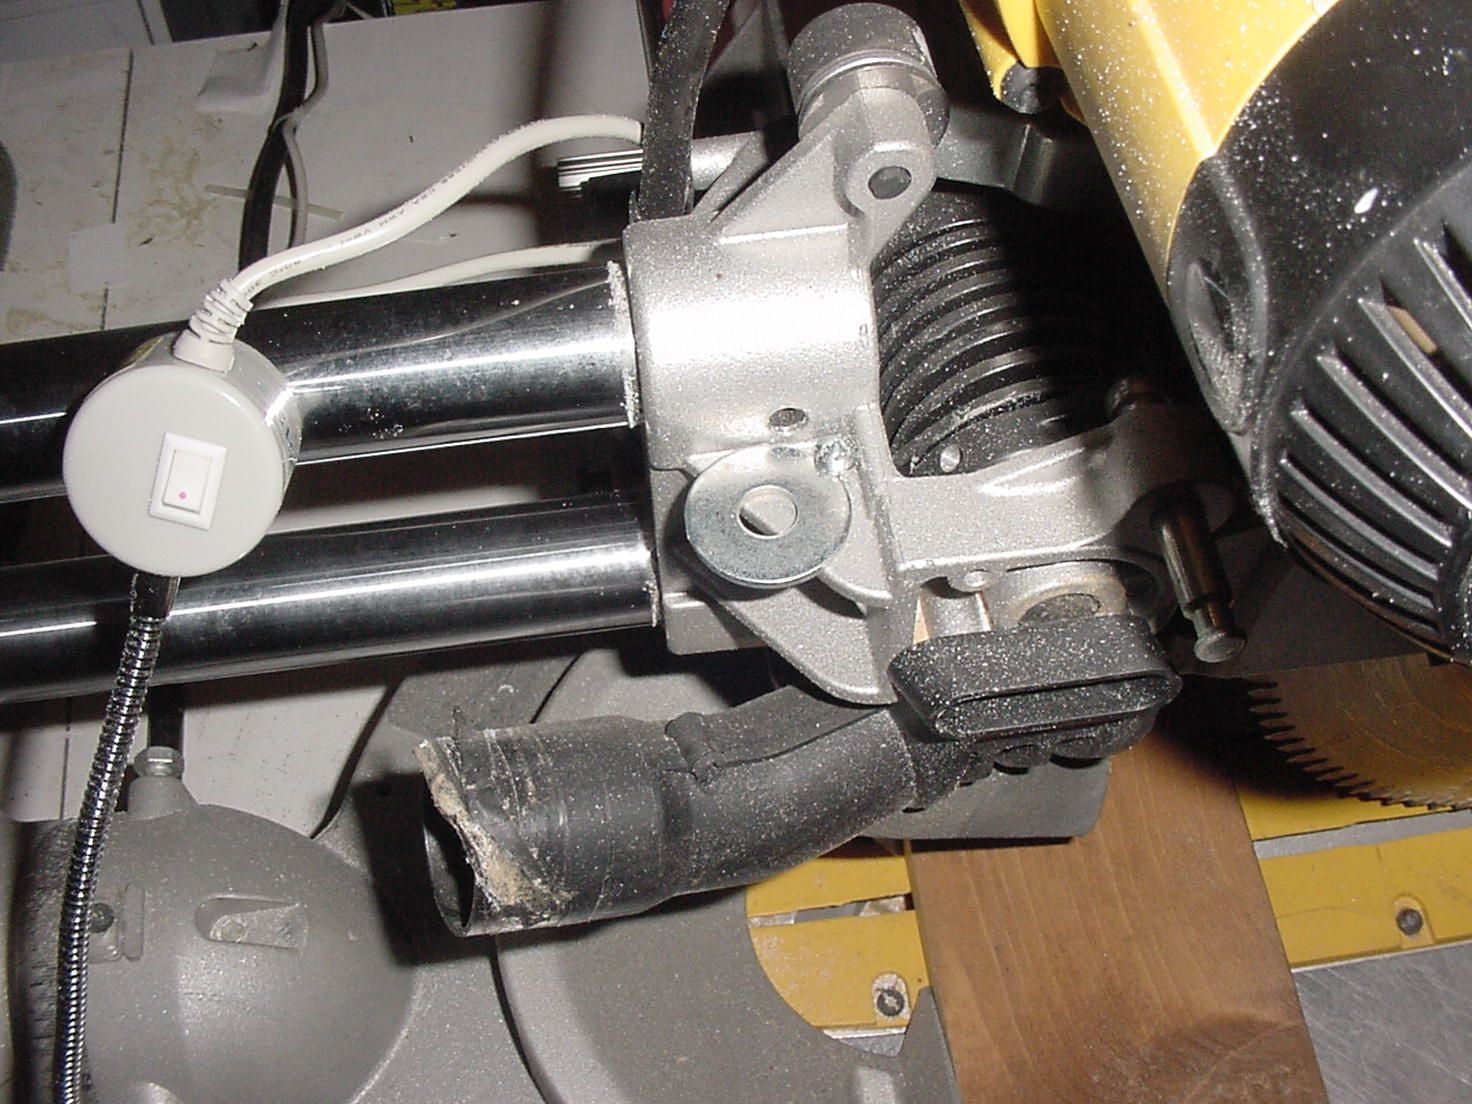
This operation takes 2 seconds. One 1 1/8″ fender washwer and a self tapping tech screw and you’re done. Like so
It holds really tight, and its very cheap to replace! Place the LED base on the washer and position it where you like it. It won’t move at all. ( pic 3) (Pic 4)
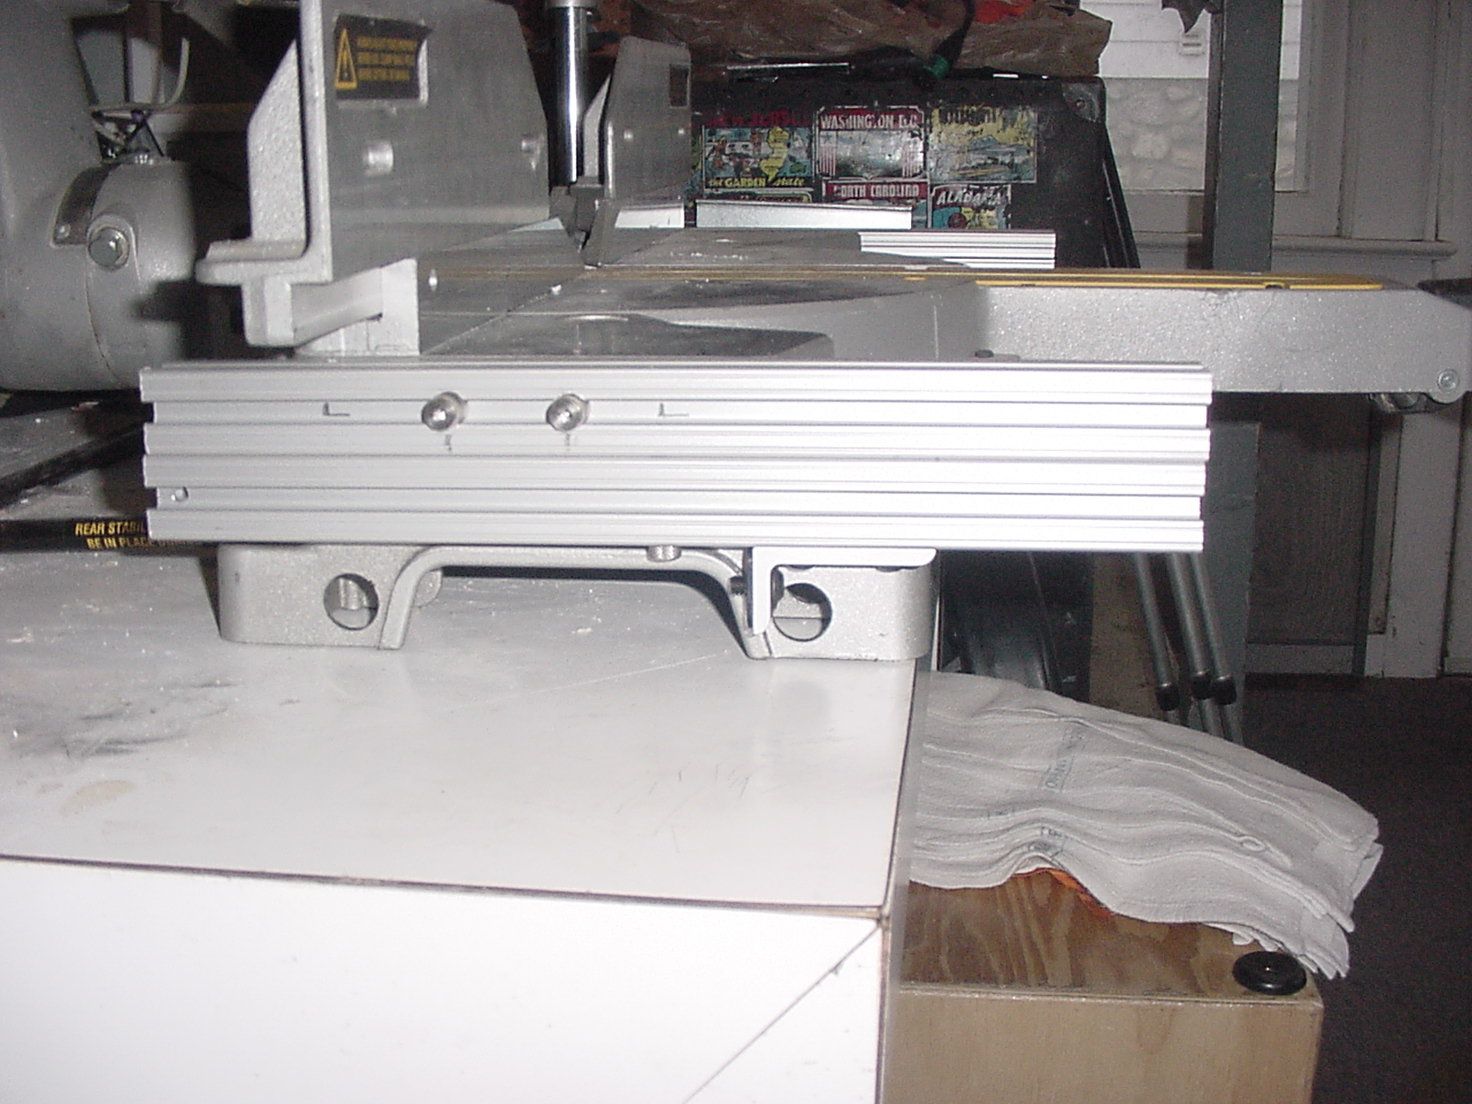
When your done with the crown Molding job, flip the bar underneath the attached side bar, and tighten, no need to take anything off as the fixture act as a support for wider stock. (Pic 5)
One last note. Using the 1×1″ stock there is the possibility of minor movement on the upper ( table fence) bar, that can be remedied by adding
80/20 10 Series 4250 3-HOLE SLOTTED CORNER BRACKET $ 4.50 to alleviate any movement. I am limited to 5 pics , so these are the essential ones. Jerry Mall, Stamford, Ct I apologize ahead of time if I posted this ass backwards, I am new to the process.
