When building a custom kitchen on a tight budget the designer will eventually face therefrigerator dilemma: cabinet-depth and built-in refrigerators take a quantum leap inprice from the standard models that can be as deep as 30″. How do you save $5000 ona refrigerator and not have it stick out in front of standard depth cabinets by 6″ or more?
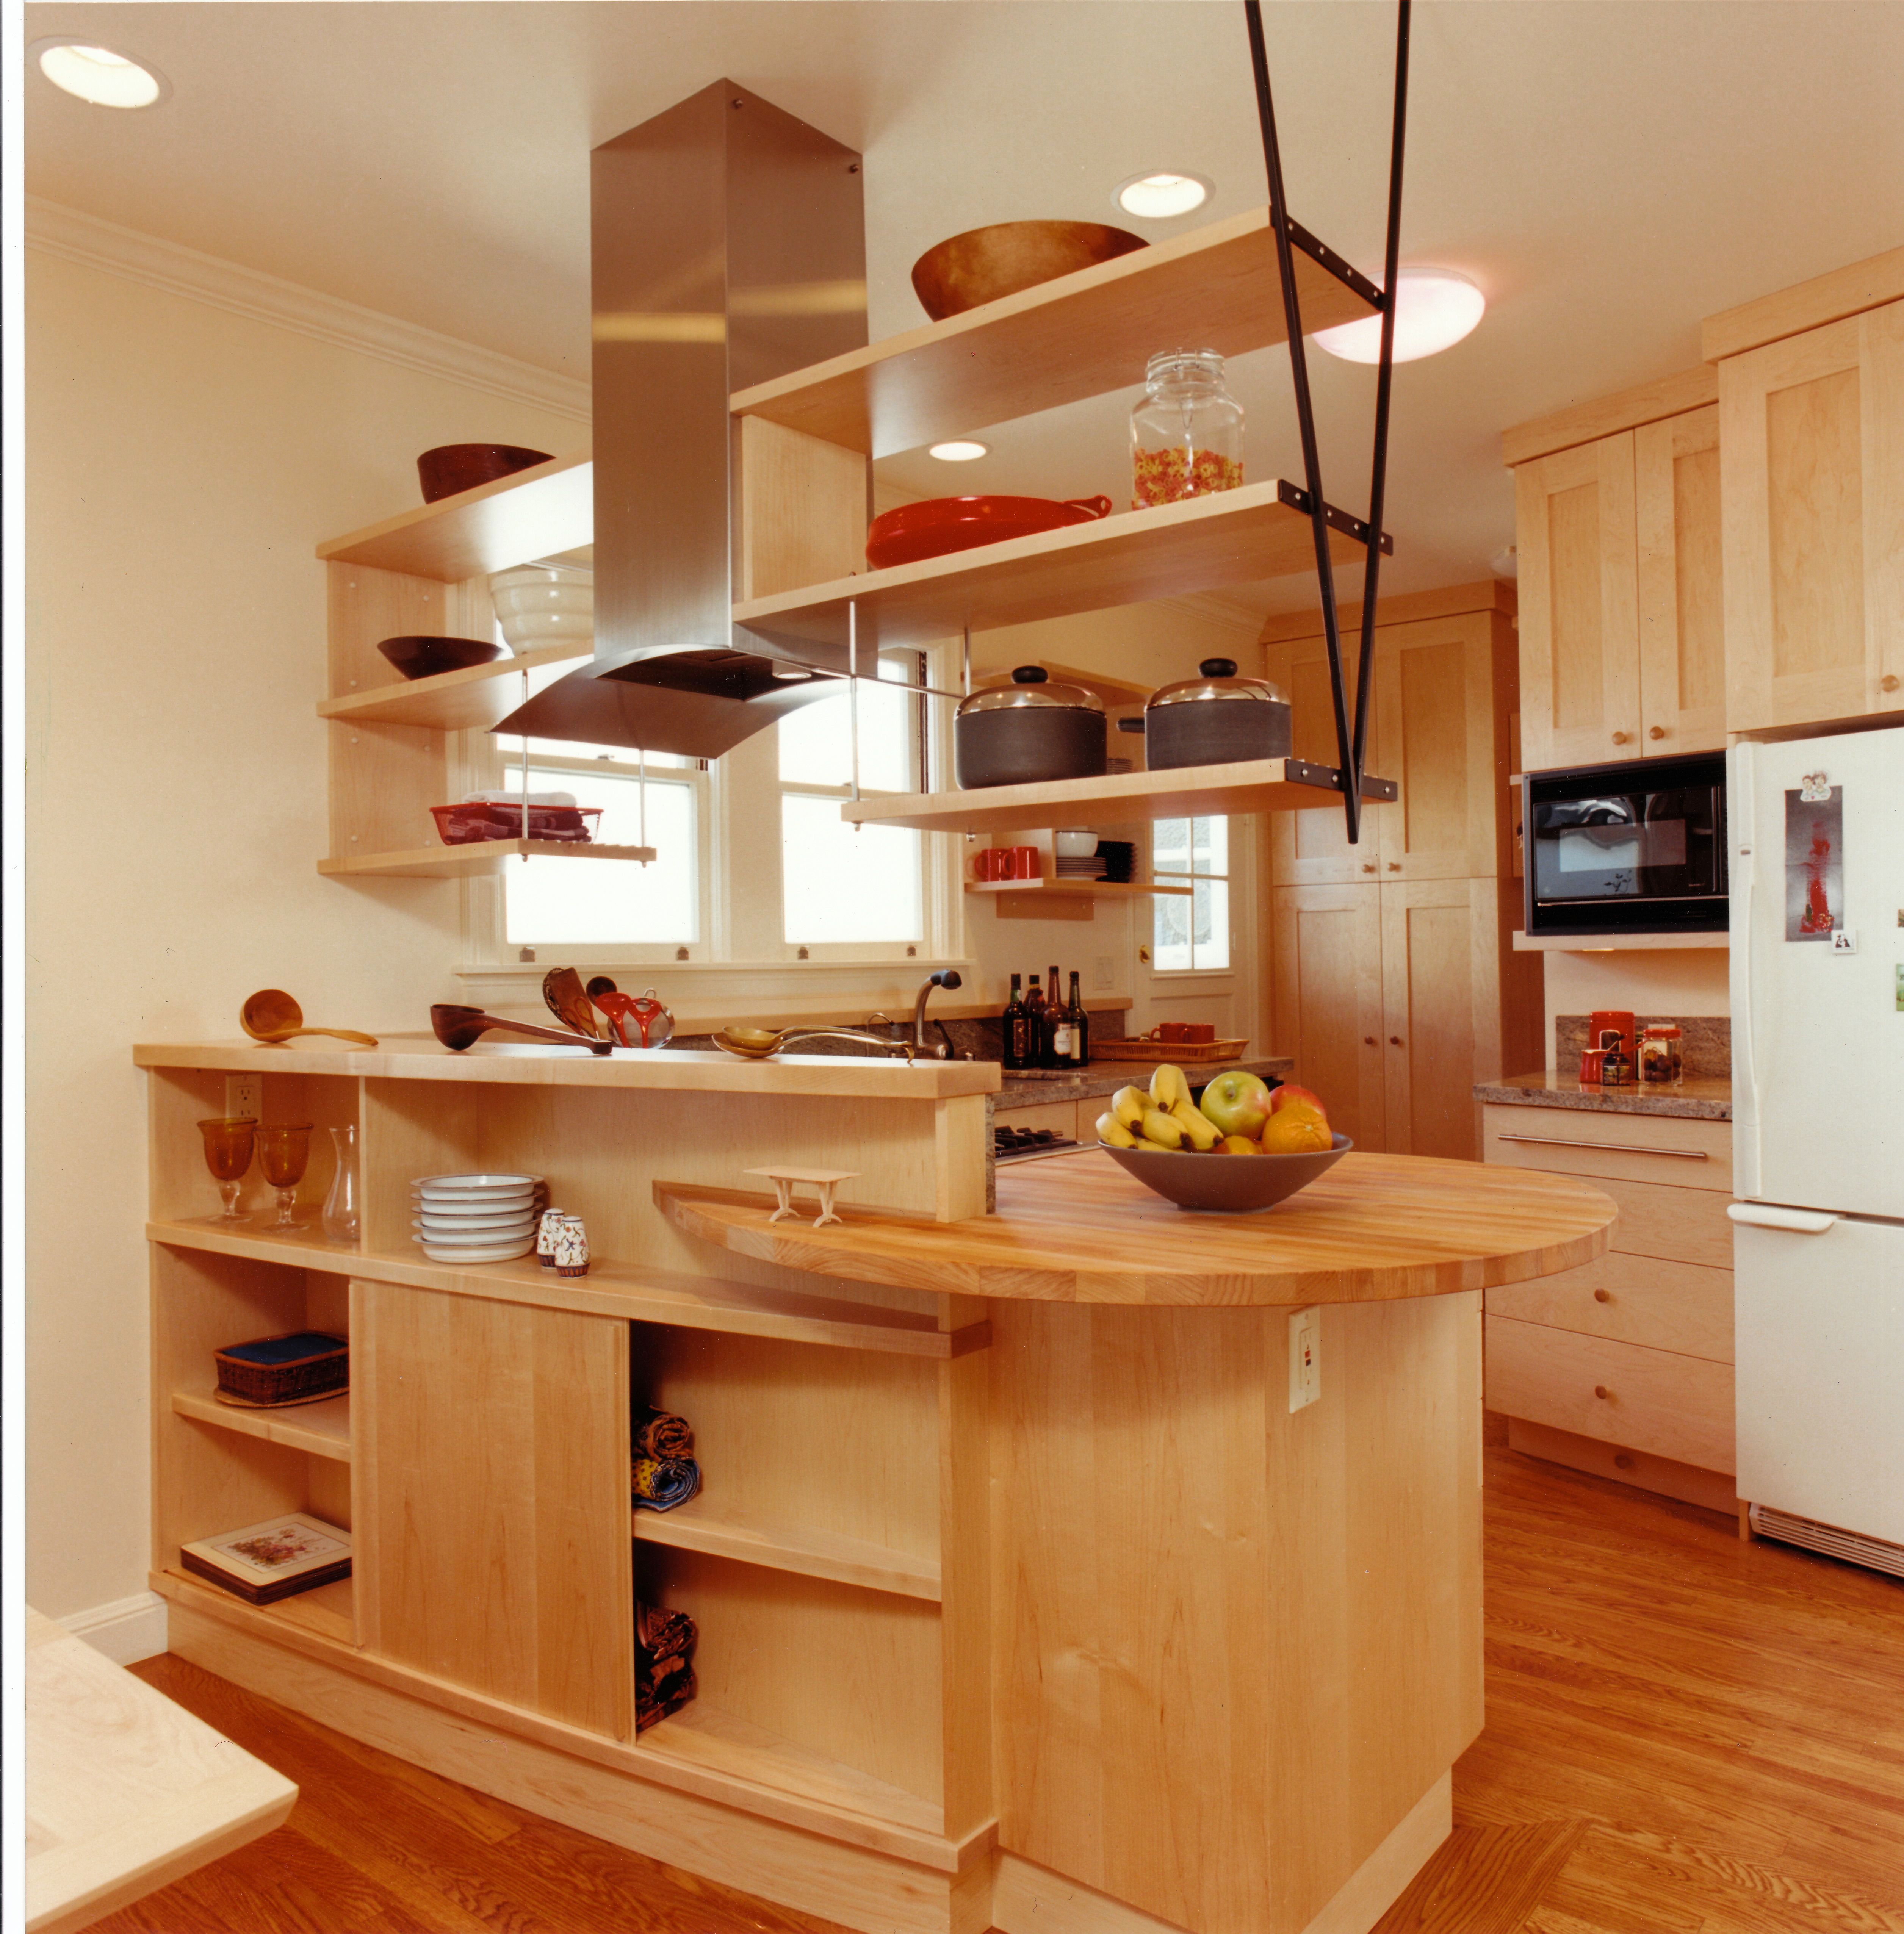
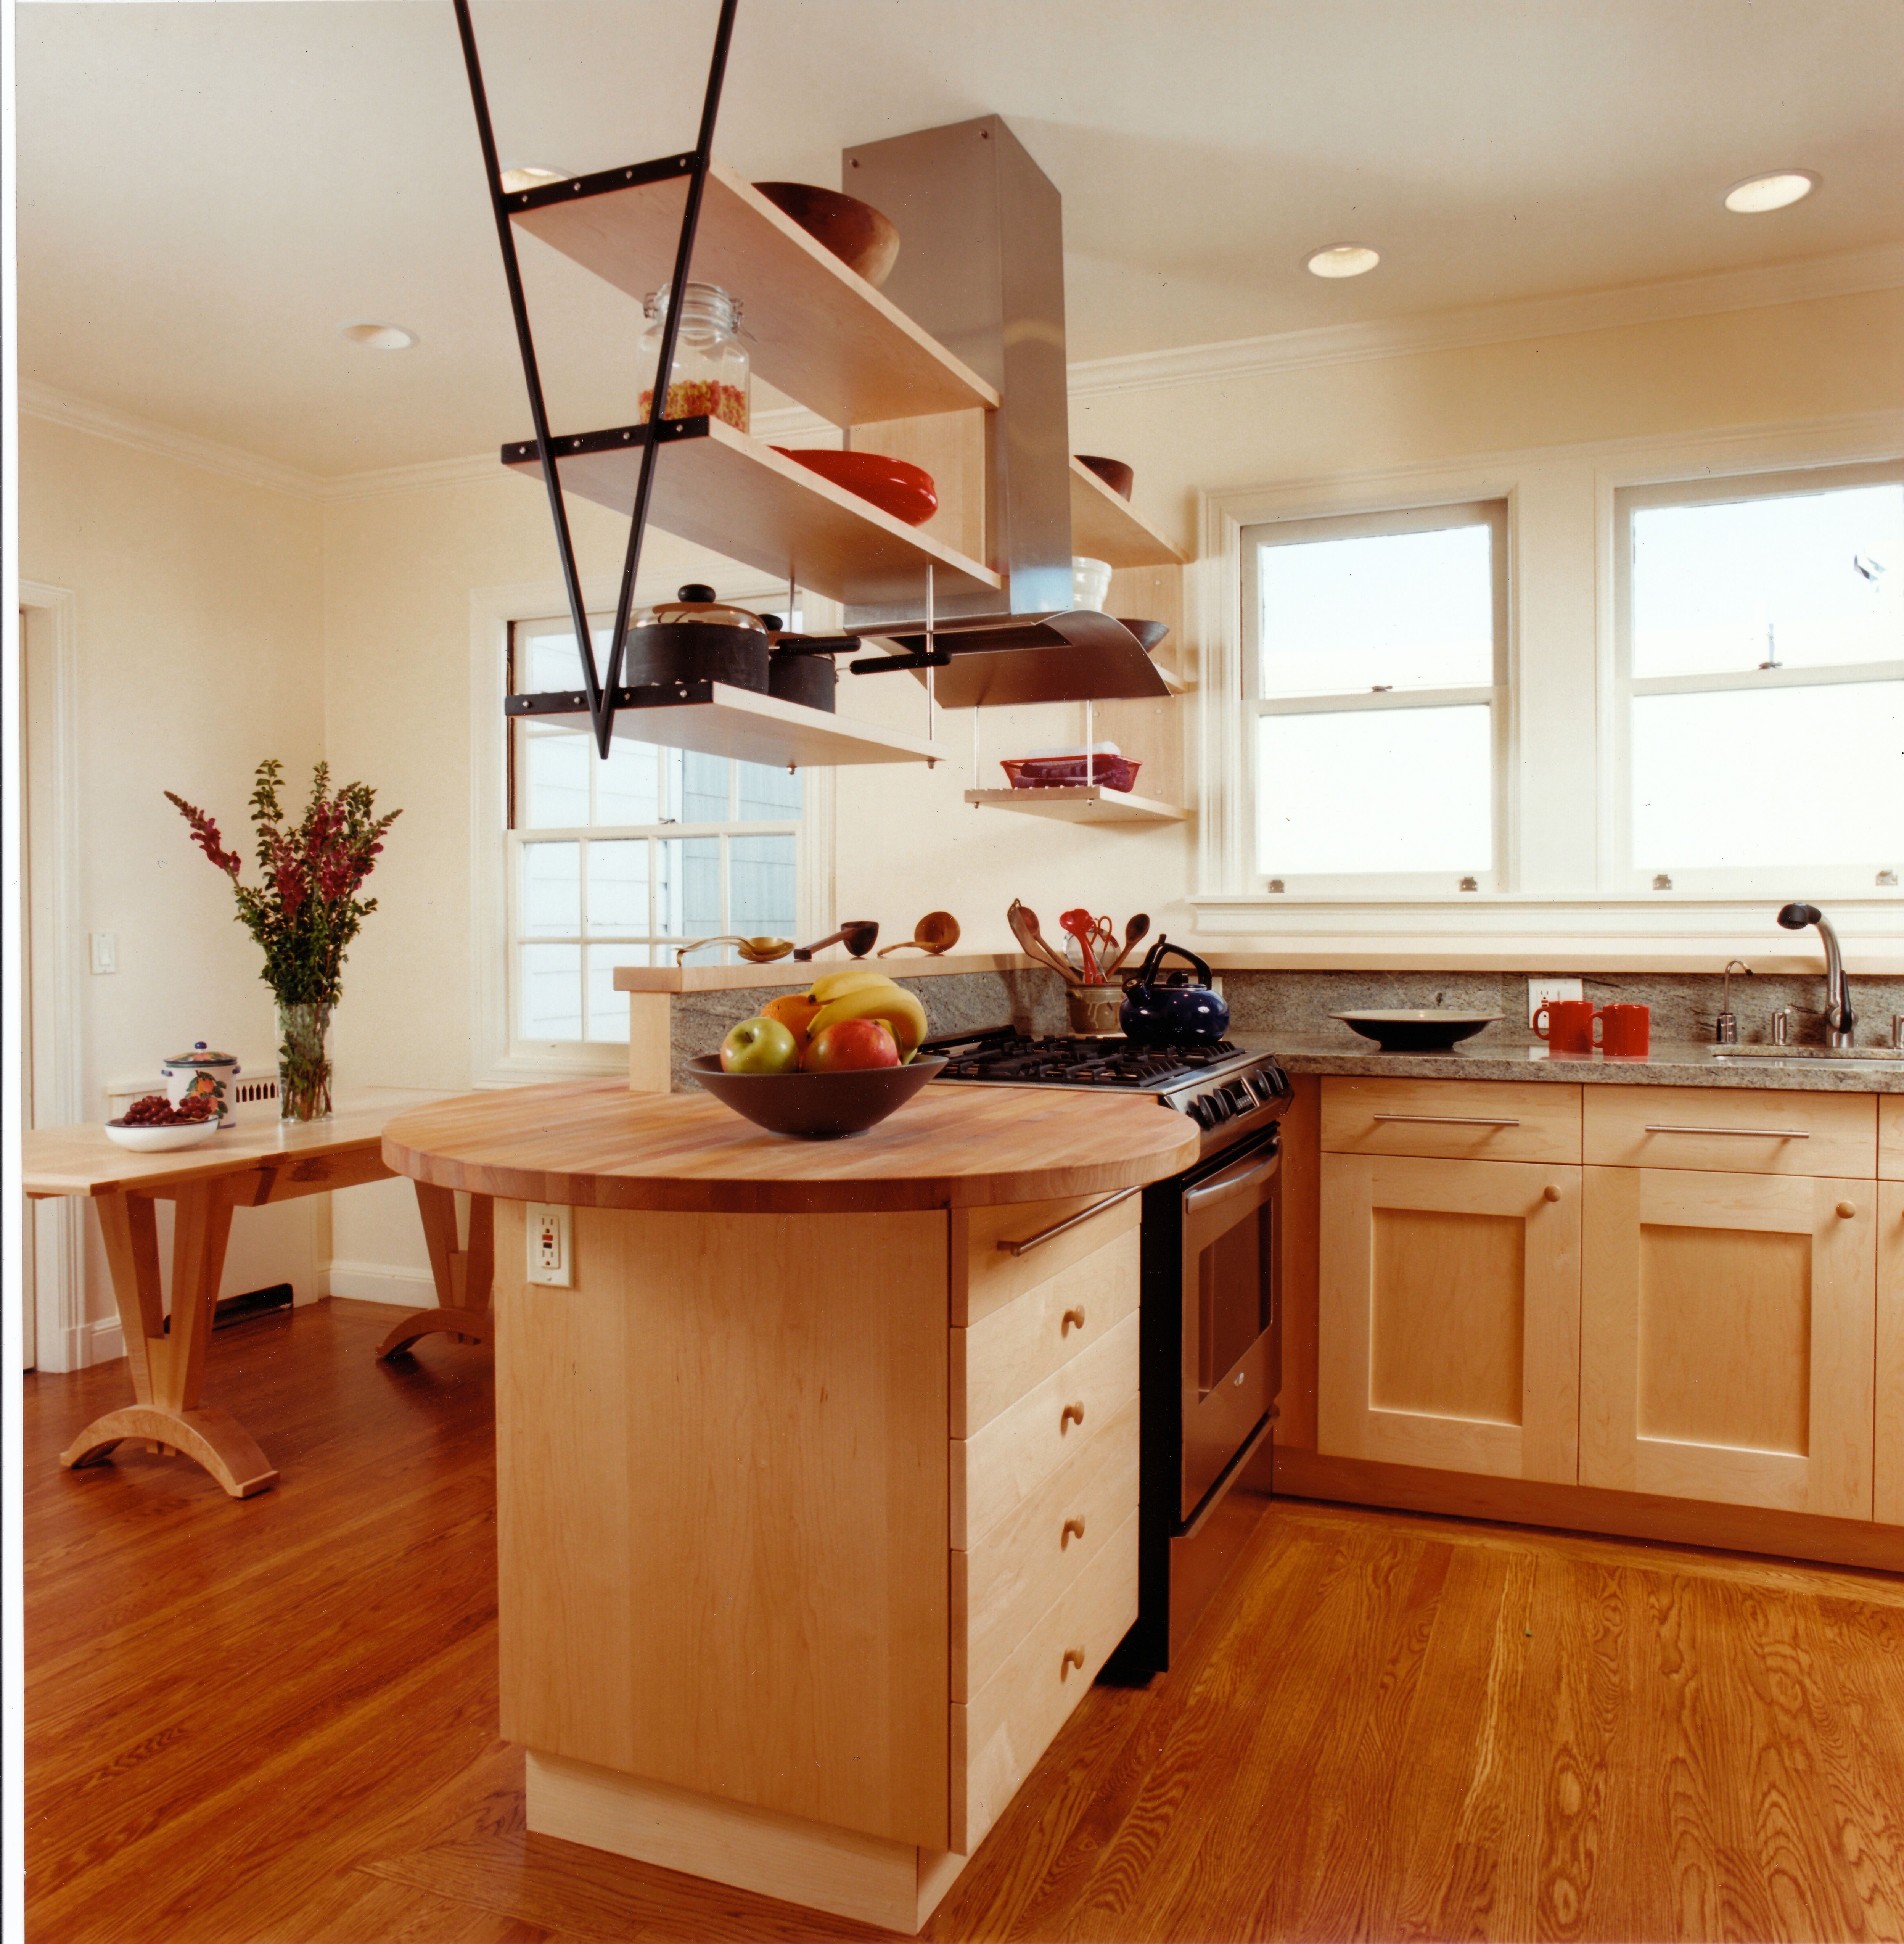
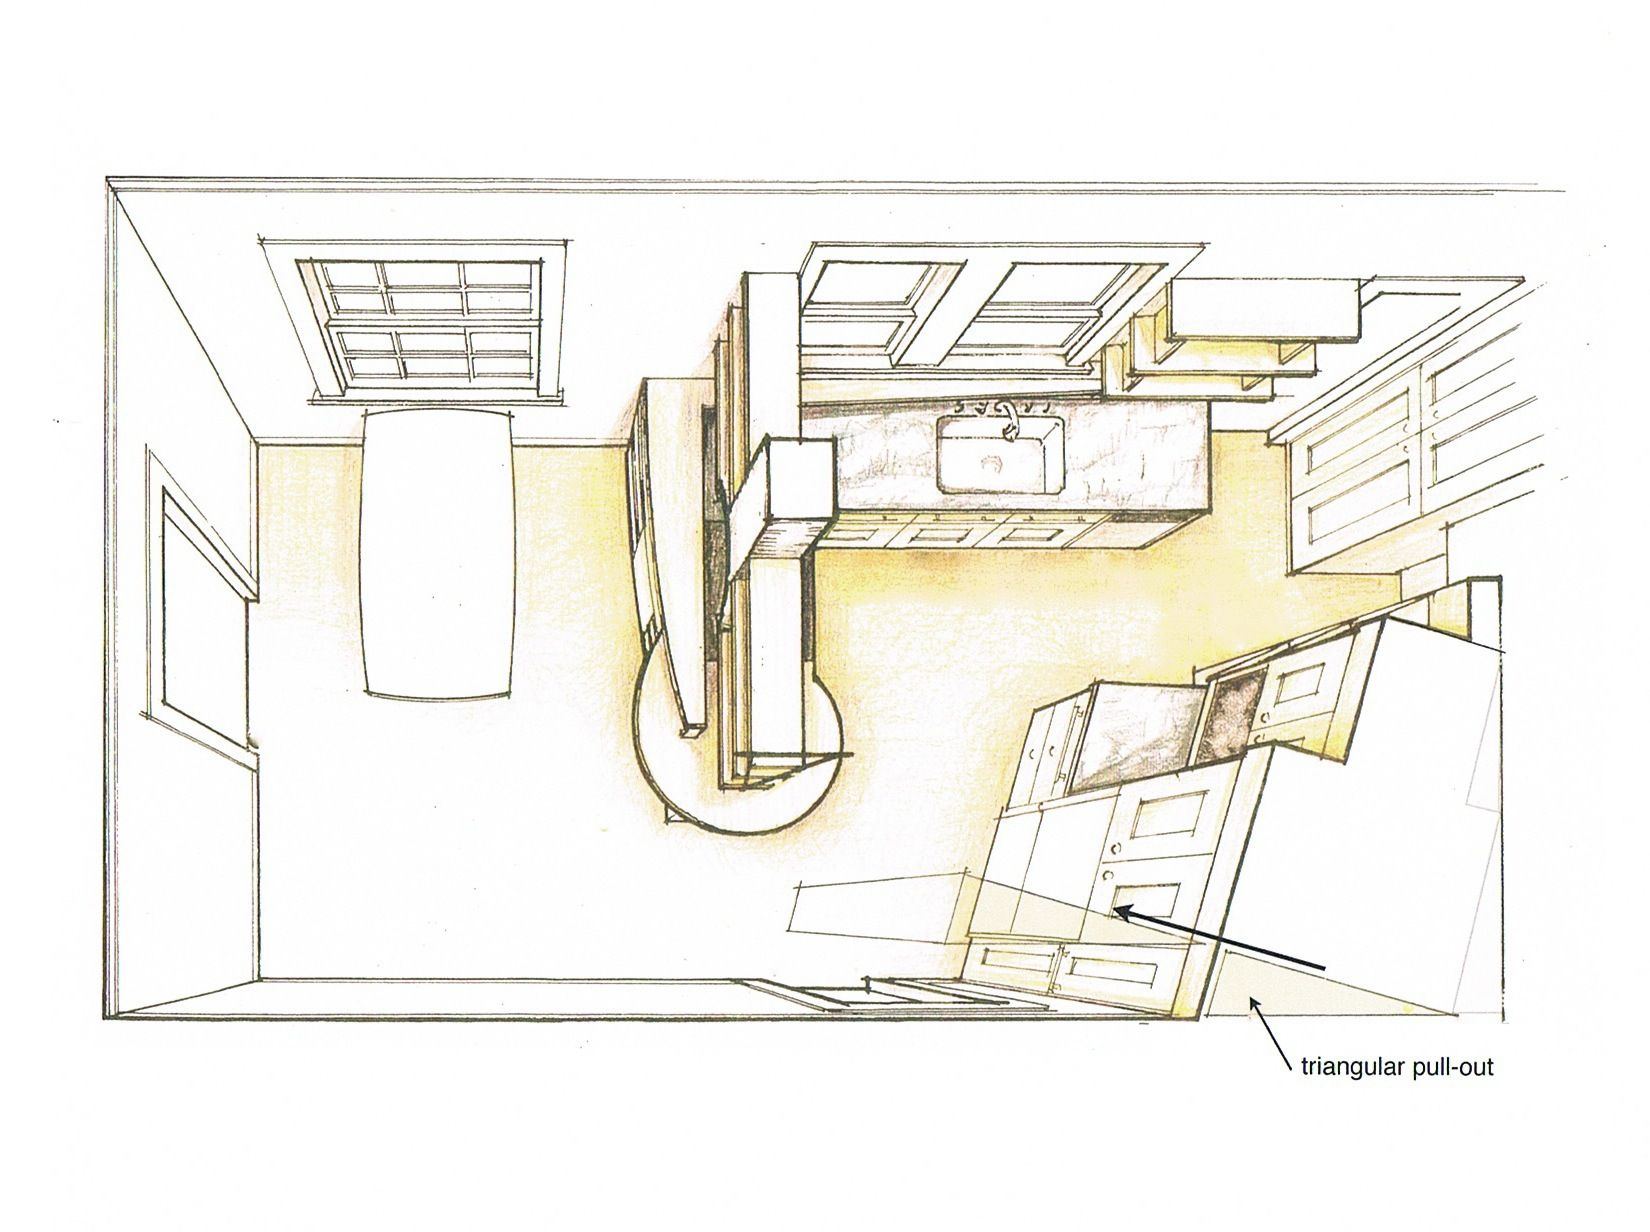
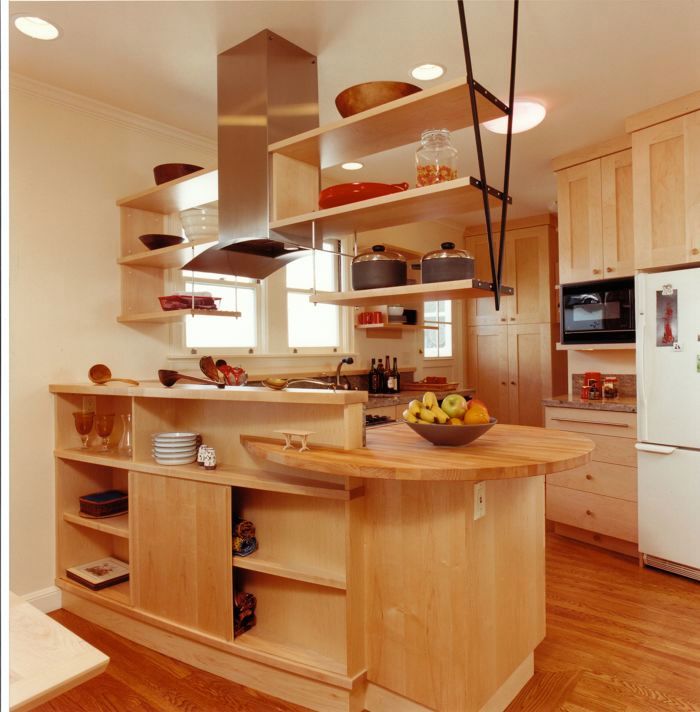
One solution is to turn the refrigerator and cabinets at an angle. Set the angle by puttingthe left side (in this case) of a standard depth cabinet and the left side of the adjacentrefrigerator both at the back wall, but then rotate each on this point until the faces ofboth are basically flush. Now you have the look of a built-in refrigerator. This will put thecabinets and refrigerator at an angle to the room, of course, which will give a little extraexcitement and style to the space, but also (in this case) has the added benefit ofshortening the distance to the peninsula (which was too big) making the space moreefficient.
The triangular space at the right side of the fridge is filled with a custom pullout that issimply hung on heavy duty drawer slides on the side of the refrigerator cabinet. Thisalso allows the pullout to move away from the adjacent wall when opened, assuringclearance to trim and switches.
The counter over the cabinet was filled to the back wall, giving greater counter spaceadjacent to the refrigerator.
The upper cabinets, standard boxes hung off the refrigerator cabinet at one end, matchthe angle, making it easier to achieve the required depth for the microwave. The freeend of the cabinet is filled with open, tapered shelves for small, often used items.This scheme also has the added benefit of giving more air space for the coils at theback of the refrigerator.
A butcher block counter was cut in a semi-spiral for the end of the peninsula givingadded counter space and a friendly curve to sit and move around above the standardcabinet boxes below.A curved front cabinet, more simple to build than it appears, holds dishes, cups, andglasses for the adjacent eating area. The curves of the top, bottom, and shelves werepatterned routed to a curve and the groove for the sliding door routed parallel to theedge using a router with a fence. A simple mold, using the same curve, was used toglue up the layers of 1/8″ plywood for the curved sliding door.
Suspended shelves above open the two rooms to one another where the wall used tobe. The tops of these shelves have 1/4″ diameter aluminum rods glued in grooves toprevent gouging of the shelves with pots and pans.
Despite the predominance of curves and angles, the use of off-the-shelf cabinet boxeswith the addition of a few simply made touches allowed this plan to be economicallyfeasible: the cabinet bid came in at 40% less than even the cabinetmakers preliminaryestimate.
