Texas Hill Country DIY Kitchen Remodel – Not For Every Marriage!
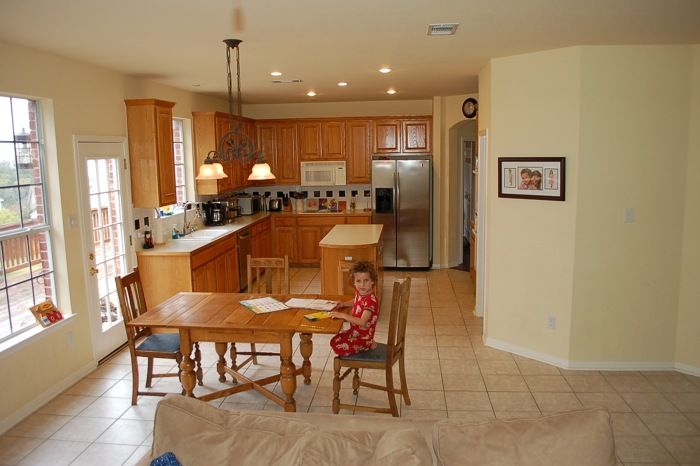
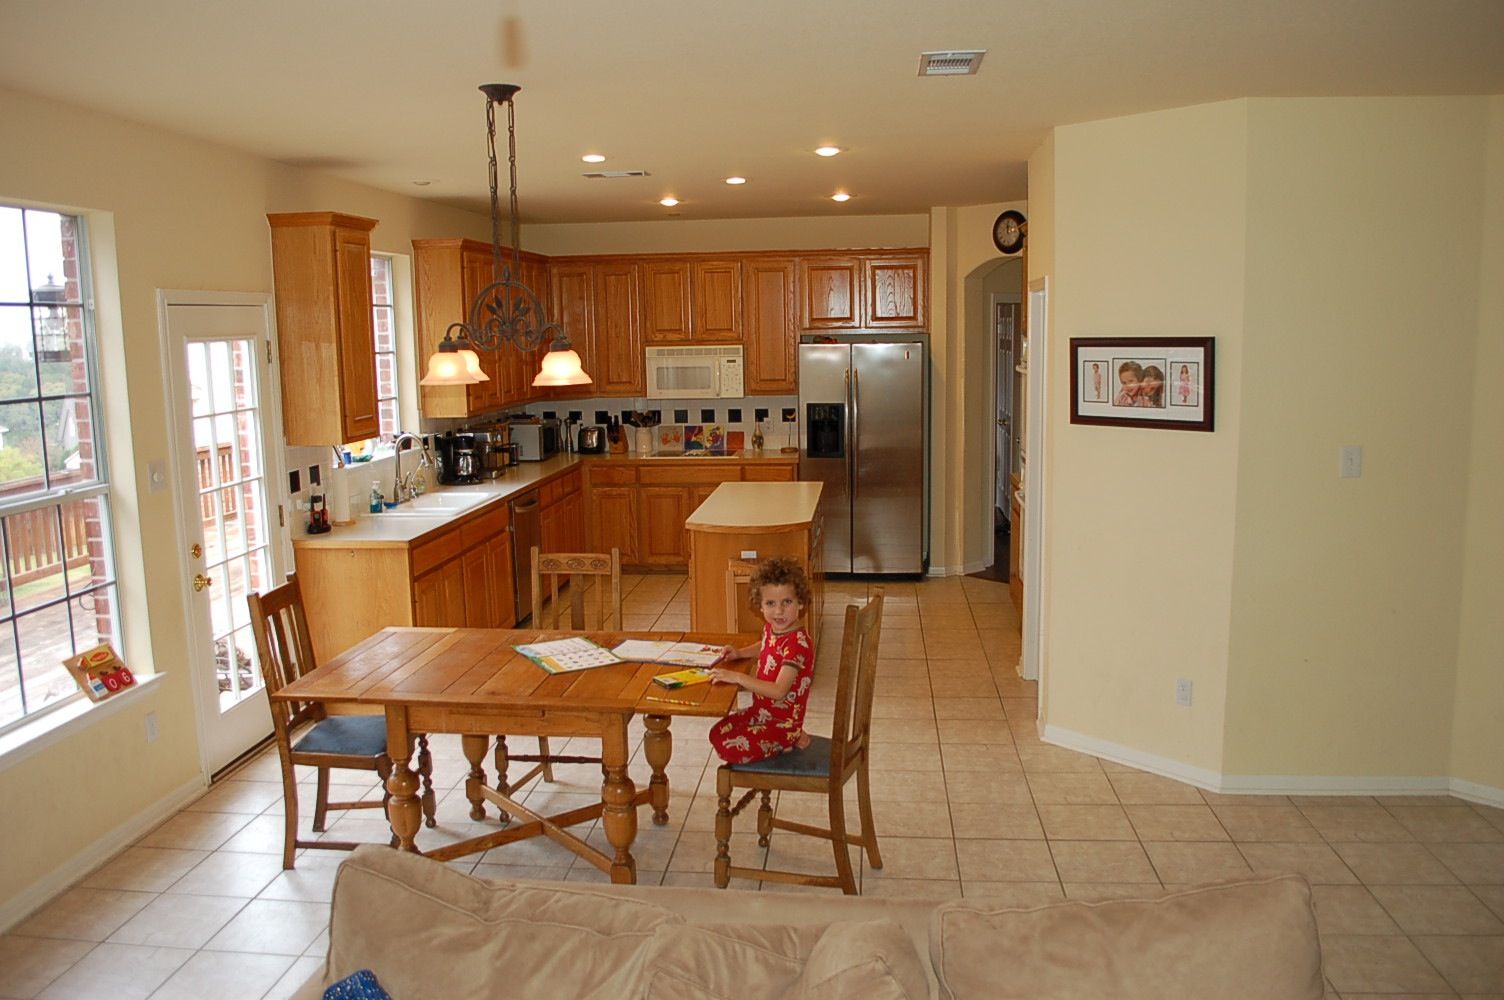
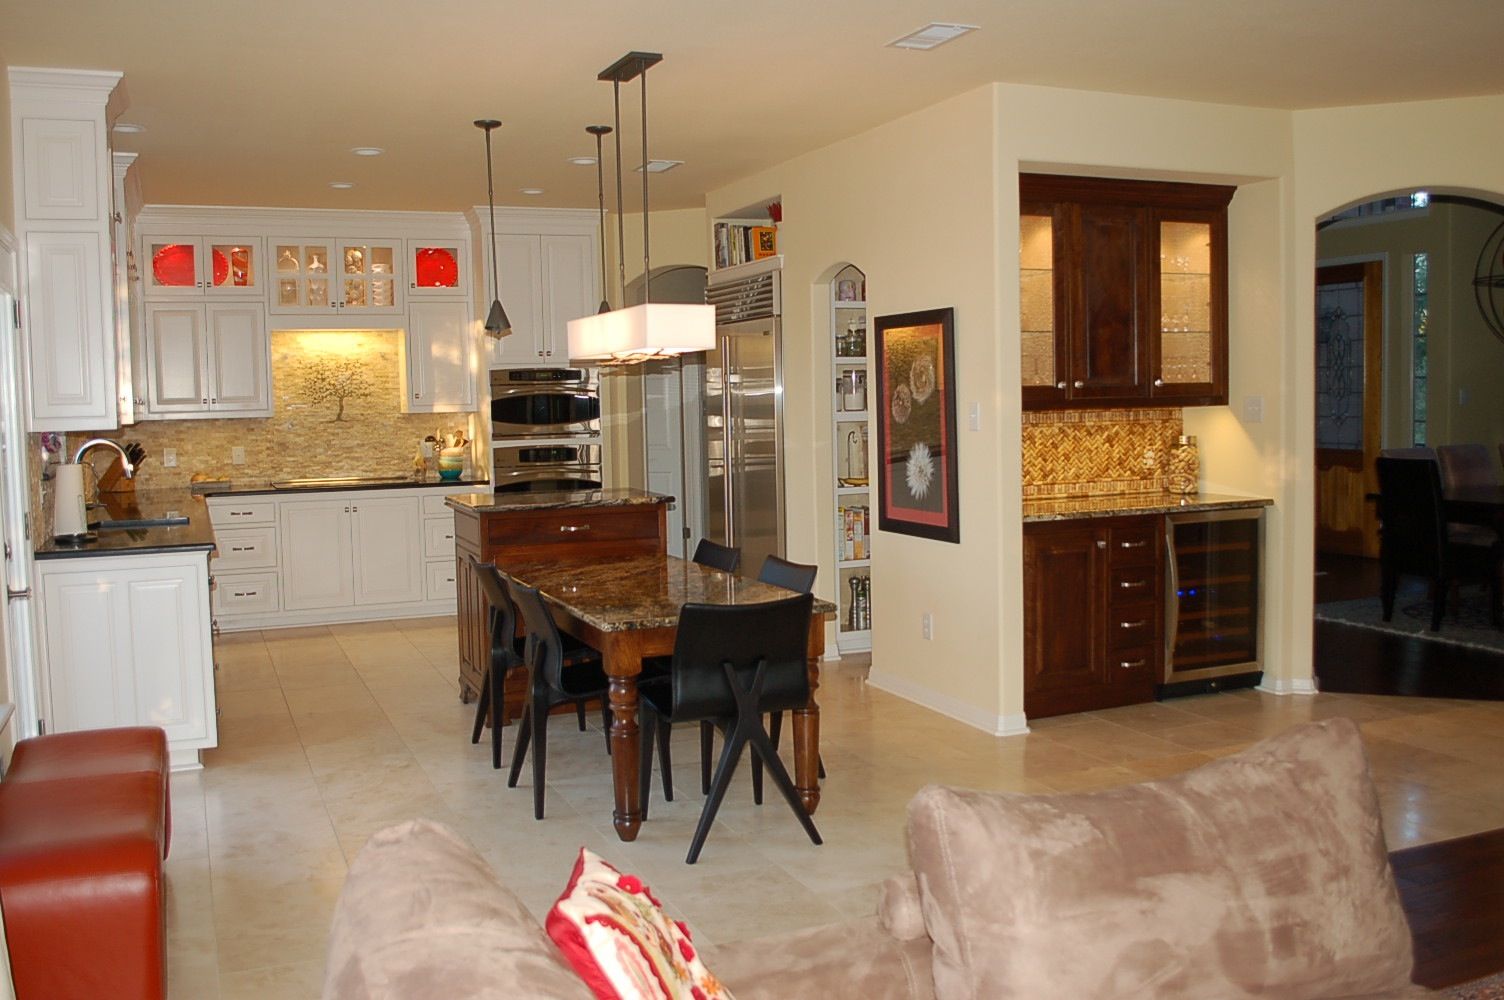
The planning for this Austin, Texas, kitchen remodel began in late 2010. The existing kitchen was workable, but after 14 years of serving the daily needs of two families with young children (ours and the previous owner’s), the kitchen needed more than just a facelift. Our goal was to create a family gathering spot that was pleasing to the eye, but was also functional and durable. We wanted a place to cook, entertain, and do homework and school projects with the kids. We wanted a better flow between our family room and kitchen and most of all, we wanted to reduce clutter. Being creative and self-motivated people, my wife and I decided to design and remodel the kitchen ourselves. This was a tremendous commitment as we both work full time and have two kids in elementary school. After getting a few preliminary bids for the cabinets, we quickly realized that our desires and our budget were not aligned, and that the semi-custom cabinets we wanted would take the lion share of our budget. It was at that point that I decided to challenge my carpentry skills and build the cabinets myself, and my wife reluctantly agreed.
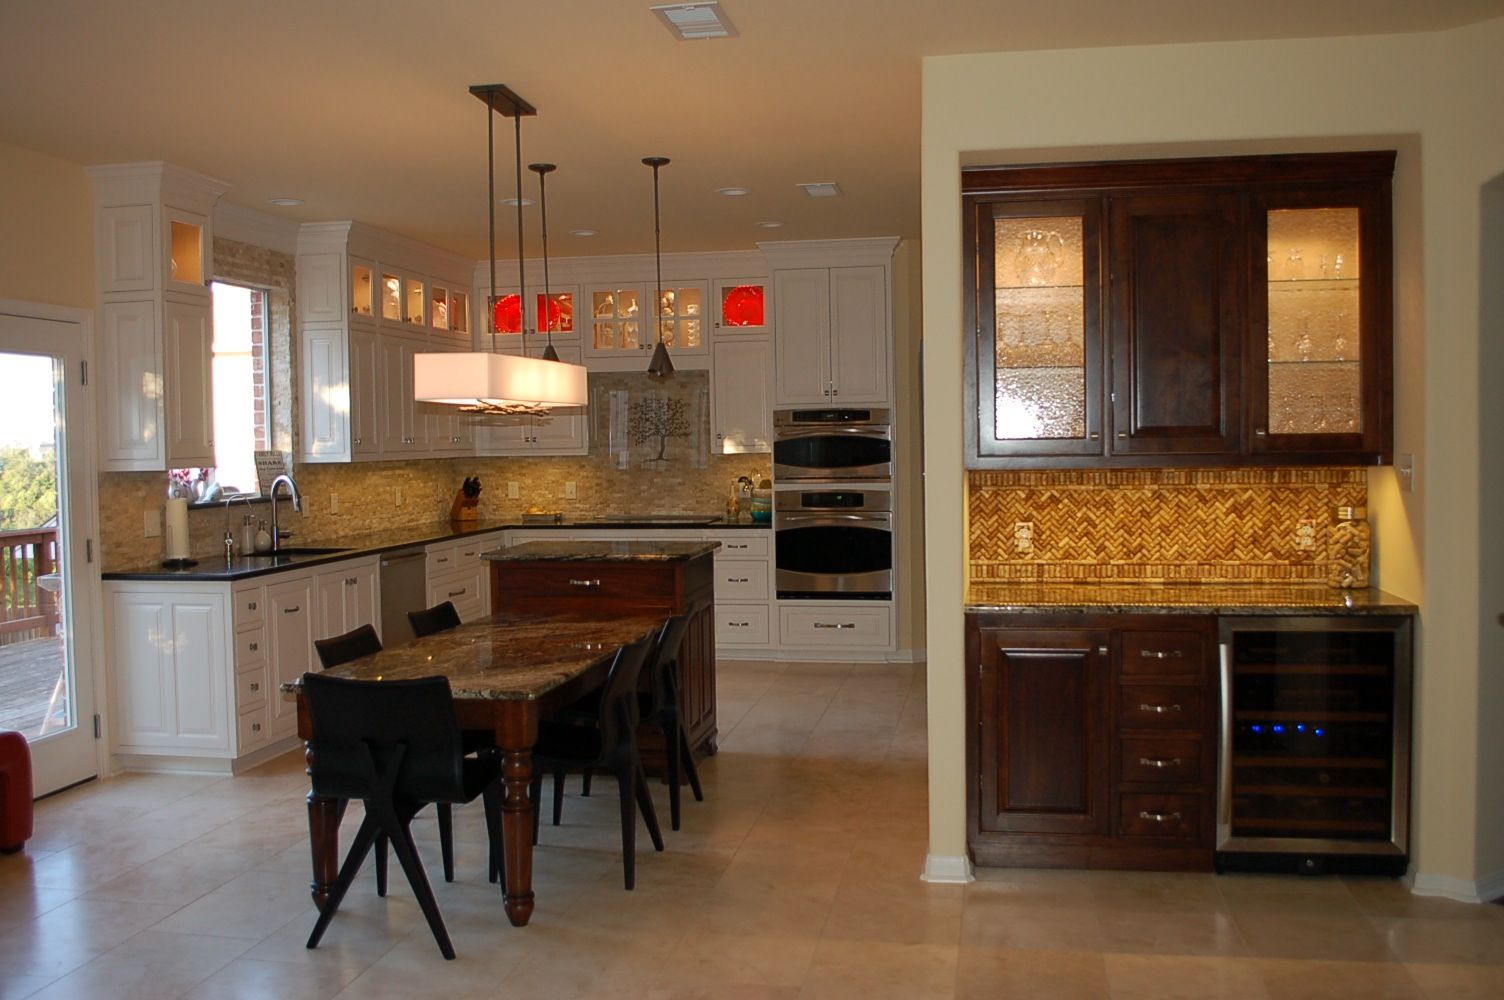
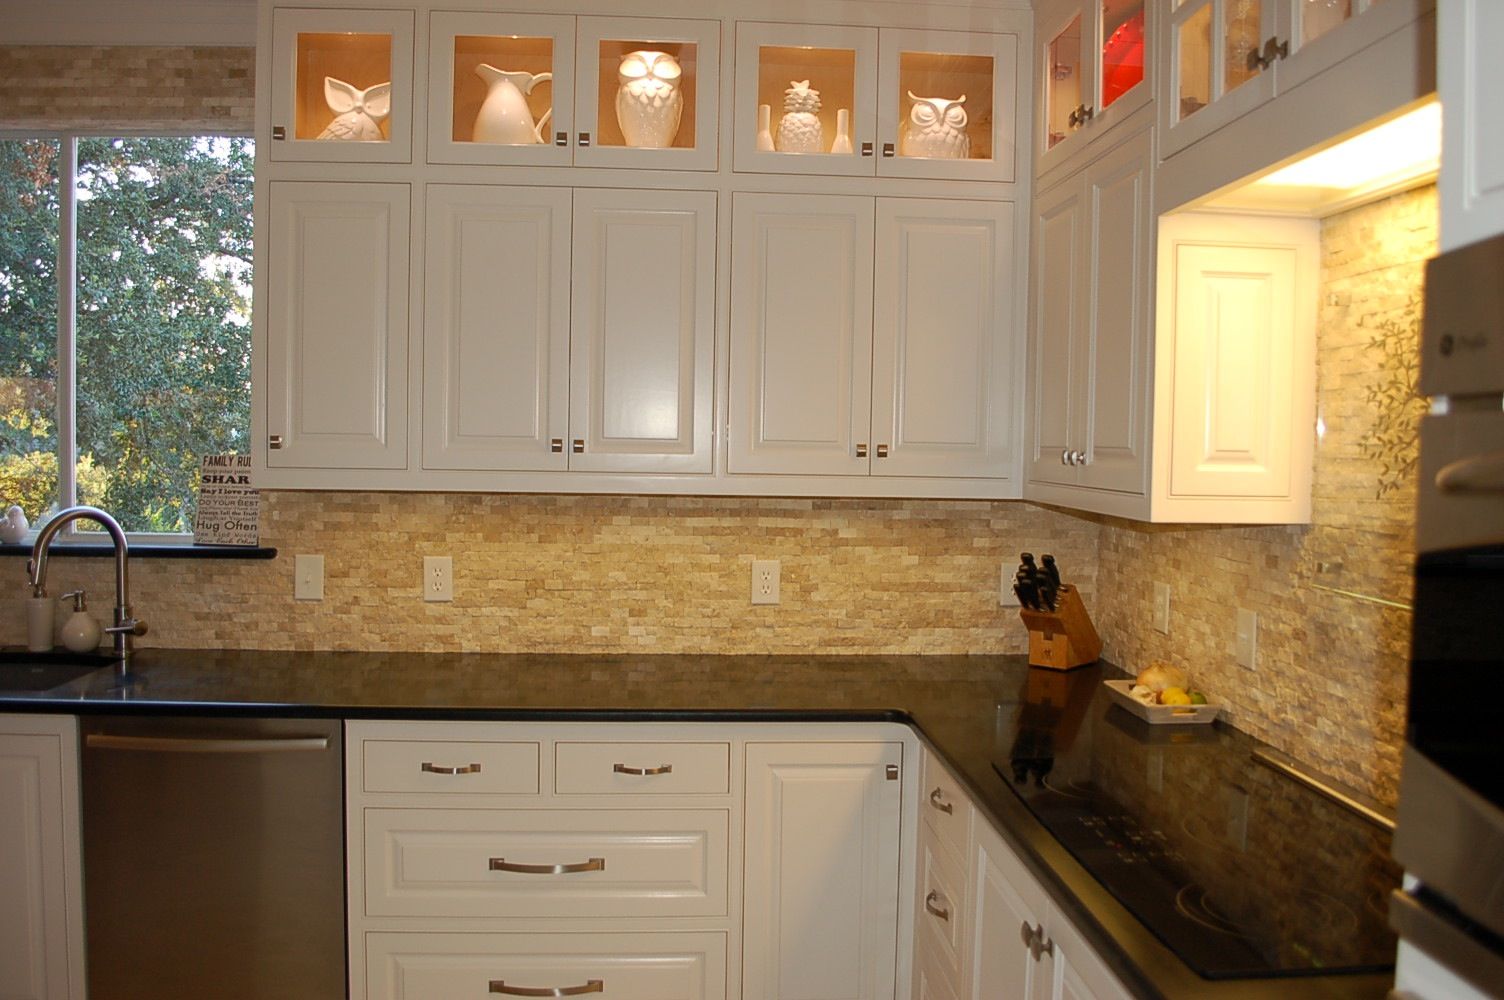
The first phase of the project was to convert the existing laundry room to a mudroom and convert a large, hardly used half bath to the new laundry room. Moving the laundry was fairly easy as the two spaces were seperated by a water heater closet and the electrical, plumbing, and dryer vent connections were easily accessible. Serving as the garage entry to the kitchen, the mudroom was a perfect catchall spot for the kids’ sports gear, coats, backpacks, and other miscellaneous things. Additionally, this space provided a perfect spot for a second refrigerator only a few steps away from the new kitchen. Constructing the mudroom cabinets taught me few valuable lessons; my workshop was not equipped to build high quality cabinets and I had a lot to learn. After a few months of studying cabinet construction techniques and investing in a plainer, a jointer, a router table, and many other needed tools, I began building the first cabinet in May of 2011. I chose to construct beaded inset cabinets. This style is the most difficult to build as it boarders furniture building, but it is the most elegant. The cabinet boxes are all constructed from ¾” prefinished plywood. The drawers are dovetailed hard maple with prefinished plywood bottom. The frames of the painted cabinets and the rails and styles of the painted doors are made from poplar. The center panels of painted doors are either MDF or glass. All stained cabinets (bar, island, and table) are made from walnut where visible and prefinished plywood where it is not.
After six months of working weekends and nights, the cabinets were finished and we were ready to demolish the existing kitchen. We constructed a makeshift kitchen in our living room and began demolition in late November of 2011. By mid-April of 2012, after five months of hard work, eating takeout, and washing dishes in a bathtub, we had a working kitchen. The project was fully completed in August of 2012.
Here are some of the highlights of the finished kitchen:
·Combination of granite and soapstone counter tops (the only part of the project that was contracted out)
·Floating etched glass to protect the backsplash behind the cook top
·Custom cabinets with soft close, heavy duty hardware on doors and drawers
·A bar and built-in wine fridge
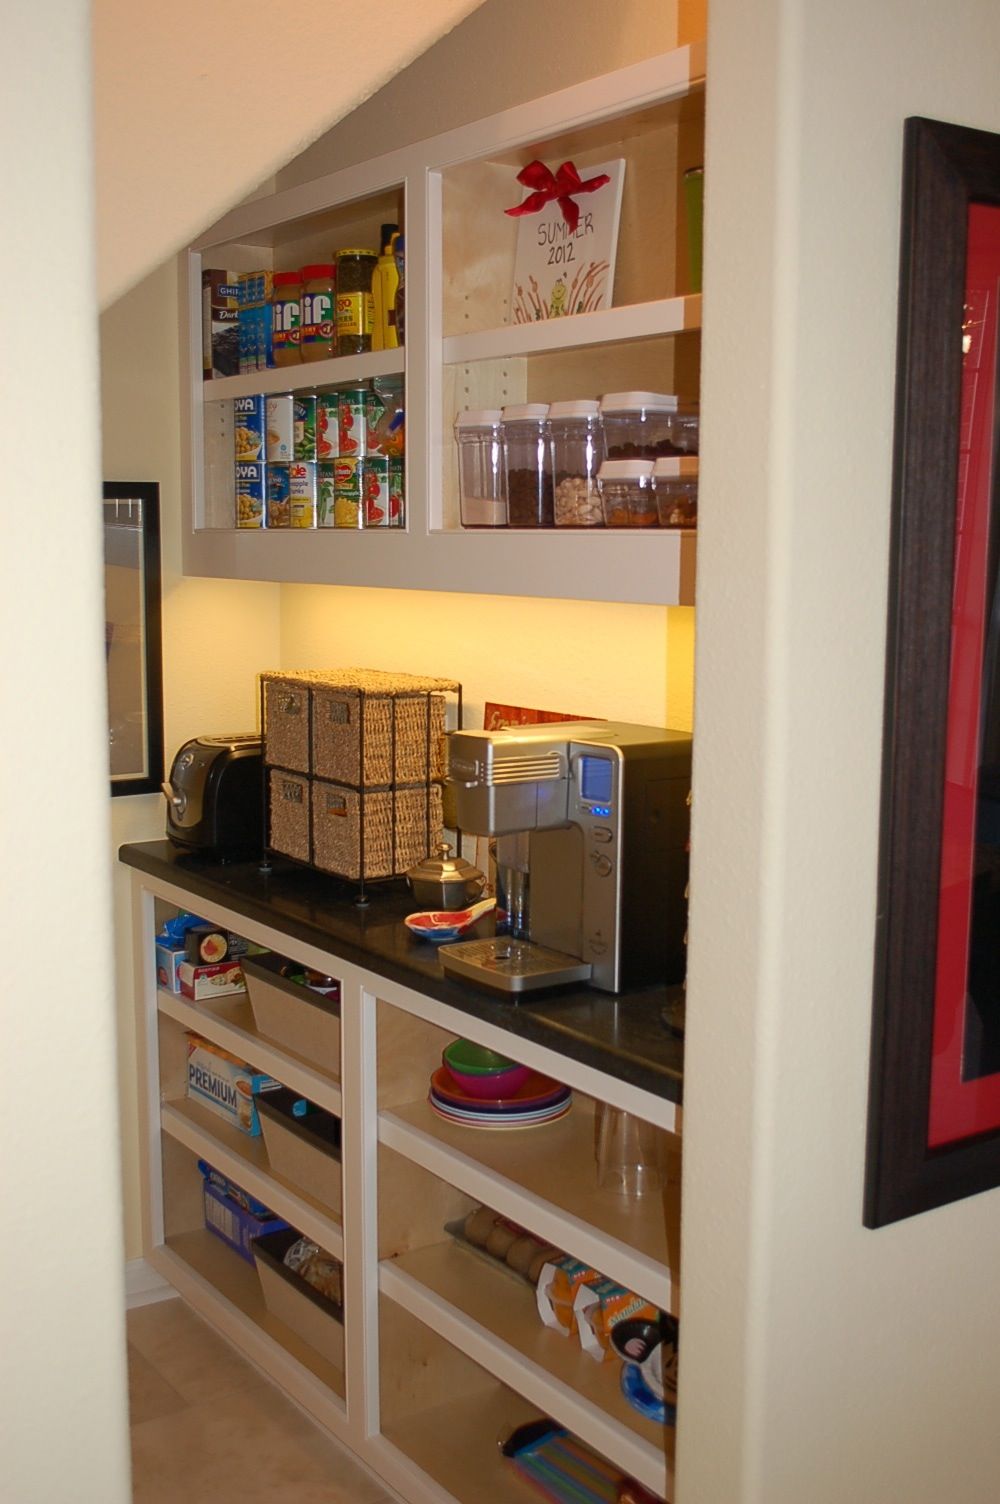
·Coffee bar and small appliance counter in the pantry
·A built-in kitchen table that provides comfortable seating for 5 but can accommodate up to 7 if needed.
·A large drawer in the island that provides storage and a charging station for all the various tablets and laptop computers.
·A phone nook with built-in USB plugs for cell phones and home phone
·LED overhead and cabinet lighting
