I want to share one technique and one device that I found useful in rehabbing an old warehouse. New windows were installed in the cinder block walls. The walls were then framed out for insulation and drywall. The openings left were very rough and uneven and 9 to 10 inches deep. Installing the finish jambs, header and sill would require a lot of shimming to get an even surface to work with. I decided to insert the one by stock into the window opening flush with the window frame and scribe cut lines to match the drywall. (Less than ideal drywall made straight cuts a rarity). After cutting and sanding to match the scribe lines I glued and screwed the sides together to form a box. I inserted each box into the window opening, shimmed and leveled as needed and nailed into the rough studs. Even though I could not nail deeply into the widow opening (too much work to shim properly and concrete block near the windows) the joints would stay square while caulking to the widow frame would add stability.
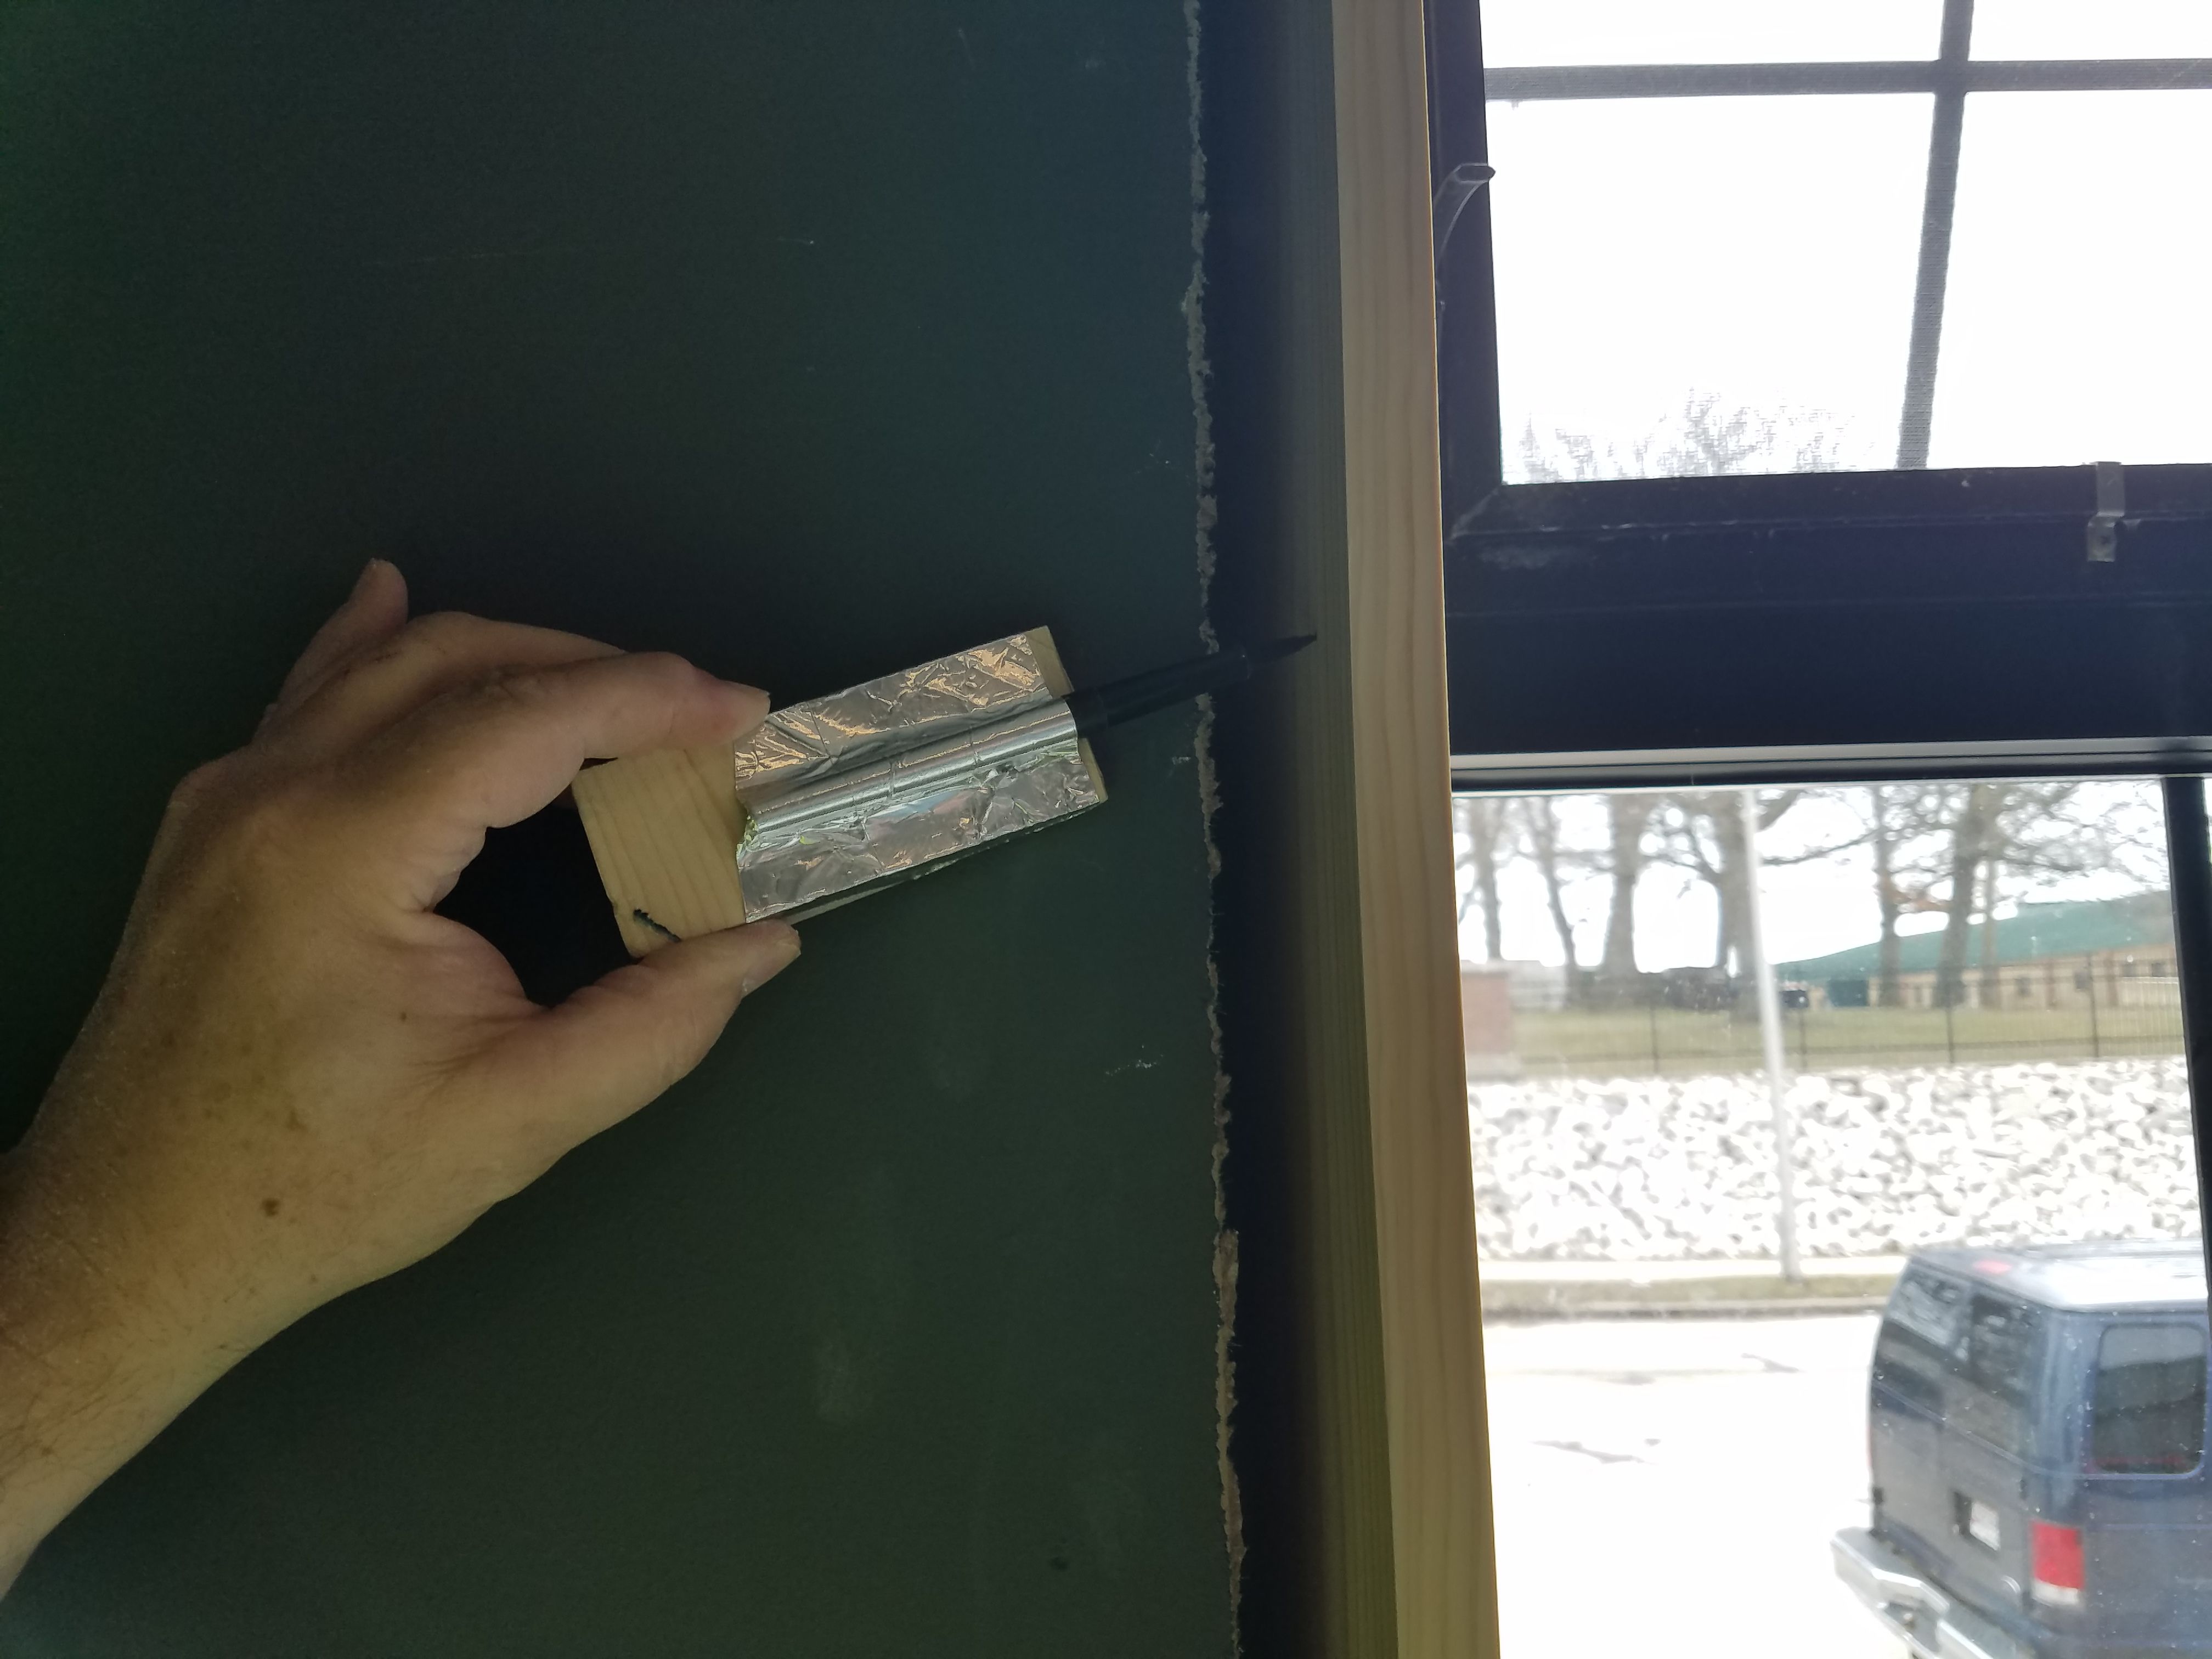
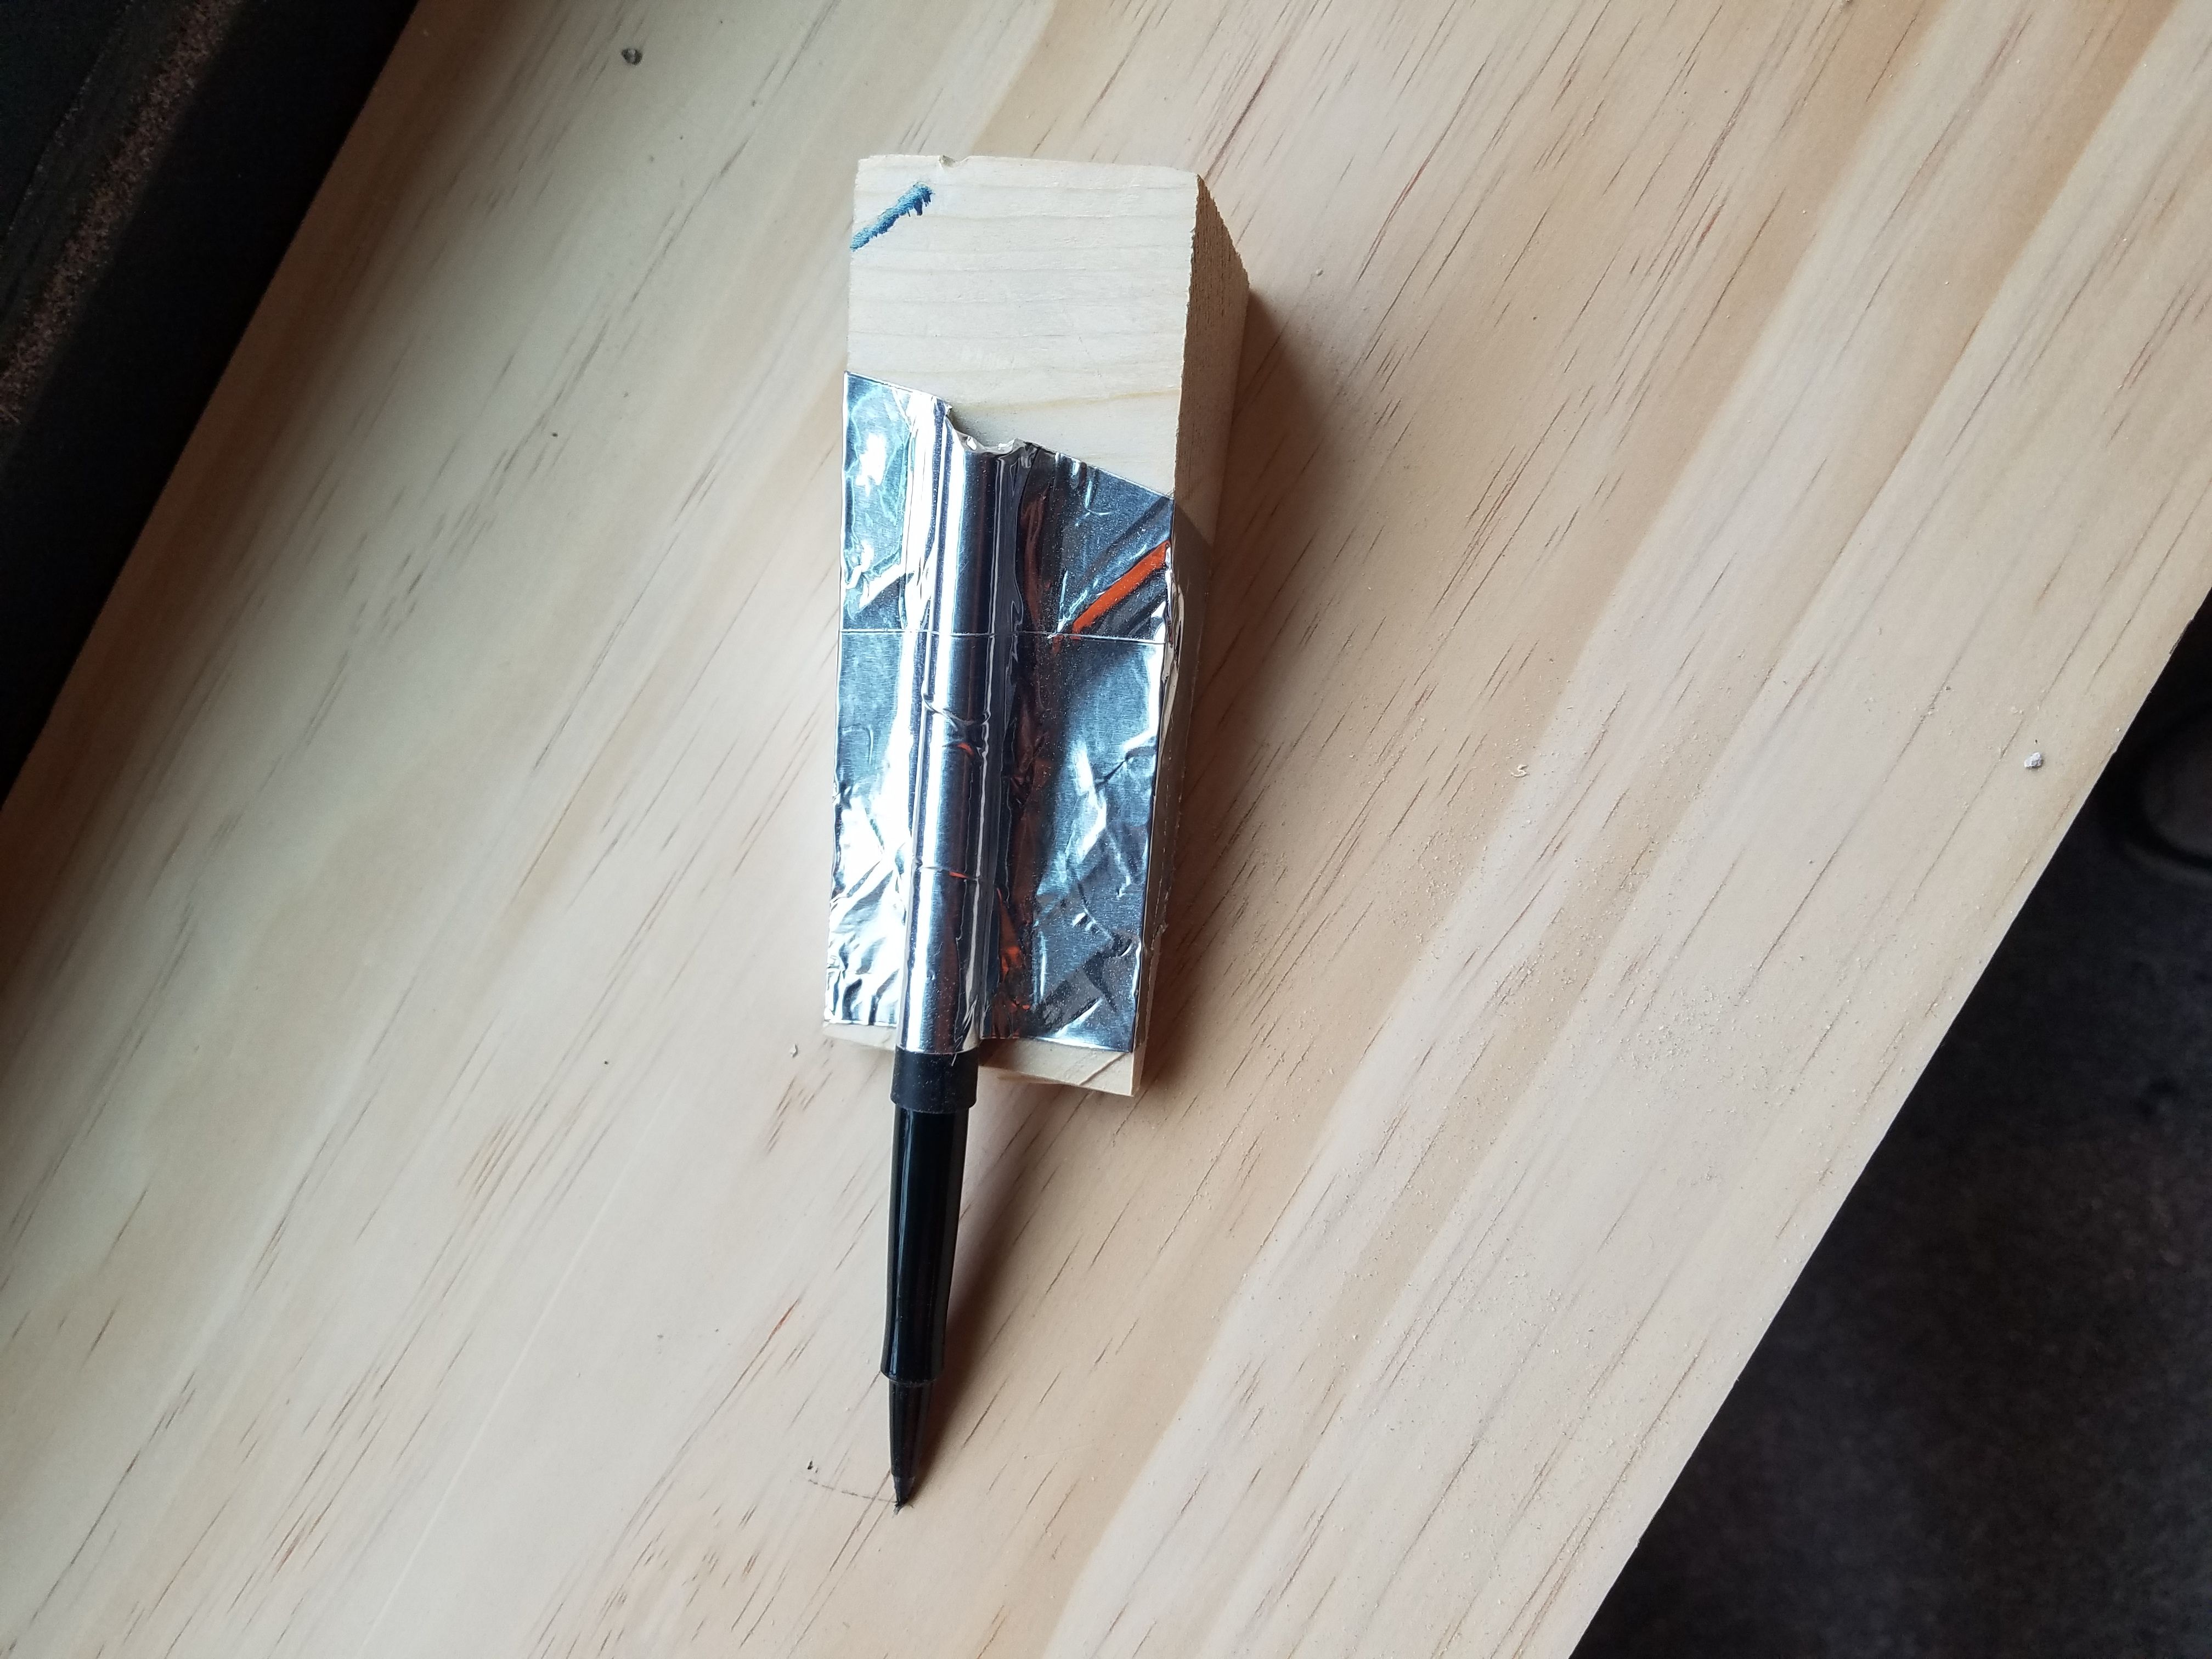
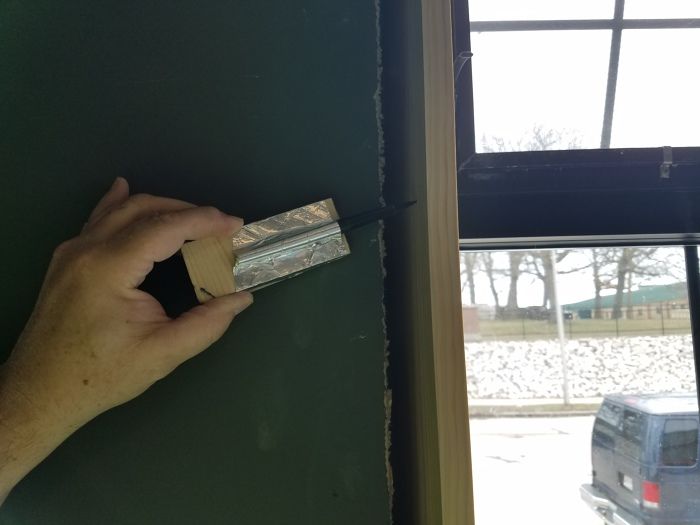
A problem arose in trying to scribe the sides. Since the openings were very rough there were gaps between the finish lumber and the drywall. Laying a pen against the drywall would result in a scribe line ¼ inch off. I came up with a jig to solve this dilemma. By cutting a scrap piece of wood in a wedge shape and taping on a felt marker so that the tip was even with the bottom of the wedge, I was able to scribe accurate lines. I used a felt tipped marker so it would work in any orientation and would not need sharpening and thus readjustment. I rounded the bottom edges to make for smooth movement over the drywall. There are probably other applications for this device but it really came in handy framing these rough window openings.
