FHB Logo Facebook LinkedIn Email Pinterest Twitter X Instagram Tiktok YouTube Plus Icon Close Icon Navigation Search Icon Navigation Search Icon Arrow Down Icon Video Guide Icon Article Guide Icon Modal Close Icon Guide Search Icon Skip to content
Subscribe
Log In
  • How-To
  • Design
  • Tools & Materials
  • Restoration
  • Videos
  • Blogs
  • Forum
  • Magazine
  • Members
  • FHB House
  • Podcast
Log In
Sponsored Post
How-To

Install a Window in a Wall With Continuous Exterior Insulation

For a wall with exterior insulation, learn how to install and flash an Andersen window with an integral flange.

By Travis Brungardt

Sponsored by Andersen Windows & Doors

  • X
  • facebook
  • linkedin
  • pinterest
  • email
  • add to favorites Log in or Sign up to save your favorite articles
Install a Window in a Wall With Continuous Exterior Insulation
For a wall with exterior insulation, learn how to install and flash an Andersen window with an integral flange.
Video Player is loading.
Current Time 0:00
/
Duration 0:00
Loaded: 0%
0:00
Stream Type LIVE
Remaining Time -0:00
 
1x
    • Chapters
    • descriptions off, selected
    • captions settings, opens captions settings dialog
    • captions off, selected

      This is a modal window.

      Beginning of dialog window. Escape will cancel and close the window.

      Text
      Background
      Window
      Font Size
      Text Edge Style
      Font Family

      End of dialog window.

      This is a modal window. This modal can be closed by pressing the Escape key or activating the close button.

      This is a modal window. This modal can be closed by pressing the Escape key or activating the close button.

      One of the most common paths to improving your energy efficiency is adding continuous exterior rigid insulation, and that can create some challenges for a window installer who may be used to attaching the window flange directly to the sheathing. Here’s how to install a window in a wall with continuous exterior insulation.

      Wall assembly components

      Wall assembly cross section
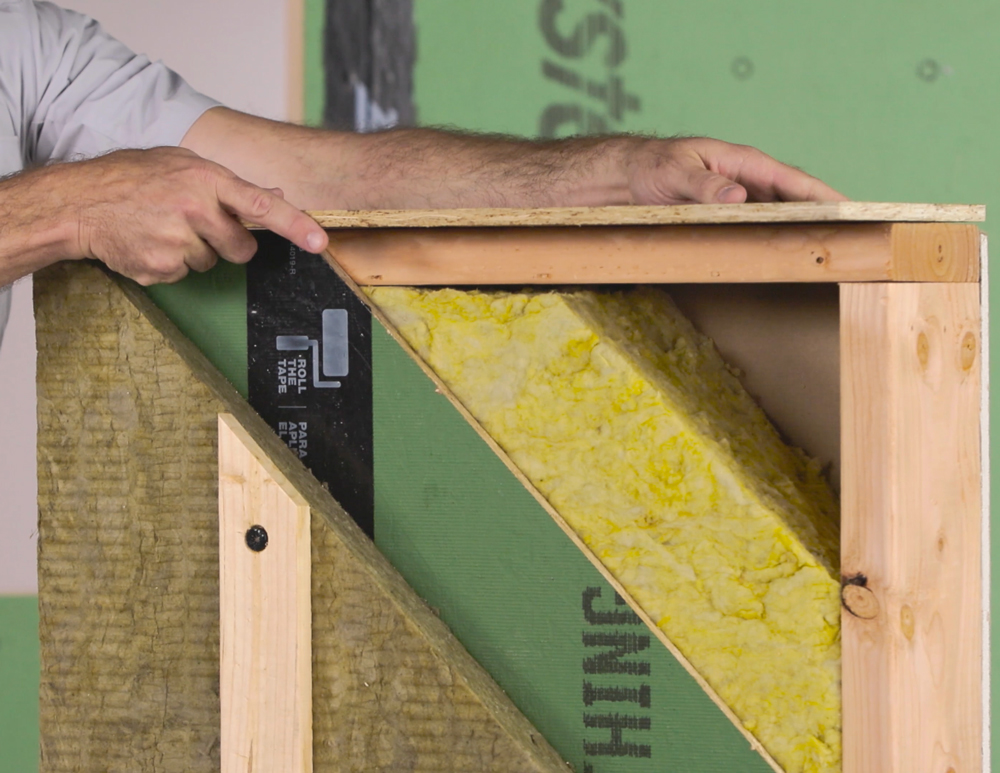
From the inside out, this high-performance wall assembly is made of 1/2-in. drywall and 2×6 framing 24 in. on-center with Rockwool R23 Comfortbatt in the cavity. To manage water and air control layers, ZIP System is used as the sheathing with 2-in. Rockwool Comfortboard on the exterior, followed by a furring strip for attaching the cladding.

      Integrating with the window

      With a high-performing wall, it’s important to go with an equally high-performing window such as the Andersen® 400 series.

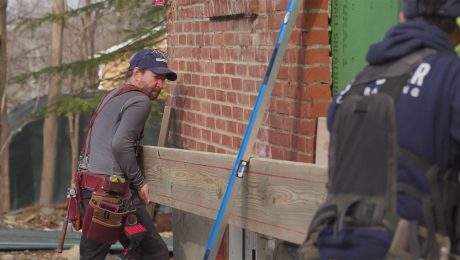
      To accommodate the exterior insulation, we’re bumping out the opening, creating a window buck with offcuts of ZIP system sheathing and 2x material ripped to the depth of our exterior insulation, in this case 2 in.

      The rough opening for the window needs to be 1 in. taller and wider than the window, to accommodate the thickness of the 7/16-in. window buck. With the opening sized correctly, 2x stock is fastened around the edge of the opening; it will act as the mounting surface for the window flange and support the window buck.

      ZIP System sheathing is fastened to the sides and top of the window opening. The bottom piece of ZIP is pitched with a few shims underneath to help water drain. Now, the opening is ready for flashing tape and to set the window.
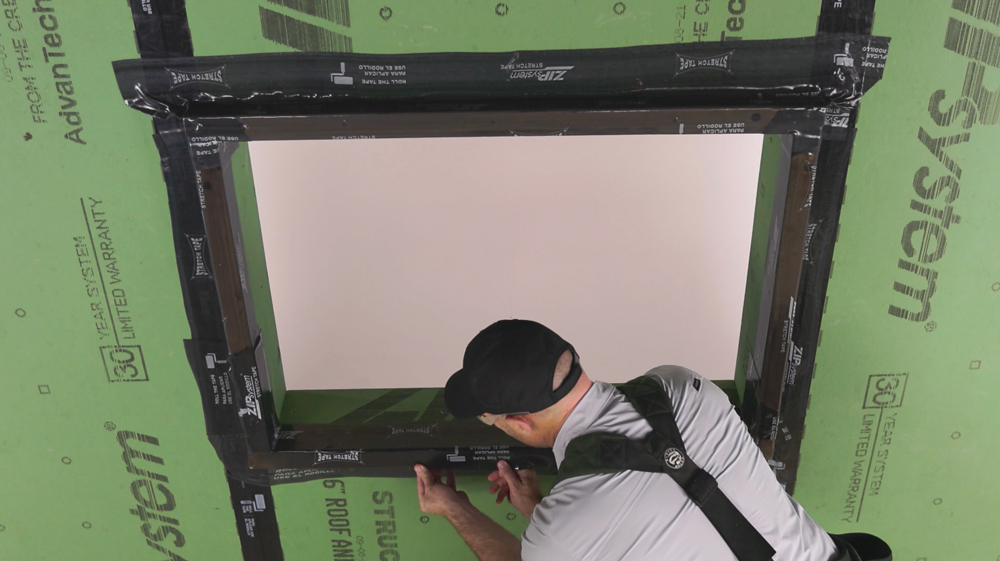
      Flashing the window

      Flashing a window buck establishes continuity of water control and air control. Start by flashing the window buck to the exterior sheathing with flashing tape, connecting from the bottom, bringing it up over the 2x, and landing it to the interior sheathing using a roller or squeegee to press the tape firm. The key to taping corners is to make sure the tape gets all the way back to where the interior of the window surface will be, so the air control layer is continuous.

      Once the buck is taped, continue the same procedure along the sides, taping over the 2x material. This taping is about continuity from the inside of the buck to the exterior sheathing for continuous water and air management.

      Flashing window opening

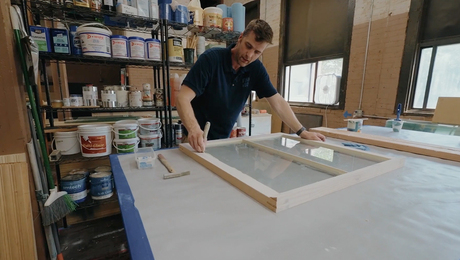
      Now it’s time to prep the window opening as you would any normal window installation. Roll out a flexible flashing tape to create the sill pan and extend it 6 in. to 8 in. up the side.

      Once the sill-pan flashing is prepared, place a few of shims at the corners of the window, check them for level, and tape them in place. This makes it easy to set the window level during the installation. After the sill pan is prepped and shims are in place, apply sealant across the top and sides of the window buck to accept the installation flange on the window. That allows us to follow the manufacturer’s recommendations to wet set into a bead of sealant for continuity of water management.
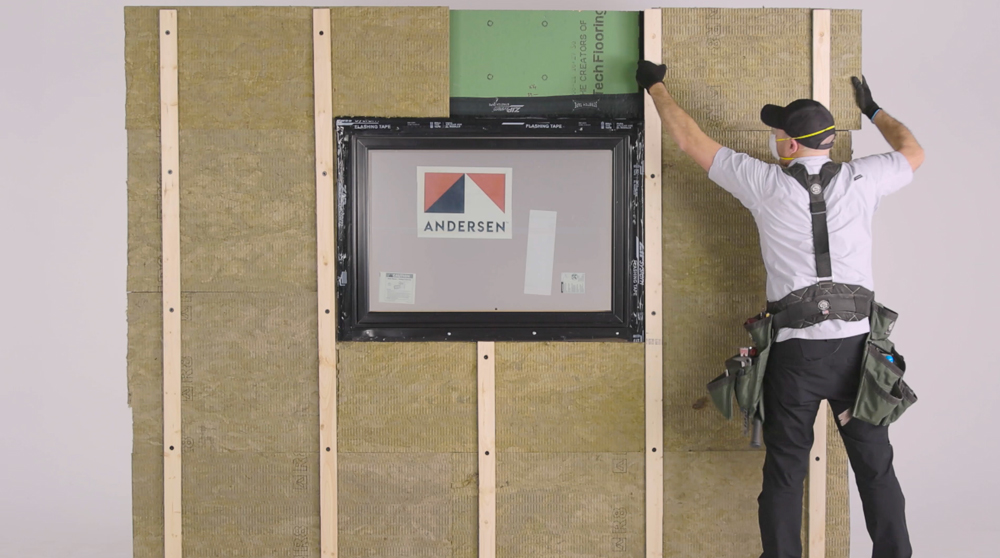
      Window installation

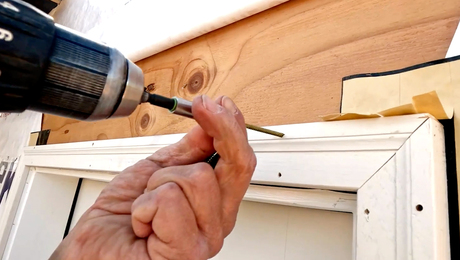
      Now it’s time to place the window into the opening. Center the window and secure it at one corner. We’re using wafer-head screws from Simpson. Double-check that the window is level, then continue fastening the top by inserting a screw every other hole in the window flange. Continue that same pattern down both sides of the window and, again, check for square.

      Before securing the bottom flange, fasten a couple of screws underneath the flange. This creates a space for water to drain from the assembly if it does get wet. Then secure the bottom flange with screws. Now comes the final step in the flashing process.

      It’s important to tape the side flanges of the window first, then install a piece of flashing tape across the top flange. This is often referred to shingle-lapping, so water isn’t trapped at tape seams as it runs down the wall. Before moving on, I add one more piece of tape across the head to bridge the space from the sheathing to the window buck, just to be consistent with that shingle lap fashion over this one edge. This connects the water control layer from top of the window all the way up onto the wall. The bottom flange is not taped, to allow water to drain out of the assembly.

      With that, the high-performance window install is complete, with continuity of water control from sheathing to buck to window. The last step, of course, is to move inside and install backer rod around the window to the buck with a bead of sealant to complete the air control layer. Now that the window is installed, you’re able to install exterior insulation, furring strips, and the trim and cladding of your choice.

      Andersen window in wall assembly while exterior insulation is being installed.

      Andersen 400 Series

      At Catalyst Construction we utilize the Andersen® 400 series windows with regularity for a few reasons. From an installer’s perspective, we like them for that integral nailing fin that’s not applied to the windows separately. That makes us able to move very quickly on our install. We also get the benefit of all the various colors and styles, and then of course, the comfort benefit on the inside. You’re getting high U-value and great gaskets for sealing, and the cost perspective is important too—this is really a premium product that we’re getting at a great value.


      RELATED STORIES

      • Installing and Flashing Windows Correctly
      • How to Install Windows on a Wall With Exterior Insulation
      • Prepare a Rough Opening for a Nail-Fin Window over Exterior Rigid-Foam Insulation

      Sign up for eletters today and get the latest how-to from Fine Homebuilding, plus special offers.

      Signing you up...

      This site is protected by reCAPTCHA and the Google Privacy Policy and Terms of Service apply.
      See all newsletters
      See all newsletters
      ×

      Get home building tips, offers, and expert advice in your inbox

      Signing you up...

      This site is protected by reCAPTCHA and the Google Privacy Policy and Terms of Service apply.
      See all newsletters
      See all newsletters

      New Feature

      Fine Homebuilding Forums

      Ask questions, offer advice, and share your work

      • X
      • facebook
      • linkedin
      • pinterest
      • email
      • add to favorites Log in or Sign up to save your favorite articles

      View Comments

      1. RetiredGuy8159 | Apr 03, 2023 01:47pm | #1

        There is a high performance option for the buck called a ThermalBuck. It eliminates the thermal bridging created by a wood buck and is no more difficult to install than your suggested method.

        I used them on some very large and heavy windows and they have performed fantastic. It's worth looking at if you are interested in a true continuous insulation layer.

        https://thermalbuck.com/

        1. user_736053 | Apr 04, 2023 08:26am | #4

          I totally agree; We have been using Thermalbuck for years on all of our renovations and new construction projects. A wood buck is a thermal bridge.

      2. user-3027284 | Apr 03, 2023 06:04pm | #2

        I don't see the advantage/value of the 7/16 "window buck", what is it's purpose here?

      3. dustindawind | Apr 03, 2023 07:59pm | #3

        I agree with the value question of the zip 7/16 buck layer—why not just frame it without the extra 1” gap and tape back farther?

      4. parlaiment | Apr 13, 2023 02:53pm | #5

        Some detail section drawings would go a long way in communicating what is going on here. The photos are a bit unclear.

      Log in or create an account to post a comment.

      Sign up Log in

      Become a member and get full access to FineHomebuilding.com

      Up Next

      Video Shorts

      Featured Story

      Podcast Episode 687: Flat Roofs, Spray Foam vs. Loose-Fill Insulation, and Building Your Own Cabinets

      Listeners write in about air-sealing numbers and wildfire recovery, before asking questions about replacing a row house roof and what kind of roof insulation is needed.

      Featured Video

      Video: Build a Fireplace, Brick by Brick

      Watch mason Mike Mehaffey construct a traditional-style fireplace that burns well and meets current building codes.

      Related Stories

      • Beat the Heat: Cool Innovations
      • Breathing New Life into Original Windows
      • Mortising a Hinge without a Router
      • Window Glazing with Traditional Putty

      Discussion Forum

      Recent Posts and Replies

      • |
      • |
      • |
      • |
      • |
      • |
      View More Create Post

      Highlights

      Fine Homebuilding All Access
      Fine Homebuilding Podcast
      Tool Tech
      Plus, get an extra 20% off with code GIFT20

      "I have learned so much thanks to the searchable articles on the FHB website. I can confidently say that I expect to be a life-long subscriber." - M.K.

      Get home building tips, offers, and expert advice in your inbox

      Signing you up...

      This site is protected by reCAPTCHA and the Google Privacy Policy and Terms of Service apply.
      See all newsletters
      See all newsletters

      Video

      View All Videos
      • Fastening an Exterior Door With Brick Mold
      • FHB Podcast Segment: Proper Flashing for Marvin Windows
      • A Closer Look at Pella's Steady Set Window Installation System with Mike Guertin
      • Details for Integrating an Addition
      View All

      Windows

      View All Windows Articles
      • Breathing New Life into Original Windows
      • Window Glazing with Traditional Putty
      • Tom Gensmer, Remodeler and Window-Repair Expert
      View All Windows Articles

      Fine Homebuilding Magazine

      • Issue 331 - June 2025
        • A More Resilient Roof
        • Tool Test: You Need a Drywall Sander
        • Ducted vs. Ductless Heat Pumps
      • Issue 330 - April/May 2025
        • Deck Details for Durability
        • FAQs on HPWHs
        • 10 Tips for a Long-Lasting Paint Job
      • Issue 329 - Feb/Mar 2025
        • Smart Foundation for a Small Addition
        • A Kominka Comes West
        • Making Small Kitchens Work
      • Issue 328 - Dec/Jan 2024
        • How a Pro Replaces Columns
        • Passive House 3.0
        • Tool Test: Compact Line Lasers
      • Issue 327 - November 2024
        • Repairing Damaged Walls and Ceilings
        • Plumbing Protection
        • Talking Shop

      Fine Home Building

      Newsletter Sign-up

      • Fine Homebuilding

        Home building tips, offers, and expert advice in your inbox.

      • Green Building Advisor

        Building science and energy efficiency advice, plus special offers, in your inbox.

      • Old House Journal

        Repair, renovation, and restoration tips, plus special offers, in your inbox.

      Signing you up...

      This site is protected by reCAPTCHA and the Google Privacy Policy and Terms of Service apply.
      See all newsletters

      Follow

      • Fine Homebuilding

        Dig into cutting-edge approaches and decades of proven solutions with total access to our experts and tradespeople.

        Start Free Trial Now
        • Facebook
        • Instagram
        • X
        • LinkedIn
      • GBA Prime

        Get instant access to the latest developments in green building, research, and reports from the field.

        Start Free Trial Now
        • Facebook
        • YouTube
      • Old House Journal

        Learn how to restore, repair, update, and decorate your home.

        Subscribe Now
        • Facebook
        • Instagram
        • X

      Membership & Magazine

      • Online Archive
      • Start Free Trial
      • Magazine Subscription
      • Magazine Renewal
      • Gift a Subscription
      • Customer Support
      • Privacy Preferences
      • About
      • Contact
      • Advertise
      • Careers
      • Terms of Use
      • Site Map
      • Do not sell or share my information
      • Privacy Policy
      • Accessibility
      • California Privacy Rights

      © 2025 Active Interest Media. All rights reserved.

      Fine Homebuilding receives a commission for items purchased through links on this site, including Amazon Associates and other affiliate advertising programs.

      • Home Group
      • Antique Trader
      • Arts & Crafts Homes
      • Bank Note Reporter
      • Cabin Life
      • Cuisine at Home
      • Fine Gardening
      • Fine Woodworking
      • Green Building Advisor
      • Garden Gate
      • Horticulture
      • Keep Craft Alive
      • Log Home Living
      • Military Trader/Vehicles
      • Numismatic News
      • Numismaster
      • Old Cars Weekly
      • Old House Journal
      • Period Homes
      • Popular Woodworking
      • Script
      • ShopNotes
      • Sports Collectors Digest
      • Threads
      • Timber Home Living
      • Traditional Building
      • Woodsmith
      • World Coin News
      • Writer's Digest
      Active Interest Media logo
      X
      X
      This is a dialog window which overlays the main content of the page. The modal window is a 'site map' of the most critical areas of the site. Pressing the Escape (ESC) button will close the modal and bring you back to where you were on the page.

      Main Menu

      • How-To
      • Design
      • Tools & Materials
      • Video
      • Blogs
      • Forum
      • Project Guides
      • Reader Projects
      • Magazine
      • Members
      • FHB House

      Podcasts

      • FHB Podcast
      • ProTalk

      Webinars

      • Upcoming and On-Demand

      Podcasts

      • FHB Podcast
      • ProTalk

      Webinars

      • Upcoming and On-Demand

      Popular Topics

      • Kitchens
      • Business
      • Bedrooms
      • Roofs
      • Architecture and Design
      • Green Building
      • Decks
      • Framing
      • Safety
      • Remodeling
      • Bathrooms
      • Windows
      • Tilework
      • Ceilings
      • HVAC

      Magazine

      • Current Issue
      • Past Issues
      • Magazine Index
      • Subscribe
      • Online Archive
      • Author Guidelines

      All Access

      • Member Home
      • Start Free Trial
      • Gift Membership

      Online Learning

      • Courses
      • Project Guides
      • Reader Projects
      • Podcast

      More

      • FHB Ambassadors
      • FHB House
      • Customer Support

      Account

      • Log In
      • Join

      Newsletter

      Get home building tips, offers, and expert advice in your inbox

      Signing you up...

      This site is protected by reCAPTCHA and the Google Privacy Policy and Terms of Service apply.
      See all newsletters
      See all newsletters

      Follow

      • X
      • YouTube
      • instagram
      • facebook
      • pinterest
      • Tiktok

      Join All Access

      Become a member and get instant access to thousands of videos, how-tos, tool reviews, and design features.

      Start Your Free Trial

      Subscribe

      FHB Magazine

      Start your subscription today and save up to 70%

      Subscribe

      Enjoy unlimited access to Fine Homebuilding. Join Now

      Already a member? Log in

      We hope you’ve enjoyed your free articles. To keep reading, become a member today.

      Get complete site access to expert advice, how-to videos, Code Check, and more, plus the print magazine.

      Start your FREE trial

      Already a member? Log in

      Privacy Policy Update

      We use cookies, pixels, script and other tracking technologies to analyze and improve our service, to improve and personalize content, and for advertising to you. We also share information about your use of our site with third-party social media, advertising and analytics partners. You can view our Privacy Policy here and our Terms of Use here.

      Cookies

      Analytics

      These cookies help us track site metrics to improve our sites and provide a better user experience.

      Advertising/Social Media

      These cookies are used to serve advertisements aligned with your interests.

      Essential

      These cookies are required to provide basic functions like page navigation and access to secure areas of the website.

      Delete My Data

      Delete all cookies and associated data