Updating Built-Ins and Trim: Adhesive Tips for a Professional Finish
See how Tyler Grace updates window trim and built-ins using adhesive to reduce fasteners at the Loctite 2nd Chance House.
Sponsored by Loctite® Power Grab

Tyler Grace is back at the Loctite® 2nd Chance House to help the Habitat for Humanity team add some detail to the dining room. On this visit, he’s updating the window trim and built-ins with Loctite® Power Grab Heavy Duty construction adhesive.
Here’s the Transcript:
Welcome back to the Loctite® 2nd Chance House. As you can see, the Habitat team’s been busy preparing for final finishes. Today my time will be spent buttoning up the trim on these new windows and the existing salvage built-ins. For that, I’ll be using the Loctite® Power Grab Heavy Duty construction adhesive. Let’s get to work.
Before I could tackle the casing on these windows, I had to make sure the window was completely sealed. So we used spray foam between the window and the rough opening, and then I preassembled all of these extension jambs.
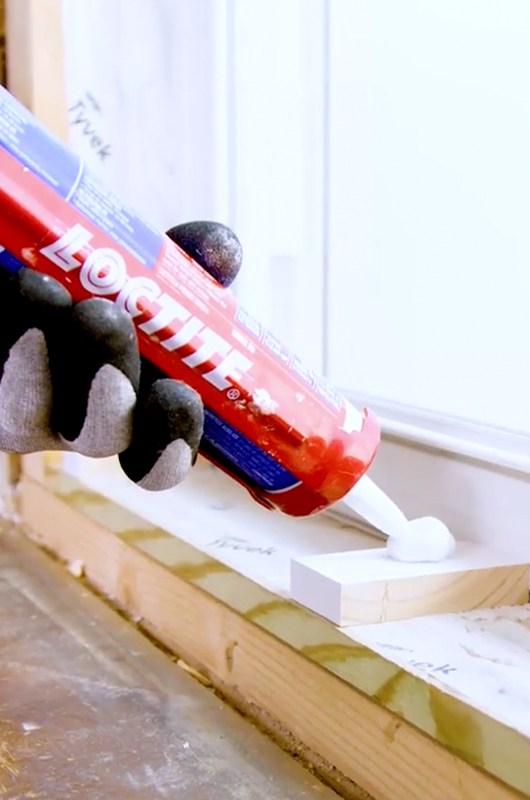
On the bottom, you’ll note that I had it pre-shimmed and I used the Loctite® Power Grab Heavy Duty to wet shim the bottom to avoid as many fasteners as possible. The last thing I’ll do is one more round of spray foam between the extension jamb and the rough opening.
Let’s Look at the Windows
Now that the jambs are installed, I’m ready to begin casing these windows out. I marked a 1/4-in. reveal on all of these jambs to make sure that my casing lines up perfectly. I’ll be using the adhesive as a wet shim to make sure that everything’s coplanar prior to nailing it off.
When I open the tube of adhesive, I like to cut at least 3/8 in. off the end. We’re going over drywall, some lumber, and plaster, so I like to get a large glob behind that trim to be able to float it and make sure that it’s lying flat.
Farewell, Fasteners
One of the nice things about this adhesive is that it has really great holding power, so it allows me to only use a few nails to keep it in place while the adhesive cures. I’ve used a lot of similar techniques installing these styles.
You want to pay special attention to the joinery between the two pieces. They’re not necessarily on the same plane, so I’ll put a lot of adhesive right in this area to be able to flatten these two pieces out to create a coplanar surface so when paint goes on, it’s nice and flat and you can’t see that it’s two different pieces of wood.
The last part of this installation is going to be installing some transitional moldings. I’ll just be using a small bead of adhesive along the entire length between the ceiling, the casing, and these existing built-ins. And at that point, Habitat will be ready for paint.
RELATED STORIES
