How to Patch Drywall
When it comes to drywall, knowledge is power. Check out these variations on patching walls.
William Barstow of Arcata California writes
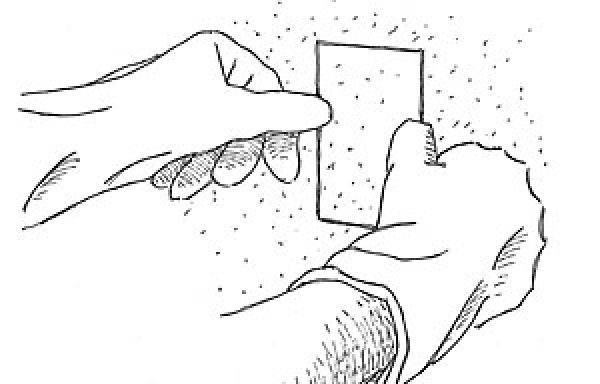
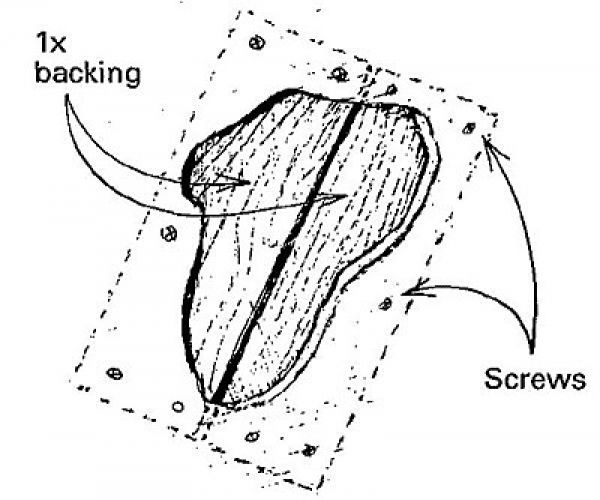
Here is still another way to install a drywall patch in a spot that doesn’t have any backing. First, cut an oversize patch, and nibble away at it until it fits the hole. Next, find a piece of plywood or lath that is longer but narrower than the hole. Slip the wood behind the drywall, and position it so that it spans the hole, as shown in the drawing. Drive drywall screws through the wallboard and into the lath to draw it up tight to the back of the gypboard. Screw the patch to the lath, and you’re ready to fill the cracks with joint compound.
For more information on drywall patching
A lot of people understandably have a love/hate relationship with drywall. Take patching holes for example. When a fix comes out right, it’s hard not to love drywall despite its messy, often fickle nature. When a patch attempt comes out badly, the only thing you can do is hate the stuff. Well, and do it again. When it comes to drywall, knowledge is power. Check out these variations on patching walls.
This tip uses polyurethane glue to make an invisible patch. Invisible Drywall Patch
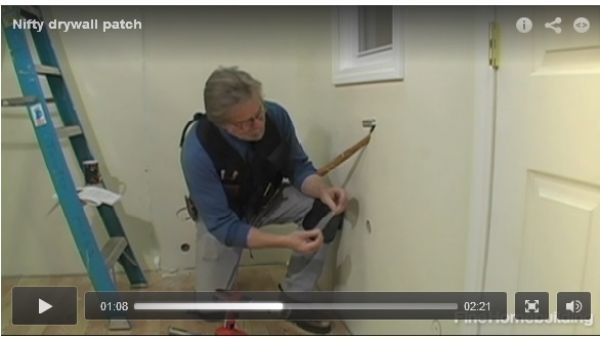
Check out this video is a combo tip that shows you how to make holes and fix them. Nifty Drywall Patch
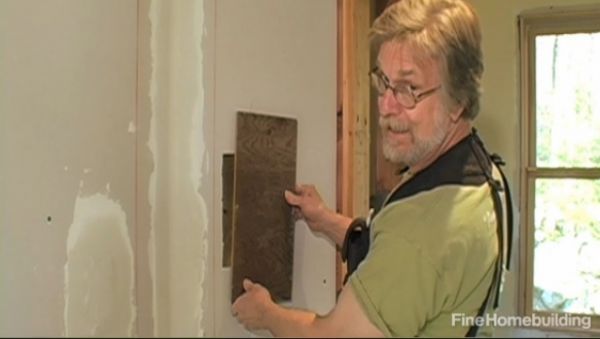
This video shows how small holes are handled. You might be familiar with this method. If not, you’ll be glad you checked it out. Small Drywall Patch
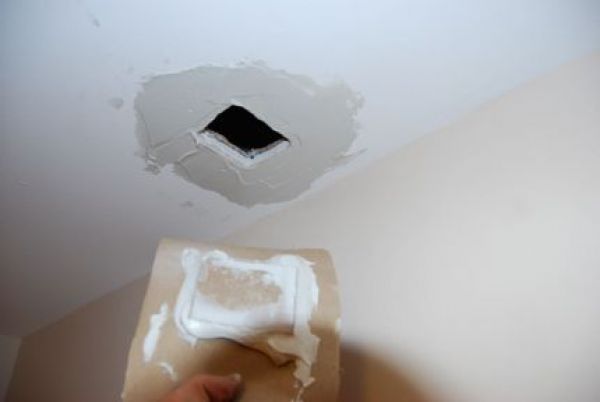
This is a reader’s submission on the California patch method. California Drywall Patch
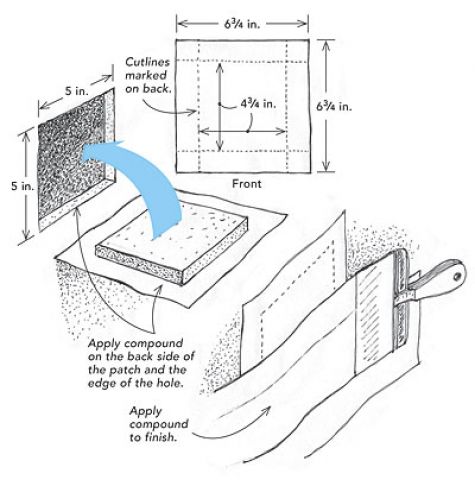
Here’s that no-tape method shown again with step-by-step illustrations. The no-tape drywall patch
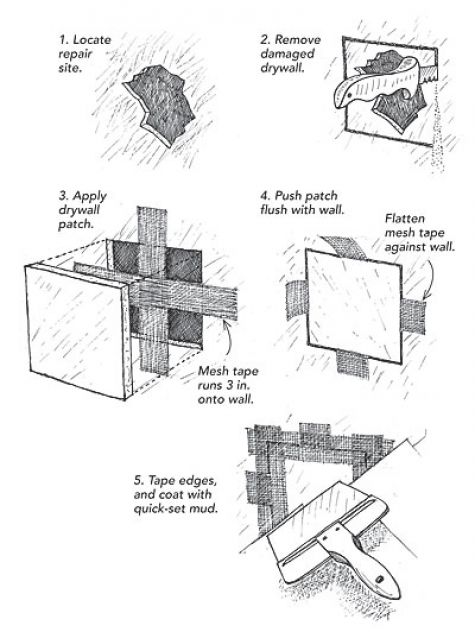
This tip shows how tape is used behind the patch. It’s part of one of the above listed videos. Drywall patch tip
This tip uses housewrap of all things as part of the fix. Improved drywall patch
Finally, for advice from start to finish, check out:





View Comments
Great tip but the music is REALLY distracting. Way to loud and why do we need it at all?
Runnerguy
Ok so I do not sound too sarcastic I first want to say that I understand everyone is not on the same level but this is a pretty basic tip. It also makes me wonder just who are the readers of finehomebuilding? I was always under the assumption that this was a publication for those in the building trades or at least more then just the casual DIYer.
You know "written by professionals for professionals." show me a person in the building trades for any time that has never put a piece of wood behind a drywall patch?
I think just about everyone half way handy can figure out if you want to screw a patch but there is nothing to screw into, why not just put something there to screw into.
Hay I got a tip if you need to drive a nail but don't own a pneumatic nail gun you can actually use a hammer and hit the nail on the end and it goes right in just like it was shot from a nail gun. Come on guys lets set the bar just a little higher on what is a good tip verses what is simply standard practice. I mean you would not call using a utility knife to score and snap dry wall a tip it is simply how drywall is cut. Putting a piece of wood behind a patch is also a standard way to patch a hole in drywall.
I agree with runnerguy - I like the tips, but these clips are produced almost for TV. They don't quite work for the internet. Dump the music and the title page - just get to the tip!
MFournier, I get your point and if all Chuck said was ‘use plywood to back up your drywall patch’, I’d agree with you. But there are some good takeaways here, namely driving a second screw near the bottom of the plywood to support it while he secures the top.
I don’t think all tips are created equal. But if they’re good, they can all have a home at FHB.com
For small holes that don't need any backing like a doorknob push-through, I've taken a piece of drywall about 3" oversize in all directions, draw the hole on the back and score around it, then crack and peel the core off the front paper. Butter the edges and paper with drywall compound, insert in hole atand feather. The patch usually winds up a tiny bit lower than the surrounding wall but that fills in nicely on the 2nd coat.
Saves time cutting a piece of backing and installling it and fiddling with small pieces of paper tape or mesh.
Sorry, but I'm kind of on the same page as MFournier. Maybe not to the extreme of using a hammer and nail to drive my point home, but I would like something a bit more advanced as well. BTW, did you notice how far from the joint the screws were driven into the drywall? They won't be covered with tape. Not a big deal, I guess.
i always keep 2" strips of 3/8" or 1/2" plywood in my truck. i install them around the perimeter of the hole about an inch in leaving an inch exposed in the hole. then screw the patch to the exposed strips this keeps the patch and the wall even all around.
Comments about the tip are true. This is a simple tip in concept, but the process of adding and using the screw "handles" is very nicely shown. I've seen some "professionals" at work not be so thoughtful.
As for the music and graphic, I don't agree with the comments at all. They are great. I don't need them for the tip but they sure make this website a clean professional site to use. To me it's the same thing as visiting an organized store with knowledgeable staff and good customer service versus a place that is messy, unhelpful, and clearly poorly managed.
Since drywall is part of the fire code, why not use a piece or pieces of drywall scrap instead of wood?
I've patched a similar hole as above, reusing the piece I had removed (for access to replace the house's main water shut-off valve). held it in place with tape and glued it there using caulk. No worries about matching texture or color. Did have a bit of challenge hiding the glue line, but, hey, my wife's an artist!
Jim
I have to agree w/ the comments about the purpose of FH- is it for pros or DIYers? While I can understand that the editors want to attract DIYers- there are a lot of them and many of them have money- backing up a drywall patch is pretty basic. Someone who needs that tip also needs half a dozen other basic concepts- how far out to feather the patch, the importance of sanding/sponging, re-texturing the patch (if you're a Left Coaster) and so on. I thought giving DIYers just enough info to get into trouble was TOH's specialty.
And speaking of re-texturing, what's with the tip about using an air gun and thinned mud in a squeeze bottle? Even the big boxes sell texture in a rattle can, adjustable no less. Granted, unless it's August in Tucson, you need to know enough to run the can under hot water for a few minutes to adjust the pressure.
Thanks for your comments everybody. We're making this video-tip stuff up as we go along, so we really appreciate your feedback. To Mfourneir's point, yes, this is a basic tip. We've always had a mix of tips in the magazine that run from beginner level to advanced, and that's because, well, we want to reach as broad an audience as possible. If you're new to the world of home building, patching a hole in a gypboard wall is a good way to get your feet wet--a sort of gateway project to more challenging tasks.
To BobboMax's comments, yep, those are all steps that are integral to making a good drywall patch. Maybe somebody will send in some advice on getting those steps right too. I hadn't heard about "texture in a can", but truth be told, I'd rather use the tools and materials I've got on site to get the job done instead of buying a can of stuff that does the same thing and will end up in a landfill.
And to runnerguy's comment, I agree with you partly. I think we need to dial down the riff at the end of the tip, and better yet, record a slightly different hook.
A request for the webmaster: Could you program pop-up titles to show when the curser is rolled over the thumbnails in the ribbon? Thanks. Waiting for the FHB logo to run to find out what the next vid is is a real pain in the butt. Thanks again.
Good idea tbw. I put a post-it on web guy's dashboard to add the pop-up titles. In the meantime, you can click on the "back to list" link at the top to get you to the menu of tip topics without the annoying yada yada.
This video and several others on this site won't load. What's going on?
I have a problem with my home 18' tall ceiling drywall cracking. The crack varies from 1/4”-3/4” and is not in line with the gyp. board joints (only at the perimeter. It goes through seasonal changes in crack width. We in Texas have some dry spells which causes the clay soil to expand during wet times and shrink during dry times. We try to keep the perimeter of the house as wet as possible to try and limit the soil settling. I know it is foundation related. We have a slab on grade post tension system. We have also had a foundation repair company come to evaluate our settlement issues. They said that we would be wasting our money because there is not enough of a problem to correct it.
Back to our situation, as you can imagine a crack in the slab translates into a wide crack 18’ in the air. Our question is, what system can we use to permanently prevent the cracking? I have thought of doing a commercial type suspended gyp. bd. Ceiling system or using battens over the joints and even crown molding around the perimeter to “hide” the cracks. I have pictures if there were a way to submit them.
Thanks for any ideas.