Cabinet-Door Shoot Out Series: Rails and Stiles: Mortise-and-Tenon Joinery
This method may be right for you if you're not in a hurry and you like hand tools more than power tools
Video Transcript
Scott Gibson: What I’ve done is I’ve cut a 1/4-in. mortise with a hollow-chisel mortiser in this test piece that is exactly the same thickness as the rail-and-stile door. And I start with the mortise dead-center because that makes it easier to make the groove and the rails and stiles exactly the same width.
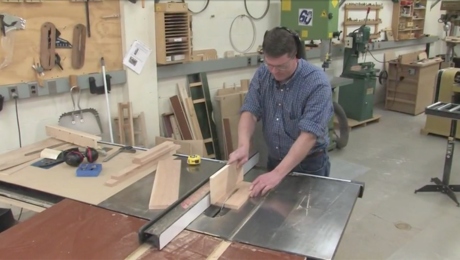
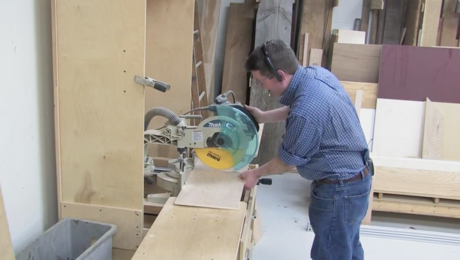
I took the block that has the mortise in it and I chopped off the end in a miter saw, so now I’ve got a gauge block that I can use to set up the tablesaw so I can cut the grooves in the rails and the stiles. The blade height is exactly 1/2-in., which is the depth of the groove. All I’ve done is held the block up against the fence, and nudged the fence over until the blade is just touching the inside edge of the mortise. Then I lock down the fence. When I send that piece through the saw, I’ll cut one half of the groove on the first pass, Then I’ll just flip the board, I’ll cut it the other way, and then I’ll have a groove that’s exactly centered on the rails and stiles.
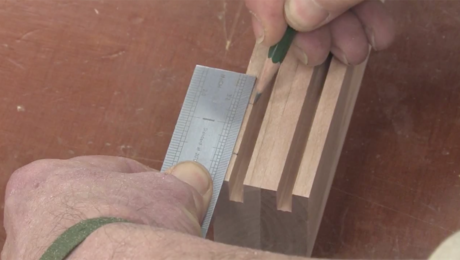
Now I’ve got to lay out where the mortises are going to be in the two rails. They’re squared up and even and I’m going to clamp them so they don’t move around. I’ll call this first rail the bottom. The bottom is 3 in., and I’m going to leave 1/2 in. of meat at the bottom, and subtract 1/2 in. from the groove at the top. That is going to show me the dimension of the mortise that I’ll cut. At the top, the rail is 2 in. wide, and I still come in 1/2-in. from the top and bottom. I make some marks across the rails so I know where to stop the mortising machine. These pieces are now ready to cut. It’s worth pointing out that the length of each of the rails is determined by how long the tenon is; these tenons are going to be 1-1/4 in., so I need to add 2-1/2 in. to the length of the rails to account for the material that we bury inside of the mortises.
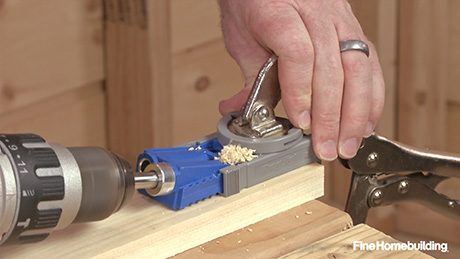
Now I pop one of the stiles into the clamp on the mortising machine and clamp it tight. This particular mortising machine has a bed that slides back and forth, so it’s really easy to make a series of holes down the length of the mortise. All I have to do is make sure the depth stop is set correctly at 1-1/4 in. plus 1/16-in. — 1-1/4-in. is the length of the tenon, plus 1/16-in. just for slop in the bottom of the mortise.
My friend Joe points out that you don’t really need to have a gigantic mortising machine to do this job. At home in my own shop I have a little bench-top model that probably weighs only 40 pounds that does just as good a job. You can even use a drill press. So, this is actually something you could do on the job site.
So I’m going to mark the length of the tenon — 1-1/4 in. — so I can set the fence up correctly on the tablesaw. Joe helpfully points out that it would be possible to just measure and set the fence, but I like to know it’s exactly right, so I’m going to measure it on the actual piece of wood. So I’m going to rest the end of the rail against the fence and move the fence until the blade is right on the mark. The other thing I have to do is figure out how deep to make the cut, so I’ll bring back that gauge block and set the height of the blade to cut the tenon to match the width of the mortise.
I’ve taken a few passes to cut a test piece and the tenon is a little snug. So, I’ll loosen up the lock nut, inch the blade up a little and re-cut the tenon. Before I do that, I’ll check the cut for square, because this is going to determine how the door comes together and I want the joint to be nice and flat.
I’ve made the cuts on the actual rails, I’ve got a pretty smooth surface on the cheeks of the tenons, and there’s a reasonably good fit in the grooves. So the next thing to do is to mark where the haunch ends as the tenon extends into the groove adjacent to the mortise. I’ll just cut off a little material there so the tenon can seat nicely into the mortise. It’s a pretty quick operation with a handsaw, and then I’ll be done. I lay the tenon on the side of the stile and use the marks I originally used to cut the mortise to layout the cuts I’ll make on the haunch. Make the tenon a little bit narrower than the mortise so that it doesn’t get bound up when you’re sliding into position. I also mark the height of the cut at 1/2 in. — the depth of the groove. Then I make two little cuts. If you were making several of these doors you might want to make a little gauge block to mark the multiple joints rather than measuring each one individually.
The smoother the surface is the stronger the joint’s going to be, so using a plane to get rid of some of the grooves on here left by the tablesaw blade is actually better for the joint.
Read the Cabinet Door Shoot-Out companion article for more information about building these doors.
