Leak-free Windows Series: Flashing Pre-Cased Jambs
Flashing windows and doors with pre-applied trim, such as brickmold, is a lot trickier than flashing a window or door with flanged jambs that will be covered with trim later.
In this video, Mike shows how to do it with specialized double-sided peel and stick membrane on one side and standard peel and stick membrane on the other.
Video transcript:
here’s another way to do a jamb flashing on a cased door, and that’s using a pre-made flashing tape designed specifically for door and cased window installations. This one is already prepared for both the face flashing, which goes on the wall, as well as the back flashing, which would go to the jamb as well as the back side of the casing itself. The part that goes on the back side of the casing and the jamb is already pre-scribed, which makes it real easy to pull off the release liner and expose the sticky part—and we can do that right now. We’ll just extend this down over the bottom of the jamb of the door by about 3 or 4 inches.
Inside corners must be tight
I’ll pull off that first strip of release liner, and then I’ll fold that adhesive part back onto its face so that it doesn’t stick when I put it on. This is a butyl-based adhesive, so it’s not quite as aggressive as an asphalt based, so that makes it a lot easier to work with. In the event that it sticks on to the jamb of the door—you don’t want it there—you just pull it back a little bit and reposition it, like I gotta do here. It’s really important to get it tight and crisp into the inside corner. We don’t want any bridging between the back of the casing and the back of the jamb, or we could end up with a problem with the door being held out from the wall a little bit. This middle strip of release liner will expose the adhesive to bond down to the back side of the door casing, and then I just need to make a relief cut at the bottom and a relief cut at the top so that we can fold that flashing tape flat against the wall.
Tie the door in to the wall
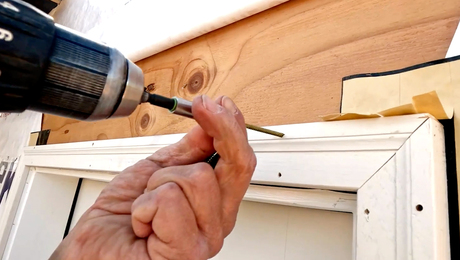
Now we’re ready to install the door frame. I’m just going to put this in with a couple of drywall screws; it’s not something I typically do except for a demonstration, and it works just fine. The important part I want to address is how to deal with the flashing up against the wall. Essentially by back flashing using the flashing tape to the casing and to the jamb, we’ve created a little bit of a flange out here on the wall. Now I can remove this release paper that’s left on there—and just to hold this in place, I’m going to fold this little bit of top over and stick it to the wall; that just holds it from folding down on itself. Remove that release paper and get another strip of flashing tape.
You need extra flashing tape if you use regular membrane
This second strip of flashing tape can be any width that you want; it could be 4 inches like this, or you could go 6 or 9 inches, but 4 should be more than adequate. To do this, I’m just going to stick it to the wall, right over the sticky part that’s exposed beneath, and bond the whole edge down as I work my way along. With the pre-made flashing tape, it’s a little bit easier; we’ve already got the second piece of flashing tape applied, so we just have to remove the release liner. Once I get hold of the release liner, I can bond the top down to the wall, and then just pull the release tape off as I work my way down, pressing as I go. I’m starting to lose a little bit of that release paper, so I’ll work from the bottom up.
Videos in this members-only series:


