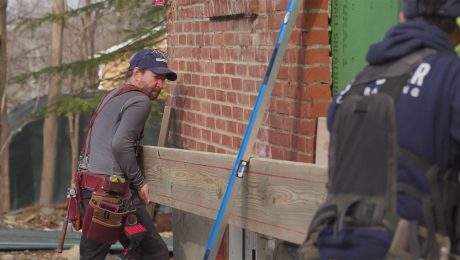
Leak-free Windows Series: Sill Pans with Regular Peel-and-Stick Membrane
The most common type of pan flashing is nonflexible flashing tape. You use this stuff all over the job site, but it poses some challenges in rough openings.
The first thing I’m going to do is remove just part of the release sheet off the back. It makes it a lot easier to install than removing the entire release sheet. Some of the manufacturers put a little cord inside of the tape itself so that you can separate the release sheet. I’ll just dig that out here; it’s a little wire. And when you pull that wire, it’ll tear the release sheet in two—but that’s not always the case. If you don’t have one of those cords to rip the release sheet in half, what you can do is use a brand-new knife blade and lightly drag it across the release sheet, just scoring it through the face—and then you can remove just part of that release sheet. You have to make sure you get it nice and tight in the inside corners; otherwise, when the window goes in, if you’ve bridged that corner with the material, it can rupture when you place the window in.
Cut and stretch the corners
This material won’t stretch around this outside corner, so we’re going to make a relief cut in order to fold the side and the bottom down. But this creates a problem because no matter what we do to patch that point, there’s a potential leak spot. There’s a couple ways we can deal with that, using either some outside preformed corners or using a patch piece that we apply either before we fold these flaps down or after we fold them. Now, when I make this cut, I’m going to start the cut about ½ to ¾ inch away from the corner itself, right there, and get the little bit of stretch I can out of the membrane. You can see how that plastic folds down; I get at least a little bit of lap there. Then I can pull the release sheet off and fold this back to the wall.
Patch the cut pieces
The way we’re going to deal with this open outside corner is to use some patch pieces. An alternative to that would have been before we folded up this material on the sill and up the jamb, we could have used a preformed piece of outside corner. These would get applied first, and then the flashing tape would go over and then up, and this would make it a seamless outside corner. Here’s a large, thin one—these stack up pretty well—and the boxes, alternatively, you can get a more rigid one. One of the problems with the rigid material, if you’re using beveled cedar siding, is this is set up at a 90-degree angle, and you can see this is an open gap right there: This rigid one wouldn’t work, whereas the flexible one, you can bend it to get into that nice and tight.
Let’s look at how we can do a patch piece over the outside corner. Already we’ve stretched a little of the nonflexible flashing around the corner, and now we’ll put this patch piece sticking up and inside the opening just a little bit. So, we’re going to go up and over into that opening just a little bit, in that corner, and again make a relief cut, but not all the way into the point where the corner is; we’re going to make it ½ to ¾ inch up and stretch the material as best we can. I have to push that as tight as I can into the corner.
Another way to deal with the corner
Now you’re here where this corner patch is overlapping the sill pan itself, so now we’ve actually got a reverse lap here. There’s another way to do this corner patch detail where we end up with a positive lap. Now I’ll take this corner patch material and apply it before I fold the flashing tape down over the face of the wall framing. I’m going to hold this up and over the inside corner where the jamb meets the sill, and I can stick this back to the wall and down underneath the sill opening. And then I’ll start my relief cut just a little bit up—½ to ¾ of an inch up from the actual corner point itself—and get as much stretch as I can out of the flashing tape material. It’ll wrinkle a little bit, but that’s OK; it won’t interfere with the window installation. Now I can fold the flashing tape, press it into the side of the rough opening, and then remove the release sheet. Again, I’m going to make a relief cut, but instead of starting right at that weak point where the corner meets the outside face of the wall, I’m going to start about ½ to ¾ inch out, and then stretch the material just a little bit so that I get at least about ½- to ¾-inch overlap between the patch piece on the bottom and the sill pan flashing itself. So, now I’ve sealed up as best I can that potential leak point. And on this detail I’ve got a positive overlap, where the flashing pan itself is overlapping the patch piece as opposed to the other side.
Use a J-Roller to help the membrane stick
Now, it’s pretty warm out today, so this material stuck instantly down to the substrate. That’s one of the problems with this peel-and-stick material. On hot days the stuff sticks pretty aggressively. But if it’s cold weather, it doesn’t stick very well, or it may take several hours, or you have to wait for a warm day for the material to stick, but it eventually will. In the meantime, when it’s cold out, you can use a J-roller to put extra pressure on the flashing tape to make sure it bonds pretty well to the substrate.
Videos in this members-only series:
