Air-Sealed Mudsill Assembly
When building a home to Passive House standards, this is one of the first steps to create the necessary airtight building envelope.

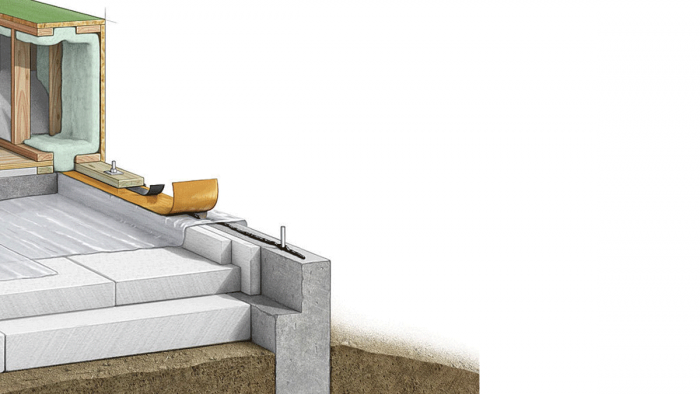
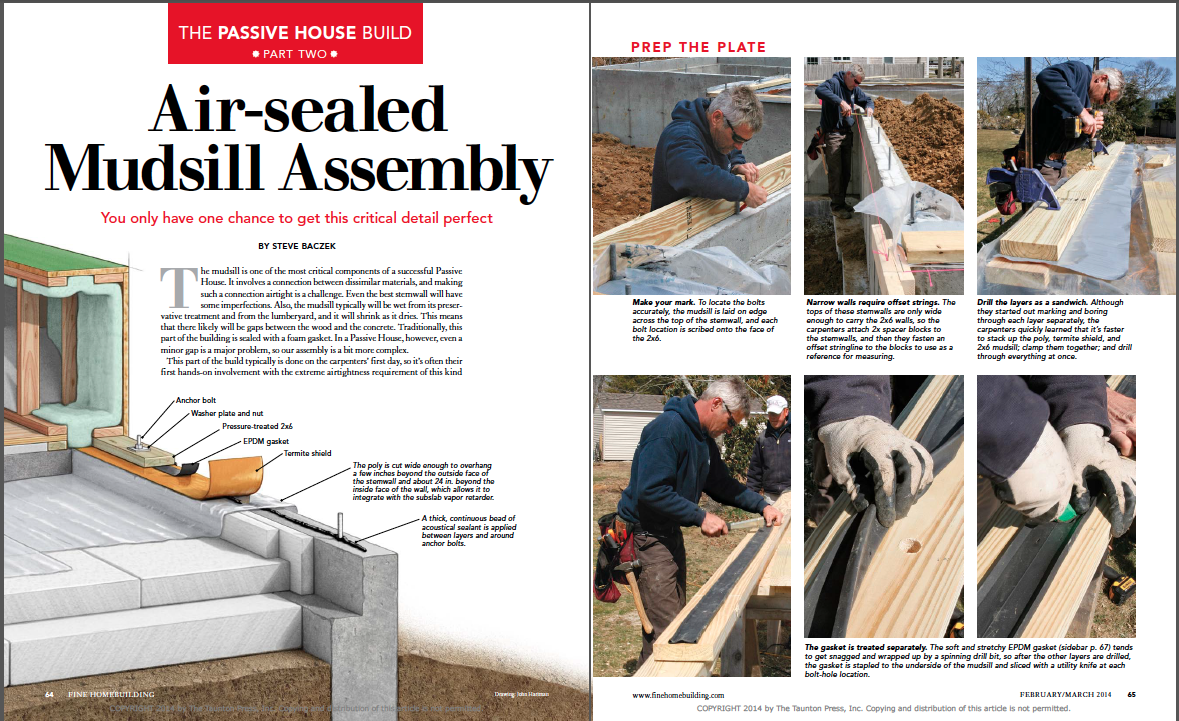
Synopsis: Part Two of this collection of Passive House articles is devoted to the “Air-Sealed Mudsill Assembly.” Architect, Steve Baczek writes that the mudsill is one of the most critical components of a successful Passive House. Airtightness is essential to a Passive House. Minor irregularities of the stemwall or shrinkage of the sill plate once the water and preservative treatment dry alone will make a mudsill prone to gaps, which would pose a major problem to the Passive House design. The article gives a detailed process of assembling an airtight mudsill sandwich comprised of poly, termite shield, EPDM, pressure-treated 2×6, and, interestingly enough, acoustical sealant.
Watch the videos and read the articles in this series (links below), then head on over to GreenBuildingAdvisor.com to join the conversation with the designer of this house, Architect Steve Baczek.
All articles in this series:
“The Passive House Build, Part One: Designed for Success” (FHB #240)
“The Passive House Build, Part Two: Air-Sealed Mudsill Assembly” (FHB #241)
“The Passive House Build, Part Three: Superinsulated Slab” (FHB #242)
“The Passive House Build, Part Four: Framing for Efficiency” (FHB #244)
“The Passive House Build, Part Five: Installing High-Performance Windows” (FHB #245)
All videos in this series:
Double-stud walls and insulation
The mudsill is one of the most critical components of a successful Passive House. It involves a connection between dissimilar materials, and making such a connection airtight is a challenge. Even the best stem wall will have some imperfections. Also, the mudsill typically will be wet from its preservative treatment and from the lumberyard, and it will shrink as it dries. This means that there likely will be gaps between the wood and the concrete. Traditionally, this part of the building is sealed with a foam gasket. In a Passive House, however, even a minor gap is a major problem, so our assembly is a bit more complex.
This part of the build typically is done on the carpenters’ first day, so it’s often their first hands-on involvement with the extreme airtightness requirement of this kind of house. In most cases, the carpenters never will have built even close to a Passive-House-level of airtightness, so establishing a good mental standard for the job starts here.
The mudsill is a one-shot deal. This project relies on several blower-door tests to evaluate air leakage, but the first test won’t happen until the walls and roof are in place and sheathed. By then, any air leakage at the mudsill is far more difficult to address. It needs to be right the first time; there is no second chance here.
Learning to love acoustical sealant
There are various sealants, gaskets, self-adhering membranes, and building tapes for air-sealing mudsills. Although we used a gasket in one layer of the mudsill assembly on this house (a belt-and-suspenders approach) most of the airtightness hinges on the use of Tremco acoustical sealant. Sold in tubes at specialty retailers and online, the black sealant installs easily with a caulk gun. It’s exceedingly sticky and highly elastic, and unlike construction adhesive, it never cures. While the gooey, get-everywhere sealant makes for an interesting job site (you’ll want to keep a large bottle of Goof Off or Goo Gone on hand), it is the most effective air-sealing solution I have found.
One of the issues in sealing mudsills with a rubber gasket alone is the treatment of butt joints and changes in direction. A healthy bead of sealant eliminates any concern about gaps in these areas.

For more photos, illustrations, and details, click the View PDF button below:


