Gable Wall — Side, Trim, and Raise
Taking care of the siding, trim, and paint at the uppermost gable peak before raising the wall saved time
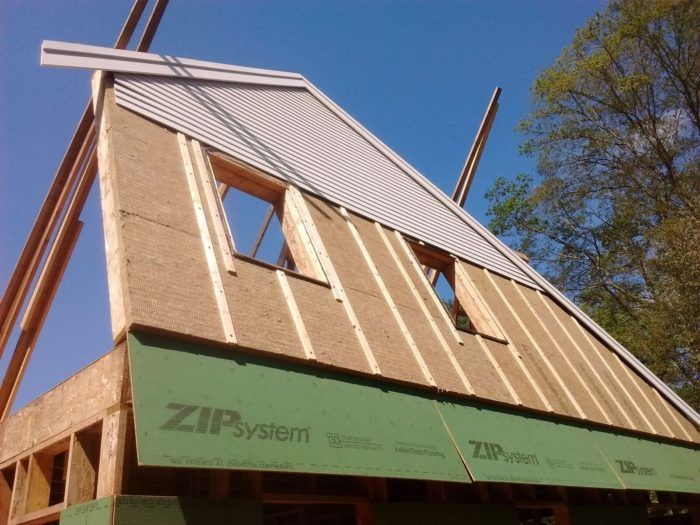
Last week, we framed and sheathed the rake wall. Once the exterior insulation was delivered, we could insulate, side, trim, and lift a nearly finished wall.
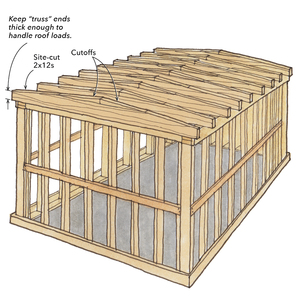
The east-facing gable-end rake wall is a saltbox style. One slope starts about a foot off the floor deck and rises 16 ft. to the ridge. The rear (south) slope starts at the full 8-ft. second-floor rear-wall height and rises to the ridge. The distance from grade to ridge is about 36 ft., so it made sense to apply as much of the exterior insulation, siding, and trim as we could while the wall was lying flat on the floor deck rather than setting up staging later.
First, we installed 2 in. of Roxul insulation over the Zip System sheathing. We screwed 1×3 furring strips over the Roxul to create a rain screen and nailing base for the TruExterior bevel siding. We couldn’t install the siding on the entire wall since the windows haven’t arrived yet, but we could install the siding above the window head. The siding went fast. Gravity worked in our favor; we could place each course in position and saw off the excess. There was no need for measurements. The Boral TruExterior bevel siding is fabricated to the same proportions as cedar bevel clapboard. But unlike cedar siding, the TruExterior can be be top-nailed rather than face-nailed.
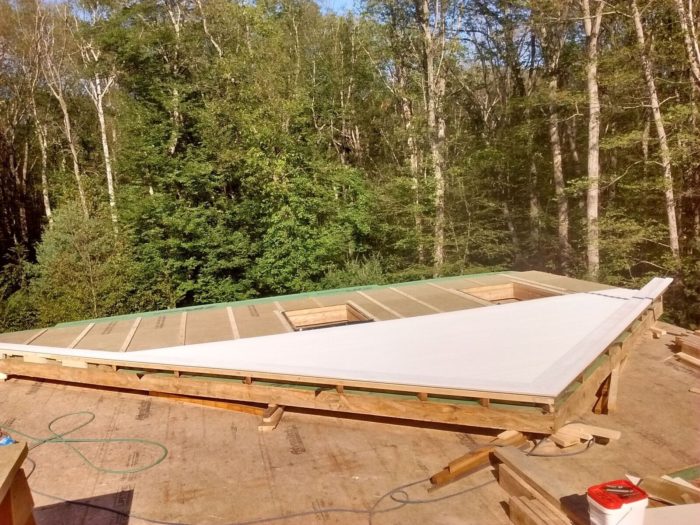
After the siding was nailed off, we rolled and brushed on the finish coat of paint. Then the 1×10 Boral TruExterior rake boards were installed, capped off with 1×4 rake shadow board, and painted.
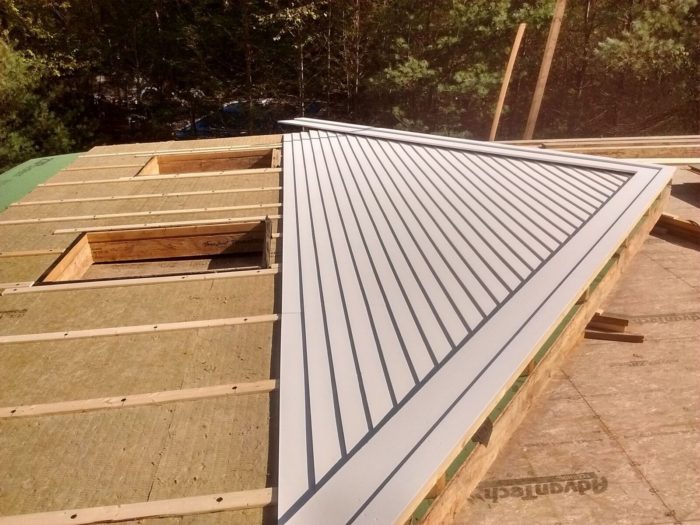
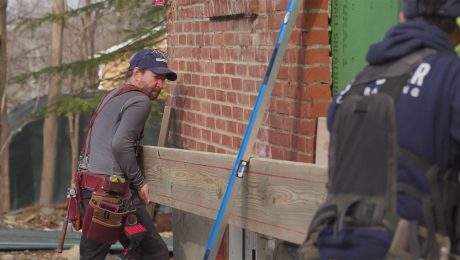
Lifting the gable end took a couple hours. We started first thing in the morning while the wind was calm. The wall was heavy due to the TimberStrand PSL stud framing, Roxul insulation, and Boral TruExterior siding and trim. We used QualCraft wall jacks to do the work. To avoid being crushed beneath the wall, we installed safety bracing with every few feet of lifting; that’s what made the process take so long. One risk when lifting a wall is a gust of wind pushing it over the end of the building.
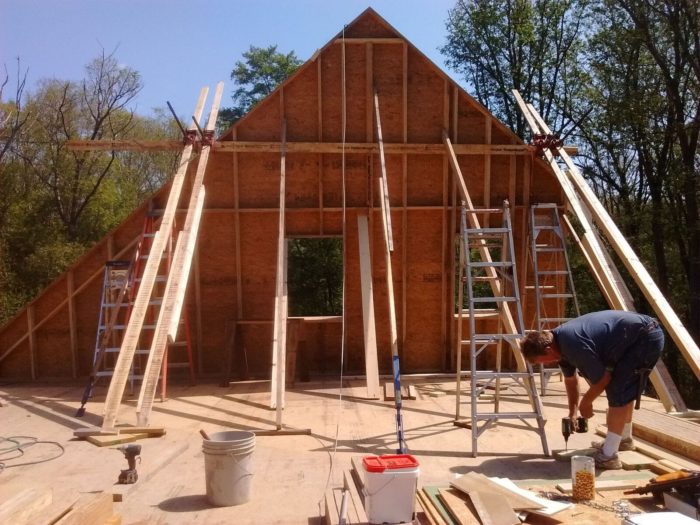
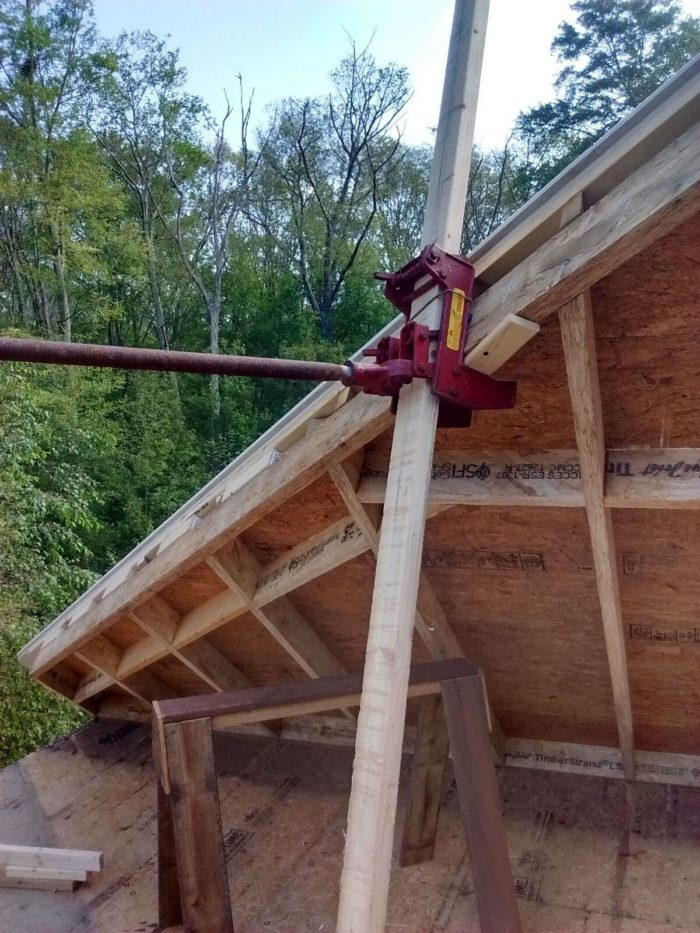
When the wall neared plumb, we installed braces to the floor deck along the 8-ft. wall line and at the ridge peak. After we nailed the bottom plate to the floor deck, Bruce nailed off the sheathing to the studs below while I laid out the next gable end to frame, side, trim, and raise.
Fine Homebuilding Recommended Products
Fine Homebuilding receives a commission for items purchased through links on this site, including Amazon Associates and other affiliate advertising programs.

Tajima Chalk Rite Chalk Line
Guardian Fall Protection Pee Vee
11" Nail Puller







View Comments
Great experience and great planning. Thanks for sharing. Two flashbacks. One mine and one FHB story. Framing a gable end in a very similar tilt up approach, four carpenters tilt up the assembly, nail the plate off, and install three braces while the adjoining walls are prepared on the deck. As a beginner I had trouble getting the nails at the bottom plate where the brace was so I tapped the brace out of the way, finished sheathing and during lunch watched the full wall slowly lean away in a slight breeze and just disappear from view. I was quite popular that day! The FHB story from years ago was related to a truck, a pulley point and a braided nylon rope to raise a gable end. Wall up on saw horses, truck starts moving away, rope tightens, truck keeps moving, rope continues to tighten, truck keeps moving, wall is not lifting. Suddenly the elastic limit is reached and the whole assembly flies way beyond vertical and to the ground as the rope had become something more like a rubber band. Your preparation and careful precautions paid off. Congrats!
I see that the upper part of the gable was not insulated with 2 in. Roxul batts. I understand it is becuase the cold attic space is behind it. What size of lumber did you use to fur out in the same plane with furring strips below?
REsponse to Araltan:
The Roxul is 2 in thick and the 1x3 furring is 11/16 in, thick. When screwed in, the furring compresses the Roxul a little so we used 2x3 studs on edge to pad out the gables. The top screw on each furring that mates to the 2x3s can be tweaked in or out a whisker so the two pieces of wood plane out.
Mike -- I've really been enjoying your detailed descriptions on this new build. One question on the wall jacks: I haven't used the QualCraft jacks before but am now considering purchasing a couple. I see that you have four jacks employed to lift the gable wall here. Why four instead of just two? I read that they are good for 1,000 pounds each. Just extra insurance to use four?
Thanks,
Blake
REply to Blake's question about the wall jacks.
Sorry for delayed reply. The Taunton comment system is supposed to send me alerts but it's not working.
The Qual Craft jacks are indeed rated for 1000 lbs. We used 4 in order to help support the wall. When we just used two jacks the middle of the wall sagged. Using 4 jacks helped spread the weight out and supported the top plate of the wall better. We've used 2 jacks in the past to lift 40+ ft long x 9 ft tall walls without a problem. Since we have 4 jacks we figured we'd use them.