A Roof for Insulation, Solar Panels, and Bedrooms
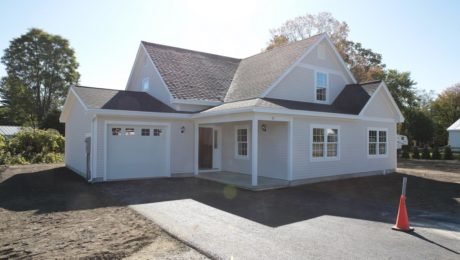
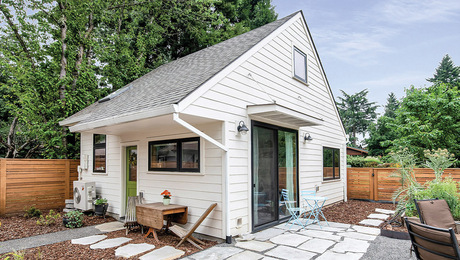
Intersecting roofs and gable ends form an interesting roofline and allow for usable space on the second level.
While many of the potential home buyers for this small development want a floor plan that accommodates single-level living, that was just one of several concerns guiding Paul Biebel as he designed the homes for this neighborhood.
He wanted the houses to have a visually interesting roof line, and they needed to include bedrooms on the second floor for customers who need more space. They also had to have a large south-facing roof plane to accommodate a PV array.
His solution is a one-and-a-half-story design with intersecting roofs and gable ends. This creates a more interesting roof line than a simple boxlike ranch, and the 10-in-12 pitch on the FHB House allows for enough usable space on the second level to tuck two bedrooms and a bathroom under the roof. There is also a good deal of conditioned storage space that helps make up for the single-car garage and the lack of a basement. The 40° roof slope is also within the Vermont location’s ideal range for maximizing solar production over the course of the year.
Although the gables and valleys were added to create visual interest, the single south-facing roof plane is large enough to accommodate up to 10kw of PV. Based on the Biebel’s experience with the first house they built in the development, Tim believes an array of this size should be enough to allow a family of four to reach net zero.
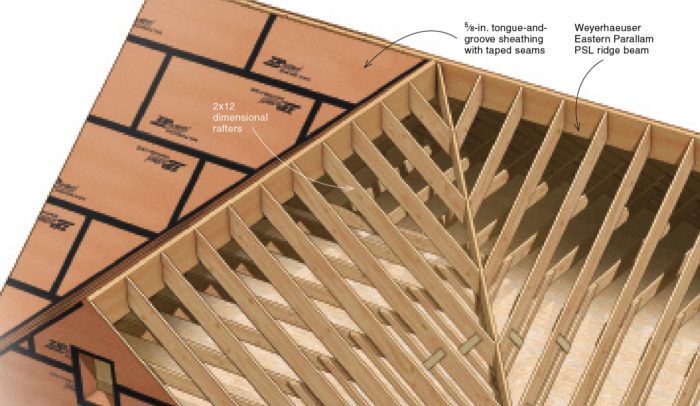
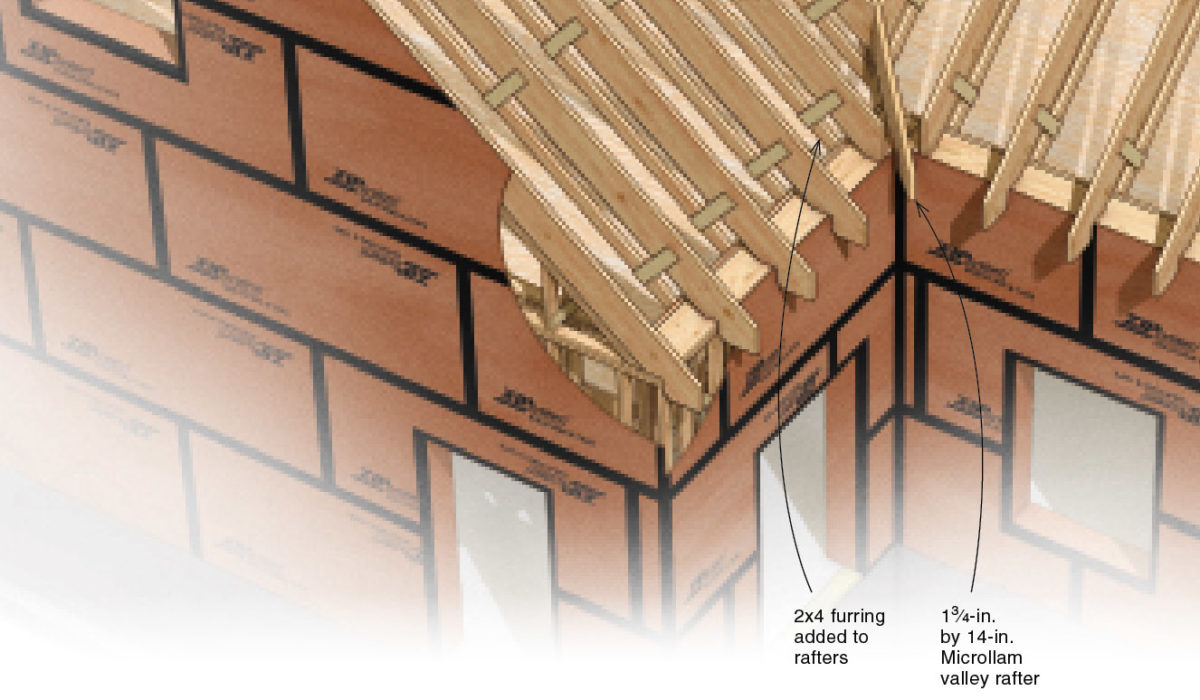
Paul and Tim have used both trusses and stick-framed roofs on their houses, letting cost dictate the choice. The roof shape of the FHB House added enough complexity to the truss design that stick-framing was the cheaper option. The structural ridge beams are 3-1⁄2-in. by 18-in. Weyerhaeuser Eastern Parallam PSL beams and smaller 1-3⁄4-in. by 14-in. Microllams for the valley rafters. The common rafters are 2x12s. However, they don’t provide the depth needed for 16 in. of dense-packed cellulose insulation to achieve R-60 in the lower portion of the ceiling. The solution is to drop the ceiling below the top plate by furring the rafters down with 2x4s. The upper end of each 2×4 is nailed to the collar tie and the lower end toe-nailed to the stud below the top plate with gussets in the middle of the run.
Fine Homebuilding Recommended Products
Fine Homebuilding receives a commission for items purchased through links on this site, including Amazon Associates and other affiliate advertising programs.

A Field Guide to American Houses

All New Kitchen Ideas that Work

A House Needs to Breathe...Or Does It?: An Introduction to Building Science









View Comments
Any illustrations of the framing detail to vent the valley?