Sheathing the Roof and Completing the Air Barrier
Builder Ian Schwandt shares tips for laying out, fastening, and taping seams correctly when installing ZIP System roof sheathing.
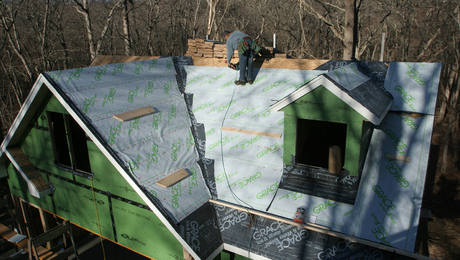
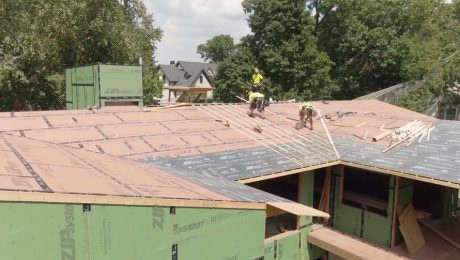
As soon as we raised the walls on our new home, we got straight to work on framing the roof, which includes a combination of parallel-chord trusses and common rafters. Now that the roof is framed, we can start work on our roof sheathing and complete our air-sealing details.
We opted to set up our cut station on the floor of what will be the garage, because with the wind and the cold we thought it would be best to keep a minimum amount of people and materials on the roof. And with the eaves being within reach of a ladder, we found it easier to cut all the sheets down on the ground and hand them up to where they get installed on the roof.
Because we’re doing 2 ft. o.c. framing, we have to use H-clips on the long edge of the ZIP System roof sheathing panels. What those do is help stiffen the panel where there isn’t any framing below it and help keep the sheathing from cupping or sagging. I like to preset the clips before I bring each sheet up and drop it into place. The clips and the edges are self-spacing, but you do have to pay attention to the left-to-right spacing on the sheathing. Usually I just put an eight-penny nail in on the top and that gets me the 1/8-in. required spacing between the sheets before I start to nail them down.
When we go to nail off our ZIP panels, just like on the walls, our spacing is 8in. in the field, which the panels have marked with squares that line up with our 2 ft. o.c. roof framing. On the edges we nail the sheets at 6 in. o.c.
Once we get the ZIP sheathing down, we tape all the seams on the roof sheathing. We are careful to make sure there aren’t any reverse laps between pieces of tape. I start with the first vertical seam, trying to get the tape centered on the butt joint of the sheets. Following the lines that are printed on the sheets helps guide me down. To get the lapping correct, I’m do the horizontal joint immediately above that vertical butt joint. It is important to center it on the horizontal because you have the H-clips, and we put the tape over the bump that the H-clip creates. It’s important to get the tape sealed and pushed down on each side of the H-clip to make sure that we have our air-seal created over the clip (the clip acting as a kind of pocket inside the air-sealing tape.)
Now that we have one side of the sheathing up to the ridge, we’ll continue taping the seams. Another reason why I like ZIP panels is that, once the opposing sides of sheathing are installed, I’ll be able to easily tape the two sides together to complete the air-seal at the ridge. Another area to pay close attention to when air-sealing is your roof-to-wall transitions. Taping these sections correctly is important in order to minimize heat loss and to keep moisture from infiltrating into your assembly. These methods follow the same taping procedure as we did on the roof by lapping the joints shingle style.


