Airtight Mudsill Connection
Learn how Catalyst Construction is detailing their mudsill at FHB House Kansas.
In the last episode of Fine Homebuilding House Kansas, we talked about the subslab details and getting the concrete slab poured for our finished basement. Now we’re excited because the weather has cleared up enough to frame and we’re getting started on our mudsill.
The framers from Schelp Construction are pretty stoked because we have some new technology on the job site. They have been framing for a long time and they’re awfully good at it, but there are some new innovations on the market that make the process a little easier and faster. We actually broke out the Stabila LA 180L Layout Station during the foundation stage, and we’re going to use it again to square mudsills very quickly and accurately.
In this setup, the layout station is on the tripod, but you could also attach it right to the corner of the foundation. When it’s on a tripod, the layout line that projects down from the Layout Station should be aligned at the corner of the foundation. Then you place the RF receiver at the next corner, and the Layout Station automatically squares itself using that reference point. Use the RF receiver to mark layout points along the top of the foundation or pull a chalk line for aligning the mudsill. The layout station projects 180°, allowing you to mark the adjoining wall so you have square layout lines.
The process for attaching mudsills to the foundation is pretty straightforward, but the mudsill connection is notorious for leaks in a residential home. We’ve solved that problem, as many have before us, with sealant and a foam gasket. We use two beads of Big Stretch across the top of the wall. Then we set a standard foam sill sealer gasket in the Big Stretch caulking and lay another bead across the centerline and around the bolts. We do this for a couple of reasons.
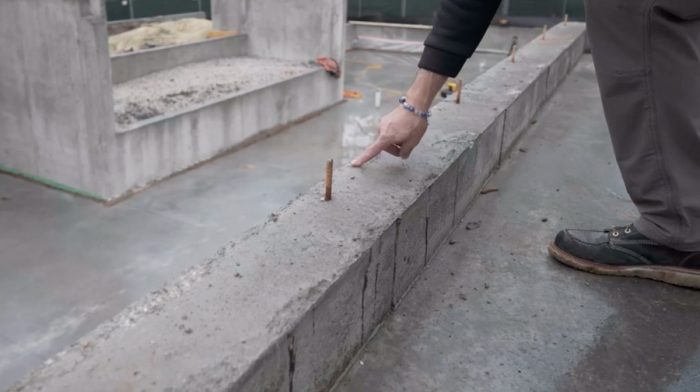
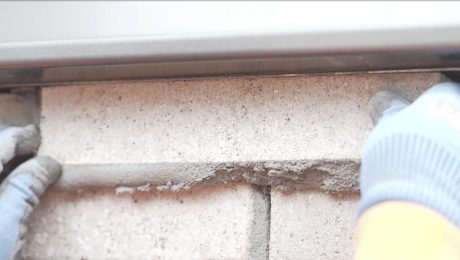
You can see here we have a top-of-wall condition that is generally flat but not perfect. There are some raised areas and imperfections that would make it hard to trust as a flat-to-flat mating surface. We can’t just put down foam seal and expect it to keep air from moving through that connection. So what we’re doing is applying the sealant below and then above the foam gasket to really supercharge it and make it adhere to both the concrete and to the bottom of the mudsill.
One of the things that we like about this sealant and gasket strategy is that it’s easy to inspect. Being able to see continuity from one material to the next assures that we’ve done our job effectively. We will also use that continuous sealant approach where we butt the ends of the mudsill connections and the corner joints.
We also oversized the mudsill because we’ll catch our Zip System R-6 Sheathing on the outside edge. The mudsill will stick out past the foundation wall about 1.5 to 2 in. for the Zip sheathing to land on top of it. At that point, our Zip System Flashing Tape will go right up onto the sheathing and wrap underneath.
Once we’ve completed the mudsill and everything’s bolted down, the framers will start popping lines to get their trusses installed. We’ve got floor trusses coming tomorrow, then we will move forward with the subfloor. We’ve got a 7/8 AdvanTech Subfloor on this job. It’s a really stout subfloor on top of the open-web floor trusses, which will make it easy to run our mechanicals. And then we’re off to the races setting walls.
RELATED STORIES











View Comments
Interesting use of a oversized mud sill, I like how it acts as a cleat for the sheathing.
What are the benefits of a wood to wood connection, couldn't you use something like the Zip liquid flash for a wood to concrete seal? There is obviously more to this than I am seeing, but for my shingle process oriented brain, this raised a red flag for me in terms of the potential of creating a water shelf in the case of a tape failure. Maybe I'm overthinking, probably.
I advocate one larger bead (3/8" diameter vs 2 beads at 1/4"). The logic is that 1/4" diameter will fail to seal everything larger than 1/4", while 3/8" will catch everything up to 3/8" and will be quicker to apply than 2 beads.