Replacing Old Shingles with a New Metal Roof
See how this old 1950s shingle roof was transformed and replaced with an exposed-fastener metal roof and new overhang size.
During the reroofing stage of FHB House New York, Jon Beer and his team replaced the old shingle roof with a new exposed-fastener metal roof. This decision was driven by a combination of performance considerations and Jon’s aesthetic preference.
In this video, see how they prepare for the new roof and how Jon achieves a more modern look by reducing the original 18-in. roof overhang.
Here’s the transcript:
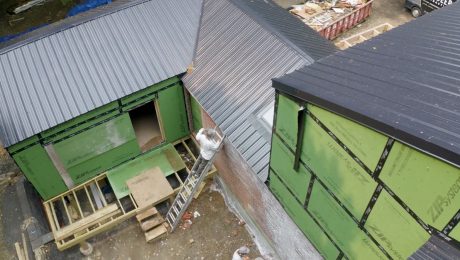
As you can see behind me, we are making progress on the exterior. Here at the Fine Homebuilding house, we have an exposed-fastener metal roof. It’s all brand-new. The existing house had a shingle roof with a variety of conditions and age. Some of it was new, and some of it was very old.
Deciding on the type of roof
We knew that with such a contemporary design, a metal roof was going to be our choice here. Part of it is aesthetics, and I think generally it looks nicer than shingles. Some of it was performance. I think metal carries a longer lifespan than shingles. Last thing was personal preference. At the end of the day, I really like the sound of the rain on a metal roof. We’ll get to listen to that when it rains. I may grow to hate it in 30 years, but for now I like it.
Our decision to make was: Do we go with an exposed-fastener panel, or do we go with standing seam? We opted to choose exposed fastener—pretty much a budgetary choice for us. We also weren’t sure early on whether we would be installing the roof in-house or hiring it out. We ended up hiring the roof out. We did the framing associated with a new structure, a second floor and the rear addition, and dried all of that in ourselves. But when it came to the tear-off and install, we let our roofing sub take care of that.
Integrating with other elements
Order of operations was a little bit of a mixed bag because we weren’t doing a simple tear-off or a simple new build. We had two new structural components we added to the house: the second story, which is primarily a single gable with a small change in plane, and the rear single-story addition, which is framed as an overlay. What that means is that the new roof lies on top of the existing roof. In order to prep for that, when we were framing, we worked right on top of the old shingles, but I cut a section out along the valley on both sides and introduced some temporary flashing for that interim period of between drying in the new addition and getting the actual roof replaced.
All of the new framing on the house, whether it’s the second-story addition or the rear single-story addition, is clad in Huber’s Zip System sheathing. On the roof we had 5/8-in. Zip that was installed and taped and dried in along with some temporary flashing there.
The tear-off
The first step in doing the whole new roof over the whole house was the tear-off. Our roofer basically scraped the existing shingles off the original part of the roof. They took the tar paper off underneath it, and from there assessed the condition of our sheathing, which—this house having been built in the 50s—had 1×10 tongue-and-groove pine sheathing. Typically we see that some replacement is necessary; that was true here. Some of that sheathing got cut out if it was dry, brittle, or a little rotten and was replaced with new 3/4-in. CDX, and then from there the roofer started laying out and got directly into installing the new metal roof.
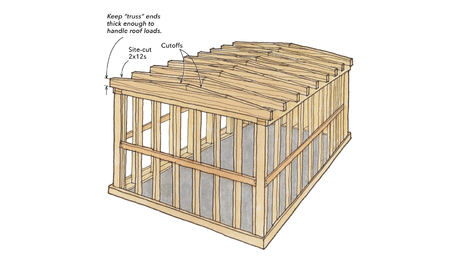
When you frame an addition that has an overlay roof, one that ties into the new roof by sitting on top of it, it’s really important to consider how your two ridges meet. It may seem at first important to make them meet at the same height, but in reality, the goal is to have the new ridge be slightly below the other. That way when it comes time to actually do the roofing, you’re able to flash it and make those transitions in metal in a way that doesn’t cause issues and also looks nice from the ground.
In our case, that started with the framing, figuring out we had a constant variable of the wall-plate height. We wanted to also approximately match the new roof pitch to the old roof pitch, and so we worked within those variables to figure out a new ridge height and figure out the rafters from there, both using mathematical formulas to figure out our theoretical rafter and then also a rafter square to double-check everything. The ridges in the framing stage were about 6 inches different from one another, the new roof ridge being lower than the existing one.
Adding skylights
The Fine Homebuilding house has three skylights on the first floor–one in the kitchen and two in the living room. When we were in the framing phase, the project was predominantly in the winter. We weren’t ready to reroof the house, so we worked from the inside out. In regard to the skylights, we basically figured out our layout for the floor plan. We placed the skylights, and they required modifying the existing roof structure and ceiling-joist structure. So part of that layout was determining where generally we want them. What’s in our way? What’s the best place to put them without disturbing as much original structure as possible?
We identified those locations, and then from there basically framed the skylights on the inside. And when it came time to do the roof, we just connected the dots from one plane to the other. The roofers were able to make four penetrations through the corners of the skylight up to the new roof deck, cut that out, and then drop the new skylight in place.
Roof details
This house is in a pretty contemporary style. Along with that, I wanted to incorporate a detail of a minimal overhang. Traditionally, a house in the United States has a soffit, or an overhang, 12 to 24 in. deep, and the original house did have that—about an 18-in. soffit. So with this redesign, I wanted to eliminate that as much as possible and create sort of a very sleek-looking contemporary shape.
When it came to the new framing, in a way it made our lives a lot easier because we were only cutting half of our bird’s mouth in the rafter. However, with the existing parts of the house, that process was a little more complicated. We had to start by removing the existing soffit and then cut each individual rafter back. Anyone who’s cut a rafter from above knows it can be kind of a challenging process to do that well and cut a nice plumb line.
Luckily, with the new design, the addition on the rear, and the changes to the front, we cut our amount of roof modification to about 50% of the existing footprint of the house. What that means is the new structure occupied 50% of the area of the original soffit area, so we only had to go through and modify about half the house. The rest was either turning into new second story or into a new addition of some kind.
The zero overhang is not technically zero. The roofing actually hangs over about 2 inches. It was an actual precise decision based on the siding. We calculated the thickness of the rainscreen, the siding, the assembly, and any other kind of exterior trim or fascia that we might have. And we gave our roofer a baseline for, here’s how much overhang we need. Make a block that’s that thick for your drip edge, and they used that to set the drip edge on all of the new roofing. So now that the roof is done, start finishing the exterior.
RELATED STORIES


