Adding Windows, Siding, and a Brick Lime-Wash Coating
With a new panelized metal roof, charred wood siding, and updated windows, HVAC, and plumbing, this midcentury ranch remodel is starting to look like a modern home.
With the major installations done, the Fine Homebuilding House in New York is starting to look like the vision depicted in the rendering. In this episode, Jon Beer gives an update on aspects of the assembly including the metal roof, windows, siding, and plumbing and HVAC systems. Most notably, Jon talks about the decision to coat the brick in a lime wash, which softens the color while (unlike paint) still allowing the brick the breathe.
Here is the transcript:
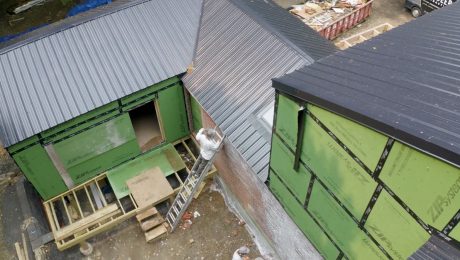
I’m Jon Beer from Jon Beer Contracting, and we’re back at the Fine Homebuilding House here in Cornwall, New York. You’ll see behind me that the exterior is starting to look a lot like the rendering. We have our new roof on, which is a panelized metal roof with exposed fasteners. It’s a nice budget option for us that still looks pretty good. The skylights are installed and one of the biggest things that we did was install all of our windows.
We got all of the windows on the first floor done off of ladders, and then we rented a 45-ft. articulating lift to install the remaining windows on the second floor. That has probably been one of the biggest and most exciting updates to the house—getting to be inside, in the space that we framed almost nine months ago, and finally see the view from the second story.
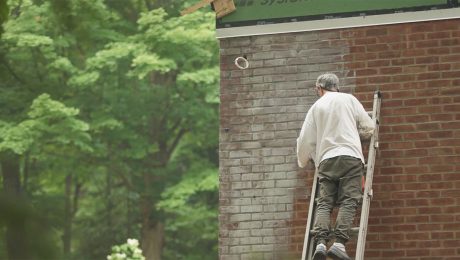
Some of the other updates that we’ve made have been to the exterior of the house. Most notably, we’ve done a lime-wash coating on all of the existing brick. Lime wash is a pretty simple mixture of water and slaked, or hydrated, lime. You basically mix it to the consistency that you want and apply it with a roller and a really big brush.
The lime wash is different from an exterior paint that you might use on wood cladding. It’s really important to actually not paint brick, because you don’t want to seal the brick. The brick is a porous material that needs to be able to breathe seasonally. So the lime wash is really the ideal finish for that because it bonds molecularly with the surface of the brick but doesn’t seal off its pores. It’s a coating that’s really easy to make. It’s a very traditional masonry coating. And it’s one that we were excited to use here on the house.
We chose to do the lime wash for a few reasons. The house is originally from 1950 and has a very stereotypical red-brick exterior that we wanted to soften. The lime wash also adds some integrity to the brick. It’s kind of like conditioner for the brick, so while it’s mostly aesthetic, it also ensures the long-term stability of the brick that’s there.
We also just installed the Cor-A-Vent rainscreen today and we’ll start siding over that. The rear one-story addition is sided in the local vertical spruce siding that came to us green and raw and which we stained here on-site before installing. That’s kind of special because typically you would just order siding from a manufacturer, it would show up, and you would throw it on. This allowed us to work with a local mill, develop a relationship, and use a product that is coming to us from our area.
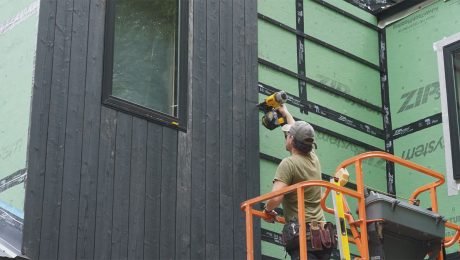
The two-story portion of the house is sided with the Yakisugi siding from Nakamoto Forestry. One of my favorite parts of this build was installing the Nakamoto siding. It quickly creates a very sleek and modern look and brings the design of the house to life. And it’s super exciting to see the house really looking like a house after working here for so long with just the ZIP System sheathing showing. To see that green get covered up with the finished material is really, really fun.
You can hear the lift and see the lift behind me. We’ve been using that 45-ft. lift for about the last 25 days working on the exterior cladding. We are about 80% finished with the siding. Today is our last day with the lift and we’ve been focusing the last month on getting the rear of the building, the front of the building, and all of the high work wrapped on the siding.
We had a lot of updates on the interior, as well. It’s been a real flurry of activity here. I did all the plumbing in house. We did a manifold system—it’s all PEX with a central manifold that lets you individually control fixtures. We have a whole new drain-waste-vent system going down to a little bit of existing underground piping, where it meets a new sewage pump and pumps out to the new septic.
Most notably, we wrapped up our electrical and plumbing rough-in, and we did our HVAC rough-in. The HVAC system in our house is air-source heat pumps. We have three condensers and eight minisplits in the house that serve the bedrooms and the offices and the living spaces. We also installed our ERV system, which is our fresh-air ventilation system.
One thing that we did differently on this project is before we installed spray foam, we performed a blower-door test to check the air-tightness of the house. During that first blower-door baseline test, we kept a bunch of Loctite Tite Foam products on hand. And we were able to go around and, on the spot, air-seal different areas that were showing air infiltration.
All in all, it’s very exciting to see the house changing this much. It really feels like a house for the first time in two years since we bought it in the middle of the pandemic. And I’m very excited to see our finishes start to come together here and share them with all of you.
RELATED STORIES


