Details of an 18th-Century Timber-Frame Revival
Follow along with the reconstruction of the period details, including doors, windows, and moldings.
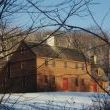
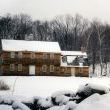
The story of my house is a full-on, A-to-Z project: to rescue, dismantle, move, reconstruct and restore an early handmade 18th-century Connecticut center-chimney, timber-frame house.
Answering feedback from readers
A number of comments and questions arose from my earlier video blog. Readers wanted to know: 1) how the interior of the house was restored and 2) how the restoration progressed to accommodate and incorporate the modern aspects of a newly-built home.
I’m happy to know that there’s so much interest in timber-framing and antique houses…and happy to continue the story here with a look at how the interior of the house came together. (I hope to address some of the other questions in future blogs.)
All about the details
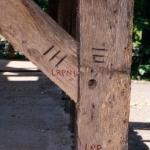
I mentioned above that the house was handmade. Remember the original builders had only hand tools, and, handmade means everything. They felled the trees, squared and joined the timbers, sawed boards, split roof shingles and clapboard siding, planed boards and moldings, and turned stair balusters.
The hinges and other hardware, including all the nails, were hand-wrought, even the window glass was poured by hand. To shoot for a restoration that is architecturally true to the period that the house was built, it’s necessary to reuse original materials when possible and to accurately reproduce replacements.
If “the devil is in the details,” so is the beauty, appreciation and character of an old house.
| MORE IN THIS SERIES: 18TH CENTURY TIMBER-FRAME COLONIAL | |
 |
PART ONE: SAVING THE STRUCTURE
Follow the process of disassembling, moving, and reconstructing the timber-frame structure. Watch it now. |
 |
PART TWO: PERIOD DETAILS
Follow along with the reconstruction of the period details, including doors, windows, and moldings. |
 |
PART THREE: HIDING THE MODERN UPGRADES
Learn how modern mechanicals and conveniences were hidden behind and 18th century facade. Watch it now. |


View Comments
I'm really enjoying the story about this house, and of course the beautiful renovation, especially because my husband and I are "rehabbing" an 18th century post and beam in Rhode Island right now. I'm wondering how you insulated -- we're looking at a combination of rigid board and spray-foam, but it's a bit of a puzzle. Any insight, thoughts, or tips? Thanks~
When I moved and rehabbed a 19th century clapboard house on the Ca coast (it's now a museum) I cleaned out the wall cavity of the mouse nesting material- about 250 gallons- left the stud bays empty. Then I applied 1/2 inch shear plywood to the interior followed by rigid foam and 5/8" sheetrock. This allowed the walls to breath and though it steals 2" from the interior and caused thicker jambs at doors and windows I have to say it worked better than I even hoped. The building is "tight" by 20th century standards yet the frame and exterior breathe to the outside as they always have.
Beautiful home - could you talk about the varied colored rooms. red, blue, yellow. etc. Were these colors found in the original house? If not, how were they chosen? They seem very intense in the video. Would the original walls have been hard white and the contrast between them and the trim color so great? Are the finished exposed walls plaster or sheet rock. Thanks.
Thanks for the comments and compliments. To answer a couple of your questions:
msoeden - It's a tremendous advantage to have the house totally apart, as we did, to plan and install the "modern" stuff...something most owners of an antique house struggle with when restoring an existing structure. I don't know how much access you have to the areas that need insulation, but here's what we did. We installed rigid foam in the original house (areas where the old exterior wall studs were reused) and in the newer part (kitchen / bath addition) put 6 inches of insulation in the outside walls combining rigid foam and pink Owens-Corning rolls. Because we restored the attic to look like it would have originally (it's pictured in my first video) we insulated the attic by building up the floor. First, the original flooring and sub-flooring boards (visible and exposed in the second floor beamed-ceiling rooms) had a layer of rigid foam laid over it, then 2X10 floor joists to raise the attic floor with 10 inches of rolled fiberglass laid in between, and finished with the original wide-width attic floor boards nailed over everything. And, I forgot to mention, vapor barriers were installed with the wall and attic insulation. Hope that helps, but the best advice for a fellow New Englander is to go for the best rating you can achieve.
fisk5 - The yellow and red were colors we found in the house, though aged and faded. Much of what I've read and seen lately about original colors indicates that they were much brighter and bolder than we once thought. The 18th century use of colors and their combinations were even at times what we would consider garrish, such as painting the bevels on raised paneling a color brightly contrasting against the field of the panels. We chose to make the yellow and red bold rather than muted, but don't know for certain if they "match" the original colors. The blue we chose on our own, based on some rooms we'd seen at various restorations. It's bold, too, and fits the theme of doing that throughout the house. The walls are sheetrock with a finish skim coat of plaster that was left unpainted. As for the intensity of the colors in the photos, three reasons: 1) we chose bold colors, as mentioned; 2) the house, like many in the 18th century, is oriented facing south and a number of photos were taken on bright days with the sun streaming in; 3) my skill level for shooting is "snapshot" not studio quality, so no filtering or color balancing...sorry.
Hope I answered your questions.
You all did a really fine job!!! Penne and I restored our home in New Orleans and built an addition using lumber that originally---late 1800s---had been used as the roof on a Wharf on the Mississippi River. We both look forward to tackling another old home, but, the next one has gotta be ABOVE SEA LEVEL. Wonderful job, particularly impressed by the Fireplaces and fake fireplace to hide venting. What am I saying, IT ALL IS SPECTACULAR!!
Brickoven, You have done what I dream of doing. You mentioned some custome tools to drive out the pegs without drilling the holes. By any chance would you lend those out?
Awesome, awesome project. Makes me feel better about my turn of the century home (lifetime) project. I cannot believe that you still had original windows to reuse.
To answer a couple of recent comments / questions...
to b a 5_1 - I've already lent them out once and they didn't come back. I figured I wasn't going to do this again any time soon and that I wouldn't need the tools. I guess the guy I lent them to figured the same. Sorry.
to barnmover - I reused only the original window glass (along with some equally old glass from another source) not the whole windows. The window frames and sash were reproduced by a specialty millworker in Glastonbury, CT who does correct copies of period architectural woodwork. We glazed in the 18thC. glass and everything is as good as old.
What a beautiful home and the attention to detail really shows. My husband and I really enjoyed this article and video. We are building a log home addition onto our 18th stone farmhouse in Bucks County PA and would certainly appreciate hearing from folks about good books or other resources on learning about 18th building, hardware, doors and millwork.
Thanks.
Kathleen
To Kathleen1B...Thanks, I'm glad you enjoyed and appreciated the story of this house. You could build a library of books about old houses, but there are two books (specific to Pennsylvania) I'd definitely recommend to start with that will help answer your questions about 18th century hardware, doors, and millwork.
In 1977, Schiffer Publishing (a PA company) reprinted a book from the 1930's titled "Early Domestic Architecture of Pennsylvania" by Eleanor Raymond, AIA. It has a lot of B&W photographs of interiors, exteriors, and doors. There's also a good sized section of measured drawings that illustrate excellent details of interior woodwork and mouldings (millwork). You can find the book online at specialized booksellers, maybe even on ebay (ISBN: 0-916838-11-0)
For hardware, Don Plummer's 1999 book "Colonial Wrought Iron - the Sorber Collection" has much more than just hardware (SkipJack Press, ISBN: 1-879535-16-5). It is so extensive, though, as to still be one of the best sources for lots of photos of diffent architectural hardware. James Sorber (a PA resident) included a large number of pieces made in Pennsylvania in his collection.
Hope this helps you with your project.